Posts

Posted in Recipe Roundup

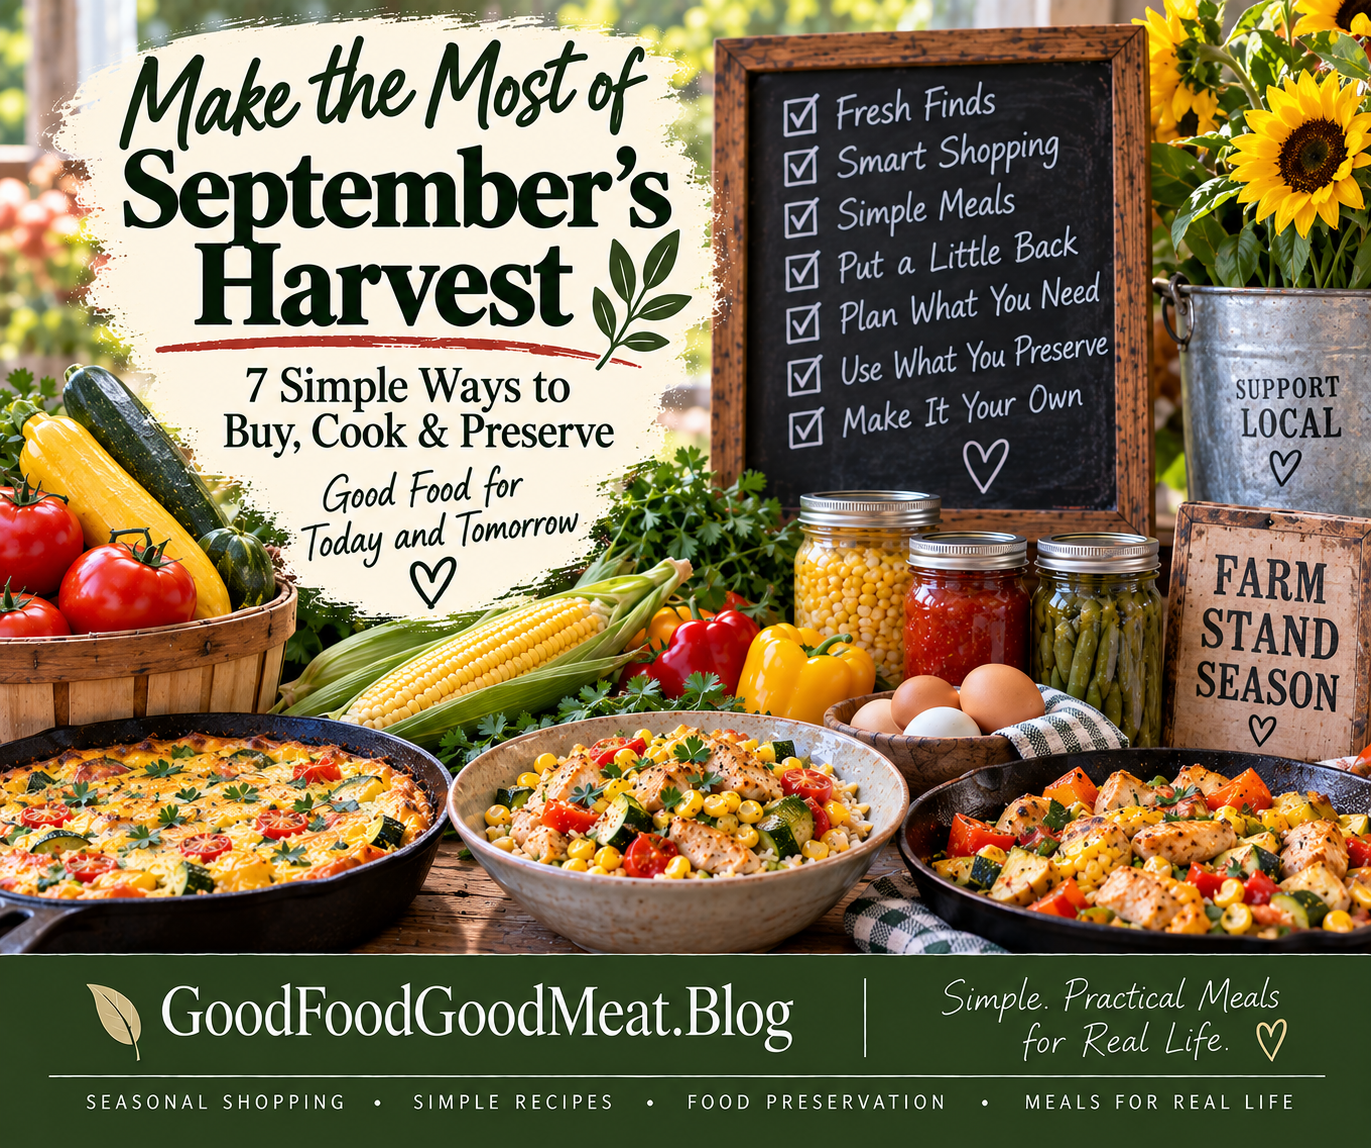
Make the Most of September’s Harvest: 7 Simple Ways to Buy, Cook & Preserve

September has a way of making the kitchen feel a little more abundant.

The farm stands are full. Corn is piled high. Tomatoes, peppers, zucchini, onions, potatoes, and other seasonal vegetables are everywhere you look. It’s tempting to bring home a little bit of everything.

But making the most of the harvest isn’t about buying everything you can carry.

It’s about buying what you’ll use, enjoying what’s fresh, putting a little back, and making tomorrow’s meals easier.

That’s the idea behind this week’s collection of GoodFoodGoodMeat.Blog posts.

🍂 The September Harvest Approach

There are really four steps to making the most of seasonal abundance:

Buy it at its peak.
Look for what’s plentiful, fresh, and reasonably priced.

Use it well.
Build simple meals around what you already have.

Put a little back.
When something is especially good and plentiful, preserve an amount that makes sense for your household.

Use it later.
The food you preserve isn’t just something sitting in the freezer or pantry. It’s an ingredient waiting for a future meal.

That’s the philosophy behind all seven posts in this week’s harvest collection.


🌽 This Week’s Harvest Collection

When the Farm Stand is Full
Check out this recipe
Smart Shopper Spotlight: What to Buy When It’s in Season
Check out this recipe
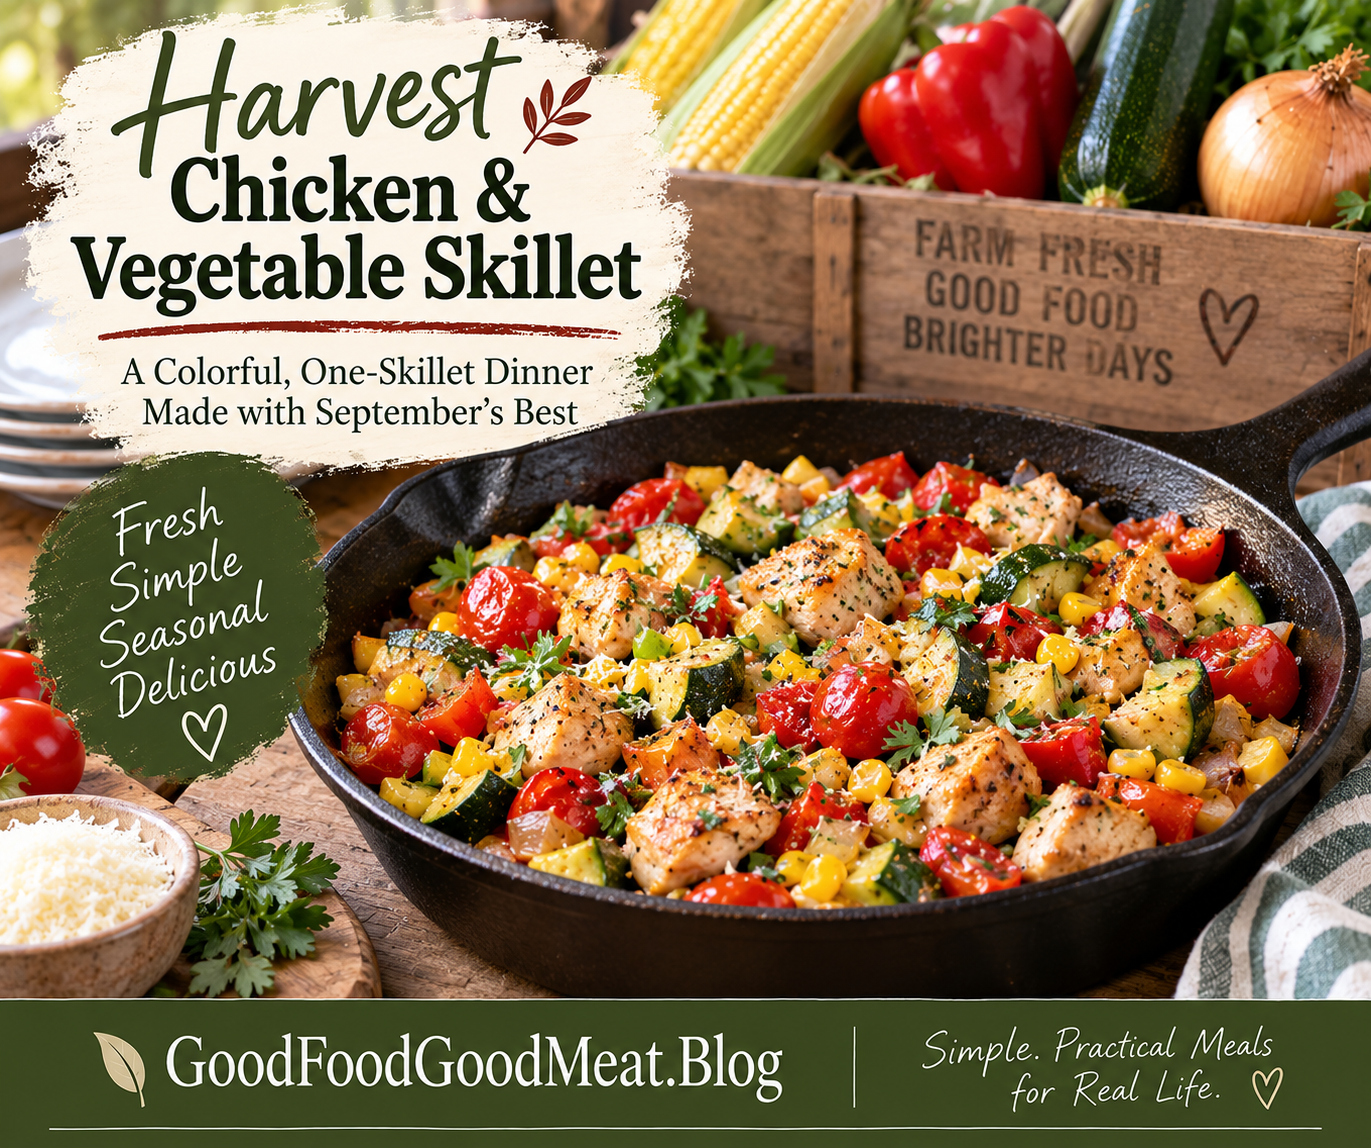
Harvest Chicken & Vegetable Skillet
Tender pieces of chicken are cooked with sweet corn, zucchini, bell pepper, onion, and tomatoes for a simple skillet dinner that tastes like the best of late summer and early fall.
Check out this recipe
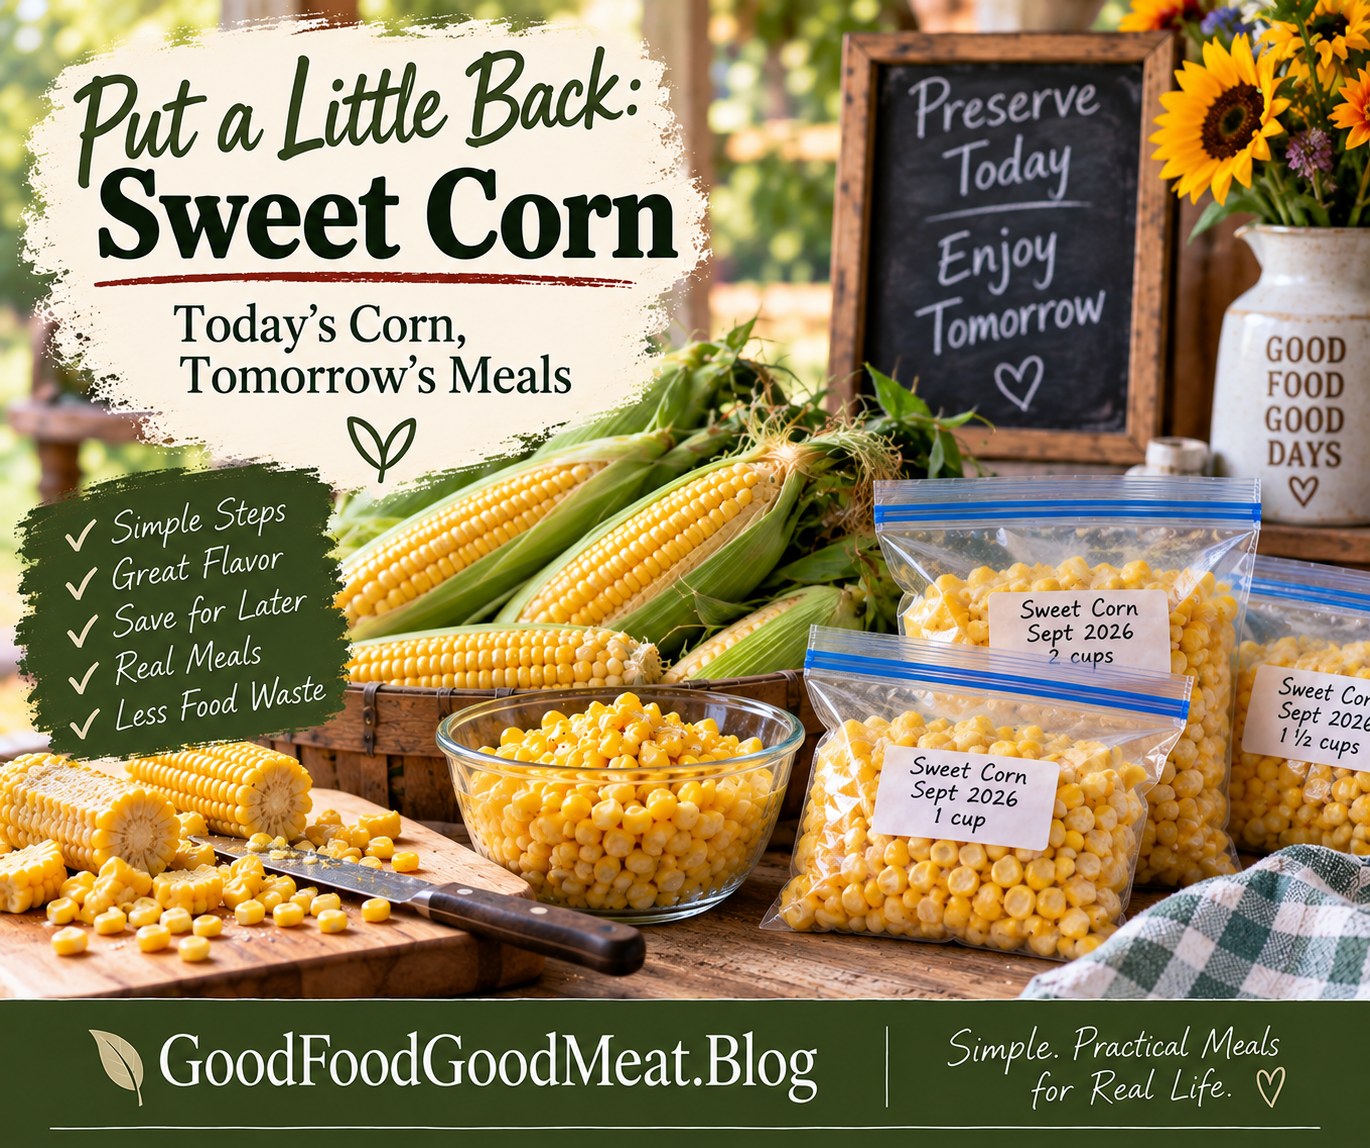
Put a Little Back: Sweet Corn — Today’s Corn, Tomorrow’s Meals
Check out this recipe
How Much Should You Actually Preserve?
Check out this recipe
Harvest Corn & Chicken Rice Bowls
There is something satisfying about putting food away when it's at its best and then actually using it later.
Check out this recipe
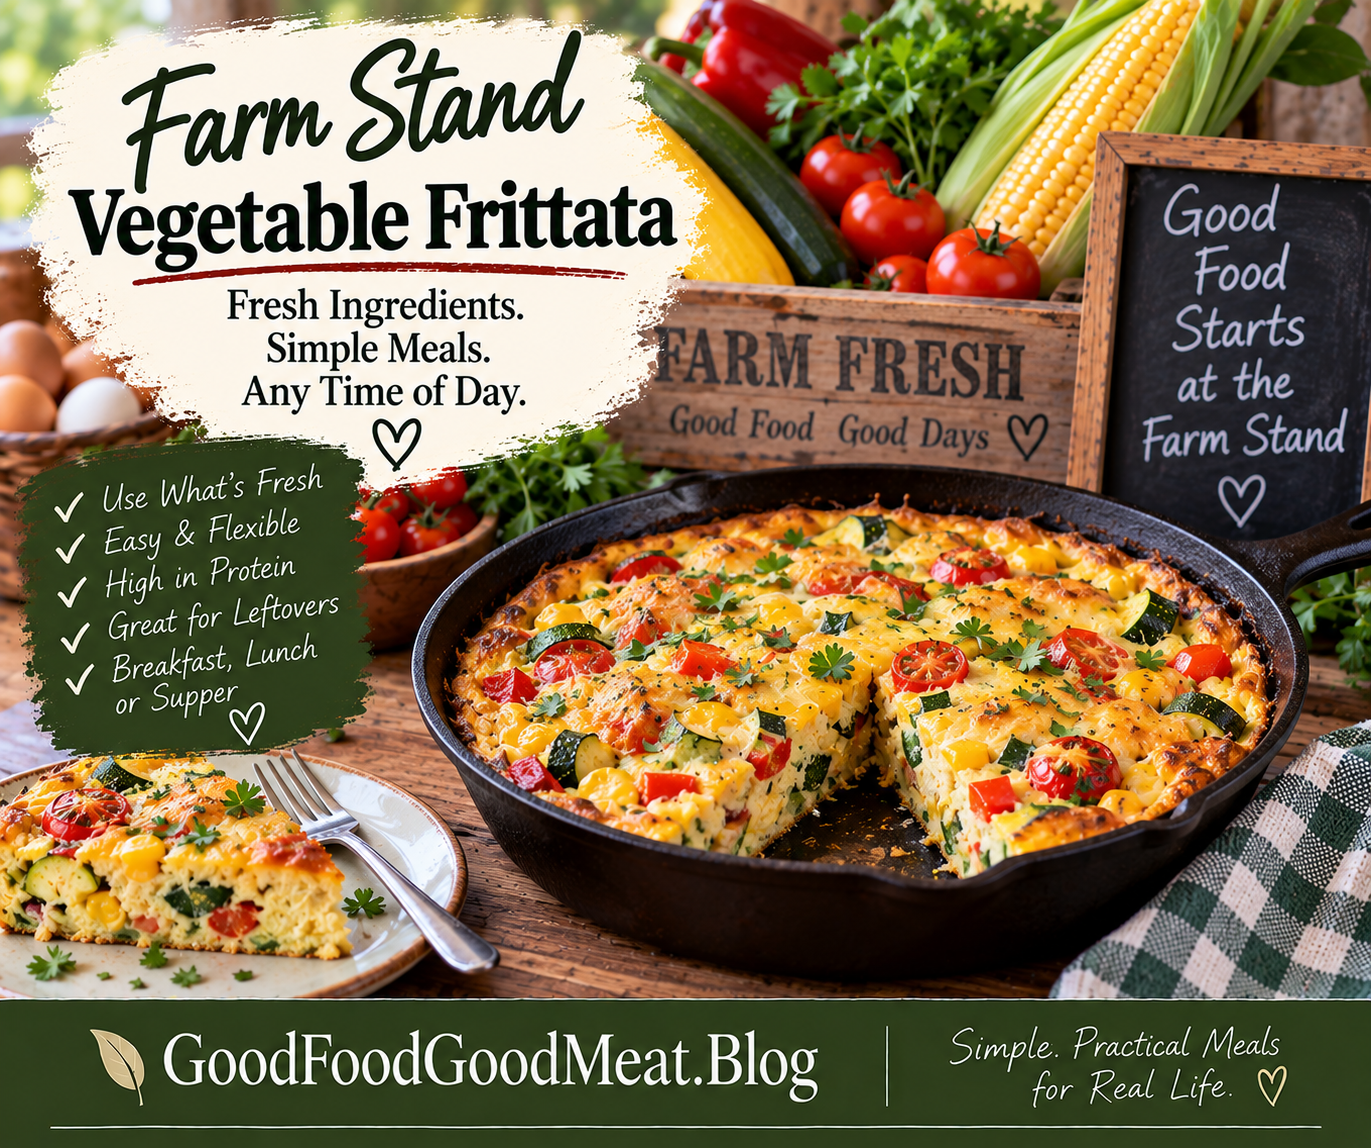
Farm Stand Vegetable Fritatta
When the farm stand is full, make a frittata!
Check out this recipe

Start With What’s in Front of You

Our week begins at the farm stand.

When the Farm Stand is Full

A full farm stand is an invitation to pay attention—not necessarily an invitation to buy everything.

The opening article looks at how to recognize seasonal abundance and make thoughtful choices about what comes home with you.

The goal is simple:

Buy what is good. Buy what you’ll use. And when it makes sense, buy a little extra for later.


🛒 Shop With a Plan

Once you know what’s plentiful, the next question is what actually belongs in your basket.

Smart Shopper Spotlight: What to Buy When It’s in Season

Seasonal shopping can be a great way to find fresh produce at good prices, but the smartest purchase isn’t necessarily the biggest one.

This article looks at how to think about:

  • What’s actually in season
  • How much you’ll realistically use
  • Whether you have room to store it
  • Whether you have time to preserve it
  • How buying seasonal produce can help reduce waste
  • When buying extra makes sense

Because a bargain isn’t really a bargain if half of it ends up in the trash.


🍗 Cook the Harvest Now

Fresh seasonal vegetables don’t have to become an elaborate project.

Harvest Chicken & Vegetable Skillet

This colorful one-skillet dinner brings together tender chicken with sweet corn, zucchini, bell pepper, tomatoes, and onion.

It’s exactly the kind of meal that makes seasonal shopping worthwhile.

You don’t need a complicated recipe when good ingredients are already doing most of the work.

And because the recipe is flexible, it’s also a good reminder that a recipe can be a starting point rather than a set of rules.

Use what looks good.

Use what you have.

Make dinner.


🫙 Put a Little Back

Of course, you don’t have to eat every bit of the harvest this week.

Some of it can become future meals.

Put a Little Back: Sweet Corn — Today’s Corn, Tomorrow’s Meals

Sweet corn is a perfect example.

When it’s fresh and plentiful, you can enjoy some now and freeze some for later.

This post walks through the basic process for freezing whole-kernel sweet corn, including blanching, cooling, cutting the kernels from the cob, portioning, packaging, and labeling.

The goal isn’t to fill the freezer.

It’s to create useful portions of a food you already know you’ll eat.

Today’s corn becomes tomorrow’s ingredient.

When preserving food at home, always check current, tested recommendations for the specific food and preservation method you’re using. The National Center for Home Food Preservation is an excellent source for research-based home-preservation guidance.


📦 How Much Is Enough?

Once you start thinking about preserving food, another question naturally follows:

How much should I actually put away?

How Much Should You Actually Preserve?

The answer isn’t the same for everyone.

Someone cooking for one has different needs from a family of six. A person with a small freezer has different options from someone with a large chest freezer.

Your preservation plan should be based on:

  • What you actually eat
  • How often you eat it
  • How much you use at a time
  • How much you’ll continue buying fresh
  • How much storage space you have
  • How much time you have available for preservation

Think in meals and portions, not just pounds and bushels.

The goal isn’t the fullest pantry.

The goal is having enough of the foods you actually use.


🥣 Turn “Later” Into Dinner

And this is where the whole idea comes together.

Harvest Corn & Chicken Rice Bowls

Remember that sweet corn we put away?

Here’s one way to use it.

These rice bowls combine chicken, sweet corn, seasonal vegetables, and brown rice for a simple meal that works beautifully with either fresh corn or the frozen corn you saved earlier.

That’s the payoff of preservation.

You aren’t preserving food simply so you can say you preserved it.

You’re creating future meal ingredients.

A package of corn in the freezer becomes part of dinner.


🥚 And Don’t Forget What’s Already in the Refrigerator

Not every harvest meal needs to begin with a trip to the farm stand.

Sometimes the smartest thing you can do is look around your own kitchen.

Farm Stand Vegetable Frittata

A frittata is one of those wonderfully forgiving recipes that can turn a handful of vegetables into a real meal.

Zucchini.

Peppers.

Tomatoes.

Corn.

Onions.

Leftover roasted vegetables.

A few eggs can bring them all together.

It’s a particularly good recipe for the end of the week because it encourages us to use what we have rather than buying something new.

Good food doesn’t have to be complicated to be useful.


The “Put a Little Back” Philosophy

If there’s one idea I hope sticks with you from this week’s collection, it’s this:

You don’t have to preserve everything.

You don’t need a freezer packed to the ceiling.

You don’t need dozens of jars lined up in the pantry.

You don’t need to spend every weekend of harvest season working in the kitchen.

You simply need to recognize what makes sense for your household.

Maybe that’s a few bags of sweet corn.

Maybe it’s a batch of tomato sauce.

Maybe it’s some dehydrated vegetables for winter soups.

Maybe it’s nothing at all this week because you already have enough.

All of those choices are perfectly reasonable.

The purpose of preservation isn’t to create more work.

It’s to make good use of abundance.


Buy It at Its Peak. Use It Well.

That’s really the story of this entire week.

The farm stand is full.

You notice what’s plentiful.

You buy what you’ll actually use.

You cook some while it’s fresh.

You preserve a little when it makes sense.

And later, when you’re standing in the kitchen wondering what’s for dinner, you discover that your past self already did you a favor.

“Oh, good. I already have some.”

That’s one of my favorite benefits of putting food back.

It’s not about stockpiling.

It’s about cooking for your future self.

A Little Harvest Wisdom

There’s another benefit to thinking this way.

When you start looking at food in terms of use, storage, and future meals, you naturally become a little more aware of what you buy.

You notice what’s sitting in the refrigerator.

You think twice before buying more.

You find ways to use leftovers.

You learn which foods are worth preserving for your household—and which aren’t.

And that brings us right back to an old-fashioned idea that still makes plenty of sense:

Waste not, want not.

You don’t have to use every scrap perfectly every single time.

You just have to keep looking for ways to make good use of what you have.


Before You Preserve

Food preservation is one area where “that’s how I’ve always done it” isn’t necessarily enough.

Different foods require different preservation methods, and safe processing depends on the food, the method, and the recipe or procedure being used.

Before freezing, drying, or especially canning food, check current, tested guidance from the National Center for Home Food Preservation.

For broader food-safety and storage questions, the USDA Food Safety and Inspection Service provides additional guidance.

A few minutes spent checking current recommendations is worth it.

We’re putting food back because we want to enjoy it later—not because we want to take unnecessary chances with it.


Make September Work for You

You don’t have to follow every idea in this collection.

Pick the ones that fit your life.

Maybe you’re a regular farmers-market shopper.

Maybe you have a tiny refrigerator freezer.

Maybe you’re cooking for one.

Maybe you’re feeding two people and deliberately trying to keep grocery spending under control.

Maybe you simply hate throwing good food away.

Wherever you start, the principle is the same:

Buy what is good.
Use what you have.
Put a little back.
Enjoy it later.

That’s how we make the most of September’s harvest.

And that’s how today’s good food becomes tomorrow’s good meal.
Posted in Breakfast, Side Dishes, Skillet Meals

Farm Stand Vegetable Frittata

A simple, colorful frittata for breakfast, lunch, or an easy meatless supper.

When the farm stand is overflowing with beautiful vegetables, sometimes the best recipe is the one that doesn’t ask you to choose just one.

This Farm Stand Vegetable Frittata brings together whatever looks freshest—zucchini, peppers, tomatoes, onions, corn, and fresh herbs—with eggs and a little cheese. Everything comes together in one oven-safe skillet for a meal that’s simple, satisfying, and wonderfully adaptable.

It’s also a great way to use those odds and ends of vegetables that aren’t quite enough for another recipe.

That’s farm stand cooking at its best: buy what’s good, use what you have, and waste as little as possible.

Why You’ll Love This Recipe

  • Flexible: Use the vegetables you have instead of making a special shopping trip.
  • Meatless: Eggs provide the protein while the vegetables bring color and flavor.
  • Small-batch friendly: Four servings makes this practical for singles and couples.
  • Good for any meal: Breakfast, brunch, lunch, or a light supper.
  • One skillet: Sauté the vegetables and bake the frittata in the same pan.
  • Budget-friendly: A few eggs and seasonal vegetables go a long way.
  • Great for leftovers: Refrigerate individual portions for easy breakfasts or lunches.

🥣 Build Your Bowl

Okay, this one isn’t technically a bowl—but the same “build it from what you have” philosophy applies.

Base:
Eggs and egg whites

Protein:
Eggs, with Greek yogurt adding a little extra protein

Vegetables:
Zucchini, bell pepper, onion, corn, and tomatoes

Sauce:
No sauce needed

Fresh Finish:
Fresh parsley or basil

Optional Toppings:
A little Parmesan, sliced avocado, or a spoonful of Greek yogurt

Make It Your Own:
Open the refrigerator and see what needs to be used. A frittata is one of the easiest ways to turn a handful of leftover vegetables into a real meal.

simplegoodfood's avatarsimplegoodfood

Farm Stand Vegetable Fritatta

When the farm stand is full, make a frittata!
Prep Time 15 minutes
Cook Time 25 minutes
Total Time 40 minutes
Servings: 4
Course: Breakfast, Dinner, Lunch
Cuisine: American
Calories: 285

Ingredients
  

  • 6 large eggs
  • 4 large egg whites
  • cup plain Greek yogurt
  • ¼ teaspoon salt
  • ¼ teaspoon black pepper
  • ½ teaspoon Italian seasoning
  • 1 tablespoon olive oil
  • ½ small onion diced
  • 1 small zucchini diced
  • ½ red bell pepper diced
  • ½ cup fresh or thawed frozen sweet corn
  • ½ cup cherry tomatoes halved
  • 1 clove garlic minced
  • ½ cup shredded reduced-fat mozzarella or Monterey Jack cheese
  • 2 tablespoons chopped fresh parsley or basil

Method
 

Preheat the oven.
  1. Preheat your oven to 375°F.
Prepare the egg mixture.
  1. In a medium bowl, whisk together the eggs, egg whites, Greek yogurt, salt, pepper, and Italian seasoning until well combined.
Sauté the vegetables.
  1. Heat the olive oil in a 10-inch oven-safe skillet over medium heat. Add the onion and bell pepper and cook for 2–3 minutes.Add the zucchini and corn and continue cooking for another 3–4 minutes, until the vegetables begin to soften.
Add the tomatoes and garlic.
  1. Stir in the tomatoes and garlic and cook for about 1 minute.
Add the eggs.
  1. Spread the vegetables evenly around the skillet. Pour the egg mixture over them and gently shake the skillet so the eggs settle around the vegetables.
Add the cheese.
  1. Sprinkle the shredded cheese evenly over the top.
Begin cooking on the stovetop.
  1. Cook without stirring for about 2 minutes, allowing the edges of the eggs to begin setting.
Finish in the oven.
  1. Transfer the skillet to the preheated oven. Bake for approximately 15–18 minutes, or until the center is set and the eggs reach 160°F.
Rest and garnish.
  1. Remove the skillet from the oven and let the frittata rest for about 5 minutes. Sprinkle with fresh parsley or basil, slice into wedges, and serve.

Notes

Make It Your Own
This is one of those recipes where I actually want you to change it.
The vegetables listed here are simply a starting point.
Try:
  • Green beans instead of zucchini
  • Spinach instead of corn
  • Mushrooms instead of peppers
  • Roasted potatoes for a heartier frittata
  • Broccoli or cauliflower for extra vegetables
  • Fresh herbs instead of dried seasoning
  • A little Parmesan instead of shredded cheese
Just remember that vegetables with a lot of moisture—such as fresh tomatoes, mushrooms, or zucchini—should be cooked first so they don’t release too much liquid into the eggs.

What About Leftover Vegetables?

This is where I especially love a frittata.

Have half a bell pepper left from another recipe?

Use it.

A handful of cooked green beans?

Into the frittata they go.

A little leftover roasted zucchini?

Perfect.

A few tablespoons of corn?

Absolutely.

The vegetables don’t all have to be perfectly fresh from the farm stand. In fact, a frittata is one of those recipes that can help keep perfectly good food from becoming food waste.

Just make sure cooked leftovers have been stored safely and are still within their recommended refrigerated storage time.

Serving Suggestions

Serve a wedge of frittata with:

  • Fresh fruit
  • Whole-grain toast
  • A simple green salad
  • Roasted potatoes
  • Fresh tomatoes
  • A spoonful of Greek yogurt

For breakfast or brunch, fruit and whole-grain toast make an easy combination.

For lunch or dinner, add a salad and you’ve got a light, satisfying meal.

Make-Ahead and Leftovers

Frittata is excellent for meal prep.

Once cooled, cut the leftovers into individual portions and refrigerate them in covered containers.

Reheat gently in the microwave or in a skillet until heated through.

For the best quality, use refrigerated leftovers within 3–4 days.

You can also enjoy leftover frittata cold or at room temperature, making it a convenient option for a quick lunch.

A Farm Stand Recipe Without a Shopping List

There’s something I particularly like about this recipe.

It doesn’t send you to the grocery store with a list of twelve ingredients.

It sends you to the farm stand—or your own refrigerator—and says:

What looks good? What do I already have? What needs to be used?

That’s a pretty good way to cook.

And it’s exactly the mindset we’ve been talking about all week.

Buy what’s plentiful.

Enjoy it while it’s fresh.

Put a little back when it makes sense.

And use what you have.

Nutrition Estimate

Per serving: approximately 285 calories and 23g protein.

Nutrition is an estimate and will vary depending on the specific ingredients and brands used.

Food Safety Note

Cook the frittata until the center reaches 160°F, measured with a food thermometer. Refrigerate leftovers promptly and use within 3–4 days.

If you’re using previously cooked vegetables or other leftovers, make sure they have been stored safely and are still within their recommended storage time.

One Last Look at the Farm Stand

This week started with a simple idea:

When the farm stand is full, pay attention.

Not because you need to buy everything.

Because abundance gives you choices.

You can cook a skillet dinner with it.

You can freeze some sweet corn for later.

You can plan how much preservation actually makes sense for your household.

And you can take a handful of those beautiful vegetables and turn them into a frittata.

That’s the kind of seasonal cooking I love.

Simple food. Good ingredients. Nothing wasted. And plenty of room to make it your own.

Posted in Rice Bowls

Harvest Corn & Chicken Rice Bowls

A colorful, protein-packed bowl that turns seasonal corn into an easy meal for today—or months from now.

There is something satisfying about putting food away when it’s at its best and then actually using it later.

That’s exactly what these Harvest Corn & Chicken Rice Bowls are about.

Tender seasoned chicken, sweet corn, colorful vegetables, and fluffy brown rice come together in a simple bowl topped with a fresh squeeze of lime and a little parsley. It’s an easy meal during harvest season, but it’s also a perfect way to use some of that sweet corn you froze when it was plentiful.

Today’s harvest really can become tomorrow’s dinner.

Why You’ll Love This Recipe

  • Uses seasonal ingredients: Sweet corn, peppers, tomatoes, and zucchini are right at home here.
  • Great for preserved corn: Pull a portion of frozen sweet corn from the freezer when fresh corn is no longer available.
  • High in protein: Chicken provides a satisfying protein base.
  • Meal-prep friendly: The components can be prepared ahead and assembled when you’re ready to eat.
  • Flexible: Change the vegetables, grain, or toppings to suit what you have.
  • Small-batch friendly: Four servings means dinner for two with leftovers, or easy individual lunches.
  • Budget conscious: Rice and seasonal vegetables help stretch a pound of chicken.

🥣 Build Your Bowl

Base:
Brown rice

Protein:
Seasoned chicken breast

Vegetables:
Sweet corn, zucchini, red bell pepper, and cherry tomatoes

Sauce:
A simple lime-and-olive-oil drizzle

Fresh Finish:
Fresh parsley and lime juice

Optional Toppings:
Avocado, a sprinkle of Parmesan, or a spoonful of Greek yogurt

Make It Your Own:
Use whatever seasonal vegetables you have on hand. Yellow squash can replace zucchini, green beans can replace the peppers, and leftover roasted vegetables work beautifully, too.

simplegoodfood's avatarsimplegoodfood

Harvest Corn & Chicken Rice Bowls

There is something satisfying about putting food away when it's at its best and then actually using it later.
Prep Time 15 minutes
Cook Time 25 minutes
Total Time 40 minutes
Servings: 4
Course: Dinner, Lunch
Cuisine: American
Calories: 475

Ingredients
  

For the Rice Bowls
  • 1 cup uncooked brown rice
  • 1 pound boneless skinless chicken breast, cut into bite-sized pieces
  • 1 tablespoon olive oil divided
  • 1 teaspoon Italian seasoning
  • ½ teaspoon garlic powder
  • ½ teaspoon salt divided
  • ¼ teaspoon black pepper
  • 1 medium zucchini diced
  • 1 red bell pepper diced
  • 1 cup sweet corn fresh or thawed frozen
  • 1 cup cherry tomatoes halved
  • 2 tablespoons chopped fresh parsley
For the Lime Drizzle
  • 1 tablespoon olive oil
  • 1 tablespoon fresh lime juice
  • 1 teaspoon honey
  • 1 small clove garlic finely minced
  • Pinch of salt

Method
 

Cook the rice.
  1. Prepare the brown rice according to the package directions. Once cooked, fluff with a fork and keep warm.
Season the chicken.
  1. Place the chicken in a bowl and toss with Italian seasoning, garlic powder, ¼ teaspoon of the salt, and black pepper.
Cook the chicken.
  1. Heat 2 teaspoons of olive oil in a large skillet over medium-high heat. Add the chicken and cook for about 5–7 minutes, stirring occasionally, until browned and cooked through. Transfer the chicken to a clean plate.
Cook the vegetables.
  1. Add the remaining teaspoon of olive oil to the skillet. Add the zucchini and bell pepper. Cook for 3–4 minutes, stirring occasionally, until they begin to soften.
Add the harvest vegetables.
  1. Stir in the corn and tomatoes. Cook for another 3–4 minutes, until the corn is heated through and the tomatoes begin to soften.
Return the chicken.
  1. Add the cooked chicken back to the skillet and stir everything together. Cook for another minute or two to bring the flavors together.
Make the lime drizzle.
  1. In a small bowl, whisk together the olive oil, lime juice, honey, garlic, and a pinch of salt.
Build the bowls.
  1. Divide the warm rice among four bowls. Top with the chicken and vegetable mixture. Drizzle lightly with the lime dressing and finish with fresh parsley.
Serve.
  1. Add any optional toppings you like and serve warm.

Notes

Using Your Frozen Sweet Corn

This is where Wednesday’s “Today’s Corn, Tomorrow’s Meals” idea gets to shine.
If you froze sweet corn during the September harvest, you can use it directly from the freezer after thawing it. Drain away any excess moisture before adding it to the skillet.
You don’t need to wait for fresh corn season to make this meal.
That’s the whole point.
A portion of corn that you prepared when it was fresh and plentiful can become part of an easy dinner weeks or months later.

Make It Your Own

The bowl is a formula more than a strict set of rules.

Try:

  • Quinoa or barley instead of brown rice.
  • Yellow squash instead of zucchini.
  • Green beans instead of bell pepper.
  • Leftover roasted vegetables when you have them.
  • Rotisserie chicken when you need a shortcut.
  • Turkey instead of chicken.
  • A sprinkle of shredded cheddar or Monterey Jack for a little extra richness.

For a little more flavor without making the dish overly spicy, try adding a pinch of smoked paprika to the chicken.

Meal Prep Tips

These bowls are easy to prepare ahead.

Cook the rice, chicken, and vegetables and store them separately or in individual meal containers. Keep the lime drizzle in a small covered container and add it just before eating.

For the best texture, reheat the rice, chicken, and vegetables before adding the fresh parsley and lime dressing.

If you’re cooking for one or two, portioning the ingredients individually means you can grab exactly one meal when you need it.

A Little Leftover Magic

Have a little chicken and vegetable mixture left over?

Don’t make another identical bowl.

Use it to make:

  • A chicken and corn quesadilla
  • A quick skillet scramble
  • A wrap
  • A simple soup
  • A stuffed baked potato

That’s one of the easiest ways to stretch a meal without making leftovers feel like punishment.

Nutrition Estimate

Per serving: approximately 475 calories and 39g protein, including the rice and lime drizzle.

Nutrition is an estimate and will vary depending on the specific ingredients and brands used.

Food Safety Note

Cook chicken to an internal temperature of 165°F, measured with a food thermometer.

If preparing these bowls ahead of time, refrigerate leftovers promptly in shallow containers. For best quality and safety, use refrigerated leftovers within 3–4 days.

From Today’s Harvest to Tomorrow’s Dinner

This is exactly why I like the idea of putting a little back.

The corn doesn’t have to be the whole meal.

It doesn’t even have to be the star.

It just has to be there when you need it.

A cup of frozen sweet corn can turn a little chicken and rice into a colorful, satisfying bowl. Add a few vegetables, a simple dressing, and you’ve got dinner.

That’s the payoff for doing a little work when the harvest was at its peak.

Buy it when it’s good. Preserve what you’ll use. Then enjoy it later.

Today’s corn just became tomorrow’s meal.

Posted in Kitchen Tips

How Much Should You Actually Preserve?

There is a temptation when you start preserving food to think you need to go big.

A bushel of tomatoes.
A dozen jars of green beans.
Twenty bags of corn.
A freezer packed so tightly that you need a map to find dinner.

But you don’t.

The right amount to preserve is the amount you will actually use.

That’s an important distinction.

Putting food back should make your life easier—not create another chore, fill your storage space with food you don’t particularly enjoy, or leave you wondering what to do with all those jars and freezer bags six months from now.

Start With What You Actually Eat

The best place to begin isn’t the farm stand.

It’s your dinner table.

Think about the foods you regularly eat throughout the year.

If you eat corn once every couple of weeks, you don’t need to preserve enough for corn every night.

If you make soup regularly, putting away vegetables that work well in soups might be worthwhile.

If you love homemade tomato sauce, tomatoes may deserve more freezer or pantry space than something you rarely use.

Your preservation plan should reflect your meals, not somebody else’s.

The National Center for Home Food Preservation makes this same basic point in its USDA preservation guidance: how much food to preserve is an individual choice, and planning can be based on how much of a particular food your household actually eats.

That’s a much better starting point than simply asking, “How much can I preserve?”

The One-Year Question

Here’s a simple question that can help:

How much of this food would I realistically use in the next year?

Not how much you could use.

Not how much you might use.

How much would you actually use?

For example, let’s say you eat about one cup of corn every other week.

That’s roughly 26 cups over a year.

You don’t necessarily have to preserve all 26 cups. Maybe you’ll buy fresh corn during part of the year. Maybe you’ll eat canned or commercially frozen corn sometimes.

But suddenly you have a useful ballpark.

Instead of thinking:

you’re thinking:

That’s a plan.

A Simple Preservation Formula

You don’t need complicated math.

Try this:

How often do I eat it? × How much do I use each time = How much I might want for the year

Then subtract what you’ll probably buy fresh or otherwise have available.

For example:

Corn:
1 cup every 2 weeks × 26 weeks = about 26 cups

If you expect to eat fresh corn for several weeks during harvest season, you might decide that putting away 12–18 cups is plenty.

And that’s perfectly reasonable.

You’re not trying to eliminate every future grocery-store purchase.

You’re simply taking advantage of today’s good harvest to make some future meals easier.

Think in Meals, Not Pounds

This is especially helpful when you’re cooking for one or two.

A five-pound bag of something might sound like a great deal.

But how many meals does it represent?

Instead of asking:

“How many pounds should I preserve?”

ask:

“How many meals can this make?”

If one freezer package contains enough corn for one rice bowl, that’s a very useful unit of measurement.

If a container of frozen vegetables is enough for one skillet meal, that’s useful, too.

You’re building a collection of future meal ingredients, not simply accumulating food.

And that changes how you think about the freezer.

Portion It for the Way You Cook

This is one of the easiest ways to make your future self happy.

Think about how much you normally use at one time.

If a recipe usually calls for one cup of corn, freezing corn in one-cup portions makes sense.

If you regularly make a soup that uses two cups, two-cup portions may be more convenient.

There isn’t a universal “correct” package size.

The best size is the one that matches your cooking.

Small portions are particularly useful when you’re cooking for one or two because you don’t have to thaw an entire large package just to use a little of it.

Don’t Forget Your Storage Space

Here’s another reality check:

Your freezer and pantry are not unlimited.

Before you preserve a large quantity of anything, look at the space you actually have available.

A bargain isn’t much of a bargain if you have nowhere to store what you bought.

This is particularly important if you use several preservation methods.

Maybe you’re freezing corn.

Dehydrating vegetables.

Canning tomatoes.

Making freezer meals.

All of those things compete for storage space.

So give yourself permission to say:

“That’s enough.”

Enough is a perfectly good preservation goal.

Consider Your Preservation Method

The amount you preserve may also depend on how you’re preserving it.

Freezing is convenient for many foods, but it requires freezer space.

Dehydrating dramatically reduces the volume of many fruits and vegetables, but the finished food still needs to be stored properly.

Canning can give you shelf-stable food, but it requires the right equipment, tested recipes, and careful attention to processing instructions.

The method should fit your food, your equipment, your storage space, and your lifestyle.

And remember that different foods require different preservation methods.

For example, some high-acid foods can be safely processed using a tested water-bath canning method, while low-acid foods require pressure canning. Don’t choose a preservation method simply because it’s the one you happen to prefer.

Use current, tested guidance from the National Center for Home Food Preservation when deciding how a particular food should be preserved.

A Little Preservation Math Goes a Long Way

You can make this as simple or as detailed as you want.

Here’s an easy worksheet:

Food: ______________________

How often do I eat it? ______________________

Amount I use each time: ______________________

Estimated yearly need: ______________________

How much will I buy fresh? ______________________

How much do I want to preserve? ______________________

Storage space available: ______________________

That’s enough information to make a reasonable decision.

You don’t need a spreadsheet.

Although, if you like spreadsheets, I certainly won’t stop you. 😉

Don’t Preserve Food You Don’t Like

This may sound obvious, but it’s surprisingly easy to forget.

Just because something is inexpensive doesn’t mean you need to preserve it.

Just because everyone else is canning it doesn’t mean you need twelve jars.

And just because you can preserve something doesn’t mean you should.

Preserve foods that fit your cooking habits.

Preserve foods your household enjoys.

Preserve foods that make sense for your budget and your storage space.

That’s how putting food back becomes useful instead of becoming a project that takes over your kitchen.

Leave Room for Fresh Food

One of my favorite reasons not to over-preserve is that you don’t have to eat from your freezer or pantry exclusively.

There will always be another harvest.

There will always be another sale.

There will always be another beautiful farm stand.

Leave yourself some room to enjoy what’s fresh.

Putting a little back doesn’t mean putting everything back.

It simply means taking advantage of abundance when it makes sense.

Think of It as Cooking for Your Future Self

This is really what preservation is about.

When you freeze those extra ears of corn, you’re not just storing corn.

You’re storing the beginning of a future dinner.

When you dehydrate a few vegetables, you’re creating ingredients for a future soup.

When you safely can a batch of something you use regularly, you’re making a future meal a little more convenient.

You’re doing a little work today so that someday you can say:

“Oh, good. I already have some.”

And honestly, that’s one of the nicest things you can give your future self.

When “Enough” Is Enough

There is no prize for having the fullest pantry.

There is no award for the freezer that requires two hands and a crowbar to close.

And there is absolutely nothing wrong with preserving only a few bags of corn because that’s all you know you’ll use.

Start small.

Pay attention to what you use.

Adjust next year.

If you run out of something you loved having on hand, preserve a little more next time.

If you still have six jars left when the next harvest arrives, preserve less.

That’s how you build a preservation plan that actually belongs to you.

Your Preservation Plan Doesn’t Have to Look Like Anyone Else’s

The beauty of putting food back is that there’s no single right-sized pantry, freezer, or preservation shelf.

A family of six will have different needs from a couple.

A couple will have different needs from someone cooking for one.

Someone with a large freezer will have different options from someone with a small refrigerator freezer.

Your job isn’t to preserve everything.

Your job is to preserve enough.

And sometimes enough is just a few packages of sweet corn.

That’s what we’re doing this September:

Buying at the peak. Enjoying what’s fresh. Putting a little back. And making tomorrow’s meals just a little easier.

Because the goal isn’t to preserve the harvest.

The goal is to use it well.

A Safe Preservation Reminder

Whenever you’re preserving food, use current, tested recommendations for the specific food and method you’re using.

The National Center for Home Food Preservation provides research-based guidance for home canning, freezing, drying, pickling, and other preservation methods.

For broader food-safety and storage information, USDA Food Safety and Inspection Service guidance is another useful resource.

When in doubt, check the current guidance before you begin. A few minutes of checking is a small price to pay for knowing that the food you’re putting back is being preserved safely.

Posted in Kitchen Tips

Put a Little Back: Sweet Corn — Today’s Corn, Tomorrow’s Meals

There is something wonderfully satisfying about opening the freezer in January and finding a bag of sweet corn that you bought when the September harvest was at its peak.

Today’s corn becomes tomorrow’s dinner.

That’s the whole idea behind putting a little back.

You don’t have to preserve bushels of produce or spend an entire weekend filling a freezer. Sometimes a few ears of particularly good corn are all it takes to make a future meal a little easier—and a little more affordable.

And sweet corn is a great place to start.

Why Freeze Sweet Corn?

When sweet corn is plentiful, you may find it at a better price than you will later in the year. More importantly, corn that is frozen while it’s fresh and at its peak can retain much of the flavor and quality you loved when you bought it.

Freezing doesn’t magically make old produce fresh again, though.

The quality of the food going into the freezer matters.

If you have beautiful, fresh corn today, that’s the corn worth putting back.

The National Center for Home Food Preservation recommends selecting tender, freshly gathered corn in the milk stage for freezing.

You Don’t Need to Freeze It on the Cob

While you certainly can freeze corn on the cob, I prefer whole-kernel corn for everyday cooking.

Why?

Because kernels are ready to use in so many meals.

A handful can go into:

  • Chicken and vegetable skillets
  • Rice bowls
  • Soups and stews
  • Casseroles
  • Fried rice
  • Quesadillas
  • Cornbread
  • Vegetable side dishes
  • Breakfast scrambles

That’s exactly what we’re after with our September preservation plan.

We’re not just preserving food.

We’re preserving future ingredients.

How to Freeze Sweet Corn

For the best quality, the National Center for Home Food Preservation recommends blanching whole-kernel corn before freezing. Blanching helps slow the enzyme activity that can cause vegetables to lose flavor, color, and texture during freezer storage.

Here’s the basic process.

1. Start With Fresh Corn

Choose fresh ears with plump kernels.

Husk the corn, remove the silk, trim the ends if needed, and wash the ears.

Don’t let beautiful corn sit around for days waiting for you to get to it. If you know you’re going to freeze it, work with it while it’s still fresh.

2. Blanch the Ears

Bring a large pot of water to a vigorous boil.

Place the ears into the boiling water and blanch for 4 minutes for whole-kernel corn.

The blanching step is important. Under-blanching can actually encourage the enzyme activity you’re trying to stop, while over-blanching can negatively affect quality. Follow the recommended time rather than simply guessing.

3. Cool the Corn Quickly

As soon as the blanching time is complete, remove the corn and cool it promptly and completely.

An ice-water bath works well.

You want to stop the cooking process before the kernels become overcooked.

Drain the ears thoroughly.

4. Cut the Kernels From the Cob

Once the corn is cool enough to handle, cut the kernels from the cob.

The National Center for Home Food Preservation recommends cutting about two-thirds of the depth of the kernels rather than scraping the cob.

A shallow baking dish or rimmed sheet pan can help catch the kernels as you work.

And don’t throw those cobs away just yet.

They can add a little extra flavor to a pot of soup or stock.

That’s the Waste Not, Want Not part of the process. 😉

5. Package It in Meal-Friendly Portions

This is where I think a little planning pays off.

Instead of putting all your corn into one enormous freezer bag, divide it into portions you’ll actually use.

For example:

  • 1 cup: quick side dish
  • 1½ cups: skillet meal or rice bowl
  • 2 cups: soup, casserole, or larger recipe

The right portion depends on how you cook.

If you’re cooking for one or two, smaller packages can save you from thawing more corn than you need.

The National Center for Home Food Preservation recommends packaging whole-kernel corn, leaving ½ inch of headspace, then sealing and freezing.

6. Label Everything

Trust me on this one.

Write the food and date on every package.

“Corn” may seem obvious today.

Six months from now, when you’re staring into the freezer at several unidentified bags, you will be very glad you took thirty seconds to label them.

A simple label is enough:

Sweet Corn — September 2026

You can also add the quantity if you packaged it in measured portions.

Freeze It Quickly

For the best quality, freeze food as quickly as possible.

USDA guidance notes that rapid freezing produces smaller ice crystals, which helps protect the quality of frozen foods. A freezer should be maintained at 0°F or below for frozen food storage.

If you’re freezing several packages at once, spread them out rather than piling them together while they’re still warm. Once they’re frozen solid, you can organize them more efficiently.

What About Freezer Bags?

Freezer bags are perfectly practical for this kind of small-batch preservation.

The important thing is to use packaging designed for freezer storage and remove as much excess air as practical before sealing.

Air is the enemy of long-term quality because it contributes to freezer burn.

And here’s an important distinction:

Freezer burn doesn’t make food unsafe.

It does, however, damage quality and can leave food dry and leathery in spots. Good packaging helps prevent it.

How Much Should You Freeze?

Here’s where I want to resist the temptation to give you a number.

There is no magic amount of corn that everyone should preserve.

If you’re cooking for one, six ears might be plenty.

If you’re cooking for two, perhaps you’ll want enough for several future meals.

If you have a large freezer and use corn constantly, you may want more.

The right amount is the amount you will actually use.

That’s an important part of putting food back.

We’re not trying to win a preservation contest.

We’re trying to make our future lives a little easier.

And that’s exactly what we’ll talk about tomorrow: How Much Should You Actually Preserve?

Today’s Corn, Tomorrow’s Meals

This is my favorite part of the whole idea.

You bought the corn when it was fresh and plentiful.

You prepared it while it was still at its best.

You put a few portions in the freezer.

And now you’ve created future meal ingredients without having to buy them again.

A few weeks from now, that corn might become part of a quick skillet dinner.

In the middle of winter, it might brighten up a soup.

Or it might become the star of a simple rice bowl.

In fact, that’s exactly where we’re headed later this week.

Friday’s Harvest Corn & Chicken Rice Bowls will put some of today’s “tomorrow” corn to work.

That’s the beauty of preserving food in small batches.

You don’t have to think of it as stocking up.

Think of it as making dinner for your future self.

A Note About Safe Food Preservation

Freezing vegetables is different from canning them, and the safety rules are different, too.

For freezing, use current, tested preservation guidance for preparation and blanching times. For canning, especially with low-acid vegetables such as corn, use tested pressure-canning instructions rather than adapting a recipe or guessing at processing times. The National Center for Home Food Preservation identifies corn as a low-acid food that requires pressure canning when canned as plain whole-kernel corn.

When you’re preserving food, check the USDA and National Center for Home Food Preservation guidance before you begin. A few minutes spent checking current recommendations is worth it for the safety and quality of the food you’re putting away.

Put a Little Back

You don’t need a pantry full of jars or a freezer packed to the ceiling.

Sometimes putting a little back means buying a few extra ears of sweet corn when they’re beautiful and plentiful.

Enjoy some tonight.

Freeze some for later.

And then, sometime when fresh corn is no longer piled high at the farm stand, open the freezer and remember:

Today’s harvest just became tomorrow’s meal.

That’s a pretty good kind of food insurance.

Posted in Skillet Meals

Harvest Chicken & Vegetable Skillet

A colorful one-skillet dinner that makes the most of September’s harvest.

When the farm stand is full of beautiful vegetables, this is exactly the kind of meal I want to make.

Tender pieces of chicken are cooked with sweet corn, zucchini, bell pepper, onion, and tomatoes for a simple skillet dinner that tastes like the best of late summer and early fall. A little garlic and Italian seasoning are all you need to bring everything together.

It’s colorful, filling, budget-friendly, and—best of all—there’s only one skillet to wash.

Why You’ll Love This Recipe

  • One skillet: Everything cooks together, making cleanup easy.
  • Harvest-friendly: Perfect for using whatever fresh vegetables look best this week.
  • High in protein: Chicken makes this a satisfying main dish.
  • Mildly seasoned: Plenty of flavor without making the dish overly spicy.
  • Flexible: Swap in whatever seasonal vegetables you already have.
  • Small-batch friendly: Makes four servings, so it works well for singles and couples with leftovers for another meal.
  • Budget-conscious: Seasonal vegetables help stretch a modest amount of chicken.
simplegoodfood's avatarsimplegoodfood

Harvest Chicken & Vegetable Skillet

Tender pieces of chicken are cooked with sweet corn, zucchini, bell pepper, onion, and tomatoes for a simple skillet dinner that tastes like the best of late summer and early fall.
Prep Time 15 minutes
Cook Time 20 minutes
Total Time 35 minutes
Servings: 4
Course: Dinner, Lunch, Main Course
Cuisine: American
Calories: 330

Ingredients
  

  • 1 pound boneless skinless chicken breasts, cut into bite-sized pieces
  • 1 tablespoon olive oil divided
  • 1 small onion chopped
  • 1 medium zucchini diced
  • 1 red bell pepper chopped
  • 1 cup fresh or frozen sweet corn
  • 1 cup cherry tomatoes halved
  • 2 cloves garlic minced
  • 1 teaspoon Italian seasoning
  • ½ teaspoon salt
  • ¼ teaspoon black pepper
  • ½ cup low-sodium chicken broth
  • 2 tablespoons chopped fresh parsley
  • ¼ cup grated Parmesan cheese optional

Method
 

Prepare the chicken.
  1. Pat the chicken dry and cut it into bite-sized pieces. Season lightly with the salt, pepper, and Italian seasoning.
Brown the chicken.
  1. Heat 2 teaspoons of the olive oil in a large skillet over medium-high heat. Add the chicken in a single layer and cook for about 5–7 minutes, turning occasionally, until lightly browned and cooked through. Transfer the chicken to a plate.
Cook the vegetables.
  1. Add the remaining teaspoon of olive oil to the skillet. Add the onion and bell pepper and cook for 2–3 minutes. Add the zucchini and corn and continue cooking for another 3–4 minutes, stirring occasionally.
Add the tomatoes and garlic.
  1. Stir in the tomatoes and garlic. Cook for about 1 minute, just until the garlic becomes fragrant and the tomatoes begin to soften.
Bring it together.
  1. Return the chicken and any accumulated juices to the skillet. Pour in the chicken broth and stir everything together.
Finish cooking.
  1. Reduce the heat to medium and simmer for 2–3 minutes, stirring occasionally, until the vegetables are tender and the broth has reduced slightly.
Finish and serve.
  1. Sprinkle with fresh parsley and, if desired, Parmesan cheese. Serve hot.

Notes

Make It Your Own

This skillet is intentionally flexible.
Use yellow squash instead of zucchini, add a handful of spinach, substitute green beans for the bell pepper, or toss in leftover roasted vegetables. If tomatoes aren’t looking their best, a few spoonfuls of drained canned diced tomatoes work, too.
You can also change the seasoning to match what you have on hand. A little dried basil or parsley works beautifully here.

Serving Suggestions

This is a complete meal on its own, but you can stretch it a little further by serving it over:

  • Brown rice
  • Quinoa
  • Barley
  • Whole-grain pasta
  • Cauliflower rice

For a lighter meal, serve it with a simple green salad or a piece of whole-grain bread.

A Little Leftover Magic

Don’t overlook the leftovers!

The chicken and vegetables can be refrigerated and reheated for another lunch or dinner. They can also become the starting point for a rice bowl, wrap, or quick quesadilla.

And if you’re following along with our September “Put a Little Back” theme, this is also a good reminder of why preserving seasonal produce can be worthwhile. Today’s harvest doesn’t have to stay today’s dinner.

Nutrition Estimate

Per serving, without optional Parmesan: approximately 330 calories and 37g protein.

Nutrition is an estimate and will vary depending on the specific ingredients and brands used.

Food Safety Note

Cook chicken to an internal temperature of 165°F as measured with a food thermometer. Refrigerate leftovers promptly and use within 3–4 days.