
Posted in Kitchen Tips

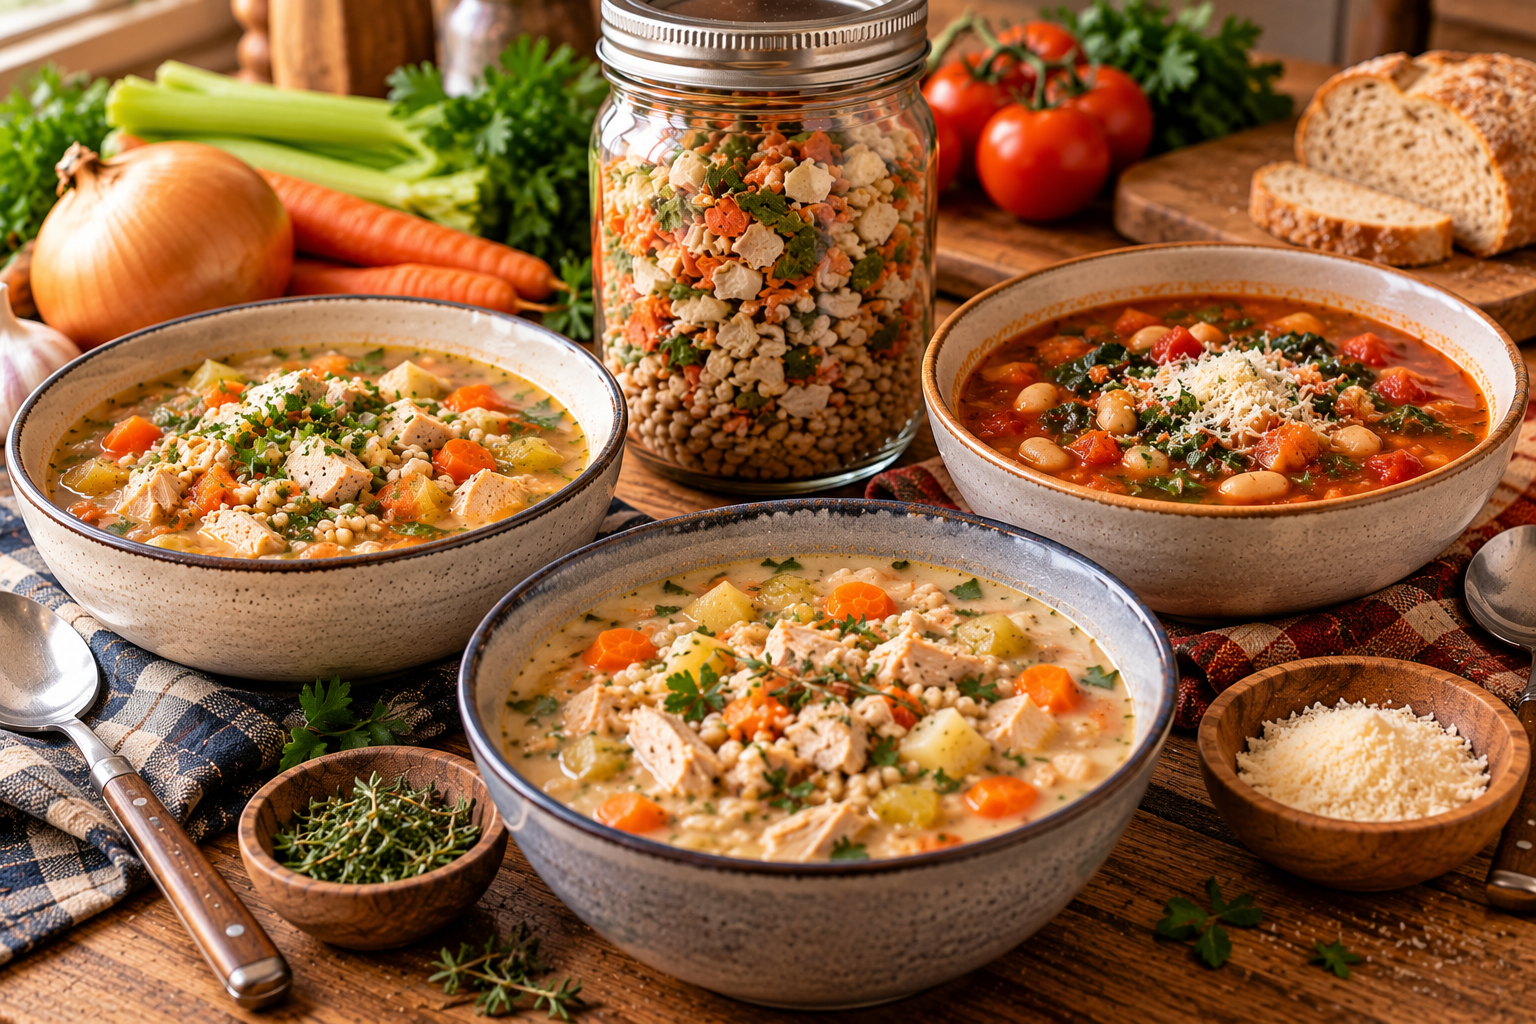
Three Ways to Change One Soup Starter

Yesterday, we turned a jar of homemade soup starter into Turkey & Barley Comfort Soup.

Today, we’re going to do something even more useful.

We’re going to take that same soup starter and turn it into three completely different meals.

Because that’s the secret to a practical pantry:

You don’t need a pantry full of recipes. You need ingredients that can work in more than one recipe.

A good soup starter gives you the vegetables, grain, and basic seasonings.

What you add to it determines what kind of soup ends up in the bowl.

And for a household of one or two, that kind of flexibility can make a big difference.

Start With the Same Soup Starter

Our Homemade Soup Starter Mix contains dehydrated:

  • Carrots
  • Celery
  • Onion
  • Potatoes

Along with:

  • Pearl barley
  • Parsley
  • Thyme
  • Garlic
  • Onion powder
  • Black pepper
  • Salt

The basic cooking method stays the same.

Add one portion of the starter to about 4 cups of broth, bring it to a simmer, and cook until the barley and vegetables are tender.

Then comes the fun part.

Change the protein. Change the vegetables. Change the seasoning. Change the finish.

And you’ve changed the soup.


1. Turkey & Barley Comfort Soup

Let’s start with the version we made yesterday.

It’s the classic combination:

Turkey + barley + root vegetables + herbs

Add

  • 1 to 1½ cups cooked turkey
  • Chicken or turkey broth
  • Fresh parsley
  • A squeeze of lemon

Optional

Add a handful of frozen peas during the last few minutes.

Why It Works

Turkey and barley are a natural match.

The barley makes the soup hearty, while the turkey adds protein without requiring a large amount of meat.

The lemon at the end gives the whole bowl a little lift.

This is the version to make when you’re craving a traditional, cozy bowl of soup.


2. Chicken, Vegetable & Lemon Soup

Now let’s change the personality of the same starter.

Instead of turkey, use chicken and brighten everything up.

Add

  • 1 to 1½ cups cooked chicken
  • Chicken broth
  • ½ cup frozen peas
  • A handful of fresh spinach
  • 1–2 teaspoons lemon juice
  • Fresh parsley

Optional

If you have leftover cooked carrots, green beans, or corn, add them too.

The Difference

The basic starter hasn’t changed.

But the addition of chicken, green vegetables, and lemon makes this version feel much lighter and brighter.

And this is a perfect example of why you don’t have to follow a recipe rigidly.

Maybe you don’t have turkey.

That’s fine.

Use chicken.

Maybe you have leftover vegetables that need a home.

Add them.

The soup adapts.


3. White Bean & Tomato Barley Soup

Now let’s take the same starter in an entirely different direction.

Skip the meat and add beans and tomatoes.

Add

  • 1 can (15 ounces) white beans, drained and rinsed
  • 1 cup diced tomatoes, canned or leftover
  • Vegetable or chicken broth
  • ½ teaspoon Italian seasoning
  • 1 tablespoon grated Parmesan, optional
  • Fresh parsley, optional

How to Make It

Start the soup starter in the broth as usual.

When the vegetables and barley are nearly tender, add the beans and tomatoes.

Simmer until everything is hot and the flavors have come together.

Taste before adding additional salt because canned beans and tomatoes can vary considerably in sodium.

Finish with Parmesan and parsley if desired.

The Difference

Suddenly we’re no longer talking about turkey soup.

We’re talking about a hearty bean-and-tomato soup with Italian-inspired flavors.

Same starter.

Completely different supper.


The Formula Behind the Three Soups

Here’s what changed:

SoupProteinFlavor DirectionFinish
Turkey & BarleyTurkeyClassic herbLemon + parsley
Chicken & VegetableChickenBright & freshLemon + greens
White Bean & TomatoWhite beansTomato & ItalianParmesan + parsley

The starter stayed essentially the same.

That’s the point.

You aren’t building three different pantry systems.

You’re building one useful base that can become several meals.

Kitchen Confidence: Think in Swaps

Once you understand the formula, you can start making substitutions without worrying that you’re somehow “ruining” the recipe.

Protein swaps

Turkey → Chicken → Beans → Lentils → Pork

Vegetable swaps

Peas → Green beans → Corn → Spinach → Cabbage

Grain swaps

Barley → Rice → Small pasta

Flavor swaps

Thyme & parsley → Italian herbs → Cumin & oregano

The combinations are practically endless.

But you don’t need endless combinations.

You only need enough variety to keep your pantry meals interesting.

What If You Don’t Have the Exact Ingredient?

This is where pantry cooking gets easier.

No fresh parsley?

Use dried.

No turkey?

Use chicken.

No chicken?

Use beans.

No peas?

Use frozen green beans.

No fresh spinach?

Skip it.

No lemon?

Try a tiny splash of vinegar in a savory soup.

No barley?

Use rice or small pasta, keeping in mind that the cooking method and timing may change.

The important thing is understanding what an ingredient contributes.

Once you know that, substitutions become much easier.

Stretch Every Grocery Dollar

This is one of the reasons I like homemade pantry mixes so much.

You’re not buying a different boxed soup mix for every flavor you want.

Instead, you keep a flexible base on hand and use the ingredients you already have to change it.

A can of white beans can become soup.

Leftover chicken can become soup.

A small amount of frozen vegetables can become soup.

That half can of tomatoes left from another recipe can become soup.

You’re getting more meals from the same groceries.

And that’s a much more useful kind of pantry stocking than simply buying more food.

Waste Not, Want Not

Soup is one of the easiest places to use small quantities of leftovers.

That doesn’t mean dumping everything into the pot.

Flavor matters.

But if you have a little cooked vegetable, a small amount of leftover meat, or part of a can of beans or tomatoes, soup is worth considering.

The trick is to ask:

Will this ingredient work with the flavor direction I’m creating?

If yes, use it.

If no, save it for something else.

“Use everything” shouldn’t mean “throw everything together.”

Cooking for One or Two

This concept is especially useful for small households.

You don’t have to make three different soups.

Make one starter mix.

Then change the additions.

For example:

Monday: Turkey soup

Wednesday: Chicken soup

Friday: Bean and tomato soup

You get variety without buying a completely different set of ingredients for each meal.

And if you live alone, you can make one or two servings at a time instead of cooking a large pot.

Meal Prep Note

If you want to make several versions during the same week, keep your starter mix dry and prepare only the amount of soup you need.

That way, you can make one flavor today and a different flavor later.

This is particularly helpful when you’re cooking for one.

There’s no reason the entire household has to eat the same soup three nights in a row simply because you made a large pot.

Storage & Freezing

Once prepared, store leftover soup in a covered container in the refrigerator and use within 3–4 days.

Individual portions can also be frozen.

If you know you’re going to freeze the soup, consider keeping delicate finishing ingredients such as fresh herbs, lemon juice, cheese, or yogurt until you’re ready to serve.

Add those after reheating for the freshest flavor.

The Bigger Lesson

This is what I really want you to take away from this week’s soup project:

A pantry doesn’t have to be a collection of finished meals.

It can be a collection of building blocks.

The soup starter gives you one building block.

Your freezer gives you another.

The canned goods on your shelf give you more.

Your refrigerator leftovers give you another.

And your knowledge of how those ingredients work together is what turns them into dinner.

That’s a much more flexible way to cook.

And once you start thinking this way, you’ll find yourself looking at your pantry a little differently.

Instead of seeing:

“I don’t have the ingredients for a recipe.”

You may start seeing:

“I have the ingredients to make something.”

And honestly, that’s a pretty useful cooking skill to have.

Posted in Jar Mixes (Meal Starters)

Homemade Soup Starter Mix

One of the best things about having a pantry stocked with dehydrated vegetables is realizing that those little jars aren’t just ingredients waiting for a recipe.

They can become the recipe starter.

A handful of dehydrated vegetables, a little barley or rice, some herbs and seasonings, and a jar of shelf-stable ingredients can turn into the beginning of a homemade pot of soup whenever you need it.

That’s the idea behind this Homemade Soup Starter Mix.

It isn’t meant to be a complete instant soup. Instead, it’s a flexible little pantry helper that gives you a head start.

Add broth. Add protein. Let everything simmer and rehydrate.

Dinner gets a whole lot easier.

Why Make a Homemade Soup Starter?

There are plenty of packaged soup mixes at the grocery store. So why make your own?

Because homemade lets you decide exactly what goes into it.

You can:

  • Use vegetables you already dehydrated.
  • Adjust the quantities for a small household.
  • Leave out ingredients your family doesn’t like.
  • Control the seasoning.
  • Use the grains or starches you already keep.
  • Make individual or two-serving portions.
  • Use up small quantities of dehydrated vegetables.
  • Build several different soups from the same basic starter.

And perhaps most importantly, you know what’s in the jar.

This isn’t about creating another complicated food-prep project.

It’s about making the pantry you already have more useful.

The Basic Soup Starter Formula

Think of your jar as four basic components:

Vegetables + Grain/Starch + Seasoning + Optional Dried Flavor Ingredients

That’s it.

The protein and broth can be added later.

For this version, we’re using dehydrated vegetables, pearl barley, onion, garlic, and simple herbs.

The result is a versatile starter that works particularly well with turkey or chicken.

Homemade Soup Starter Mix

Makes

4 small starter portions

Each portion makes approximately 2 servings of soup, depending on the amount of broth and protein added.

Ingredients

For the complete dry mix:

  • ½ cup dehydrated diced carrots
  • ½ cup dehydrated diced celery
  • ½ cup dehydrated diced onion
  • ½ cup dehydrated diced potatoes
  • 1 cup pearl barley
  • 2 teaspoons dried parsley
  • 1 teaspoon dried thyme
  • 1 teaspoon garlic powder
  • 1 teaspoon onion powder
  • ½ teaspoon black pepper
  • ½ teaspoon salt

To Package

You’ll also need:

  • Four pint-size mason jars or other airtight containers
  • Labels

A pint jar gives you plenty of room to combine the ingredients without having to cram everything inside.

Making the Mix

1. Make sure the vegetables are thoroughly dry.

This is the most important step.

Dehydrated vegetables intended for storage should be completely dry and properly cooled before being packed.

They should not feel soft or damp.

If you’re unsure whether a batch is sufficiently dry, give it more drying time rather than taking chances with storage.

2. Combine the dry ingredients.

In a large bowl, combine the dehydrated carrots, celery, onion, and potatoes.

Add the barley, parsley, thyme, garlic powder, onion powder, black pepper, and salt.

Stir thoroughly so the seasonings are distributed throughout the mixture.

3. Divide into four portions.

Measure approximately 1½ cups of the dry mixture into each jar.

Don’t worry if the portions aren’t perfectly identical. The mix is flexible.

4. Label the jars.

At minimum, write:

Homemade Soup Starter Mix

Use 1 jar for approximately 2 servings

Date prepared

If you’re keeping several mixes in your pantry, it’s also helpful to note the main ingredients.

How to Use the Soup Starter

When you’re ready to make soup, empty one jar into a saucepan.

Add:

  • 4 cups chicken or turkey broth
  • 1 to 1½ cups cooked turkey or chicken, chopped or shredded

Bring the mixture to a boil, then reduce the heat and simmer gently until the barley and vegetables are tender.

Because dehydrated vegetables vary in size and dryness, cooking time can vary.

Start checking around 35 minutes, but allow additional time if the barley or vegetables aren’t tender yet.

Add additional broth or water as needed.

Taste and adjust the seasoning before serving.

A Note About the Potatoes

Dehydrated potatoes can take a little longer to rehydrate than some other vegetables.

Cutting them into small, uniform pieces before dehydrating helps them cook more evenly.

If your dehydrated potato pieces are larger, give them extra cooking time.

What Goes Into the Soup Later?

This is intentionally a starter, not a finished meal.

That’s what makes it useful.

You can add:

Protein

  • Cooked turkey
  • Cooked chicken
  • Canned chicken
  • Cooked pork
  • Beans
  • Lentils

Extra Vegetables

  • Frozen peas
  • Frozen green beans
  • Corn
  • Spinach
  • Fresh cabbage
  • Fresh zucchini

Finishing Ingredients

  • Lemon juice
  • Fresh parsley
  • Greek yogurt
  • Parmesan
  • Shredded cheese
  • A splash of vinegar

The same jar can become several different soups depending on what you add.

Kitchen Confidence: Don’t Make the Mix Too Complicated

It’s tempting when making homemade mixes to keep adding ingredients.

A little of this.

A little of that.

Another spice.

Another dried vegetable.

Before you know it, you’ve created a jar that only works for one specific recipe.

That’s not what we’re trying to do here.

The most useful pantry mixes are flexible.

Think of this as a blank canvas rather than a finished recipe.

The jar gives you the vegetables, grain, and basic seasoning.

You decide what dinner becomes.

Stretch Every Grocery Dollar

This kind of mix can also help you make better use of food you’ve already preserved.

Dehydrated vegetables take up very little storage space, which makes them especially useful when refrigerator and freezer space are limited.

Instead of keeping a large bag of fresh vegetables in the refrigerator and hoping you’ll use them before they spoil, you can preserve some of them for later.

And once they’re dehydrated, they become incredibly convenient.

A tablespoon or two of dried onion can be exactly what a small recipe needs.

A handful of dried carrots can become part of a soup.

Those little quantities add up.

Waste Not, Want Not

This is also a good project for using the smaller quantities left over from different dehydrating batches.

You don’t need to dedicate an entire batch of vegetables to soup mix.

Have a little dehydrated carrot left?

Add it.

A small jar of dried onion?

Use it.

Some dehydrated celery that isn’t enough for another storage jar?

Into the soup mix it goes.

This is one of the places where dehydrating really shines for a small household.

Small quantities don’t have to become waste.

They can become ingredients.

Cooking for One or Two

The recipe makes four starter portions, but you can easily scale it down.

For a household of one, make smaller jars containing enough mix for one serving.

You can also prepare the four portions and simply use half of a jar when you need one bowl of soup.

The important thing is to keep the dry ingredients in a clean, dry, airtight container.

Meal Prep Note

These starter jars are a great way to make future meal prep easier.

You can prepare several jars at once and keep them ready in the pantry.

Then on a busy evening, you aren’t measuring five different dried vegetables and three different seasonings.

The measuring is already done.

You simply grab a jar and start cooking.

That is exactly what a good pantry convenience food should do.

Storage

For best storage, make sure every dehydrated ingredient is completely dry before assembling the mix.

Store the finished mix in a clean, dry, airtight container in a cool, dark pantry.

Label each jar with the date and ingredients.

Because this mix contains multiple homemade dehydrated ingredients, I recommend treating the storage life according to the ingredient with the shortest reliable storage life rather than assuming the entire mix will last indefinitely.

If you notice moisture, condensation, off odors, mold, or any other sign of spoilage, discard the mix.

When in doubt, throw it out.

Important Preservation Note

This homemade soup mix is a dry pantry mix, not a pressure-canned or shelf-stable canned meal.

Do not put the assembled soup mix into a canning jar and process it as though it were a tested canning recipe.

For food-preservation guidance, follow tested recommendations from reliable preservation authorities and use your dehydrated ingredients according to established dehydration and storage practices.

Three Ways to Use One Starter

The real beauty of this mix is what happens after the jar is opened.

Turkey & Barley Comfort Soup

Add turkey, chicken or turkey broth, and finish with parsley and a squeeze of lemon.

That’s the version we’ll be making tomorrow.

Chicken & Vegetable Soup

Use chicken instead of turkey and add a handful of frozen peas near the end.

The same starter suddenly has a completely different personality.

Vegetable & Bean Soup

Skip the meat and add a can of drained white beans or another bean you enjoy.

Add a little tomato if you want a richer, tomato-based soup.

One starter.

Three very different dinners.

And that’s before we start changing the seasonings.

The Bigger Pantry Idea

A pantry full of ingredients is useful.

A pantry full of ready-to-combine ingredients is even more useful.

That’s the difference between simply storing food and actually building a working pantry.

The goal isn’t to have shelves that look impressive.

The goal is to be able to open the pantry on a Wednesday night, look around, and think:

“I can make dinner from this.”

A few jars of homemade soup starter can help make that possible.

Tomorrow, we’ll put one of these jars to work with Turkey & Barley Comfort Soup—a good example of how a little advance preparation can turn dehydrated pantry ingredients into a genuinely comforting meal.