Posted in Jar Mixes (Meal Starters)

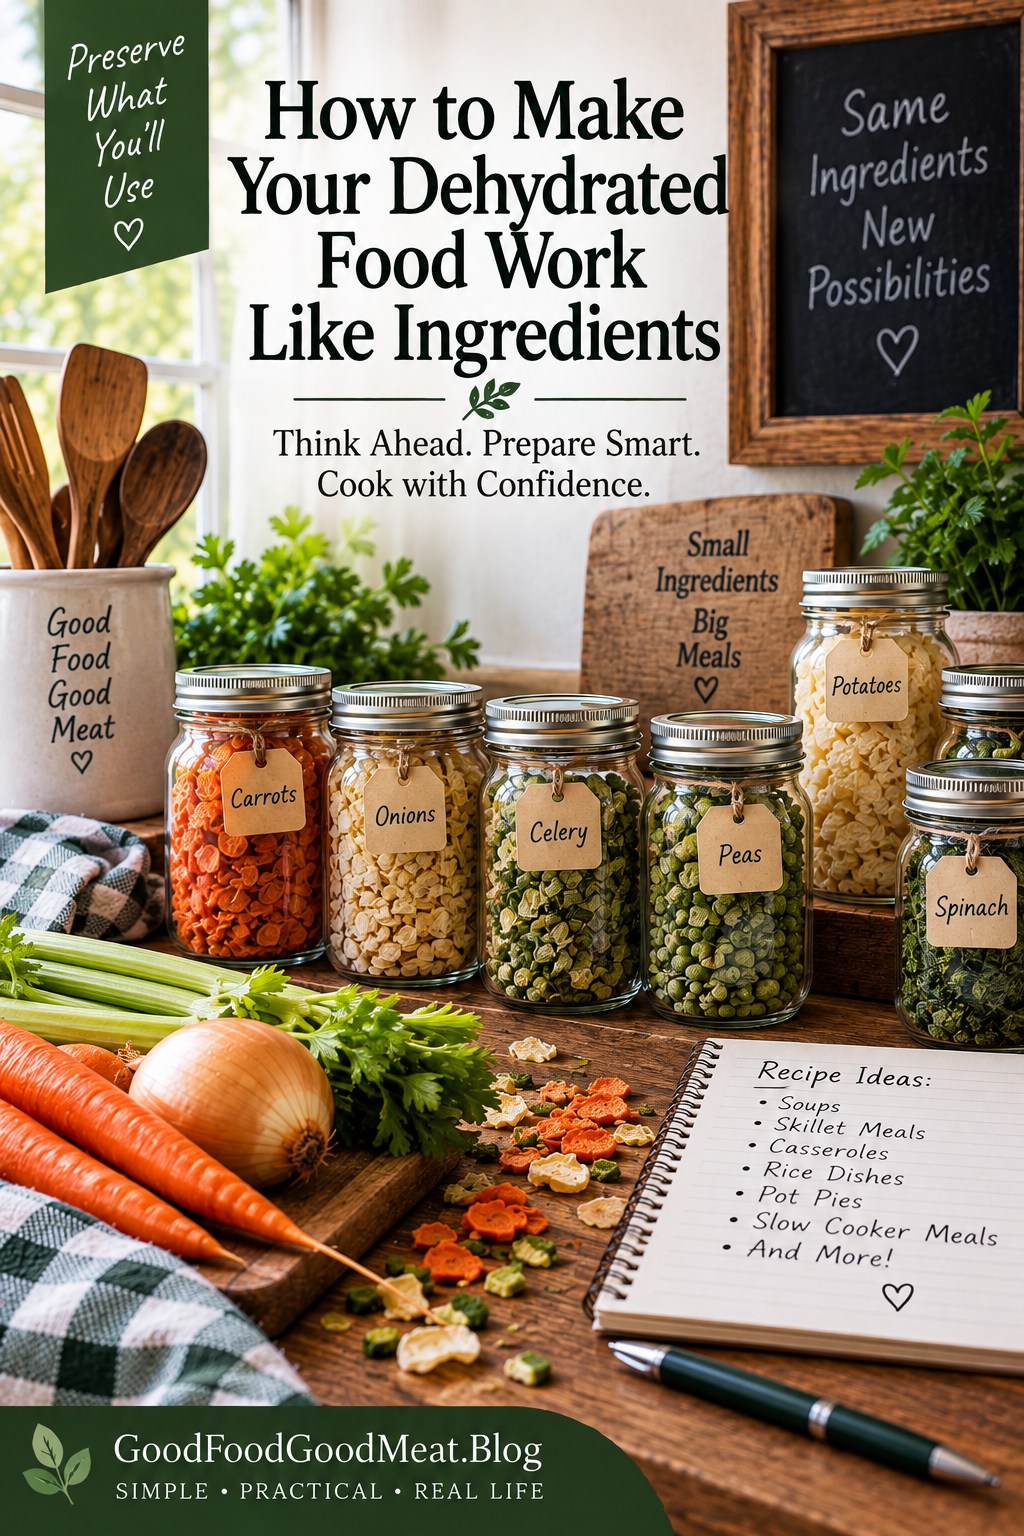
How to Make Your Dehydrated Food Work Like Ingredients

The most useful dehydrated foods aren’t the ones that simply look good in a jar. They’re the ones that make your next meal easier.

There is a point in food preservation when you have to stop thinking about the food you’re preserving today and start thinking about the meal you’ll make with it later.

That’s especially true with dehydrating.

It’s easy to get caught up in the process.

How do I dry carrots?

How do I dry onions?

How do I dry zucchini?

How long does everything take?

Those are useful questions.

But I think there’s another question that’s even more useful:

What can I make with this six months from now?

That’s the question that turns dehydrated food into ingredients.

A Jar of Carrots Isn’t Dinner

Let’s take carrots.

You can dehydrate a batch, put them in a jar, label it, and feel good about putting some of the harvest away.

But the real value comes later.

Those carrots could become part of:

  • Chicken soup
  • Beef stew
  • Chicken and rice
  • A casserole
  • A pot pie
  • A skillet meal
  • A rice bowl

The jar isn’t the finished product.

It’s an ingredient waiting for a recipe.

That small change in how you think about dehydrating can make a big difference in what you choose to preserve.


Think About the Future Recipe First

Before putting something into the dehydrator, ask yourself:

How am I going to use this?

If the answer is soup, prepare it for soup.

If the answer is casseroles, think about what size pieces work best in a casserole.

If you’re making meal starters, consider how the ingredients will work together in the same jar.

This is why I’ve started paying more attention to how I cut vegetables before dehydrating them.

For example, diced onions are much easier to measure later than onions that were sliced before drying.

Both can be used.

But one is much more convenient when you’re trying to measure a specific amount for a recipe.

The potatoes I’ve dehydrated were diced, too, and that makes them immediately useful for soups and other dishes.

The dehydrator doesn’t get the final say. The future recipe does.


Some Ingredients Are Meant to Disappear

One of the things I’ve learned from actually cooking with dehydrated vegetables is that they don’t all behave the same way.

Some come back looking remarkably recognizable.

Carrots, celery, potatoes, and other vegetables can retain enough shape and texture that you can clearly tell what you’re eating.

Others have a different job.

Spinach is a good example.

When I added dehydrated spinach to my soup, it essentially disappeared into the broth.

At first glance, that might sound like a problem.

It isn’t.

The spinach didn’t need to remain a recognizable green leaf.

It became part of the soup.

That’s a useful ingredient.

So when you’re evaluating dehydrated food, don’t judge everything by whether it looks exactly like the fresh version.

Ask instead:

Does it perform the job I want it to perform?


Texture Matters

Another reason to think about the finished recipe is texture.

Some vegetables need to remain recognizable.

Others can be softer.

Some are perfectly happy simmering in soup.

Others might be better added toward the end of cooking.

That’s something you learn by using your dehydrated food.

And that experimentation is valuable.

My first small batch of dehydrated-vegetable soup taught me that the vegetables themselves were actually working very well.

The carrots, celery, onions, peas, and potatoes rehydrated without becoming gummy.

The problem wasn’t the vegetables.

It was the balance of the finished recipe.

That’s an important distinction.

Sometimes the answer isn’t to change the preservation method.

Sometimes you simply need to change how much of an ingredient you use.


Don’t Overfill the Jar

When you’re creating a meal starter, it’s tempting to put a little bit of everything into the jar.

More vegetables must be better, right?

Not necessarily.

I’ve learned that lesson with peas.

A smaller amount worked better in my soup than the original amount.

That’s why I like the idea of small experimental batches.

You don’t have to commit a dozen jars to a recipe before you know whether you like it.

Make one.

Cook it.

Taste it.

Then change it.

Maybe next time you want:

  • More carrots
  • Less peas
  • More celery
  • No spinach
  • Different seasonings

That’s not failure.

That’s recipe development.


Seasonings Can Be Part of the Experiment, Too

You can certainly put seasonings into a meal-starter jar.

But I’d be cautious about making the seasoning too strong.

I learned that one the hard way.

My first soup experiment included thyme.

There was too much.

In fact, there was enough thyme that it completely overwhelmed the flavor of the chicken.

The next batch was much better without it.

That’s why I’m leaning toward keeping meal-starter jars relatively neutral and allowing the cook to season the finished dish.

A little garlic powder, parsley, or another mild seasoning can work.

But you don’t have to decide the final flavor of the meal six months before you eat it.


Think in Combinations

Once you begin thinking of dehydrated food as ingredients, you can start looking at combinations.

Soup Starter

Carrots
Celery
Onion
Potatoes
Spinach
Lentils

Add broth and chicken later.

Chicken & Rice

Carrots
Celery
Onion
Spinach

Add rice, broth, and chicken later.

Rustic Vegetable Stew

Carrots
Green beans
Potatoes
Onion

Add broth and protein later.

The combinations don’t have to be complicated.

In fact, simple is probably better.


Shelf Space Matters

If you don’t have a huge pantry, refrigerator, or freezer, this approach becomes even more useful.

A small jar of dehydrated vegetables takes up very little room.

A bag of dry lentils takes up very little room.

A few cans of commercially prepared meat take up a manageable amount of shelf space.

Together, they give you options.

And because you’re storing ingredients rather than complete meals, the same ingredients can be used in several different ways.

That’s important when every inch of storage space matters.


You Don’t Have to Dehydrate Everything Yourself

This is worth repeating because food preservation can sometimes turn into an exercise in doing everything the hard way.

I don’t think that’s necessary.

If something is already available in a safe, shelf-stable form and it works for the way you cook, use it.

Dry lentils are already shelf-stable.

Rice is already shelf-stable.

Commercially canned chicken is shelf-stable.

And a rotisserie chicken can be a very practical way to get cooked chicken for several meals without spending hours dehydrating meat yourself.

The goal is a useful pantry—not a collection of complicated projects.

🧮 Ask One More Question: Is It Worth It?

When we’re talking about making dehydrated food useful, there’s another question worth asking:

Is making this ingredient myself actually the best use of my money and time?

That’s an especially important question for small households.

You might save money by dehydrating vegetables from your garden or by buying seasonal produce at a very good price.

But if you’re buying fresh vegetables at regular grocery-store prices, running the dehydrator for hours, and ending up with a small amount of finished food, the savings may disappear.

Commercially dried foods can sometimes be surprisingly inexpensive when purchased in larger quantities.

So don’t assume that homemade = cheaper.

Instead, compare.

If the commercial version is inexpensive, shelf-stable, convenient and something you use regularly, buying it may be the thrifty choice.

Save your dehydrator time for the foods where you actually gain something—whether that’s lower cost, better quality, using up excess produce, preserving something you can’t easily buy, or simply having the exact ingredient you want on hand.

That, to me, is much more useful than trying to make everything from scratch.


Build Meal Starters Around Your Life

A meal starter should fit the way you actually eat.

If you cook for one or two, make two-serving starters.

If you love soup, build soup starters.

If rice bowls are something you make regularly, create combinations that can become rice bowls.

If you don’t like a particular vegetable, don’t preserve it simply because it’s available.

Your pantry should reflect your meals, not somebody else’s idea of the perfect pantry.


What About Six Months From Now?

This is my favorite question to ask when I’m putting something away.

Imagine opening that jar six months from now.

Would you know immediately what to do with it?

If yes, you’ve probably created a useful pantry ingredient.

If you’re standing there thinking, “Now what am I supposed to do with this?”—maybe that’s not something you need to preserve again.

There’s no rule that says every vegetable needs to become a dehydrated vegetable.

Preserve what you’ll use.


The Little Jar Test

If you’re trying this for the first time, don’t make ten jars.

Make one.

Choose a combination of ingredients you already enjoy.

Put them into a small jar.

Label it with the contents and date.

Then actually cook with it.

Pay attention to:

  • How well everything rehydrates
  • How much liquid it needs
  • How long it takes
  • Which vegetables keep their shape
  • Which ones disappear into the dish
  • Whether the flavors work together
  • How much finished food the jar produces

Then make your next jar better.

That’s how you build a pantry that actually works.


The Pantry Is Really a Collection of Future Meals

That’s the way I’m beginning to look at dehydrated food.

Not as jars of vegetables.

Not as food that I’m preserving simply because I can.

But as ingredients waiting for their turn in the kitchen.

A little jar of carrots can become soup.

A jar of onions can become a casserole.

Dried potatoes can become part of a hearty meal.

Lentils can provide substance without taking up freezer space.

And a can of chicken can supply the protein.

Put them together, and you have something much more valuable than a collection of preserved foods.

You have options for dinner.

And when space is limited, options are worth a lot.

So the next time you’re standing in front of your dehydrator, don’t just ask:

“What can I dry?”

Ask:

“What can I make with this?”

That’s when dehydrating starts working like a pantry instead of just a preservation project.

And that’s how you put a little back—one useful ingredient at a time. 🫙🥕🍲

Posted in Jar Mixes (Meal Starters)

Put a Little Back: Dehydrated Vegetables

Build a Harvest Vegetable Soup Starter

One small jar of dehydrated vegetables can become the beginning of a future dinner. Here’s how to turn the harvest into a practical meal starter for your pantry.

There is a difference between preserving food and preserving something useful.

You can fill your pantry with jars of dehydrated vegetables, and that’s certainly a way to put food away. But I think there’s an even better approach:

Put together ingredients with a future meal already in mind.

That’s what I mean by a meal starter.

Instead of asking, “How much food can I preserve?” I’m asking:

“What can I put away today that will make dinner easier later?”

For someone with limited pantry, refrigerator, or freezer space, that can make a surprising amount of sense.

And sometimes, one little jar is enough.


🫙 What Is a Meal Starter?

A meal starter isn’t necessarily a complete meal.

Think of it as the foundation.

You put several compatible ingredients together, store them in a compact container, and later add the ingredients that need to be fresh or shelf-stable.

For soup, that might mean:

Dehydrated vegetables + dried lentils + seasonings

Later, you add:

Broth + protein

And dinner comes together.

That’s a whole lot more useful to me than having six different jars sitting on the shelf and having to figure out what to do with each one.


🥕 Harvest Vegetable Soup Starter

For this particular starter, we’re using vegetables that work well together in a simple soup.

Dry ingredients

For one 1-pint wide-mouth Mason jar:

  • ¼ cup dehydrated carrots
  • ¼ cup dehydrated celery
  • 2 tablespoons dehydrated onions
  • 2 tablespoons dehydrated peas
  • 2 tablespoons dehydrated spinach
  • 2 tablespoons dehydrated potatoes
  • ¼ cup dry lentils

That’s a small amount of food.

But once those ingredients are rehydrated and cooked, they become considerably more substantial.

Why a pint jar?

Because small is the point.

If you’re working with limited storage space, you don’t need a quart jar containing enough soup starter for a family of eight.

A pint jar is compact, easy to store, and makes enough starter for a couple of servings.

It also makes it easier to experiment.

If you don’t like the combination, you haven’t filled an entire shelf with it.


Think About the Cut Before You Dehydrate

This is one of those details that doesn’t sound important until you actually start using dehydrated food.

Prepare the vegetables with their future use in mind.

For example, I’ve found that diced onions are much easier to measure and use than onions that were sliced before dehydrating.

The sliced onions still work, but they don’t fit into a measuring cup quite as neatly.

Diced potatoes, on the other hand, are already in a useful form for soup.

The same principle applies to other vegetables.

Before you put something into the dehydrator, ask:

“What will this look like when I use it six months from now?”

That question can save you a surprising amount of fuss later.


What Goes Into the Jar?

The beauty of this starter is that you don’t need to put everything required for the finished soup into the jar.

We’re only putting away the ingredients that make sense to preserve together.

In the jar:

Vegetables + lentils

When you’re ready to cook:

Broth + cooked chicken

That’s important because it keeps the jar small and flexible.

You could use leftover chicken.

You could use rotisserie chicken.

You could use commercially canned chicken.

Or you could leave the chicken out entirely and make a vegetable and lentil soup.

The jar doesn’t dictate the entire meal.

It simply gives you a head start.


What About the Seasonings?

You can put seasonings in the jar, but I’m going to make a slightly different recommendation after testing this soup myself.

I originally added thyme to my first batch.

Way too much thyme.

It overwhelmed the other flavors and completely covered up the chicken.

The second batch was much better without it.

That’s one reason I like the idea of keeping the basic meal starter relatively neutral.

You can always season the finished soup to suit the meal you’re making.

If you want to include seasoning in the jar, I’d keep it very simple—perhaps a small amount of garlic powder or dried parsley.

But don’t feel obligated to season the jar.

Flexibility is part of the point.


🍲 Turning the Jar Into Soup

When you’re ready to make the soup, empty the contents of the jar into a small slow cooker.

Add:

3½ cups chicken or vegetable broth

Then cook until the lentils and vegetables are tender.

For my 1–2 quart slow cooker, about 3½ hours on HIGH worked well.

The dehydrated vegetables rehydrated surprisingly well.

The carrots, celery, onions, potatoes, and peas returned to recognizable shapes without becoming gummy.

The spinach behaved differently—it essentially disappeared into the soup.

And that’s perfectly fine.

It becomes part of the broth and adds another vegetable without leaving obvious pieces of spinach in the bowl.


Then Add Your Protein

Once the soup is nearly finished, add about ½ cup cooked shredded chicken for two servings.

Rotisserie chicken works beautifully here.

So does leftover chicken or commercially canned chicken.

Heat until the chicken is warmed through.

And suddenly that little pint jar has become four cups of soup—two generous two-cup servings.

That’s quite a transformation for something that took up very little pantry space.


Don’t Expect Fresh Vegetables to Come Back Looking Fresh

This is worth mentioning because it’s something you notice immediately when you start cooking with dehydrated vegetables.

They don’t always come back looking exactly like the fresh vegetables they started as.

The flavor and texture can be excellent while the color is less vibrant.

That’s simply part of the process.

If appearance matters, you can give the finished soup a little fresh color with:

  • Chopped parsley
  • Green onion
  • A fresh herb
  • A few fresh vegetables

The important thing is that the preserved ingredients are doing the heavy lifting.

The fresh addition is simply the finishing touch.


🥫 Small Pantry, Big Possibilities

This is where I think meal starters become especially useful.

A small pantry doesn’t mean you have to settle for boring meals.

You just have to think in terms of components.

A pint jar of dehydrated vegetables.

A bag of rice.

Some dried lentils.

A few cans of shelf-stable protein.

Some broth.

A little cooked chicken when you have it.

Those ingredients can be combined in different ways to create different meals.

And because you’re storing ingredients instead of complete meals, you’re not locked into one recipe.


You Don’t Have to Dehydrate Everything

This is another lesson I’ve learned along the way.

There are foods I enjoy dehydrating myself.

There are also foods where I think buying the shelf-stable version makes more sense for me.

Meat is a good example.

Dehydrating meat at home can take a long time. If I can pick up a package of cooked rotisserie chicken and turn it into several meals, that’s a perfectly reasonable shortcut.

Commercially canned meats can serve the same purpose.

The goal isn’t to make preservation harder.

The goal is to make your pantry more useful.


How Much Should You Put Back?

This is where I think small batches really shine.

You don’t need to dehydrate enough vegetables to last for years.

Try one batch.

Put it into one jar.

Use it.

Then decide whether you’d make it again.

Maybe you’ll discover that you want more carrots.

Maybe fewer peas.

Maybe no spinach.

Maybe you prefer chicken soup to vegetable soup.

That’s information.

And every little experiment teaches you how to build a pantry that fits your cooking.


The Real Point of Putting a Little Back

For me, food preservation isn’t about seeing how many jars I can fill.

It’s about opening a cupboard on a busy evening and finding something useful waiting for me.

A little jar of vegetables.

Some lentils.

A can of chicken.

A carton of broth.

Suddenly dinner doesn’t require a trip to the grocery store.

That’s what makes this worthwhile.

Today’s harvest becomes tomorrow’s ingredient.

And eventually, those ingredients become tomorrow’s dinner.


Start Small

If you’re new to dehydrating, don’t start by trying to preserve everything in sight.

Pick one vegetable.

Prepare it in a form you’ll actually use.

Dehydrate a small batch.

Put it in a labeled jar.

Then cook with it.

Once you know what you like, you can start combining ingredients into meal starters.

That’s how I’m approaching my own pantry.

One small batch.
One useful jar.
One future meal at a time.

That’s enough.

After all, we’re not building a bunker.

We’re just putting a little back. 🫙🥕🍲

Posted in Jar Mixes (Meal Starters)

Rustic Harvest Chicken & Rice

Dehydrated vegetables make this simple chicken-and-rice skillet a practical small-batch meal—proof that the food you put away today can become dinner later.

Introduction

There is something wonderfully satisfying about opening a little jar of dehydrated vegetables and knowing that it can help make dinner.

That’s exactly what we’re doing with this rustic chicken and rice.

This isn’t a complicated recipe, and it doesn’t require a long list of ingredients. A handful of dehydrated vegetables, some rice, broth, and cooked chicken come together in one skillet for a cozy meal that’s just right for one or two people.

It’s also a good example of why I like to think of dehydrated food as ingredients rather than finished food.

The vegetables have already been preserved. Now they’re ready to become dinner.

Why You’ll Love This Recipe

  • Small-batch friendly — Makes two generous servings.
  • Uses pantry ingredients — Great when refrigerator and freezer space are limited.
  • A practical way to use dehydrated vegetables — No special rehydration step is necessary.
  • Flexible — Use cooked chicken, leftover turkey, or another cooked protein.
  • One skillet — Less cleanup is always welcome.
  • Budget-friendly — A little cooked chicken goes a long way when combined with rice and vegetables.
simplegoodfood's avatarsimplegoodfood

Rustic Harvest Chicken & Rice

Put those dehydrated vegetables to work in a simple, satisfying meal.
Prep Time 10 minutes
Cook Time 30 minutes
Total Time 40 minutes
Servings: 2
Course: Dinner, Lunch
Cuisine: American
Calories: 450

Ingredients
  

  • ½ cup cooked shredded chicken
  • ½ cup long-grain white rice uncooked
  • ¼ cup dehydrated carrots
  • 2 tablespoons dehydrated celery
  • 2 tablespoons dehydrated onion
  • 2 tablespoons dehydrated spinach
  • 2 tablespoons dehydrated green beans
  • cups chicken broth
  • 1 tablespoon olive oil
  • ¼ teaspoon garlic powder
  • ¼ teaspoon dried parsley
  • ¼ teaspoon salt or to taste
  • Black pepper optional

Method
 

Start the vegetables
  1. Heat the olive oil in a medium skillet over medium heat.
  2. Add the dehydrated carrots, celery, onion, and green beans.
  3. Cook for about 2 minutes, stirring frequently.
  4. You aren’t trying to brown the vegetables. You’re simply giving them a little head start.
Add the rice and broth
  1. Stir in the uncooked rice, garlic powder, parsley, salt, and chicken broth.
  2. Bring the mixture to a gentle simmer.
Cover and cook
  1. Reduce the heat to low and cover the skillet.
  2. Cook for approximately 18–20 minutes, or until the rice is tender and most of the liquid has been absorbed.
  3. Avoid lifting the lid repeatedly while the rice cooks.
Add the chicken and spinach
  1. Once the rice is tender, stir in the shredded cooked chicken and dehydrated spinach.
  2. Cover again and cook for 3–5 minutes, just until the chicken is heated through and the spinach has rehydrated.
  3. If the mixture seems dry, add a splash of broth.
Rest and serve
  1. Remove the skillet from the heat and let it rest, covered, for about 5 minutes.
  2. Fluff gently with a fork and serve.

Notes

A Note About the Vegetables
The vegetables don’t need to be rehydrated separately. They’ll absorb some of the broth while the rice cooks.
That’s one of the things that makes dehydrated vegetables so handy for meals like this.
And if your vegetables are cut differently from mine, that’s perfectly fine. The important thing is to use pieces that make sense for the finished dish.
Kitchen Confidence
This is a very forgiving recipe.
If your dehydrated vegetables are particularly dry or chunky, they may need a little additional liquid. If the rice absorbs the broth before it’s completely tender, simply add 2–3 tablespoons of broth at a time and continue cooking.
And remember: dehydrated vegetables don’t always return to the exact color or appearance they had when fresh. That’s okay.
We’re preserving ingredients—not trying to recreate fresh vegetables.

Stretch Every Grocery Dollar

This recipe is a great way to stretch a small amount of cooked chicken.

You only need ½ cup of shredded chicken for two servings. The rice, vegetables, and broth provide the rest of the meal.

It’s also a useful way to turn leftover rotisserie chicken into something that feels completely different from the meal you originally bought it for.

Waste Not, Want Not

Don’t have exactly the vegetables listed?

Use what you have.

A little dehydrated corn, peas, zucchini, or another vegetable can work here.

That’s part of the beauty of building a pantry around ingredients rather than rigid recipes.

Use what you have. Put a little back. Waste a little less.

Cooking for One or Two

This recipe is written for two servings, but it’s easy to divide.

For one serving, use approximately:

  • ¼ cup chicken
  • ¼ cup rice
  • Half the dehydrated vegetables
  • ¾ cup broth

You can cook the single serving in a small skillet with a lid.

Or make the two-serving recipe and save the second portion for another meal.

Meal Prep Note

This recipe is especially useful when you have cooked chicken that needs to be used.

Shred the chicken and portion it into small containers or freezer bags. Then you’ll have cooked protein ready to combine with pantry ingredients when you need a quick meal.

Storage & Freezing

Refrigerate leftovers in a covered container and use within 3–4 days.

For longer storage, portion the cooled chicken and rice into individual freezer-safe containers.

Thaw in the refrigerator and reheat gently, adding a splash of broth or water if needed.


The Pantry Lesson

This little skillet demonstrates something I really like about dehydrating:

The dehydrated vegetables aren’t the meal. They’re what makes the meal easier.

A jar of vegetables sitting on the shelf doesn’t look like much.

But add rice, broth, and a little chicken, and suddenly that small jar has become dinner.

That’s what putting a little back is all about. 🫙🍗🍚

Posted in Freezer & Make-Ahead Meals, Jar Mixes (Meal Starters)

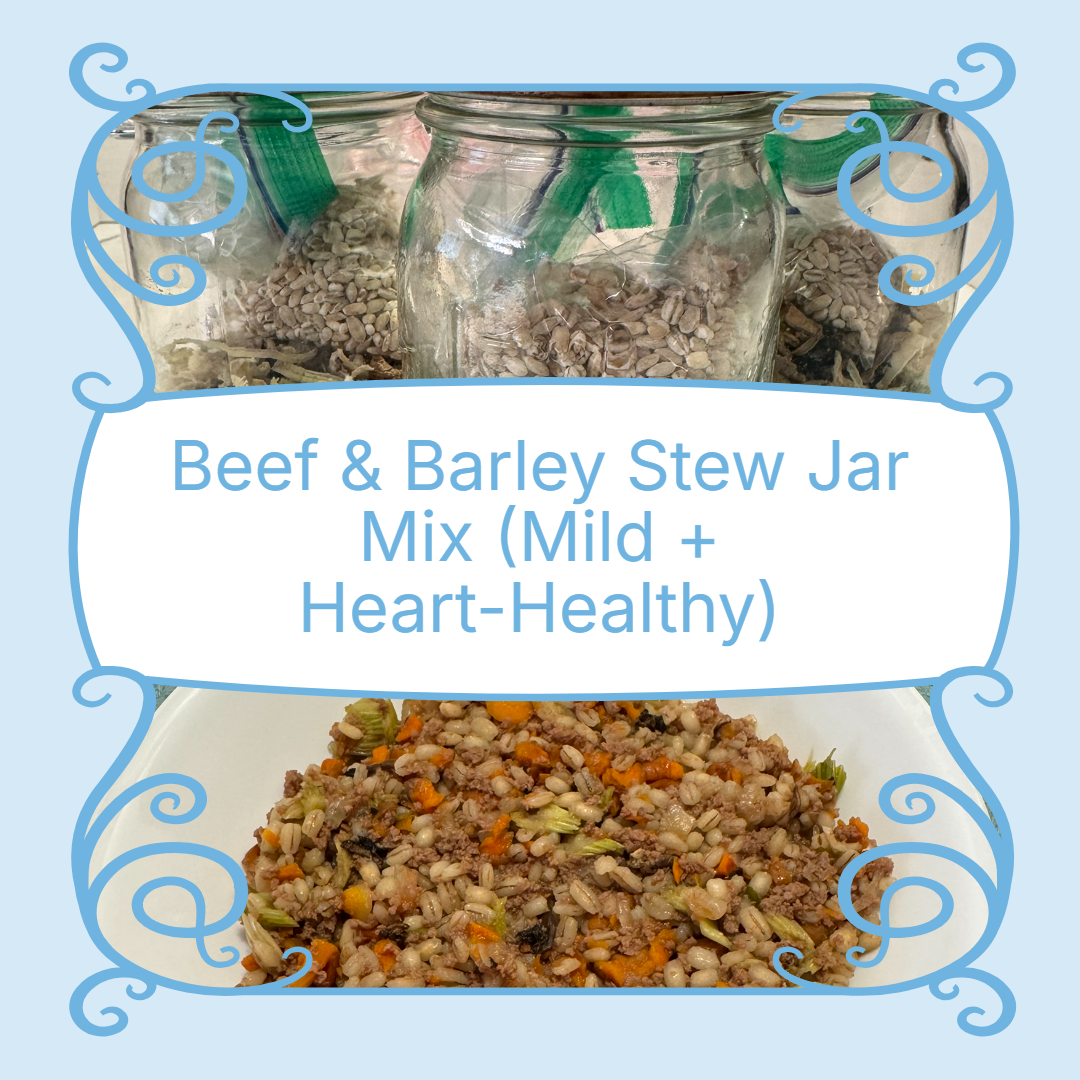
Beef & Barley Stew Jar Mix (Mild + Heart-Healthy)

🥗 Beef & Barley Stew

Heart-Healthy | Low-Cholesterol | Low-A1C


💛 Why You’ll Love This Recipe

This was just so good. The recipe gives you the ingredient amounts to make 2, 1 or light lunch, which comes in handy. It took less than 30 minutes to make, and I wish I had made more! But I’ve got 2 more jars waiting for me in my pantry.


🛒 Ingredients

Quart Jar – 2 servings

  • 1/2 cup dehydrated shredded beef
  • 1/3 cup pre-cooked dehydrated barley
  • 1/3 cup dehydrated carrots
  • 2–3 tbsp dehydrated onions
  • 1–2 tbsp dehydrated celery
  • 1/4 cup dehydrated mushrooms (optional but really good here)
  • 2 tsp low-sodium beef bouillon
  • Gentle Seasoning Blend:
  • 1/2 tsp thyme
  • 1/2 tsp parsley
  • 1/4 tsp garlic powder
  • Optional: tiny pinch rosemary (go light—it can take over)

PINT JAR (Single Serving)

  • 1/4 cup beef
  • 2–3 tbsp barley
  • 2 tbsp carrots
  • 1–2 tbsp onions/celery mix
  • 1 tsp bouillon
  • Pinch of each seasoning

HALF-PINT (Light Meal / Side)

  • 2–3 tbsp beef
  • 1–2 tbsp barley
  • 1–2 tbsp veggies
  • 1/2 tsp bouillon

👩‍🍳 Instructions

  1. Use pre-cooked barley:
    • Cook barley fully (like you would for a side dish)
    • Spread thin
    • Dehydrate until dry
    • 👉 This ensures it rehydrates soft—not chewy or underdone.
  2. Add 3–3½ cups boiling water (1 1/2 – 2 cups for Pint, 1 cup for Half Pint)
  3. Cover and let sit 20–25 minutes (or simmer 10–15) (20 min for Pint, less for Half Pint)
  4. 👉 Barley takes a little longer than noodles, but it’s worth it.

💡 Tips & Swaps

  • Given the current price of beef, I substituted some ground Turkey. Next time I make the jars up, I want to try shredded pork. Either way, it was absolutely delicious.
  • Once you’ve added the ingredients and the water comes back to a boil, turn the burner down to a simmer. You won’t need more.
  • If you have leftovers, let them cool and store in a covered container in the refrigerator.

🥡 Meal Prep & Storage

  • Reheat instructions: I would add a little moisture to the stew before you microwave it. I believe that either low sodium beef broth or water would work well. Heat for 2 minutes before checking.

❤️ Heart-Healthy Notes

Using a dehydrated protein means that the excess fat is already gone from the meat. The barley and vegetables add fiber without overwhelming the protein. It was just that good!


📣 Let’s Connect

If you try this recipe, I’d love to hear how it turned out!
#HeartHealthy #LowCholesterol #LowA1C #SimpleGoodFood


Follow this blog on Mastodon or the Fediverse to receive updates directly in your feed.

simplegoodfood
simplegoodfood

Just a Pennsylvania Dutch girl raised on simple good food that fills you up. Fussy recipes that leave you still hungry need not apply!

303 posts
2 followers