Posted in Side Dishes

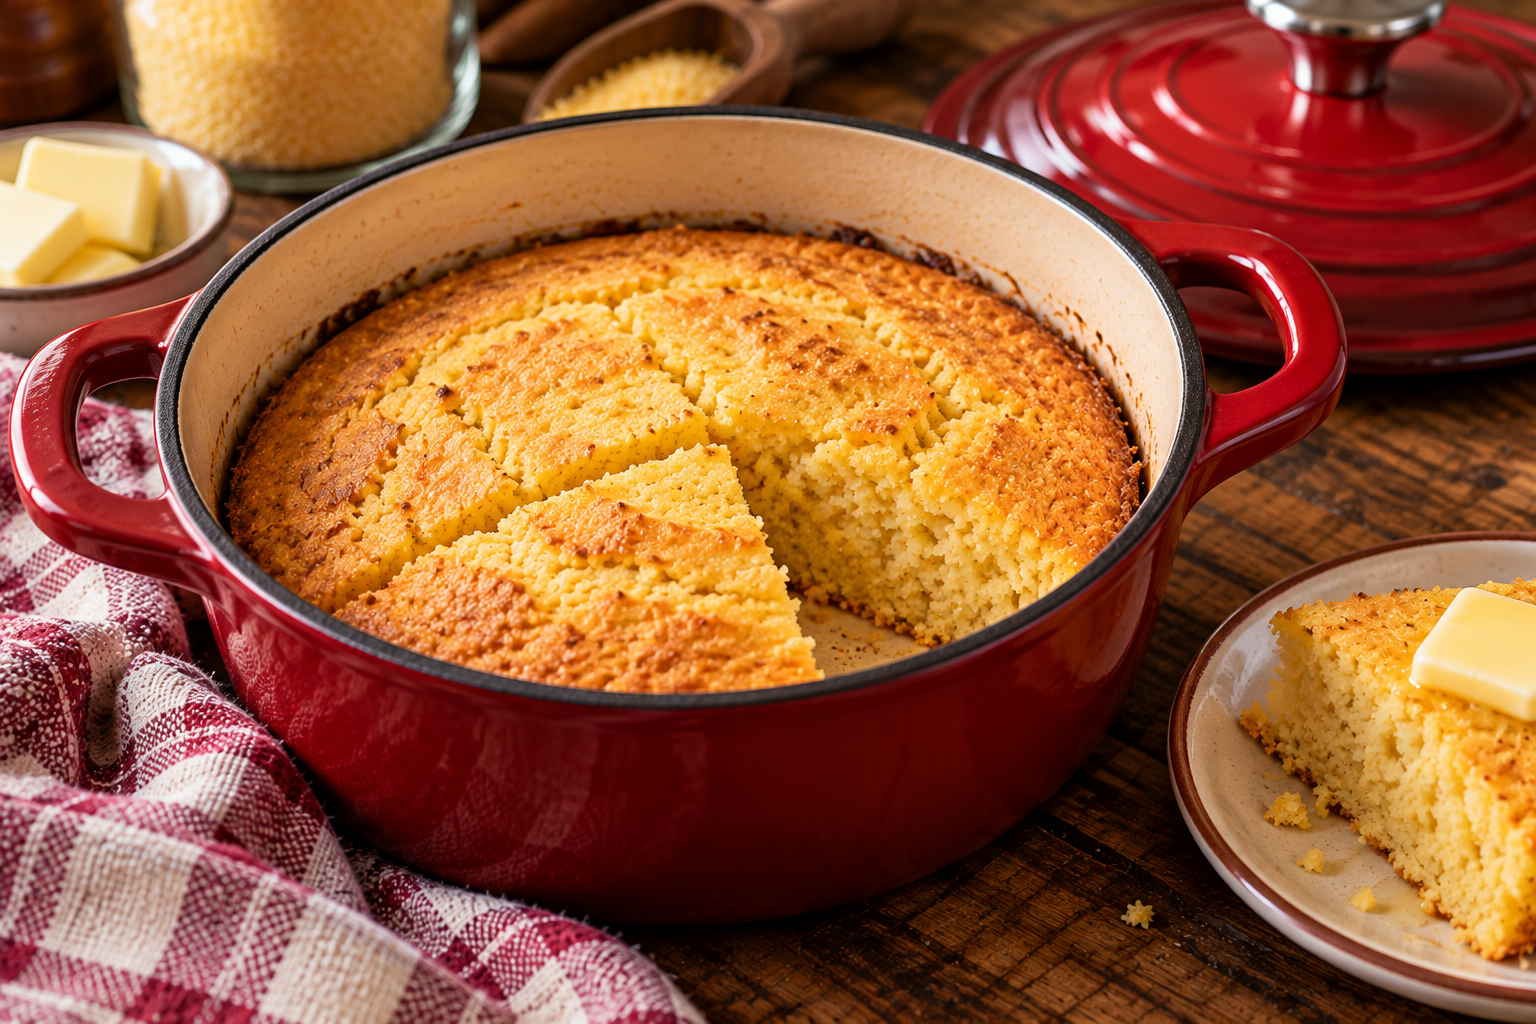
Dutch Oven Cornbread for Two

A pot of soup or stew has a way of asking for cornbread.

There’s just something about having a warm piece of cornbread alongside a bowl of chili, beef stew, or beans. But if you’re cooking for one or two people, a traditional pan of cornbread can leave you with far more than you want.

That’s why this Dutch Oven Cornbread for Two is intentionally small.

It makes just enough for two generous servings—or one serving tonight and another tomorrow—without requiring a full-size skillet or a big batch of leftovers.

And because we’re talking about Pantry to Table, most of the ingredients are simple pantry staples you can keep ready for exactly this kind of meal.

Why You’ll Love This Recipe

  • Makes a genuinely small batch.
  • Uses inexpensive pantry ingredients.
  • No special baking pan required.
  • Works beautifully with soups, stews, chili, and beans.
  • Slightly crisp around the edges while staying tender inside.
  • Easy to adapt for either sweet or savory preferences.
  • Makes good use of a small Dutch oven.

Recipe Information

Servings: 2
Serving size: 1 generous piece per serving
Prep time: 10 minutes
Cook time: 15–18 minutes
Total time: About 25–30 minutes
Meal category: Side Dish / Dutch Oven Meals
Main protein: None
Estimated calories: Approximately 240–260 calories per serving

simplegoodfood's avatarsimplegoodfood

Dutch Oven Cornbread for Two

A pot of soup or stew has a way of asking for cornbread.
Prep Time 10 minutes
Cook Time 18 minutes
Total Time 30 minutes
Servings: 2
Course: Side Dish
Cuisine: American
Calories: 260

Ingredients
  

  • ¼ cup yellow cornmeal
  • ¼ cup all-purpose flour
  • 1 tablespoon granulated sugar optional
  • ½ teaspoon baking powder
  • ⅛ teaspoon baking soda
  • ⅛ teaspoon salt
  • 1 large egg
  • ¼ cup buttermilk
  • 1 tablespoon unsalted butter melted
  • 1 teaspoon butter or olive oil for the Dutch oven

Method
 

Prepare the Dutch oven
  1. Preheat your oven to 400°F.
  2. Place a small oven-safe Dutch oven—approximately 6 inches in diameter—in the oven while it preheats.
  3. The preheated pot helps create those lightly crisp edges that make cornbread so good.
Mix the dry ingredients
  1. In a small bowl, whisk together the cornmeal, flour, sugar if using, baking powder, baking soda, and salt.
Mix the wet ingredients
  1. In another small bowl, whisk together the egg, buttermilk, and melted butter.
Combine
  1. Pour the wet ingredients into the dry ingredients.
  2. Stir just until everything is combined.
  3. Don’t overmix. A few small lumps are perfectly fine.
Add the batter to the Dutch oven
  1. Carefully remove the hot Dutch oven from the oven.
  2. Add the teaspoon of butter or olive oil and swirl carefully to coat the bottom.
  3. Pour in the cornbread batter.
  4. It should begin to sizzle gently when it hits the hot pot.
Bake
  1. Return the Dutch oven to the oven.
  2. Bake for 15–18 minutes, or until the top is golden and a toothpick inserted in the center comes out clean.
  3. The exact time will depend on the size and material of your Dutch oven.
Rest and serve
  1. Let the cornbread cool for about 5 minutes before removing it from the pot.
  2. Cut into two pieces and serve warm.

Notes

Kitchen Confidence
Don’t overmix the batter.
Cornbread doesn’t need the same kind of mixing as a cake.
Stir just until the dry ingredients are moistened. Overmixing can make the finished cornbread tougher.
Preheat the pot.
This is one of the little tricks that makes Dutch oven cornbread special.
The hot cooking surface helps the edges begin cooking immediately, giving you a lightly crisp exterior while the center stays tender.
Just remember that the pot will be very hot. Use oven mitts and keep the handle of the lid and pot turned away from the edge of the counter when possible.
Sweet or Savory?
This is one place where I don’t think there’s a single correct answer.
If you like a slightly sweet cornbread, keep the tablespoon of sugar.
If you prefer savory cornbread, leave it out.
You can also add a little extra flavor with:
  • 1 tablespoon finely chopped green onion
  • 1 tablespoon shredded cheddar cheese
  • A few tablespoons of corn
  • A pinch of dried herbs
For this small batch, keep additions modest so they don’t weigh down the batter.

Stretch Every Grocery Dollar

Cornmeal is one of those pantry ingredients that can quietly earn its keep.

A bag lasts a long time, and a small amount can become cornbread, cornmeal coating, or part of a casserole or skillet meal.

You don’t need to buy a special cornbread mix every time you want a couple of servings.

Keeping cornmeal, flour, baking powder, and eggs on hand gives you the ability to make a small batch whenever you need it.

And because this recipe makes only two servings, you’re not spending money on ingredients for a large batch that may sit around until it goes stale.

Waste Not, Want Not

If you don’t use the entire container of buttermilk, don’t let it become a refrigerator science experiment.

You can freeze buttermilk in small portions for future baking, or use it in pancakes, waffles, biscuits, or another cornbread batch.

No buttermilk?

You can make a quick substitute by adding about ¾ teaspoon lemon juice or vinegar to ¼ cup milk. Let it stand for about 5 minutes before using.

The result won’t be exactly the same, but it works well for a small batch like this.

Cooking for One or Two

For two people, divide the cornbread in half and serve it alongside your main meal.

For one person, you can eat half today and refrigerate the other half for tomorrow.

Reheat gently before serving.

You can also cut the finished cornbread into small cubes and toast them lightly to make a simple addition to soups or salads.

Meal Prep Note

Cornbread is best fresh, but it holds up reasonably well for a day or two.

If you’re planning ahead, wrap the cooled cornbread tightly and refrigerate it.

Reheat briefly in the microwave or warm it in the oven.

For the best texture, don’t overheat it.

Storage & Freezing

Store cooled cornbread in an airtight container.

Refrigerate for up to 3 days.

For longer storage, wrap individual pieces well and freeze for up to 2 months.

Thaw at room temperature or in the refrigerator and warm before serving.

What to Serve With Dutch Oven Cornbread

This little cornbread is a natural partner for all kinds of Pantry to Table meals.

Try it with:

  • Beef stew
  • Chicken soup
  • Vegetable soup
  • Chili
  • Black-eyed peas
  • White bean soup
  • Pinto beans
  • Chicken and vegetable stew
  • Pulled pork
  • A simple skillet meal

And don’t overlook breakfast.

A leftover piece of cornbread warmed with a little butter can make a surprisingly good small breakfast or snack.

A Dutch Oven Isn’t Just for Dinner

When we think about Dutch ovens, it’s easy to picture a big pot of stew simmering away.

But they’re useful for much more than that.

A small Dutch oven can bake a small loaf of bread, a couple of servings of cornbread, a fruit crisp, or another small-batch dessert.

That’s part of what makes Dutch oven cooking so practical for a small household.

You don’t need a huge pot to get the benefits.

Pantry to Table

This little recipe is a good reminder that a practical pantry doesn’t have to contain complicated ingredients.

Cornmeal.

Flour.

Egg.

Buttermilk.

A little butter.

A few basic leaveners.

That’s enough to turn a few pantry staples into something warm and homemade to put beside dinner.

And sometimes that’s exactly what makes an ordinary bowl of soup feel like a meal.
Posted in Breakfast, Side Dishes, Skillet Meals

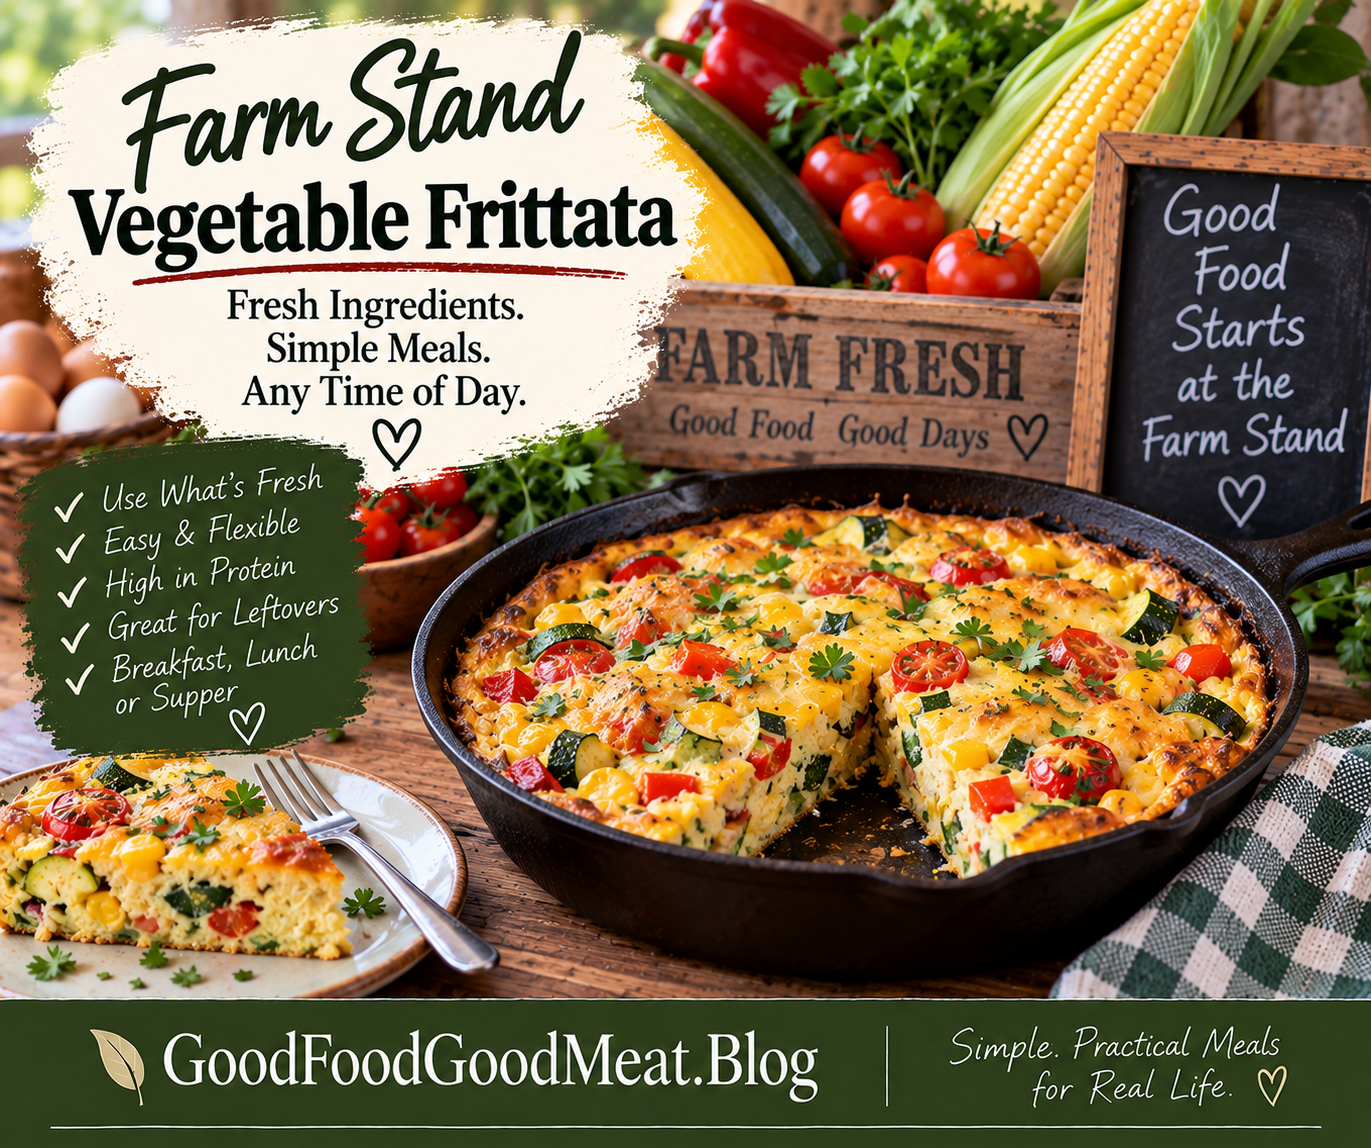
Farm Stand Vegetable Frittata

A simple, colorful frittata for breakfast, lunch, or an easy meatless supper.

When the farm stand is overflowing with beautiful vegetables, sometimes the best recipe is the one that doesn’t ask you to choose just one.

This Farm Stand Vegetable Frittata brings together whatever looks freshest—zucchini, peppers, tomatoes, onions, corn, and fresh herbs—with eggs and a little cheese. Everything comes together in one oven-safe skillet for a meal that’s simple, satisfying, and wonderfully adaptable.

It’s also a great way to use those odds and ends of vegetables that aren’t quite enough for another recipe.

That’s farm stand cooking at its best: buy what’s good, use what you have, and waste as little as possible.

Why You’ll Love This Recipe

  • Flexible: Use the vegetables you have instead of making a special shopping trip.
  • Meatless: Eggs provide the protein while the vegetables bring color and flavor.
  • Small-batch friendly: Four servings makes this practical for singles and couples.
  • Good for any meal: Breakfast, brunch, lunch, or a light supper.
  • One skillet: Sauté the vegetables and bake the frittata in the same pan.
  • Budget-friendly: A few eggs and seasonal vegetables go a long way.
  • Great for leftovers: Refrigerate individual portions for easy breakfasts or lunches.

🥣 Build Your Bowl

Okay, this one isn’t technically a bowl—but the same “build it from what you have” philosophy applies.

Base:
Eggs and egg whites

Protein:
Eggs, with Greek yogurt adding a little extra protein

Vegetables:
Zucchini, bell pepper, onion, corn, and tomatoes

Sauce:
No sauce needed

Fresh Finish:
Fresh parsley or basil

Optional Toppings:
A little Parmesan, sliced avocado, or a spoonful of Greek yogurt

Make It Your Own:
Open the refrigerator and see what needs to be used. A frittata is one of the easiest ways to turn a handful of leftover vegetables into a real meal.

simplegoodfood's avatarsimplegoodfood

Farm Stand Vegetable Fritatta

When the farm stand is full, make a frittata!
Prep Time 15 minutes
Cook Time 25 minutes
Total Time 40 minutes
Servings: 4
Course: Breakfast, Dinner, Lunch
Cuisine: American
Calories: 285

Ingredients
  

  • 6 large eggs
  • 4 large egg whites
  • ⅓ cup plain Greek yogurt
  • ¼ teaspoon salt
  • ¼ teaspoon black pepper
  • ½ teaspoon Italian seasoning
  • 1 tablespoon olive oil
  • ½ small onion diced
  • 1 small zucchini diced
  • ½ red bell pepper diced
  • ½ cup fresh or thawed frozen sweet corn
  • ½ cup cherry tomatoes halved
  • 1 clove garlic minced
  • ½ cup shredded reduced-fat mozzarella or Monterey Jack cheese
  • 2 tablespoons chopped fresh parsley or basil

Method
 

Preheat the oven.
  1. Preheat your oven to 375°F.
Prepare the egg mixture.
  1. In a medium bowl, whisk together the eggs, egg whites, Greek yogurt, salt, pepper, and Italian seasoning until well combined.
Sauté the vegetables.
  1. Heat the olive oil in a 10-inch oven-safe skillet over medium heat. Add the onion and bell pepper and cook for 2–3 minutes.Add the zucchini and corn and continue cooking for another 3–4 minutes, until the vegetables begin to soften.
Add the tomatoes and garlic.
  1. Stir in the tomatoes and garlic and cook for about 1 minute.
Add the eggs.
  1. Spread the vegetables evenly around the skillet. Pour the egg mixture over them and gently shake the skillet so the eggs settle around the vegetables.
Add the cheese.
  1. Sprinkle the shredded cheese evenly over the top.
Begin cooking on the stovetop.
  1. Cook without stirring for about 2 minutes, allowing the edges of the eggs to begin setting.
Finish in the oven.
  1. Transfer the skillet to the preheated oven. Bake for approximately 15–18 minutes, or until the center is set and the eggs reach 160°F.
Rest and garnish.
  1. Remove the skillet from the oven and let the frittata rest for about 5 minutes. Sprinkle with fresh parsley or basil, slice into wedges, and serve.

Notes

Make It Your Own
This is one of those recipes where I actually want you to change it.
The vegetables listed here are simply a starting point.
Try:
  • Green beans instead of zucchini
  • Spinach instead of corn
  • Mushrooms instead of peppers
  • Roasted potatoes for a heartier frittata
  • Broccoli or cauliflower for extra vegetables
  • Fresh herbs instead of dried seasoning
  • A little Parmesan instead of shredded cheese
Just remember that vegetables with a lot of moisture—such as fresh tomatoes, mushrooms, or zucchini—should be cooked first so they don’t release too much liquid into the eggs.

What About Leftover Vegetables?

This is where I especially love a frittata.

Have half a bell pepper left from another recipe?

Use it.

A handful of cooked green beans?

Into the frittata they go.

A little leftover roasted zucchini?

Perfect.

A few tablespoons of corn?

Absolutely.

The vegetables don’t all have to be perfectly fresh from the farm stand. In fact, a frittata is one of those recipes that can help keep perfectly good food from becoming food waste.

Just make sure cooked leftovers have been stored safely and are still within their recommended refrigerated storage time.

Serving Suggestions

Serve a wedge of frittata with:

  • Fresh fruit
  • Whole-grain toast
  • A simple green salad
  • Roasted potatoes
  • Fresh tomatoes
  • A spoonful of Greek yogurt

For breakfast or brunch, fruit and whole-grain toast make an easy combination.

For lunch or dinner, add a salad and you’ve got a light, satisfying meal.

Make-Ahead and Leftovers

Frittata is excellent for meal prep.

Once cooled, cut the leftovers into individual portions and refrigerate them in covered containers.

Reheat gently in the microwave or in a skillet until heated through.

For the best quality, use refrigerated leftovers within 3–4 days.

You can also enjoy leftover frittata cold or at room temperature, making it a convenient option for a quick lunch.

A Farm Stand Recipe Without a Shopping List

There’s something I particularly like about this recipe.

It doesn’t send you to the grocery store with a list of twelve ingredients.

It sends you to the farm stand—or your own refrigerator—and says:

What looks good? What do I already have? What needs to be used?

That’s a pretty good way to cook.

And it’s exactly the mindset we’ve been talking about all week.

Buy what’s plentiful.

Enjoy it while it’s fresh.

Put a little back when it makes sense.

And use what you have.

Nutrition Estimate

Per serving: approximately 285 calories and 23g protein.

Nutrition is an estimate and will vary depending on the specific ingredients and brands used.

Food Safety Note

Cook the frittata until the center reaches 160°F, measured with a food thermometer. Refrigerate leftovers promptly and use within 3–4 days.

If you’re using previously cooked vegetables or other leftovers, make sure they have been stored safely and are still within their recommended storage time.

One Last Look at the Farm Stand

This week started with a simple idea:

When the farm stand is full, pay attention.

Not because you need to buy everything.

Because abundance gives you choices.

You can cook a skillet dinner with it.

You can freeze some sweet corn for later.

You can plan how much preservation actually makes sense for your household.

And you can take a handful of those beautiful vegetables and turn them into a frittata.

That’s the kind of seasonal cooking I love.

Simple food. Good ingredients. Nothing wasted. And plenty of room to make it your own.

Posted in Side Dishes, Skillet Meals

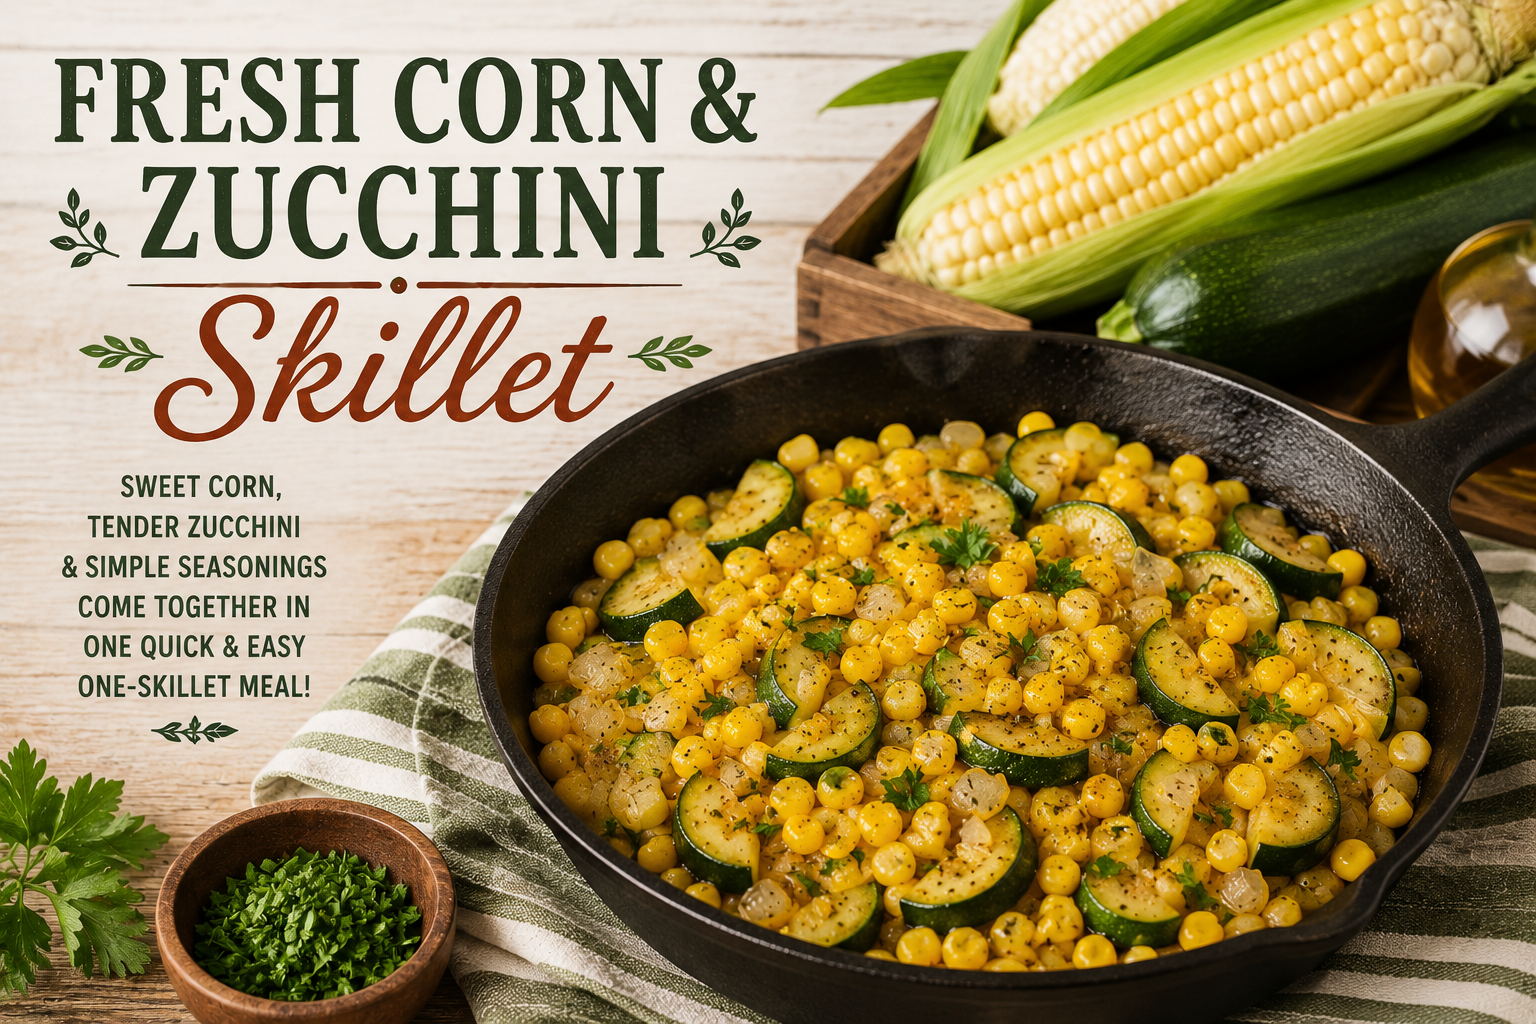
Fresh Corn & Zucchini Skillet

When summer vegetables are at their best, they don’t need much help.

Fresh corn brings sweetness. Zucchini brings tenderness. A little onion, garlic, and seasoning bring everything together without covering up the vegetables themselves.

That’s the idea behind this Fresh Corn & Zucchini Skillet.

It’s a simple side dish for a grilled meal, a bowl of soup, or just about anything else that needs a little color on the plate. And because everything cooks in one skillet, it’s just as practical for a campground kitchen as it is at home.

It’s also a good reminder that seasonal cooking doesn’t have to mean complicated cooking.

Sometimes the best way to enjoy the harvest is simply to let it shine.

simplegoodfood's avatarsimplegoodfood

Fresh Corn & Zucchini Skillet

Fresh summer corn and tender zucchini come together in this simple one-skillet side dish.
Prep Time 10 minutes
Cook Time 10 minutes
Total Time 20 minutes
Servings: 4
Course: Dinner, Side Dish
Cuisine: American
Calories: 125

Ingredients
  

  • 2 cups fresh corn kernels cut from about 3 ears of corn
  • 2 medium zucchini diced
  • 1/2 small onion diced
  • 1 tablespoon olive oil
  • 1 clove garlic minced
  • 1/2 teaspoon dried parsley
  • 1/4 teaspoon black pepper
  • 1/4 teaspoon salt or to taste
  • 1 tablespoon chopped fresh parsley optional
  • 1 tablespoon grated Parmesan cheese optional

Method
 

Prepare the vegetables.
  1. Cut the corn kernels from the cobs and dice the zucchini into bite-sized pieces.
Start the onion.
  1. Heat the olive oil in a large skillet over medium heat. Add the diced onion and cook for 2–3 minutes, until it begins to soften.
Add the corn.
  1. Stir in the fresh corn and cook for about 3 minutes, stirring occasionally. The corn should become bright and slightly tender.
Add the zucchini.
  1. Stir in the zucchini, garlic, parsley, black pepper, and salt.
Cook until tender-crisp.
  1. Continue cooking for about 5–7 minutes, stirring occasionally. The zucchini should be tender but still have a little bite. Avoid overcooking it into mush.
Finish and serve.
  1. Remove from the heat. Sprinkle with fresh parsley and Parmesan, if using.

Notes

🌾 Kitchen Confidence: When Are Summer Vegetables at Their Peak?
One of the easiest ways to make seasonal cooking taste better is to learn what fresh actually looks like.
Corn: Look for bright green husks and silk that is moist rather than dry. The kernels should feel plump when you gently press the husk.
Zucchini: Choose smaller to medium zucchini that feel firm and heavy for their size. Very large zucchini can be watery and have larger seeds.
Green beans: Look for beans that are crisp and snap easily rather than bend limply.
Tomatoes: They should have good color, feel heavy for their size, and have a fresh tomato aroma.
And don’t be afraid of vegetables that aren’t perfectly shaped. A crooked zucchini can taste every bit as good as a picture-perfect one.

💡 Make It Your Own

This skillet is intentionally simple, but you can change it depending on what’s available.

Try adding:

  • Diced red bell pepper
  • Fresh tomatoes
  • Sliced mushrooms
  • A handful of fresh spinach
  • Chopped green beans
  • A sprinkle of Italian seasoning

For a little more richness, add a teaspoon of butter along with the olive oil.

For a heartier dish, stir in leftover cooked chicken or turkey.

🏕️ Campground-Friendly Tip

This is exactly the kind of recipe that works well in a small electric skillet.

You don’t need an oven, a pile of cookware, or much counter space. Everything happens in one pan, and the vegetables cook quickly enough that you’re not spending half the evening standing over the stove.

It’s also a great recipe for using corn and zucchini that you picked up because they were simply too good a bargain to pass up.

Posted in Side Dishes

Rainbow Coleslaw

(Creamy Coleslaw from Scratch)

Years ago, my husband found himself temporarily between jobs.  One night after I got off work, he went with me to the grocery store.  I wanted to make some coleslaw and needed to buy some cabbage to do so.  I decided to use both Red and Green Cabbage for a colorful look.  At the register, the young clerk looked at the heads of cabbage for a moment, before apologizing and asking what they were.  We exchanged glances and let her know it was cabbage.  My husband asked her if her mother had ever made coleslaw.  She just shrugged sheepishly and told us that her mother didn’t cook either, the family bought all their meals.

We went home and I made supper.  My husband looked at me afterwards and asked me if it was that hard to cook.  My reply was something along lines of “Not Really.”   

The next day he went down to the local branch of the library and checked out several cookbooks and even a VHS tape or two.  When I came home, he had a wonderful meal waiting for me.

That evening reminded me of something I’ve never forgotten no one is born knowing how to cook. Every confident cook started by learning one simple recipe at a time. Rainbow Coleslaw is one of those recipes—easy to make, inexpensive, and a great place to build your confidence in the kitchen.

Introduction

Fresh, crisp, colorful, and incredibly easy to make, Rainbow Coleslaw is one of those classic side dishes that deserves a place in every cook’s recipe collection. While store-bought coleslaw mixes are convenient, making your own from fresh cabbage gives you better flavor, more crunch, and often costs less.

If you’ve never made homemade coleslaw before, don’t worry. It’s simply a matter of slicing a few vegetables, stirring together a quick dressing, and letting the flavors come together in the refrigerator. Once you’ve made it yourself, you may never want to buy prepared coleslaw again.

This recipe pairs beautifully with this week’s BBQ Pulled Pork Sandwiches and makes a colorful addition to picnics, cookouts, campground meals, and everyday family dinners.


❤️ Why You’ll Love This Recipe

  • Fresh, crisp, and colorful
  • Budget-friendly side dish
  • Beginner-friendly
  • No special equipment required
  • Perfect for cookouts, sandwiches, and meal prep

Keeps well for several days

simplegoodfood's avatarsimplegoodfood

Rainbow Cabbage

Once you've made it yourself, you may never want to buy prepared coleslaw again.
Prep Time 20 minutes
Cook Time 0 minutes
Chill Time 30 minutes
Total Time 50 minutes
Servings: 6
Course: Dinner, Lunch, Salad, Side Dish
Cuisine: American
Calories: 140

Ingredients
  

  • 4 cups shredded green cabbage
  • 2 cups shredded red cabbage
  • 1 cup shredded carrots
  • 2 green onions thinly sliced
For the Dressing
  • ½ cup mayonnaise
  • 1 tablespoon apple cider vinegar
  • 1 tablespoon granulated sugar or honey
  • 1 teaspoon Dijon mustard
  • ½ teaspoon celery seed
  • Salt and black pepper to taste

Method
 

  1. Wash and dry all vegetables thoroughly.
  2. Thinly shred the green cabbage, red cabbage, and carrots.
  3. Place the vegetables in a large mixing bowl.
  4. In a separate bowl, whisk together the mayonnaise, vinegar, sugar, Dijon mustard, celery seed, salt, and pepper until smooth.
  5. Pour the dressing over the vegetables.
  6. Toss until everything is evenly coated.
  7. Cover and refrigerate for at least 30 minutes before serving to allow the flavors to blend.
  8. Stir again before serving.

Notes

🧺 Kitchen Confidence
This Week’s Skill: Choosing and Shredding Cabbage
Fresh cabbage is one of the best bargains in the produce department.
Look for heads that feel heavy for their size with crisp, tightly packed leaves. Green cabbage has a mild flavor that’s perfect for traditional coleslaw, while red cabbage adds beautiful color and a slightly peppery bite.
No food processor? No problem! Cut the cabbage into quarters, remove the tough core, then use a sharp knife to slice it into thin strips. It only takes a few extra minutes and gives you complete control over the texture.
A whole cabbage can last several weeks in the refrigerator, making it an economical vegetable to keep on hand.

💰 Stretch Every Grocery Dollar

Skip the bagged coleslaw mix and buy whole heads of cabbage instead. They usually cost less per serving, stay fresh much longer, and can be used in soups, stir-fries, fried rice, tacos, salads, and countless other meals throughout the week.


♻️ Waste Not, Want Not

Still have extra cabbage? Use it later this week in soups, rice bowls, stir-fries, or simply sauté it with a little onion for an easy side dish. Cabbage is one of the most versatile vegetables you can keep in your refrigerator.


🍽️ Cooking for One or Two

This recipe keeps well, making it ideal for small households. Enjoy it with sandwiches today, serve it alongside another dinner later in the week, or top a baked potato with leftover pulled pork and a scoop of Rainbow Coleslaw for a completely different meal.


🥣 Meal Prep Note

Shred the vegetables ahead of time and store them in an airtight container. Mix the dressing separately and combine them about 30 minutes before serving for the freshest texture.


Storage & Freezing

Refrigerator: Store covered for up to 4 days. Stir before serving if the dressing settles.

Freezing: Not recommended. The vegetables lose their crisp texture after thawing

Posted in Side Dishes

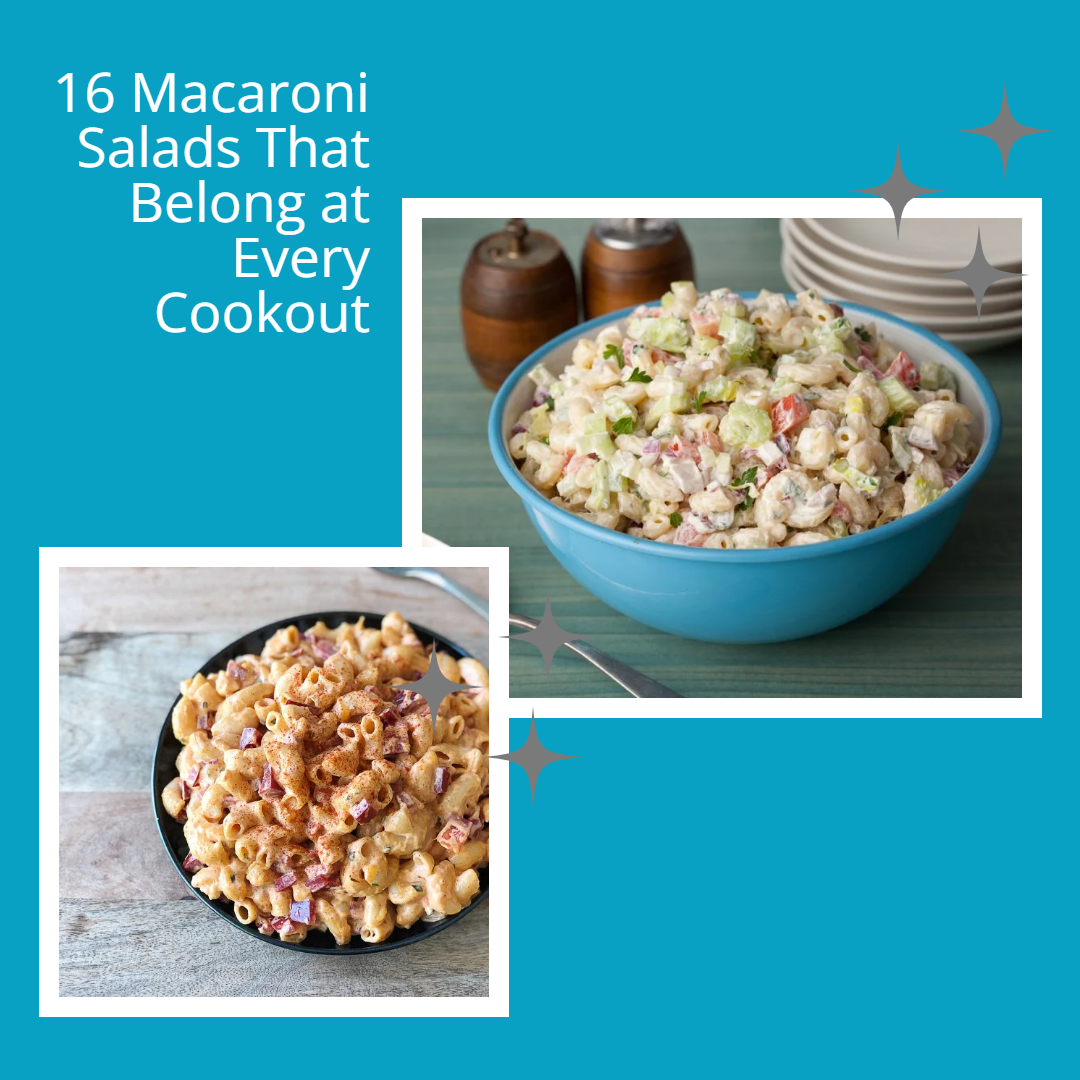
16 Macaroni Salads That Belong at Every Cookout

From classic deli-style macaroni salad to smoky, spicy and protein-packed twists, these crowd-pleasing recipes prove there’s more than one way to make the ultimate summer side.

Our All-Time-Best Macaroni Salad Recipes

While grilled meats and summer desserts get all the attention, no backyard barbecue or picnic would be complete without the sides. Macaroni salad is a favorite nationwide, providing a creamy, cooling contrast to spicy, charred and smoked dishes on the table. The added vegetables and overall flavor profile is totally versatile, as long as you stick to the core pasta and mayo-based dressing. Dressed up or dressed down, macaroni salad should be on constant rotation all summer long.

This is the quintessential macaroni salad recipe. Elbow macaroni tossed in a creamy mayonnaise-based dressing with crunchy celery and minced red onion is a favorite at picnics and barbecues nationwide. A handful of chopped tomatoes is optional but adds a juicy contrast.

Food Network

Posted in Campground Meals, Side Dishes

Garlic Ranch Roasted Green Beans

These Garlic Ranch Roasted Green Beans are an easy campground side dish that works with almost any dinner. They cook quickly in the air fryer or oven and bring tons of flavor with very little effort.

Grilled green beans with creamy herb sauce and fresh parsley in a rustic bowl

Garlic Ranch Roasted Green Beans

These Garlic Ranch Roasted Green Beans are an easy campground side dish that works with almost any dinner. They cook quickly in the air fryer or oven and bring tons of flavor with very little effort.
Prep Time 1 minute
Cook Time 10 minutes
Servings: 4
Course: Side Dish
Cuisine: American
Calories: 90

Ingredients
  

  • 1 lb fresh green beans trimmed
  • 1 tbsp olive oil
  • 1 tsp ranch seasoning
  • 1/2 tsp garlic powder
  • Salt & pepper to taste

Method
 

Air Fryer
  1. Toss green beans with olive oil and seasonings.
  2. Air fry at 375°F for 8–10 minutes, shaking halfway through.
Oven
  1. Spread seasoned green beans on a baking sheet.
  2. Roast at 425°F for 15–18 minutes.