Posted in One-Pot Meals

Dutch Oven Favorites

There’s something wonderfully satisfying about cooking dinner in a Dutch oven.

Maybe it’s the way a stew slowly simmers until the meat is tender. Maybe it’s the crisp edges on a small batch of cornbread. Or maybe it’s simply knowing that dinner can happen in one sturdy pot instead of filling the kitchen sink with dishes.

For a small household, that last part matters.

A Dutch oven isn’t just a piece of specialty cookware reserved for Sunday roasts or elaborate recipes. A smaller Dutch oven can be one of the most useful tools in the kitchen when you’re cooking for one or two.

This collection brings together Dutch oven recipes and practical one-pot meals from Good Food Good Meat, with an emphasis on simple ingredients, reasonable portions, and meals that make your grocery dollars work harder.


Our Dutch Oven Favorites

Here are the Dutch oven recipes featured in this week’s Weekend Suppers collection.

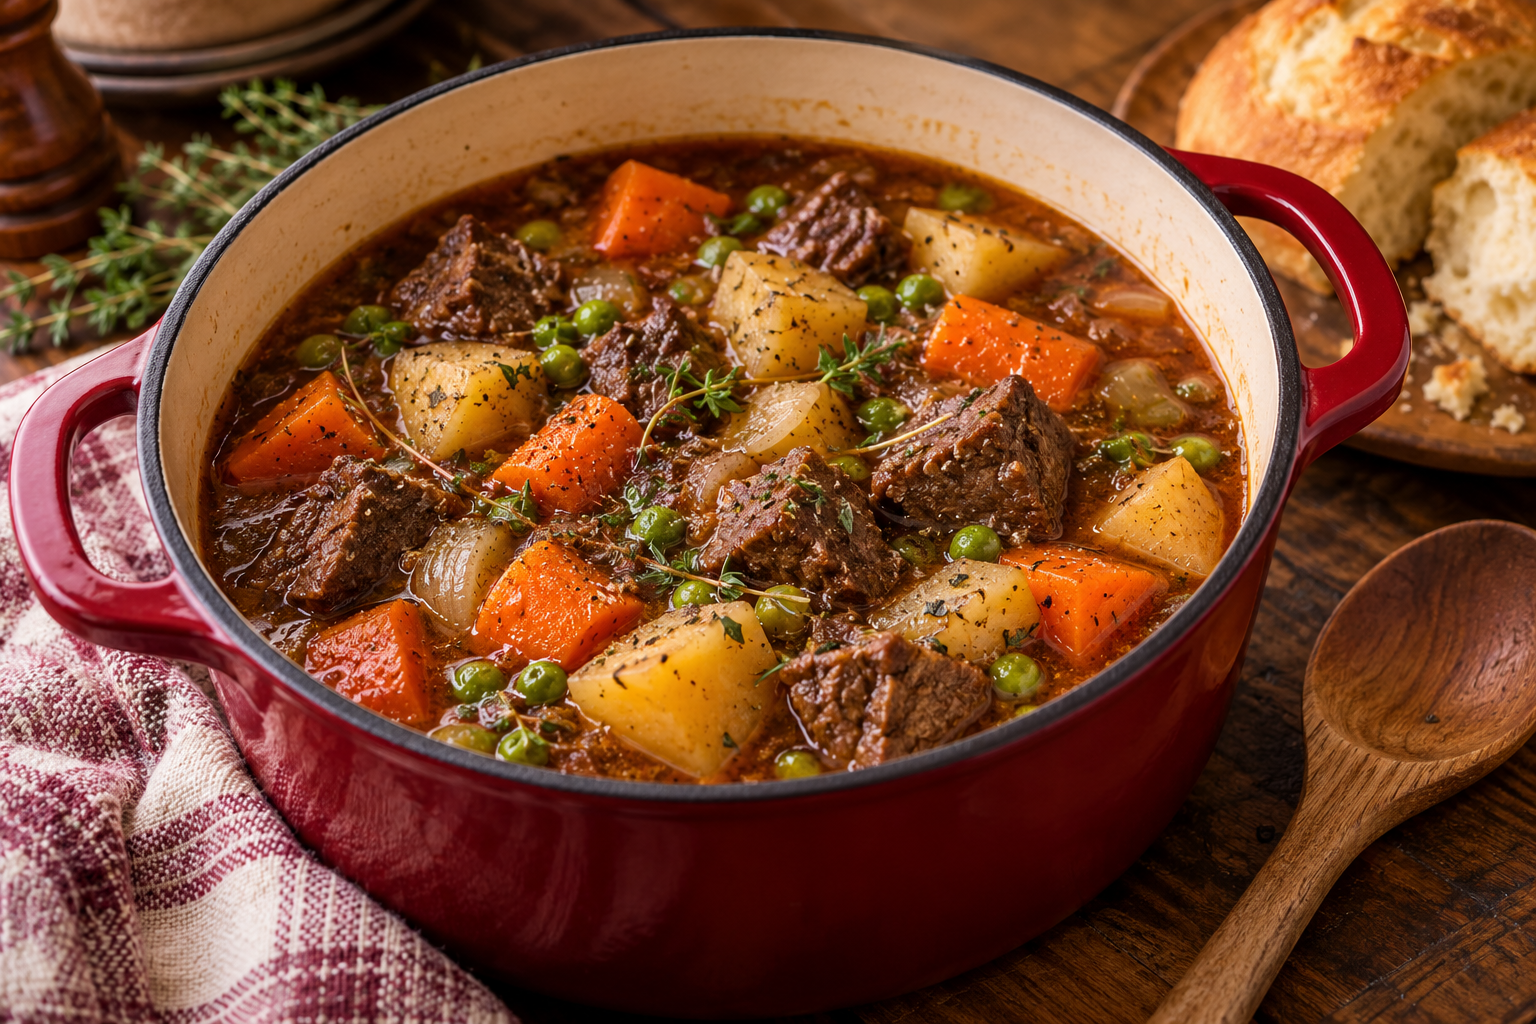
Dutch Oven Beef Stew
There are some meals that just seem to belong to October, and a good beef stew is one of them.
Check out this recipe
The Pantry-to-Pot Formula: Building a One-Pot Meal
Read the Article!
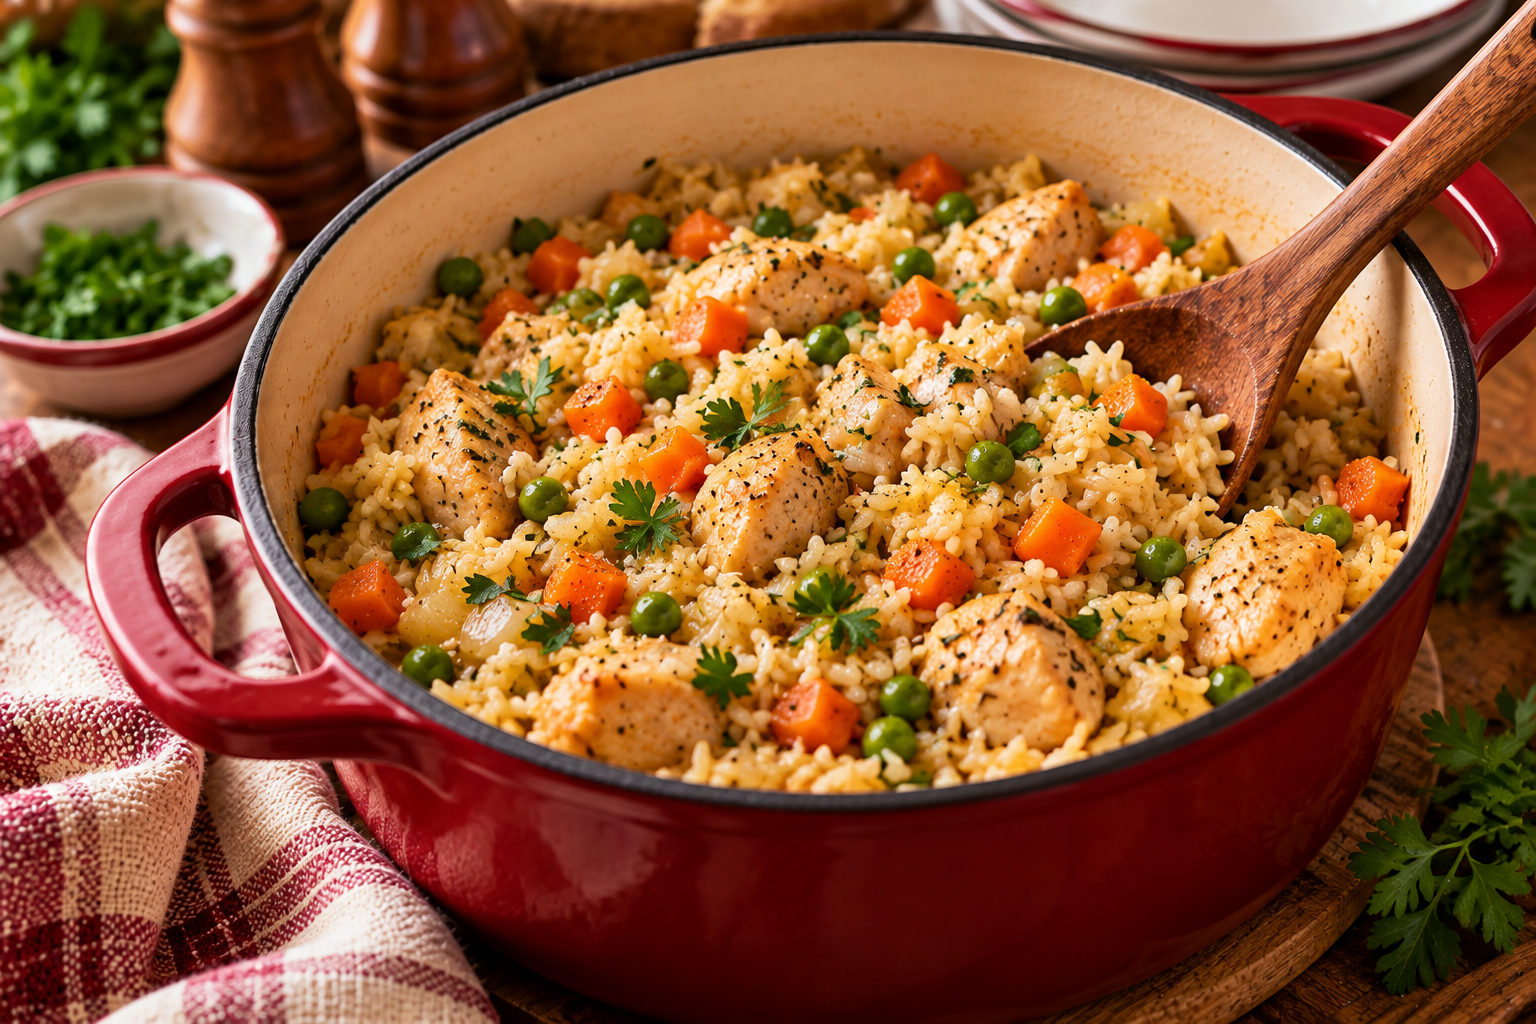
Dutch Oven Chicken & Rice
There is something wonderfully practical about a pot of chicken and rice.
Check out this recipe
Pantry Beans: More Than a Side Dish
Read the Article!
Dutch Oven Cornbread for Two
A pot of soup or stew has a way of asking for cornbread.
Check out this recipe
How to Stretch a Dutch Oven Meal Into Two Suppers
Read the Article!

Why Dutch Oven Cooking Works for Small Households

A good Dutch oven can brown, sauté, simmer, braise, and bake.

That means you can build an entire meal in one pot.

And because Dutch ovens hold heat so well, they’re particularly good for the kinds of meals we tend to crave when the weather gets cooler:

  • Soups
  • Stews
  • Chili
  • Braised meats
  • Chicken and rice
  • Beans
  • One-pot meals
  • Small-batch breads and cornbread

The recipes don’t have to be complicated.

In fact, some of the best Dutch oven meals are built from the simplest ingredients.

Don’t Forget the Second Supper

One of the best things about Dutch oven cooking is that many of these meals can do double duty.

A little planning can turn one cooking session into two suppers.

Try:

  • Beef stew → beef pot pie
  • Chicken and rice → chicken soup
  • Chili → chili baked potatoes
  • Braised chicken → chicken sandwiches or wraps
  • Beans → bean and rice bowls

The goal isn’t to eat the exact same leftovers two nights in a row.

It’s to cook once and make tomorrow easier.

That’s especially valuable when you’re cooking for one or two.

Cooking for One or Two

If you’re used to recipes written for families, Dutch oven cooking may initially seem like a recipe for too much food.

It doesn’t have to be.

Look for smaller Dutch ovens and smaller recipes.

A meal that makes two or four servings can be exactly what you need:

Dinner tonight + lunch tomorrow.

Or:

Dinner tonight + a freezer meal for later.

That’s a much more useful way to think about leftovers than simply trying to avoid them.

And if a recipe makes more than you need, that’s not necessarily a problem. With a little planning, the extra portion can become the starting point for another meal.

A Dutch Oven Is a Pantry Tool

There’s another reason Dutch ovens fit so well with the October Pantry to Table theme.

They make pantry staples useful.

Rice.

Beans.

Potatoes.

Pasta.

Broth.

Canned tomatoes.

Frozen vegetables.

Cornmeal.

A little meat.

These aren’t necessarily exciting ingredients sitting individually on a pantry shelf.

But put them together in a Dutch oven, and they can become dinner.

That’s what a well-stocked pantry is supposed to do.

Build a Meal From What You Have

You don’t always need a recipe to get started.

Remember the Pantry-to-Pot Formula:

Protein + Vegetables + Starch + Liquid + Flavor = One-Pot Meal

Choose a protein.

Add one or two vegetables.

Pick a starch.

Add enough liquid to cook everything properly.

Then season it in a direction you enjoy.

The Dutch oven takes care of the rest.

Once you get comfortable with this way of thinking, you may find yourself looking at the pantry differently.

A can of beans isn’t just a side dish.

A little leftover chicken isn’t necessarily the end of a meal.

And that half bag of rice isn’t just something waiting for a special recipe.

They’re building blocks.

Stretch Every Grocery Dollar

Dutch oven meals are particularly good for budget-conscious cooking because they allow you to use smaller amounts of meat alongside inexpensive ingredients.

A little beef can flavor a stew.

A few ounces of chicken can make a pot of rice more substantial.

Beans can become the main protein or stretch a smaller amount of meat.

Potatoes and grains can turn a modest amount of protein into a satisfying meal.

And because many Dutch oven meals reheat well, one cooking session can take care of more than one meal.

That’s a win for both your grocery budget and your time.

Waste Not, Want Not

Dutch oven cooking also gives you plenty of opportunities to use ingredients before they go to waste.

That extra carrot?

Put it in the stew.

The half onion left from another recipe?

Into the pot.

A handful of frozen peas?

Perfect.

Leftover cooked chicken?

It can become the protein in a completely different one-pot meal.

You don’t have to use every leftover ingredient in every meal. But keeping an eye on what needs to be used first is one of the simplest ways to make your grocery budget work harder.

A Dutch Oven Doesn’t Have to Mean a Giant Meal

This is worth repeating because it’s an easy assumption to make.

Dutch oven recipes don’t have to feed a crowd.

A small Dutch oven is perfectly capable of making:

  • Two servings of stew
  • A small chicken and rice dinner
  • A couple of servings of beans
  • A small batch of cornbread
  • A small casserole
  • A simple fruit crisp

That’s one of the reasons Dutch oven cooking works so well for a small household.

You’re still getting all the benefits of one-pot cooking without committing yourself to leftovers for an entire week.

Weekend Supper

Set the Dutch oven on the stove.

Pull a few things from the pantry.

Use up a couple of vegetables from the refrigerator.

Add a little protein.

Let the pot do the work.

Then sit down and enjoy dinner.

That’s a pretty good weekend supper.

And that’s Pantry to Table.
Posted in One-Pot Meals

Dutch Oven Chicken & Rice

There is something wonderfully practical about a pot of chicken and rice.

You don’t need an expensive cut of meat. You don’t need a long list of ingredients. And you don’t need a pile of dirty dishes afterward.

This Dutch Oven Chicken & Rice is a simple, savory one-pot meal built for a small household. Tender chicken, rice, vegetables, and a flavorful broth cook together until everything is warm, comforting, and satisfying.

It’s also a perfect example of the Pantry-to-Pot Formula we talked about yesterday: choose a protein, add vegetables and a starch, bring everything together with a flavorful liquid, and let one pot do the work.

Why You’ll Love This Recipe

  • One pot does almost everything.
  • It uses inexpensive ingredients that are easy to keep on hand.
  • A small amount of chicken goes a long way when paired with rice and vegetables.
  • It’s naturally suited to cooking for two.
  • It can be adapted to whatever vegetables you have available.
  • Leftovers make an easy second meal.
  • It’s comfort food without being heavy.

Recipe Information

Servings: 2 generous servings
Serving size: About 1½ cups
Prep time: 15 minutes
Cook time: 35–40 minutes
Total time: About 50–55 minutes
Meal category: Dutch Oven Meals / One-Pot Meals
Main protein: Chicken
Estimated calories: Approximately 450–500 calories per serving, depending on the chicken used

simplegoodfood's avatarsimplegoodfood

Dutch Oven Chicken & Rice

There is something wonderfully practical about a pot of chicken and rice.
Prep Time 15 minutes
Cook Time 40 minutes
Total Time 55 minutes
Servings: 2
Course: Dinner, Lunch
Cuisine: American
Calories: 500

Ingredients
  

  • 8 ounces boneless, skinless chicken thighs or chicken breast cut into bite-size pieces
  • 1 tablespoon olive oil
  • ½ small onion diced
  • 1 small carrot diced
  • 1 clove garlic minced
  • ½ cup long-grain white rice uncooked
  • 1¼ cups low-sodium chicken broth
  • ½ teaspoon dried thyme
  • ¼ teaspoon dried parsley
  • ¼ teaspoon paprika
  • ⅛ teaspoon black pepper
  • ¼ teaspoon salt or to taste
  • ½ cup frozen peas
  • 1 teaspoon lemon juice optional
  • 1 tablespoon chopped fresh parsley optional

Method
 

Prepare the chicken
  1. Pat the chicken dry and cut it into bite-size pieces.
  2. Season lightly with the salt, pepper, thyme, and paprika.
Brown the chicken
  1. Heat the olive oil in a small Dutch oven over medium heat.
  2. Add the chicken in a single layer and cook for 3–4 minutes, stirring occasionally, until lightly browned.
  3. The chicken does not need to be completely cooked at this point. It will finish cooking with the rice.
  4. Remove the chicken to a plate and set aside.
Cook the vegetables
  1. Add the onion and carrot to the same Dutch oven.
  2. Cook for 3–4 minutes, stirring occasionally, until the onion begins to soften.
  3. Add the garlic and cook for about 30 seconds.
Add the rice
  1. Stir the uncooked rice into the vegetables.
  2. Cook for about 1 minute, stirring constantly.
  3. This quick step lightly toasts the rice and helps build another layer of flavor.
Add the broth and chicken
  1. Pour in the chicken broth and scrape the bottom of the pot to loosen any browned bits.
  2. Return the chicken and any juices on the plate to the Dutch oven.
  3. Stir in the parsley.
  4. Bring the mixture to a gentle simmer.
Cover and cook
  1. Reduce the heat to low and cover the Dutch oven.
  2. Cook for about 18–20 minutes, or until the rice is tender and most of the liquid has been absorbed.
  3. Avoid repeatedly lifting the lid while the rice cooks. Every time you remove the lid, you lose steam that the rice needs to cook properly.
Add the peas
  1. Stir in the frozen peas during the final 3–5 minutes of cooking.
  2. If desired, add a small squeeze of lemon juice just before serving. It brightens the flavors without making the dish taste lemony.
  3. Let the chicken and rice rest, covered, for about 5 minutes before serving.
  4. Fluff gently with a fork and sprinkle with fresh parsley if you have it.

Notes

Kitchen Confidence
Don’t skip browning the chicken.
You aren’t trying to cook the chicken completely during the first step.
You’re building flavor.
The browned bits left in the bottom of the Dutch oven will become part of the broth once you add the liquid.
Keep the lid on.
Rice is much less forgiving than a stew.
Once the broth is simmering and the lid is on, resist the temptation to keep checking it. Give the rice time to absorb the liquid and cook evenly.
If the rice is still firm when the liquid is nearly gone, add a small splash of broth, cover the pot again, and continue cooking.

Stretch Every Grocery Dollar

Chicken and rice are two of the most useful ingredients in a budget-conscious kitchen.

You don’t need a large amount of chicken to make this a satisfying meal. The rice provides substance while the vegetables add flavor, texture, and nutrition.

Chicken thighs can also be a good choice when they’re less expensive than boneless chicken breast. Remove the skin and any excess fat before cooking if necessary.

And this is exactly the kind of recipe where buying a larger package of chicken when it’s on sale can make sense. Divide it into meal-sized portions and freeze what you won’t use immediately.

Waste Not, Want Not

This recipe is wonderfully flexible when it comes to vegetables.

You can replace the carrot and peas with whatever makes sense in your kitchen.

Try:

  • Frozen mixed vegetables
  • Corn
  • Chopped green beans
  • Diced bell pepper
  • Finely chopped celery
  • A small amount of leftover cooked vegetables

Just remember that vegetables with longer cooking times should go in earlier, while delicate vegetables can be added near the end.

Cooking for One or Two

This recipe makes two generous servings.

If you’re cooking for one, you have two good choices:

Make the recipe as written and save half for tomorrow, or halve the ingredients for a single serving.

For most people, I’d choose the first option.

Cooking once and getting two meals out of it is one of the easiest ways to make home cooking fit into a busy week.

If you halve the recipe, use a very small Dutch oven or heavy saucepan so the rice and liquid remain in a reasonably deep layer.

Meal Prep Note

Chicken and rice is an excellent meal-prep combination.

Divide leftovers into individual containers once the food has cooled.

When reheating, add a tablespoon or two of water or broth before covering and heating. This helps keep the rice from becoming dry.

For best texture, reheat gently rather than blasting it at high heat.

Storage & Freezing

Refrigerate leftovers promptly in a covered container and use within 3–4 days.

Chicken and rice can be frozen, although the rice may become slightly softer after thawing.

For best results, freeze individual portions in airtight freezer containers.

Thaw overnight in the refrigerator and reheat thoroughly before serving.

Easy Variations

Chicken & Vegetable Rice

Add a little extra frozen vegetable mix for a more vegetable-heavy meal.

Garlic Herb Chicken & Rice

Increase the garlic slightly and use thyme, parsley, and a little rosemary.

Creamy Chicken & Rice

Stir a tablespoon or two of plain Greek yogurt into an individual serving after reheating for a creamy finish.

Southwest Chicken & Rice

Use cumin and chili powder instead of thyme and parsley. Add corn and a little diced bell pepper.

You can change the flavor profile without changing the basic cooking method.

What This Recipe Teaches

This little Dutch oven meal is more than just chicken and rice.

It demonstrates why a pantry meal formula is so useful.

You have:

Protein: chicken
Vegetables: carrots and peas
Starch: rice
Liquid: chicken broth
Flavor: garlic, herbs, paprika, and lemon

Put them together in one pot and you have dinner.

That’s Pantry to Table in action.

One More Reason to Love One-Pot Cooking

There’s a practical advantage to one-pot meals that doesn’t get enough attention:

There is less to clean up.

When you’re cooking for one or two people, washing three saucepans, a skillet, a roasting pan, and a casserole dish for one meal gets old quickly.

A Dutch oven lets you brown, sauté, simmer, and serve from the same pot.

Sometimes the best kitchen equipment isn’t the fanciest.

It’s the piece that makes you willing to cook dinner.

Posted in One-Pot Meals, Soups & Stews

Dutch Oven Beef Stew

There are some meals that just seem to belong to October, and a good beef stew is one of them.

This Dutch Oven Beef Stew is the kind of dinner that makes a chilly evening feel a little more welcoming. Tender beef, potatoes, carrots, onions, and a savory broth come together in one pot for a hearty meal without requiring a long list of complicated ingredients.

More importantly, it shows what Pantry to Table is really about: taking a few dependable ingredients you already have on hand and turning them into something that tastes like you planned ahead.

And while a Dutch oven is perfect for this kind of meal, you don’t need an elaborate recipe or a huge family-sized batch. This version is designed with smaller households in mind, so you get a satisfying supper without being buried under a refrigerator full of leftovers.

Why You’ll Love This Recipe

  • One-pot cooking means less cleanup.
  • It’s built around ordinary ingredients that are easy to keep in the pantry or refrigerator.
  • A little beef goes a long way when combined with potatoes and vegetables.
  • It’s perfect for cool-weather cooking.
  • The leftovers can become another supper, making this a particularly good grocery-budget meal.
  • It can be made on the stovetop or finished in the oven, depending on how you like to use your Dutch oven.

Recipe Information

Servings: 2 generous servings
Serving size: About 1½ cups stew
Prep time: 20 minutes
Cook time: 1 hour 30 minutes
Total time: About 1 hour 50 minutes
Meal category: Dutch Oven Meals / Skillet & One-Pot Meals
Main protein: Beef
Estimated calories: Approximately 500–550 calories per serving, depending on the beef used

simplegoodfood's avatarsimplegoodfood

Dutch Oven Beef Stew

There are some meals that just seem to belong to October, and a good beef stew is one of them.
Prep Time 20 minutes
Cook Time 1 hour 30 minutes
Total Time 1 hour 50 minutes
Servings: 2
Course: Dinner, Main Course
Cuisine: American
Calories: 550

Ingredients
  

  • 8 ounces beef stew meat cut into bite-size pieces
  • 1 tablespoon all-purpose flour
  • 1 tablespoon olive oil
  • ½ small onion chopped
  • 1 clove garlic minced
  • 1 medium carrot sliced
  • 1 medium potato peeled and cut into chunks
  • 1 cup low-sodium beef broth
  • 1 tablespoon tomato paste
  • ½ teaspoon dried thyme
  • ¼ teaspoon dried rosemary
  • ¼ teaspoon salt or to taste
  • ⅛ teaspoon black pepper
  • ½ cup frozen peas
  • 1 teaspoon Worcestershire sauce optional

Equipment

  • 1 6 in Dutch Oven

Method
 

Prepare the beef
  1. Pat the beef dry with paper towels. Toss the pieces with the flour, salt, and pepper.
  2. Don’t worry about getting every piece perfectly coated. The small amount of flour will help with browning and will also help thicken the stew as it cooks.
Brown the beef
  1. Heat the olive oil in a small Dutch oven over medium-high heat.
  2. Add the beef in a single layer. Brown for several minutes, turning the pieces so they develop color on more than one side.
  3. Work in batches if necessary. Crowding the pot causes the beef to steam instead of brown.
  4. Remove the beef to a plate and set aside.
Build the base
  1. Reduce the heat to medium.
  2. Add the onion and carrot to the same Dutch oven. Cook for 3–4 minutes, stirring occasionally.
  3. Add the garlic and cook for about 30 seconds.
  4. Stir in the tomato paste and cook for another minute.
Return the beef to the pot
  1. Add the browned beef back to the Dutch oven.
  2. Pour in the beef broth and Worcestershire sauce, if using. Stir well, scraping up the browned bits from the bottom of the pot.
  3. Add the thyme and rosemary.
Add the potatoes
  1. Bring the mixture to a gentle simmer.
  2. Add the potatoes, then reduce the heat to low. Cover and simmer for about 60–75 minutes, or until the beef is tender and the potatoes are cooked through.
  3. Stir occasionally and check the liquid level. If the stew becomes too thick before the beef is tender, add a small amount of broth or water.
Finish with the peas
  1. Stir in the frozen peas during the final 5 minutes of cooking.
  2. Taste and adjust the seasoning if needed.
  3. Let the stew rest for a few minutes before serving. The broth will thicken slightly as it stands.

Notes

Kitchen Confidence

Don’t rush the browning.
The browned bits left on the bottom of the Dutch oven are part of what gives a simple stew its deep flavor. You don’t need to brown the beef until it’s cooked through — you’re simply developing color on the outside.
And don’t panic if the pot looks a little messy after browning. Once you add the broth, those flavorful browned bits become part of the sauce.
A Dutch oven doesn’t have to mean an enormous batch of food.
A smaller Dutch oven works beautifully for cooking for one or two. The heavy pot holds heat well and gives you the advantages of one-pot cooking without requiring a six-quart recipe.

Stretch Every Grocery Dollar

Beef stew is a great example of how to make a modest amount of meat feed more people.

You don’t need a pound or two of beef for two people. Eight ounces of beef combined with potatoes, carrots, onions, and peas makes a substantial meal.

If stew meat is expensive at your grocery store, look for a small chuck roast on sale and cut it into cubes yourself. You can also freeze the extra beef in meal-sized portions for another Dutch oven dinner.

And don’t automatically discard the vegetables in the bottom of the refrigerator. A little celery, a few mushrooms, or leftover frozen vegetables can all find a home in a stew.

Waste Not, Want Not

This is one of those meals where odds and ends can be useful.

Have half an onion left from another recipe? Use it.

A lonely carrot in the refrigerator? Into the stew it goes.

A handful of frozen peas? Perfect.

You can even substitute some of the potato with another sturdy vegetable such as turnip or rutabaga.

The goal isn’t to make the stew exactly the same every time. It’s to use what you have before buying more.

Cooking for One or Two

For one person, divide the finished stew into two portions and save one for another meal.

You can also make the full recipe for two and plan ahead for leftovers. A second serving reheats beautifully and may actually taste better the next day.

If you prefer truly single-serving cooking, halve all the ingredients and use a very small Dutch oven or heavy saucepan with a lid.

Meal Prep Note

This is an excellent make-ahead meal.

Cool leftover stew promptly and refrigerate it in a covered container. When reheating, add a splash of broth or water if the gravy has thickened too much.

For meal prep, portion the stew into individual containers so you have a ready-made supper waiting for you.

Storage & Freezing

Refrigerate leftovers for up to 3–4 days.

For longer storage, freeze cooled stew in individual portions for up to 3 months for best quality.

Potatoes can soften somewhat after freezing and thawing, but the stew will still be delicious. If you know ahead of time that you’re freezing the entire batch, slightly undercook the potatoes.

Thaw overnight in the refrigerator and reheat gently on the stovetop or in the microwave.

A Little More From the Dutch Oven

This stew is the first example in this week’s Dutch Oven & One-Pot Pantry Meals theme.

The real lesson isn’t simply how to make beef stew. It’s how useful one-pot cooking can be when you’re cooking for a small household.

A Dutch oven lets you brown, simmer, and finish a meal in the same pot. That means fewer dishes, fewer specialty ingredients, and plenty of opportunity to use what you already have.

That’s exactly where Pantry to Table begins.

Posted in Skillet Meals

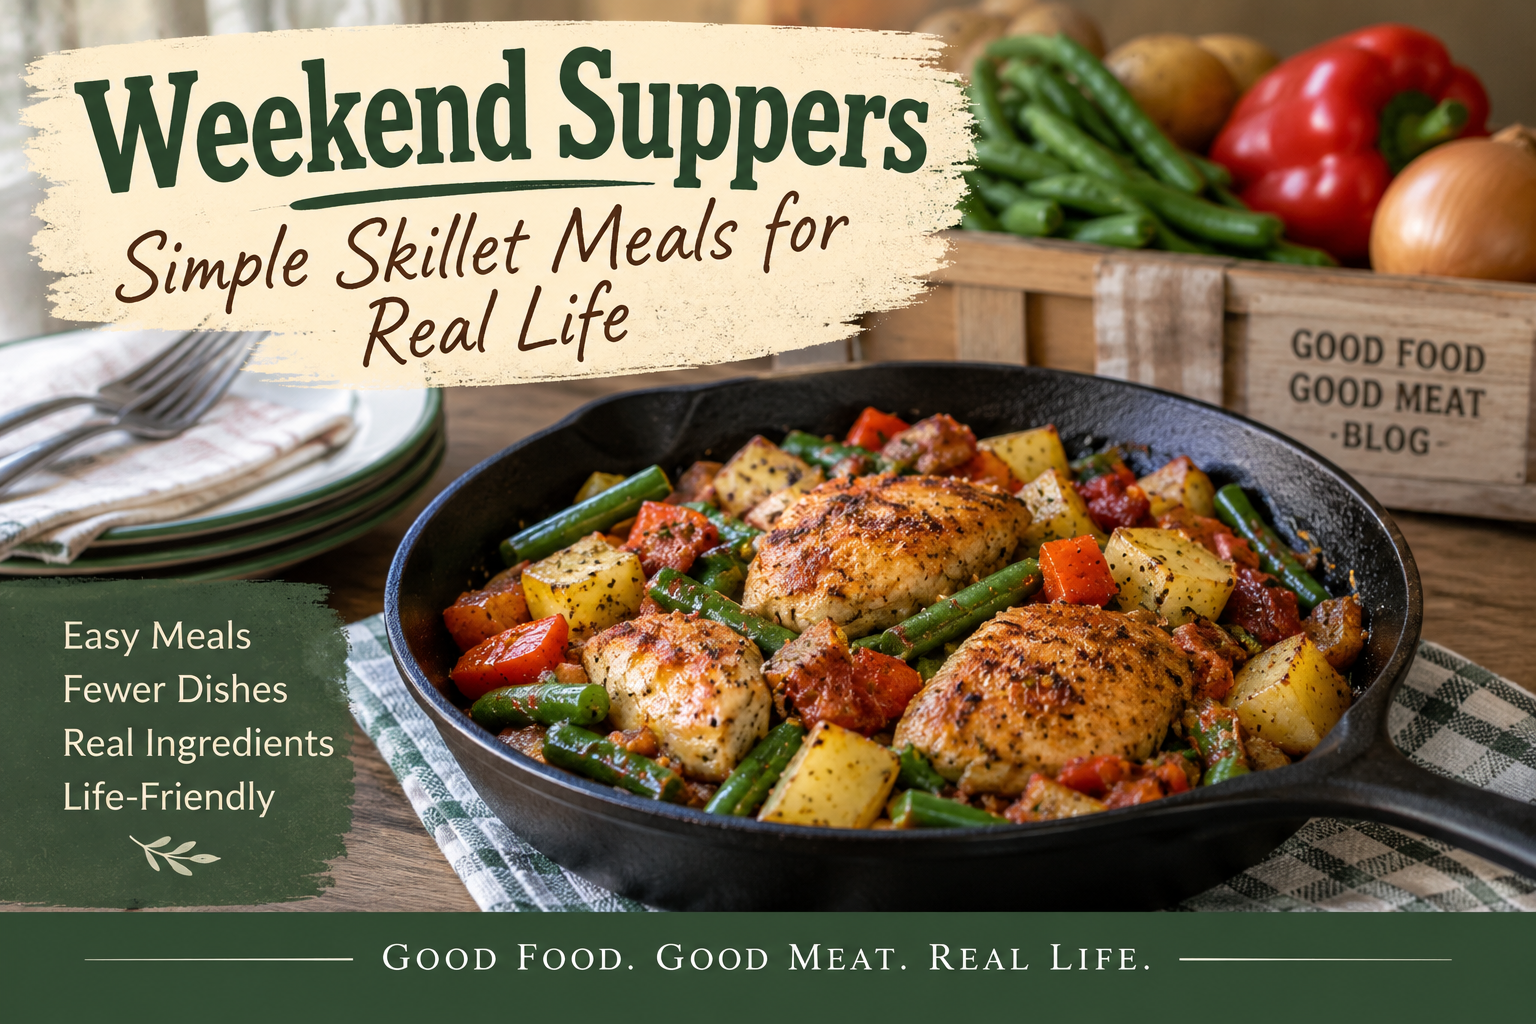
Weekend Suppers: Simple Skillet Meals for Fall

There is something wonderfully practical about a skillet supper.

One pan. A handful of ingredients. Enough food for supper without ending up with a refrigerator full of leftovers.

And as September winds down and we head into October, skillet meals are especially welcome. They’re hearty enough for a cool evening, but they don’t require the oven to be running for an hour.

So, this week’s Weekend Suppers is all about simple skillet meals — the kind of dinners that make sense when you’re cooking for one or two.

Three Skillet Suppers to Try

🍗 Chicken & Veggie Skillet

Chicken and vegetables come together in one skillet for a simple supper that doesn’t require a lot of ingredients or complicated preparation.

This is a good choice when you’re looking for something that’s satisfying without being especially heavy.

Main Protein: Chicken
Meal Category: Skillet Meals


🥔 Sausage & Potato Skillet

If you’re looking for something a little heartier, potatoes and sausage make a classic combination.

This is the kind of supper that feels right as the weather starts cooling down — filling, familiar, and made in one pan.

Main Protein: Sausage
Meal Category: Skillet Meals


🍚 Cajun Sausage & Rice Skillet

Sometimes you want a skillet supper with a little more personality.

Sausage and rice make this one filling enough for supper, while the Cajun seasoning brings a little extra flavor to the table.

And because it’s a skillet meal, cleanup stays pleasantly simple.

Main Protein: Sausage
Meal Category: Skillet Meals


More Skillet Suppers

If those three don’t quite fit what you’re hungry for, there are more skillet meals in the Good Food Good Meat kitchen.

🧀 Philly Cheesesteak Skillet

All the familiar flavors of a cheesesteak in an easy skillet meal.

🌭 Easy Sausage & Potato Skillet Dinner

Another sausage-and-potato option when you want a straightforward, budget-friendly supper.

🥬 Beef & Cabbage Skillet

Beef and cabbage are a particularly good pairing when you’re looking for a simple meal built around inexpensive ingredients.


Why I Keep Coming Back to Skillet Meals

Skillet meals solve a lot of the problems that come with cooking for one or two.

You don’t need a big roasting pan.

You don’t have to make a recipe designed for six people and figure out what to do with the leftovers.

And most of the time, you can get dinner on the table with one pan to wash.

That’s a pretty good combination.

They’re also flexible. A little leftover cooked meat, a potato or two, some vegetables, and a handful of rice or pasta can often become the foundation for supper.

That’s practical cooking.

And practical cooking is what Good Food Good Meat is all about.

Cooking for One or Two

When you’re cooking for a smaller household, don’t be afraid to scale a skillet recipe down.

You may not need to cut every ingredient exactly in half. Sometimes it’s easier to make the full amount of one component — such as cooked rice or potatoes — and use the leftovers in another meal.

That’s one of the easiest ways to make a small kitchen work harder without making your cooking feel like a production.

Your Turn: Pick a Skillet for Supper

Which one sounds good tonight?

Pick a skillet, grab what you have on hand, and put supper on the table.

If you make one of these recipes, I’d love to know which one you chose — and what you thought of it. And if you have a favorite skillet supper of your own, share it in the comments.

Sometimes the best recipes are the ones that become regulars simply because they’re easy, affordable, and good enough to make again.

Looking Toward October

This is our final Weekend Supper of September, and we’ve spent the month thinking about Harvest & Putting Things Back — taking advantage of seasonal food, preserving what we can, and thinking ahead to the meals those foods can become.

Tomorrow, we’ll begin the final week of the series by looking at one of the most familiar foods to preserve from the late-summer harvest:

tomatoes. 🍅

But before we start putting tomatoes into jars, we’re going to talk about something that every new home canner needs to understand:

Why can some foods be processed in a boiling-water canner while others cannot?

That’s an important question, and understanding the answer is more useful than simply memorizing a processing time.

For tonight, though, let’s keep it simple.

Grab a skillet and make supper.

Posted in Chicken Meals, Rice Bowls, Seasonal

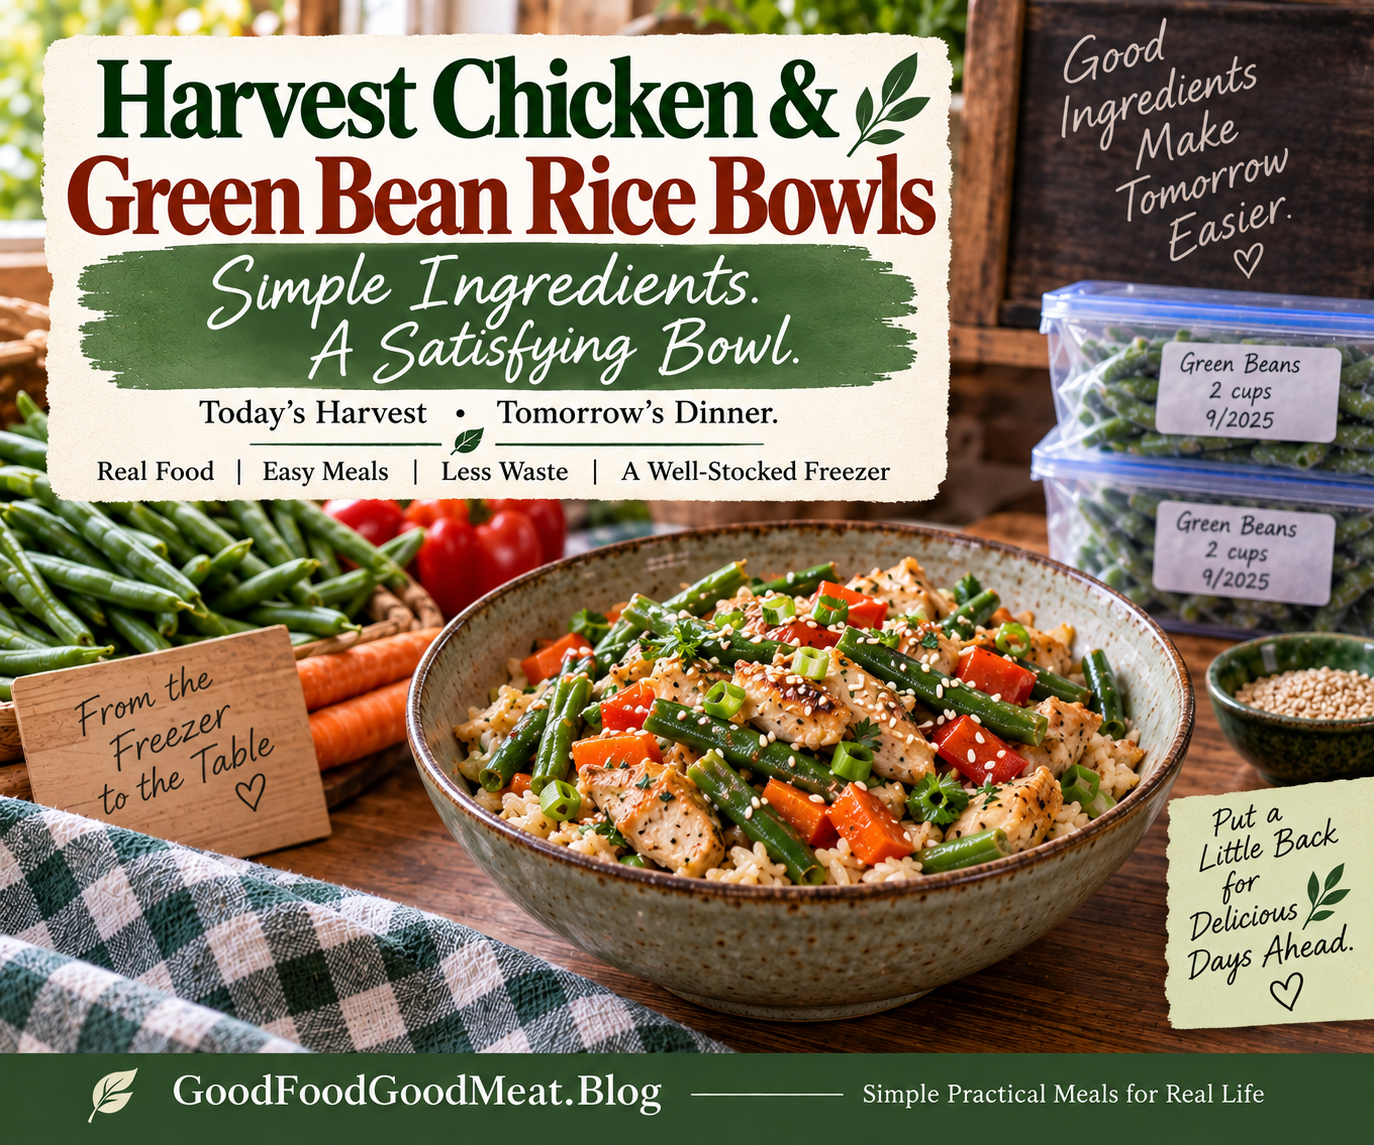
Harvest Chicken & Green Bean Rice Bowls

Remember those green beans we put in the freezer earlier this week?

Now they’re dinner.

These Harvest Chicken & Green Bean Rice Bowls are a simple example of why I like preserving ingredients instead of only preserving finished meals. A portion of frozen green beans, some cooked chicken, rice, and a handful of pantry staples come together in a warm, satisfying bowl.

It’s not complicated.

It’s not fancy.

It’s just a good meal waiting in the freezer.

And that’s exactly what we’re after this September.

Why You’ll Love This Recipe

  • Uses frozen green beans, making it a great follow-up to our Put a Little Back feature.
  • A practical way to use leftover or meal-prepped chicken.
  • Makes just 2 servings, perfect for a small household.
  • Uses inexpensive pantry staples.
  • The vegetables, protein, and grain are all in one bowl.
  • Easy to customize with whatever vegetables you have available.
  • A good example of turning preserved ingredients into an actual meal.

🥣 Build Your Bowl

Base

Cooked brown or white rice.

Protein

Cooked chicken, shredded or chopped.

Vegetables

Frozen green beans, plus optional additional vegetables such as carrots, corn, or bell peppers.

Sauce

A simple savory garlic-soy sauce.

Fresh Finish

Fresh parsley or sliced green onion adds a little brightness.

Optional Toppings

  • Sesame seeds
  • Sliced green onion
  • A small sprinkle of shredded Parmesan
  • A squeeze of lemon

Make It Your Own

This is a bowl, not a rulebook.

Use whatever rice you have. Swap the chicken for cooked turkey. Add another vegetable. Change the sauce.

The important part is the basic formula:

Grain + protein + vegetables + sauce = dinner.

simplegoodfood's avatarsimplegoodfood

Harvest Chicken & Green Bean Rice Bowls

A portion of frozen green beans, some cooked chicken, rice, and a handful of pantry staples come together in a warm, satisfying bowl.
Prep Time 10 minutes
Cook Time 10 minutes
Total Time 20 minutes
Servings: 2
Course: Dinner, Lunch, Main Course
Cuisine: American
Calories: 475

Ingredients
  

For the Bowls
  • 1 1/2 cups cooked rice
  • 2 cups frozen green beans prepared for freezing and thawed
  • 2 cups cooked chicken chopped or shredded
  • 1/2 cup diced carrots
  • 1/2 cup diced bell pepper
  • 1 teaspoon olive oil
  • 1/4 teaspoon garlic powder
  • 1/4 teaspoon dried thyme
  • 1/4 teaspoon black pepper
  • 1/8 teaspoon salt or to taste
For the Simple Sauce
  • 2 tablespoons low-sodium soy sauce
  • 1 tablespoon low-sodium chicken broth or water
  • 1 teaspoon honey
  • 1 teaspoon rice vinegar or lemon juice
  • 1/4 teaspoon garlic powder
For Serving
  • 1 tablespoon sliced green onion or fresh parsley
  • 1 teaspoon sesame seeds optional

Method
 

Prepare the Rice
  1. If you don’t already have cooked rice available, prepare enough for about 1 1/2 cups cooked rice.
  2. Leftover rice is perfect for this recipe.
  3. If you’re using refrigerated leftover rice, make sure it has been stored properly and reheat it thoroughly before serving.
Make the Sauce
  1. In a small bowl, whisk together the soy sauce, chicken broth or water, honey, rice vinegar or lemon juice, and garlic powder.
  2. Set aside.
Cook the Vegetables
  1. Heat the olive oil in a 10-inch skillet over medium heat.
  2. Add the carrots and bell pepper. Cook for about 3–4 minutes, stirring occasionally.
  3. Add the frozen green beans.
  4. Cook for another 4–5 minutes, stirring occasionally, until the vegetables are hot and tender-crisp.
  5. If the green beans are already fully cooked from a previous preparation, they only need enough time to heat through.
Add the Chicken
  1. Add the cooked chicken to the skillet.
  2. Sprinkle with the garlic powder, thyme, black pepper, and salt.
  3. Stir everything together and cook until the chicken is heated through.
Add the Sauce
  1. Pour the sauce over the chicken and vegetables.
  2. Stir gently and cook for another 1–2 minutes, just long enough for the sauce to coat everything.
  3. Taste and adjust the seasoning if needed.
Build the Bowls
  1. Divide the warm rice between two bowls.
  2. Top each with half of the chicken and vegetable mixture.
  3. Finish with fresh parsley or green onion and sesame seeds, if desired.
  4. Serve warm.

Notes

A Very Good Use for Frozen Green Beans

This is exactly why I like freezing vegetables in meal-sized portions.
The green beans don’t have to become a recipe all by themselves.
They can simply become part of a recipe.
On Wednesday, they’re a package in the freezer.
On Friday, they’re vegetables in dinner.
That’s a pretty good return on a little bit of preservation work.

Use What You Have

The basic combination here is chicken, green beans, and rice, but you can easily adjust it.

Swap the Protein

Try:

  • Cooked turkey
  • Leftover pork
  • Rotisserie chicken
  • Cooked shrimp

Change the Vegetables

Use what needs to be used.

Try:

  • Corn
  • Peas
  • Broccoli
  • Cauliflower
  • Zucchini
  • Mushrooms
  • Extra carrots
  • Frozen mixed vegetables

Change the Grain

Rice is inexpensive and versatile, but you could also use:

  • Brown rice
  • Wild rice blend
  • Quinoa
  • Barley
  • Farro

Or skip the grain and serve the chicken and vegetables over mashed potatoes.

A Simple Sauce Goes a Long Way

You don’t need a complicated sauce to make a good bowl.

The combination of a little low-sodium soy sauce, honey, acid, and garlic gives the chicken and vegetables plenty of flavor without making the meal heavily seasoned.

If you prefer a different direction, try a simple lemon-herb sauce instead.

Or use a spoonful of your favorite prepared sauce from the refrigerator.

This is one of the advantages of bowl meals:

the basic ingredients can stay the same while the flavor changes.

Stretch Every Grocery Dollar

This is a particularly economical meal because several of the ingredients can do double duty.

Cook a little extra chicken for another meal.

Make extra rice and refrigerate or freeze it in useful portions.

Buy green beans when they’re plentiful and preserve some for later.

Use the last carrot or bell pepper in the refrigerator instead of letting it become waste.

You’re not trying to make an elaborate meal from expensive ingredients.

You’re combining inexpensive ingredients that you already know how to use.

Waste Not, Want Not

This recipe is practically designed for leftovers.

Have half a bell pepper?

Use it.

A lonely carrot?

Dice it up.

A little leftover chicken?

Perfect.

Some cooked rice from yesterday?

Even better.

That’s one of my favorite kinds of cooking—looking at what you already have and figuring out how to make it into something worth eating.

Cooking for One or Two

This recipe makes 2 servings, but it’s easy to adjust.

Cooking for one?

Make one bowl and refrigerate the remaining ingredients separately for another meal.

Cooking for two?

Make both bowls and enjoy dinner together.

If you’re planning ahead, you can also prepare the chicken, vegetables, and rice separately and assemble the bowls when you’re ready to eat.

Meal Prep Note

This recipe works especially well as a small meal-prep project.

Prepare the chicken, rice, and vegetables ahead of time and refrigerate them separately.

When you’re ready for dinner, reheat what you need and add the sauce.

You can also portion the cooked components into two meal containers for easy lunches.

The key is keeping the components useful enough that you’re not locked into eating exactly the same meal twice.

Storage & Freezing

Refrigerate leftovers promptly in a covered container.

For best quality, enjoy refrigerated leftovers within 3–4 days.

If you’re using previously frozen green beans, thaw them safely and keep them refrigerated until you’re ready to cook them.

I don’t recommend refreezing the completed rice bowl. Instead, freeze the individual ingredients when appropriate and assemble fresh bowls when you’re ready to eat.

For current food-storage and food-safety recommendations, the USDA’s guidance on Freezing and Food Safety is a useful reference.

Recipe Information

Yield: About 4 cups, 2 servings
Prep Time: 10 minutes
Cook Time: 10 minutes
Total Time: About 20 minutes
Equipment: 10-inch skillet, small mixing bowl

Today’s Harvest, Tomorrow’s Dinner

This bowl is really the whole September preservation idea in miniature.

You bought or harvested the green beans while they were plentiful.

You prepared and froze them.

You labeled them and put them away.

And now you’ve pulled them back out and made dinner.

That’s the point of putting food back.

Not a freezer full of food you never use.

Not a collection of containers that eventually become mystery packages.

Just good ingredients, saved at the right time, ready when you need them.

Today’s harvest really can become tomorrow’s dinner.

Posted in Chicken Meals, Seasonal, Skillet Meals

Chicken & Vegetable Pot Pie Skillet

There are nights when you want chicken pot pie, but you don’t necessarily want to make an entire pie.

That’s where this Chicken & Vegetable Pot Pie Skillet comes in.

Tender chicken and vegetables are tucked into a simple creamy sauce, then topped with golden biscuits and baked right in the skillet. It has all the cozy appeal of pot pie without rolling out a crust or making a full-size casserole.

And it’s exactly the kind of meal that makes a well-stocked freezer worthwhile.

Those vegetables you put away when they were plentiful? This is one of the dinners they were waiting for.

Why You’ll Love This Recipe

  • All the comfort of chicken pot pie without making a pie crust.
  • Uses convenient cooked chicken, making it a great way to use meal-prepped or leftover chicken.
  • Frozen vegetables work beautifully here.
  • Everything starts in one skillet and finishes in the oven.
  • Makes 4 servings, so it works for a small household with leftovers for lunch.
  • Easy to adapt based on what’s in your freezer.
  • Mildly seasoned rather than heavily spiced.
simplegoodfood's avatarsimplegoodfood

Chicken & Vegetable Pot Pie Skillet

There are nights when you want chicken pot pie, but you don't necessarily want to make an entire pie.
Prep Time 15 minutes
Cook Time 20 minutes
Total Time 35 minutes
Servings: 4
Course: Dinner, Lunch, Main Course
Cuisine: American
Calories: 390

Ingredients
  

For the Filling
  • 2 cups cooked chicken shredded or chopped
  • 2 cups mixed vegetables such as carrots, peas, corn, and green beans
  • 1 tablespoon olive oil
  • 1/2 cup finely diced onion
  • 2 tablespoons all-purpose flour
  • 2 cups low-sodium chicken broth
  • 1/2 cup milk
  • 1/2 teaspoon dried thyme
  • 1/4 teaspoon garlic powder
  • 1/4 teaspoon salt or to taste
  • 1/4 teaspoon black pepper or to taste
For the Biscuit Topping
  • 1 cup baking mix
  • 1/3 cup milk
  • 1 tablespoon grated Parmesan cheese optional
  • 1/4 teaspoon dried parsley optional

Equipment

  • 1 10-inch Oven-safe Skillet

Method
 

Prepare the Skillet
  1. Preheat the oven to 400°F.
  2. Heat a 10-inch oven-safe skillet over medium heat. Add the olive oil and diced onion. Cook for about 3–4 minutes, stirring occasionally, until the onion begins to soften.
Make the Sauce
  1. Sprinkle the flour over the onion and stir well. Cook for about 1 minute to remove the raw flour taste.
  2. Gradually pour in the chicken broth, stirring constantly to prevent lumps.
  3. Add the milk, thyme, garlic powder, salt, and pepper. Continue cooking for 3–5 minutes, stirring frequently, until the sauce thickens enough to coat the back of a spoon.
Add the Chicken and Vegetables
  1. Stir in the cooked chicken and mixed vegetables.
  2. If you’re using frozen vegetables, there’s no need to thaw them first. Allow the mixture to heat through for several minutes.
Taste and adjust the seasoning if needed.
  1. The filling should be creamy but still loose enough that it can bubble around the biscuit topping. If it seems too thick, add another splash of broth or milk.
Make the Biscuit Topping
  1. In a small bowl, stir together the baking mix and milk until just combined.
  2. Don’t overmix. A few small lumps are perfectly fine.
  3. If using them, gently stir in the Parmesan and dried parsley.
Add the Biscuits
  1. Drop the biscuit dough by spoonfuls over the chicken mixture, leaving a little space between the biscuits so steam can escape.
  2. You don’t need to completely cover the filling. In fact, leaving a few little windows of creamy chicken and vegetables showing makes the finished skillet look especially inviting.
Bake
  1. Carefully transfer the skillet to the preheated oven.
  2. Bake for 15–20 minutes, or until the biscuits are golden brown and cooked through and the filling is bubbling around the edges.
  3. If the biscuits brown before they’re completely cooked inside, loosely cover the skillet with foil and continue baking until done.
Rest and Serve
  1. Let the skillet rest for about 5 minutes before serving.
  2. That gives the filling a chance to settle while the biscuits finish soaking up a little of that creamy sauce.
  3. Spoon directly from the skillet and enjoy.

Notes

Make It Your Own

This is exactly the kind of recipe where your freezer can do the heavy lifting.
Use whatever vegetables you have available, as long as they’re suitable for cooking in a creamy filling.
Good choices include:
  • Green beans
  • Peas
  • Corn
  • Carrots
  • Broccoli
  • Cauliflower
  • Diced zucchini
  • Mixed vegetables
You can also substitute cooked turkey for the chicken.
And if you have leftover roasted vegetables, don’t be afraid to use them. Just remember that already-cooked vegetables may need less time to heat through.

Using Your Freezer Chicken

This recipe is especially useful if you’ve cooked chicken ahead and portioned it for future meals.

A freezer package containing about 2 cups of cooked chicken is practically an invitation to make this skillet.

Thaw the chicken safely in the refrigerator before using, or use chicken that has already been thawed and refrigerated.

The same goes for your frozen vegetables: keeping them portioned in meal-sized amounts means you can pull out exactly what you need without thawing an entire bag.

That’s the whole idea behind this week’s freezer theme.

You’re not just putting food away. You’re putting future meals away.

What to Serve With Chicken Pot Pie Skillet

Honestly, this skillet can stand on its own.

You’ve already got protein, vegetables, a creamy sauce, and biscuits all in one dish.

If you’d like something alongside it, keep it simple:

  • A green salad
  • Fresh fruit
  • Steamed vegetables
  • A small side of cranberry sauce

You don’t need to turn a cozy skillet supper into a production.

Storing Leftovers

Refrigerate leftovers promptly in a covered container.

For the best quality, enjoy refrigerated leftovers within 3–4 days.

The biscuit topping will soften as it sits, but reheating individual portions in the oven or air fryer can help bring back some of the crispness.

If you’re cooking for one or two, leftovers make an especially good next-day lunch.

A Little Future Dinner

This is one of my favorite reasons to preserve food.

A bag of frozen vegetables doesn’t look particularly exciting.

Neither does a container of cooked chicken.

But combine them with a few pantry staples, and suddenly you’ve got a warm, bubbling chicken pot pie skillet coming out of the oven.

That’s the payoff.

Today’s harvest becomes tomorrow’s dinner.

Recipe Details

Yield: About 6 cups, 4 servings
Prep Time: 15 minutes
Cook Time: 20 minutes
Total Time: About 35 minutes
Equipment: 10-inch oven-safe skillet