Posted in Chicken Meals, Seasonal, Skillet Meals

Chicken & Vegetable Pot Pie Skillet

There are nights when you want chicken pot pie, but you don’t necessarily want to make an entire pie.

That’s where this Chicken & Vegetable Pot Pie Skillet comes in.

Tender chicken and vegetables are tucked into a simple creamy sauce, then topped with golden biscuits and baked right in the skillet. It has all the cozy appeal of pot pie without rolling out a crust or making a full-size casserole.

And it’s exactly the kind of meal that makes a well-stocked freezer worthwhile.

Those vegetables you put away when they were plentiful? This is one of the dinners they were waiting for.

Why You’ll Love This Recipe

  • All the comfort of chicken pot pie without making a pie crust.
  • Uses convenient cooked chicken, making it a great way to use meal-prepped or leftover chicken.
  • Frozen vegetables work beautifully here.
  • Everything starts in one skillet and finishes in the oven.
  • Makes 4 servings, so it works for a small household with leftovers for lunch.
  • Easy to adapt based on what’s in your freezer.
  • Mildly seasoned rather than heavily spiced.
simplegoodfood's avatarsimplegoodfood

Chicken & Vegetable Pot Pie Skillet

There are nights when you want chicken pot pie, but you don't necessarily want to make an entire pie.
Prep Time 15 minutes
Cook Time 20 minutes
Total Time 35 minutes
Servings: 4
Course: Dinner, Lunch, Main Course
Cuisine: American
Calories: 390

Ingredients
  

For the Filling
  • 2 cups cooked chicken shredded or chopped
  • 2 cups mixed vegetables such as carrots, peas, corn, and green beans
  • 1 tablespoon olive oil
  • 1/2 cup finely diced onion
  • 2 tablespoons all-purpose flour
  • 2 cups low-sodium chicken broth
  • 1/2 cup milk
  • 1/2 teaspoon dried thyme
  • 1/4 teaspoon garlic powder
  • 1/4 teaspoon salt or to taste
  • 1/4 teaspoon black pepper or to taste
For the Biscuit Topping
  • 1 cup baking mix
  • 1/3 cup milk
  • 1 tablespoon grated Parmesan cheese optional
  • 1/4 teaspoon dried parsley optional

Equipment

  • 1 10-inch Oven-safe Skillet

Method
 

Prepare the Skillet
  1. Preheat the oven to 400°F.
  2. Heat a 10-inch oven-safe skillet over medium heat. Add the olive oil and diced onion. Cook for about 3–4 minutes, stirring occasionally, until the onion begins to soften.
Make the Sauce
  1. Sprinkle the flour over the onion and stir well. Cook for about 1 minute to remove the raw flour taste.
  2. Gradually pour in the chicken broth, stirring constantly to prevent lumps.
  3. Add the milk, thyme, garlic powder, salt, and pepper. Continue cooking for 3–5 minutes, stirring frequently, until the sauce thickens enough to coat the back of a spoon.
Add the Chicken and Vegetables
  1. Stir in the cooked chicken and mixed vegetables.
  2. If you’re using frozen vegetables, there’s no need to thaw them first. Allow the mixture to heat through for several minutes.
Taste and adjust the seasoning if needed.
  1. The filling should be creamy but still loose enough that it can bubble around the biscuit topping. If it seems too thick, add another splash of broth or milk.
Make the Biscuit Topping
  1. In a small bowl, stir together the baking mix and milk until just combined.
  2. Don’t overmix. A few small lumps are perfectly fine.
  3. If using them, gently stir in the Parmesan and dried parsley.
Add the Biscuits
  1. Drop the biscuit dough by spoonfuls over the chicken mixture, leaving a little space between the biscuits so steam can escape.
  2. You don’t need to completely cover the filling. In fact, leaving a few little windows of creamy chicken and vegetables showing makes the finished skillet look especially inviting.
Bake
  1. Carefully transfer the skillet to the preheated oven.
  2. Bake for 15–20 minutes, or until the biscuits are golden brown and cooked through and the filling is bubbling around the edges.
  3. If the biscuits brown before they’re completely cooked inside, loosely cover the skillet with foil and continue baking until done.
Rest and Serve
  1. Let the skillet rest for about 5 minutes before serving.
  2. That gives the filling a chance to settle while the biscuits finish soaking up a little of that creamy sauce.
  3. Spoon directly from the skillet and enjoy.

Notes

Make It Your Own

This is exactly the kind of recipe where your freezer can do the heavy lifting.
Use whatever vegetables you have available, as long as they’re suitable for cooking in a creamy filling.
Good choices include:
  • Green beans
  • Peas
  • Corn
  • Carrots
  • Broccoli
  • Cauliflower
  • Diced zucchini
  • Mixed vegetables
You can also substitute cooked turkey for the chicken.
And if you have leftover roasted vegetables, don’t be afraid to use them. Just remember that already-cooked vegetables may need less time to heat through.

Using Your Freezer Chicken

This recipe is especially useful if you’ve cooked chicken ahead and portioned it for future meals.

A freezer package containing about 2 cups of cooked chicken is practically an invitation to make this skillet.

Thaw the chicken safely in the refrigerator before using, or use chicken that has already been thawed and refrigerated.

The same goes for your frozen vegetables: keeping them portioned in meal-sized amounts means you can pull out exactly what you need without thawing an entire bag.

That’s the whole idea behind this week’s freezer theme.

You’re not just putting food away. You’re putting future meals away.

What to Serve With Chicken Pot Pie Skillet

Honestly, this skillet can stand on its own.

You’ve already got protein, vegetables, a creamy sauce, and biscuits all in one dish.

If you’d like something alongside it, keep it simple:

  • A green salad
  • Fresh fruit
  • Steamed vegetables
  • A small side of cranberry sauce

You don’t need to turn a cozy skillet supper into a production.

Storing Leftovers

Refrigerate leftovers promptly in a covered container.

For the best quality, enjoy refrigerated leftovers within 3–4 days.

The biscuit topping will soften as it sits, but reheating individual portions in the oven or air fryer can help bring back some of the crispness.

If you’re cooking for one or two, leftovers make an especially good next-day lunch.

A Little Future Dinner

This is one of my favorite reasons to preserve food.

A bag of frozen vegetables doesn’t look particularly exciting.

Neither does a container of cooked chicken.

But combine them with a few pantry staples, and suddenly you’ve got a warm, bubbling chicken pot pie skillet coming out of the oven.

That’s the payoff.

Today’s harvest becomes tomorrow’s dinner.

Recipe Details

Yield: About 6 cups, 4 servings
Prep Time: 15 minutes
Cook Time: 20 minutes
Total Time: About 35 minutes
Equipment: 10-inch oven-safe skillet
Posted in Breakfast, Side Dishes, Skillet Meals

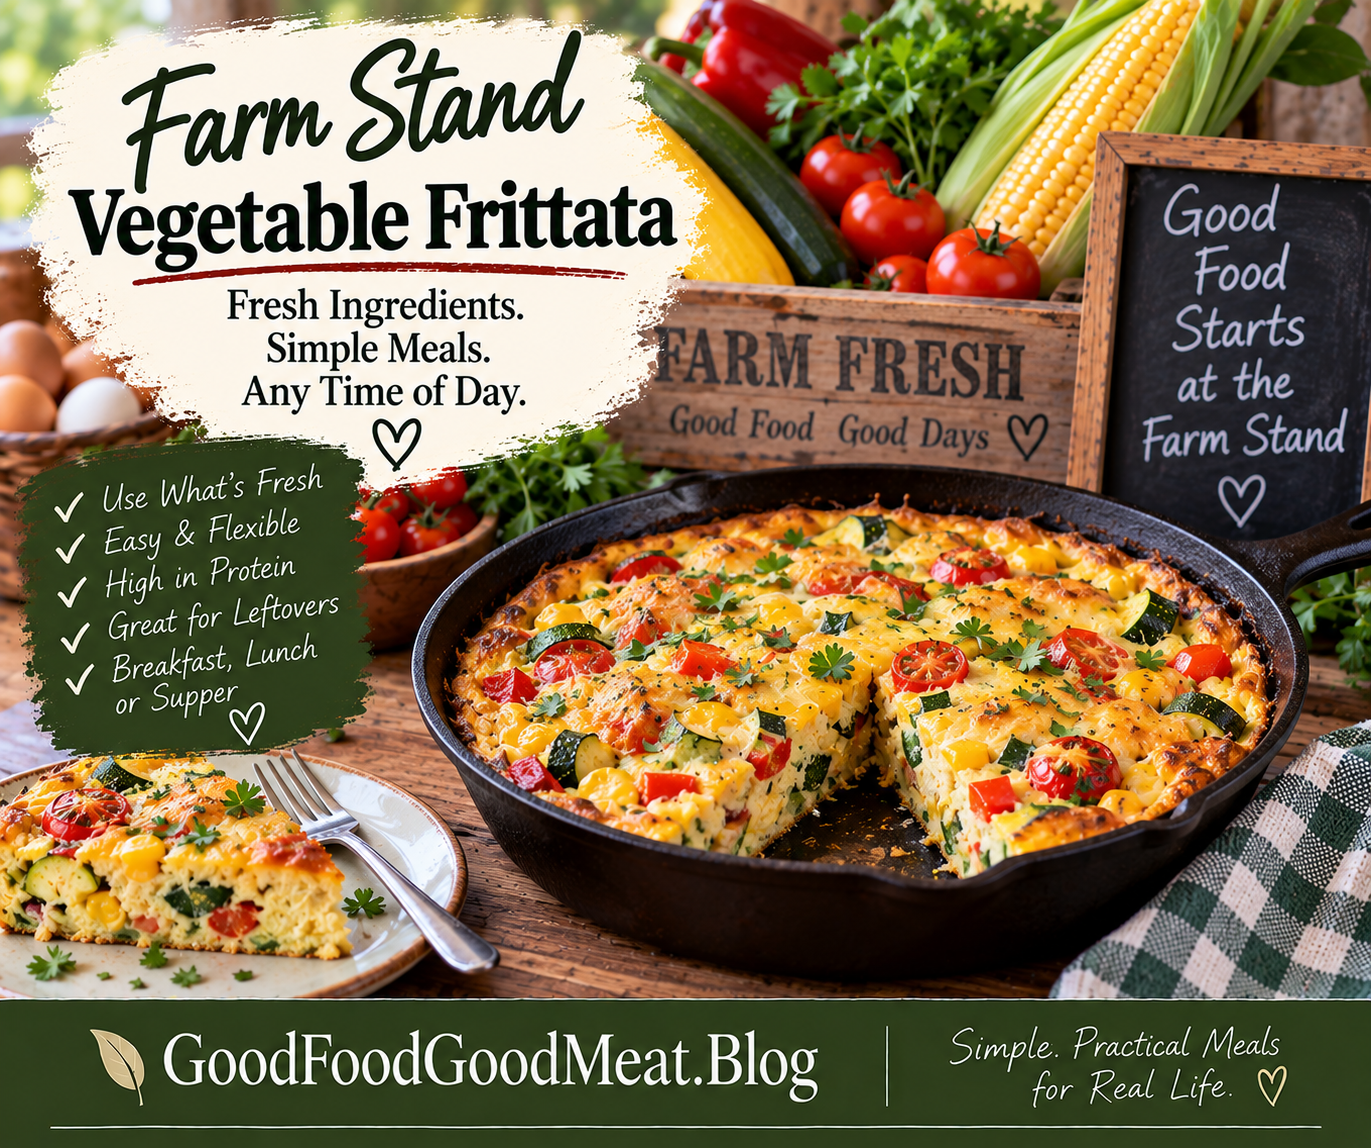
Farm Stand Vegetable Frittata

A simple, colorful frittata for breakfast, lunch, or an easy meatless supper.

When the farm stand is overflowing with beautiful vegetables, sometimes the best recipe is the one that doesn’t ask you to choose just one.

This Farm Stand Vegetable Frittata brings together whatever looks freshest—zucchini, peppers, tomatoes, onions, corn, and fresh herbs—with eggs and a little cheese. Everything comes together in one oven-safe skillet for a meal that’s simple, satisfying, and wonderfully adaptable.

It’s also a great way to use those odds and ends of vegetables that aren’t quite enough for another recipe.

That’s farm stand cooking at its best: buy what’s good, use what you have, and waste as little as possible.

Why You’ll Love This Recipe

  • Flexible: Use the vegetables you have instead of making a special shopping trip.
  • Meatless: Eggs provide the protein while the vegetables bring color and flavor.
  • Small-batch friendly: Four servings makes this practical for singles and couples.
  • Good for any meal: Breakfast, brunch, lunch, or a light supper.
  • One skillet: Sauté the vegetables and bake the frittata in the same pan.
  • Budget-friendly: A few eggs and seasonal vegetables go a long way.
  • Great for leftovers: Refrigerate individual portions for easy breakfasts or lunches.

🥣 Build Your Bowl

Okay, this one isn’t technically a bowl—but the same “build it from what you have” philosophy applies.

Base:
Eggs and egg whites

Protein:
Eggs, with Greek yogurt adding a little extra protein

Vegetables:
Zucchini, bell pepper, onion, corn, and tomatoes

Sauce:
No sauce needed

Fresh Finish:
Fresh parsley or basil

Optional Toppings:
A little Parmesan, sliced avocado, or a spoonful of Greek yogurt

Make It Your Own:
Open the refrigerator and see what needs to be used. A frittata is one of the easiest ways to turn a handful of leftover vegetables into a real meal.

simplegoodfood's avatarsimplegoodfood

Farm Stand Vegetable Fritatta

When the farm stand is full, make a frittata!
Prep Time 15 minutes
Cook Time 25 minutes
Total Time 40 minutes
Servings: 4
Course: Breakfast, Dinner, Lunch
Cuisine: American
Calories: 285

Ingredients
  

  • 6 large eggs
  • 4 large egg whites
  • cup plain Greek yogurt
  • ¼ teaspoon salt
  • ¼ teaspoon black pepper
  • ½ teaspoon Italian seasoning
  • 1 tablespoon olive oil
  • ½ small onion diced
  • 1 small zucchini diced
  • ½ red bell pepper diced
  • ½ cup fresh or thawed frozen sweet corn
  • ½ cup cherry tomatoes halved
  • 1 clove garlic minced
  • ½ cup shredded reduced-fat mozzarella or Monterey Jack cheese
  • 2 tablespoons chopped fresh parsley or basil

Method
 

Preheat the oven.
  1. Preheat your oven to 375°F.
Prepare the egg mixture.
  1. In a medium bowl, whisk together the eggs, egg whites, Greek yogurt, salt, pepper, and Italian seasoning until well combined.
Sauté the vegetables.
  1. Heat the olive oil in a 10-inch oven-safe skillet over medium heat. Add the onion and bell pepper and cook for 2–3 minutes.Add the zucchini and corn and continue cooking for another 3–4 minutes, until the vegetables begin to soften.
Add the tomatoes and garlic.
  1. Stir in the tomatoes and garlic and cook for about 1 minute.
Add the eggs.
  1. Spread the vegetables evenly around the skillet. Pour the egg mixture over them and gently shake the skillet so the eggs settle around the vegetables.
Add the cheese.
  1. Sprinkle the shredded cheese evenly over the top.
Begin cooking on the stovetop.
  1. Cook without stirring for about 2 minutes, allowing the edges of the eggs to begin setting.
Finish in the oven.
  1. Transfer the skillet to the preheated oven. Bake for approximately 15–18 minutes, or until the center is set and the eggs reach 160°F.
Rest and garnish.
  1. Remove the skillet from the oven and let the frittata rest for about 5 minutes. Sprinkle with fresh parsley or basil, slice into wedges, and serve.

Notes

Make It Your Own
This is one of those recipes where I actually want you to change it.
The vegetables listed here are simply a starting point.
Try:
  • Green beans instead of zucchini
  • Spinach instead of corn
  • Mushrooms instead of peppers
  • Roasted potatoes for a heartier frittata
  • Broccoli or cauliflower for extra vegetables
  • Fresh herbs instead of dried seasoning
  • A little Parmesan instead of shredded cheese
Just remember that vegetables with a lot of moisture—such as fresh tomatoes, mushrooms, or zucchini—should be cooked first so they don’t release too much liquid into the eggs.

What About Leftover Vegetables?

This is where I especially love a frittata.

Have half a bell pepper left from another recipe?

Use it.

A handful of cooked green beans?

Into the frittata they go.

A little leftover roasted zucchini?

Perfect.

A few tablespoons of corn?

Absolutely.

The vegetables don’t all have to be perfectly fresh from the farm stand. In fact, a frittata is one of those recipes that can help keep perfectly good food from becoming food waste.

Just make sure cooked leftovers have been stored safely and are still within their recommended refrigerated storage time.

Serving Suggestions

Serve a wedge of frittata with:

  • Fresh fruit
  • Whole-grain toast
  • A simple green salad
  • Roasted potatoes
  • Fresh tomatoes
  • A spoonful of Greek yogurt

For breakfast or brunch, fruit and whole-grain toast make an easy combination.

For lunch or dinner, add a salad and you’ve got a light, satisfying meal.

Make-Ahead and Leftovers

Frittata is excellent for meal prep.

Once cooled, cut the leftovers into individual portions and refrigerate them in covered containers.

Reheat gently in the microwave or in a skillet until heated through.

For the best quality, use refrigerated leftovers within 3–4 days.

You can also enjoy leftover frittata cold or at room temperature, making it a convenient option for a quick lunch.

A Farm Stand Recipe Without a Shopping List

There’s something I particularly like about this recipe.

It doesn’t send you to the grocery store with a list of twelve ingredients.

It sends you to the farm stand—or your own refrigerator—and says:

What looks good? What do I already have? What needs to be used?

That’s a pretty good way to cook.

And it’s exactly the mindset we’ve been talking about all week.

Buy what’s plentiful.

Enjoy it while it’s fresh.

Put a little back when it makes sense.

And use what you have.

Nutrition Estimate

Per serving: approximately 285 calories and 23g protein.

Nutrition is an estimate and will vary depending on the specific ingredients and brands used.

Food Safety Note

Cook the frittata until the center reaches 160°F, measured with a food thermometer. Refrigerate leftovers promptly and use within 3–4 days.

If you’re using previously cooked vegetables or other leftovers, make sure they have been stored safely and are still within their recommended storage time.

One Last Look at the Farm Stand

This week started with a simple idea:

When the farm stand is full, pay attention.

Not because you need to buy everything.

Because abundance gives you choices.

You can cook a skillet dinner with it.

You can freeze some sweet corn for later.

You can plan how much preservation actually makes sense for your household.

And you can take a handful of those beautiful vegetables and turn them into a frittata.

That’s the kind of seasonal cooking I love.

Simple food. Good ingredients. Nothing wasted. And plenty of room to make it your own.

Posted in Skillet Meals

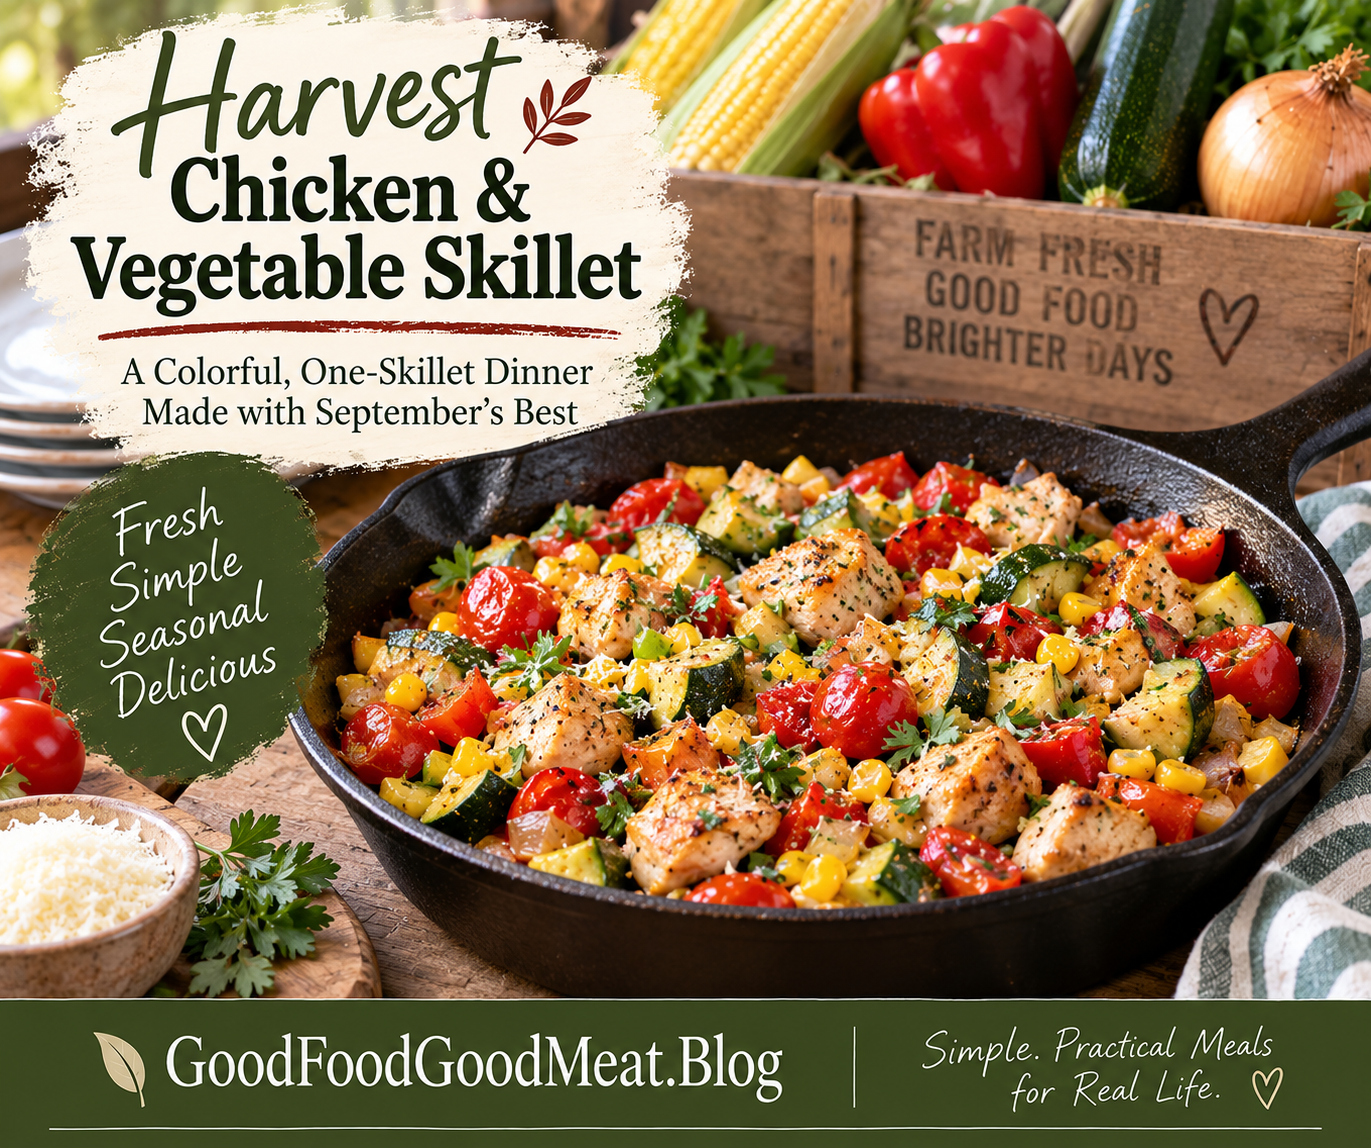
Harvest Chicken & Vegetable Skillet

A colorful one-skillet dinner that makes the most of September’s harvest.

When the farm stand is full of beautiful vegetables, this is exactly the kind of meal I want to make.

Tender pieces of chicken are cooked with sweet corn, zucchini, bell pepper, onion, and tomatoes for a simple skillet dinner that tastes like the best of late summer and early fall. A little garlic and Italian seasoning are all you need to bring everything together.

It’s colorful, filling, budget-friendly, and—best of all—there’s only one skillet to wash.

Why You’ll Love This Recipe

  • One skillet: Everything cooks together, making cleanup easy.
  • Harvest-friendly: Perfect for using whatever fresh vegetables look best this week.
  • High in protein: Chicken makes this a satisfying main dish.
  • Mildly seasoned: Plenty of flavor without making the dish overly spicy.
  • Flexible: Swap in whatever seasonal vegetables you already have.
  • Small-batch friendly: Makes four servings, so it works well for singles and couples with leftovers for another meal.
  • Budget-conscious: Seasonal vegetables help stretch a modest amount of chicken.
simplegoodfood's avatarsimplegoodfood

Harvest Chicken & Vegetable Skillet

Tender pieces of chicken are cooked with sweet corn, zucchini, bell pepper, onion, and tomatoes for a simple skillet dinner that tastes like the best of late summer and early fall.
Prep Time 15 minutes
Cook Time 20 minutes
Total Time 35 minutes
Servings: 4
Course: Dinner, Lunch, Main Course
Cuisine: American
Calories: 330

Ingredients
  

  • 1 pound boneless skinless chicken breasts, cut into bite-sized pieces
  • 1 tablespoon olive oil divided
  • 1 small onion chopped
  • 1 medium zucchini diced
  • 1 red bell pepper chopped
  • 1 cup fresh or frozen sweet corn
  • 1 cup cherry tomatoes halved
  • 2 cloves garlic minced
  • 1 teaspoon Italian seasoning
  • ½ teaspoon salt
  • ¼ teaspoon black pepper
  • ½ cup low-sodium chicken broth
  • 2 tablespoons chopped fresh parsley
  • ¼ cup grated Parmesan cheese optional

Method
 

Prepare the chicken.
  1. Pat the chicken dry and cut it into bite-sized pieces. Season lightly with the salt, pepper, and Italian seasoning.
Brown the chicken.
  1. Heat 2 teaspoons of the olive oil in a large skillet over medium-high heat. Add the chicken in a single layer and cook for about 5–7 minutes, turning occasionally, until lightly browned and cooked through. Transfer the chicken to a plate.
Cook the vegetables.
  1. Add the remaining teaspoon of olive oil to the skillet. Add the onion and bell pepper and cook for 2–3 minutes. Add the zucchini and corn and continue cooking for another 3–4 minutes, stirring occasionally.
Add the tomatoes and garlic.
  1. Stir in the tomatoes and garlic. Cook for about 1 minute, just until the garlic becomes fragrant and the tomatoes begin to soften.
Bring it together.
  1. Return the chicken and any accumulated juices to the skillet. Pour in the chicken broth and stir everything together.
Finish cooking.
  1. Reduce the heat to medium and simmer for 2–3 minutes, stirring occasionally, until the vegetables are tender and the broth has reduced slightly.
Finish and serve.
  1. Sprinkle with fresh parsley and, if desired, Parmesan cheese. Serve hot.

Notes

Make It Your Own

This skillet is intentionally flexible.
Use yellow squash instead of zucchini, add a handful of spinach, substitute green beans for the bell pepper, or toss in leftover roasted vegetables. If tomatoes aren’t looking their best, a few spoonfuls of drained canned diced tomatoes work, too.
You can also change the seasoning to match what you have on hand. A little dried basil or parsley works beautifully here.

Serving Suggestions

This is a complete meal on its own, but you can stretch it a little further by serving it over:

  • Brown rice
  • Quinoa
  • Barley
  • Whole-grain pasta
  • Cauliflower rice

For a lighter meal, serve it with a simple green salad or a piece of whole-grain bread.

A Little Leftover Magic

Don’t overlook the leftovers!

The chicken and vegetables can be refrigerated and reheated for another lunch or dinner. They can also become the starting point for a rice bowl, wrap, or quick quesadilla.

And if you’re following along with our September “Put a Little Back” theme, this is also a good reminder of why preserving seasonal produce can be worthwhile. Today’s harvest doesn’t have to stay today’s dinner.

Nutrition Estimate

Per serving, without optional Parmesan: approximately 330 calories and 37g protein.

Nutrition is an estimate and will vary depending on the specific ingredients and brands used.

Food Safety Note

Cook chicken to an internal temperature of 165°F as measured with a food thermometer. Refrigerate leftovers promptly and use within 3–4 days.

Posted in Skillet Meals

Garden Vegetable Pasta Toss

Introduction

Sometimes the refrigerator doesn’t need another shopping trip.

It needs a little attention.

A zucchini that’s been waiting patiently in the vegetable drawer. A handful of mushrooms. Some green beans. A carrot or two. Maybe a little spinach that’s getting close to the end of its useful life.

That’s where Garden Vegetable Pasta Toss comes in.

This isn’t a recipe that requires you to have exactly the right vegetables. It’s a framework for turning the vegetables you already have into a simple pasta dinner.

The vegetables are sautéed until tender-crisp, tossed with pasta and a light garlic-herb sauce, and finished with Parmesan and fresh herbs.

It’s colorful, satisfying, inexpensive, and — perhaps most importantly — flexible.

Because sometimes the best ingredient in the kitchen is the one you already bought.

Why You’ll Love This Recipe

  • It’s a refrigerator-cleanout meal without feeling like one.
  • You can use almost any combination of vegetables.
  • It’s inexpensive and naturally meatless.
  • One pot of pasta and one skillet handle most of the work.
  • It can be served warm or at room temperature.
  • It’s easy to scale for one or two people.
  • The vegetables can be prepped ahead, making tomorrow’s dinner easier.
simplegoodfood's avatarsimplegoodfood

Garden Vegetable Pasta Toss

This isn't a recipe that requires you to have exactly the right vegetables. It's a framework for turning the vegetables you already have into a simple pasta dinner.
Prep Time 15 minutes
Cook Time 15 minutes
Total Time 30 minutes
Servings: 4
Course: Dinner, Lunch, Main Course
Cuisine: American
Calories: 390

Ingredients
  

  • 8 ounces pasta such as penne, rotini, or bow ties
  • 1 tablespoon olive oil
  • 1 small onion diced
  • 2 medium carrots thinly sliced
  • 1 cup sliced mushrooms
  • 1 cup green beans cut into bite-sized pieces
  • 1 medium zucchini diced
  • 2 cloves garlic minced
  • ½ teaspoon dried basil
  • ½ teaspoon dried parsley
  • ¼ teaspoon dried thyme
  • ½ teaspoon salt or to taste
  • ¼ teaspoon black pepper
  • ½ cup low-sodium vegetable broth
  • 1 tablespoon lemon juice
  • ¼ cup grated Parmesan cheese
  • 2 tablespoons chopped fresh parsley
Optional Additions
  • 1 cup fresh spinach
  • ½ cup frozen peas
  • leftover cooked corn
  • chopped bell pepper
  • roasted vegetables
  • cherry tomatoes
  • cooked chicken or turkey

Method
 

Cook the Pasta
  1. Bring a large pot of salted water to a boil.
  2. Cook the pasta according to the package directions until just tender.
  3. Before draining, reserve ½ cup of the pasta water.
  4. Drain the pasta and set aside.
Start With the Firm Vegetables
  1. While the pasta cooks, heat the olive oil in a large skillet over medium heat.
  2. Add the onion and carrots.
  3. Cook for 3–4 minutes, stirring occasionally.
  4. Add the green beans and mushrooms.
  5. Continue cooking for another 3–4 minutes.
Add the Quick-Cooking Vegetables
  1. Add the zucchini.
  2. Cook for 2–3 minutes, stirring occasionally.
  3. The vegetables should be tender but still have some texture.
  4. If you’re using bell peppers, peas, or other vegetables, add them according to how quickly they cook.
Add the Garlic and Herbs
  1. Add the garlic, basil, parsley, thyme, salt, and black pepper.
  2. Cook for about 30 seconds, just until fragrant.
Make the Light Sauce
  1. Pour the vegetable broth into the skillet.
  2. Add the lemon juice.
  3. Stir and allow the mixture to simmer for 1–2 minutes.
  4. The broth isn’t supposed to make a heavy sauce. It’s simply there to bring the flavors together and give the pasta a little moisture.
Toss Everything Together
  1. Add the drained pasta to the skillet.
  2. Toss gently until the pasta is coated with the vegetables and pan juices.
  3. If the mixture seems dry, add a tablespoon or two of the reserved pasta water.
  4. Continue tossing until everything is heated through.
Finish the Pasta
  1. Remove the skillet from the heat.
  2. Add the Parmesan cheese and fresh parsley.
  3. Toss again.
  4. Taste and adjust the seasoning.
  5. Serve warm.

🌿 Kitchen Confidence: Cook Vegetables in the Right Order

One of the easiest ways to improve a vegetable pasta dish is to stop treating every vegetable the same.

Some vegetables need more time.

Some need almost none.

For this recipe:

Carrots and onions go in first.

Green beans and mushrooms come next.

Zucchini goes in toward the end.

Spinach only needs a minute or two.

That simple change means you can have vegetables that are cooked through without turning everything into one soft, indistinguishable mixture.

And that matters.

Good vegetable dishes should still taste like vegetables.

The Refrigerator-Cleanout Rule

The beauty of this recipe is that you don’t need all five vegetables listed above.

Think of the recipe as a starting point.

You need:

Pasta + vegetables + a little liquid + seasoning.

That’s the basic formula.

If you have zucchini but no green beans, use zucchini.

If the mushrooms need to be used, add them.

If you’ve got leftover cooked broccoli, toss it in near the end.

If you have spinach that needs attention, add it just before the pasta.

The goal isn’t to make the vegetables match the recipe.

The goal is to make the recipe work for the vegetables you have.

Cook Today, Make Tomorrow Easier

This recipe can also become a small meal-prep project without really feeling like one.

If you’re already washing and chopping vegetables for dinner, chop a little extra.

If you’re already cooking pasta, make enough for another meal.

Store the extra cooked vegetables separately or refrigerate the finished pasta for another day.

You can even prepare a container of sautéed vegetables and freeze them as a meal starter for a future pasta dish, soup, or skillet meal.

That’s the whole philosophy we’ve been working with this week:

Do a little more while you’re already in the kitchen.

Make It Your Own

Add Protein

If you want a heartier meal, add:

  • leftover cooked chicken
  • turkey
  • cooked shrimp
  • white beans
  • chickpeas

Change the Pasta

Almost any medium-sized pasta works.

Try:

  • rotini
  • penne
  • bow ties
  • shells
  • whole-wheat pasta
  • chickpea pasta

Change the Flavor

For an Italian-style version, add extra basil and Parmesan.

For a brighter summer version, add more lemon and fresh parsley.

For a heartier fall version, try roasted carrots, mushrooms, and spinach.

The basic method stays the same.

Storage

Store leftovers in a covered container in the refrigerator.

Use within 3–4 days.

When reheating, add a splash of water or vegetable broth if the pasta has dried out.

For best texture, gently reheat in a skillet rather than overheating it in the microwave.

Posted in Skillet Meals

Beef Fried Rice

Introduction

Fried rice is one of those meals that can make you feel like you planned ahead even when you really didn’t.

A little cooked beef left from another meal. Some rice in the refrigerator. A few vegetables that need to be used.

Suddenly, dinner is handled.

This Beef Fried Rice is intentionally flexible. It’s a great way to use leftover cooked beef and rice, along with whatever vegetables are hanging around the refrigerator.

And that’s exactly what makes it such a good fit for Cooking Today, Planning for Tomorrow.

The beef doesn’t have to come from one particular recipe. Leftover beef from a skillet, rice bowl, roast, or meal-prep session can all find a second life here.

It’s not really leftovers anymore.

It’s dinner.

Why You’ll Love This Recipe

  • It’s ready in about 25 minutes.
  • Leftover cooked beef does the heavy lifting.
  • Day-old rice works beautifully.
  • It’s an excellent refrigerator clean-out meal.
  • The seasoning is savory without being overly spicy.
  • You can easily make two servings instead of four.
  • It’s perfect for an electric skillet or regular skillet at the campground.
simplegoodfood's avatarsimplegoodfood

Beef Fried Rice

Fried rice is one of those meals that can make you feel like you planned ahead even when you really didn't.
Prep Time 10 minutes
Cook Time 15 minutes
Total Time 25 minutes
Servings: 4
Course: Dinner, Lunch, Main Course
Cuisine: American
Calories: 500

Ingredients
  

  • 2 cups cooked lean beef chopped into small pieces
  • 3 cups cold cooked rice
  • 1 tablespoon olive oil
  • 1 small onion diced
  • 1 medium carrot finely diced
  • 1 cup frozen peas and carrots
  • ½ cup chopped green beans optional
  • 2 cloves garlic minced
  • 2 large eggs lightly beaten
  • 2 tablespoons low-sodium soy sauce
  • 1 tablespoon Worcestershire sauce
  • ½ teaspoon sesame oil
  • ¼ teaspoon black pepper
  • 2 green onions sliced
Optional Additions
  • mushrooms
  • zucchini
  • corn
  • leftover cooked broccoli
  • spinach
  • a small amount of shredded cabbage

Method
 

Get Everything Ready First
  1. Fried rice moves quickly once you start cooking. Have your beef chopped, rice separated, vegetables prepared, eggs beaten, and seasonings measured before you heat the skillet.
  2. If your rice is stuck together in the refrigerator, break it apart with your fingers or a fork before adding it to the skillet.
Cook the Vegetables
  1. Heat a large skillet or electric skillet over medium-high heat. Add the olive oil. Add the onion and carrot and cook for 2–3 minutes.
  2. Add the frozen peas and carrots and optional green beans. Cook for another 2–3 minutes, until the vegetables are hot and beginning to soften.
Add the Garlic and Beef
  1. Add the garlic and cook for about 30 seconds. Add the chopped cooked beef.
  2. Stir everything together and cook for 2–3 minutes, allowing the beef to warm through and pick up some of the flavor from the skillet.
Add the Rice
  1. Add the cold cooked rice. Spread it across the skillet and let it cook undisturbed for about 1 minute. Then stir and continue cooking for another 3–4 minutes. This little bit of contact with the hot skillet helps the rice develop the texture we’re looking for.
Make Room for the Eggs
  1. Push the beef, rice, and vegetables toward one side of the skillet. Pour the beaten eggs into the empty space. Cook, stirring gently, until the eggs are mostly set. Then stir them into the rice mixture.
Season the Fried Rice
  1. Add the soy sauce, Worcestershire sauce, sesame oil, and black pepper. Stir thoroughly so the seasonings are distributed throughout the rice. Cook for another 1–2 minutes.
  2. Taste and add a little more soy sauce if needed.
Finish and Serve
  1. Remove from the heat.
  2. Stir in the sliced green onions.
  3. Serve immediately.

Cook Today, Make Tomorrow Easier

This recipe is practically the definition of the week’s theme.

When you’re making rice for another meal, cook extra.

When you’re cooking beef, save a portion.

When you have vegetables that need to be used, put them aside.

Then later:

Rice + beef + vegetables = fried rice.

You don’t need to plan a special meal-prep session.

You simply made a few ingredients available for the next meal.

Make It Your Own

Change the Protein

Although we’re using beef here, the same method works with:

  • cooked chicken
  • pork
  • turkey
  • cooked sausage

Change the Vegetables

This is where fried rice really earns its refrigerator-cleanout reputation.

Use what you have.

Try:

  • cabbage
  • mushrooms
  • zucchini
  • corn
  • broccoli
  • spinach
  • green beans

Just remember that vegetables with a lot of moisture may need a little extra cooking time before the rice goes in.

Keep the Seasoning Mild

If you’re not a fan of spicy foods, there’s no reason to add hot sauce or chili peppers.

The combination of soy sauce, Worcestershire sauce, garlic, and a tiny amount of sesame oil gives the dish plenty of flavor without heat.

Storage

Refrigerate leftovers promptly in a shallow, covered container.

Use within 3–4 days.

Reheat thoroughly in a skillet or microwave.

Because this recipe contains cooked rice, it’s especially important to cool and refrigerate leftovers promptly rather than leaving the finished fried rice sitting at room temperature.

Posted in Skillet Meals

Rustic Beef & Cabbage Skillet

Cabbage is one of those vegetables that doesn’t get nearly enough credit.

It’s inexpensive, keeps well in the refrigerator, and can turn a small amount of meat into a satisfying meal. The trick is knowing how to cook it without reducing it to a pile of mush.

This Rustic Beef & Cabbage Skillet keeps things simple: browned ground beef, plenty of cabbage, onions, carrots, and a handful of familiar seasonings. Everything cooks together in one skillet until the cabbage is tender but still has enough texture to make the dish interesting.

It’s the kind of meal that feels old-fashioned in the best possible way — hearty, economical, and uncomplicated.

And because we’re talking about Cooking Today, Planning for Tomorrow, you can easily cook an extra portion or two to use later in the week.

Why You’ll Love This Recipe

  • Cabbage does a lot of work for very little money.
  • One skillet keeps cleanup easy.
  • The flavors are mild and familiar, rather than heavily spiced.
  • Ground beef makes it filling and protein-rich.
  • It reheats well, making it a natural make-ahead meal.
  • The vegetables can be adjusted according to what’s already in your refrigerator.
  • It works equally well on a stovetop or in an electric skillet at the campground.

🥬 Kitchen Confidence: How to Cook Cabbage Without Making It Mushy

The secret is simple: don’t drown it.

Cabbage naturally releases quite a bit of water as it cooks. Adding a lot of liquid at the beginning can turn a skillet meal into boiled cabbage.

Instead:

  1. Cut the cabbage into bite-sized pieces. Thin ribbons cook quickly; slightly wider pieces give you more texture.
  2. Cook the cabbage in stages. Give the firmer vegetables a head start.
  3. Let the cabbage have contact with the skillet. A little browning adds wonderful flavor.
  4. Don’t cover the pan for the entire cooking time. Trapped steam makes cabbage soften much faster.
  5. Stop cooking when it’s tender-crisp. It will continue softening slightly from the residual heat.

You want cabbage that’s tender enough to eat easily but still has a little bite.

simplegoodfood's avatarsimplegoodfood

Rustic Beef & Cabbage Skillet

This Rustic Beef & Cabbage Skillet keeps things simple: browned ground beef, plenty of cabbage, onions, carrots, and a handful of familiar seasonings.
Prep Time 10 minutes
Cook Time 25 minutes
Total Time 35 minutes
Servings: 4
Course: Dinner, Lunch, Main Course
Cuisine: American
Calories: 365

Ingredients
  

  • 1 pound lean ground beef
  • 1 tablespoon olive oil if needed
  • 1 small onion diced
  • 2 medium carrots peeled and thinly sliced
  • 4 cups chopped green cabbage about ½ small head
  • 2 cloves garlic minced
  • 1 teaspoon dried parsley
  • 1 teaspoon dried thyme
  • ½ teaspoon paprika
  • ½ teaspoon salt or to taste
  • ¼ teaspoon black pepper
  • ½ cup low-sodium beef broth
  • 1 tablespoon Worcestershire sauce
  • 1 teaspoon Dijon mustard
Optional
  • 1 tablespoon chopped fresh parsley for serving
  • 1 teaspoon apple cider vinegar or lemon juice for a brighter finish

Method
 

  1. Brown the Beef
  2. Heat a large skillet over medium-high heat.
  3. Add the ground beef and cook for 5–7 minutes, breaking it into crumbles as it browns.
  4. When the beef is cooked through and nicely browned, drain excess fat if necessary.
  5. Kitchen Confidence reminder: Let the beef sit against the hot skillet for a minute before stirring. Constant stirring prevents the browning we’re after.
  6. Add the Onion and Carrots
  7. Reduce the heat to medium.
  8. Add the onion and carrots to the skillet with the beef.
  9. Cook for 4–5 minutes, stirring occasionally, until the onion begins to soften and the carrots are starting to become tender.
  10. Add the Cabbage
  11. Add the chopped cabbage in a couple of handfuls, stirring as it begins to wilt.
  12. Don’t worry if the skillet looks ridiculously full at first. Cabbage has a magical way of collapsing once it heats up. 😉
  13. Cook uncovered for about 5 minutes, stirring occasionally.
  14. Season Everything
  15. Add the garlic, parsley, thyme, paprika, salt, and black pepper.
  16. Stir and cook for about 30 seconds.
  17. Finish the Skillet
  18. Whisk together the beef broth, Worcestershire sauce, and Dijon mustard.
  19. Pour the mixture into the skillet and stir well.
  20. Cook uncovered for another 5–7 minutes, stirring occasionally, until the cabbage is tender but still has some texture and most of the liquid has cooked away.
  21. Taste and adjust the seasoning.
  22. Brighten It Up
  23. If you’d like a little more brightness, add a teaspoon of apple cider vinegar or lemon juice just before serving.
  24. That small splash of acid helps balance the richness of the beef and brings out the flavor of the cabbage.

Notes

🍽️ Serving Suggestions
This is a complete meal on its own, but it can also be served with:
  • cooked brown or white rice
  • boiled or roasted potatoes
  • mashed potatoes
  • a slice of whole-grain bread
For a cook-once, enjoy-more-than-once approach, I especially like this over a small scoop of potatoes or rice. The vegetables and beef make the bulk of the meal while the starch stretches it a little further.

Make It Your Own

Have extra cabbage? Add another cup or two. Just give it enough room in the skillet to cook down.

Have leftover vegetables? Carrots, mushrooms, green beans, zucchini, or even a handful of spinach can find a home here.

Want to change the flavor later? Keep the base seasoning mild. That makes leftovers much easier to transform into another meal.

Using leftover beef from Sunday’s skillet? You can absolutely do that. Skip the beef-browning step, start with the onion and carrots, then add your cooked beef once the vegetables begin to soften.

That’s a perfect example of the week’s theme: tonight’s cooking can make tomorrow’s cooking easier.

Storage & Reheating

Cool leftovers promptly and refrigerate in a covered container.

Use refrigerated leftovers within 3–4 days.

For longer storage, portion the cooled skillet into freezer-safe containers, label with the date and contents, and freeze.

Reheat gently in a skillet or microwave until heated through. If the mixture seems dry, add a tablespoon or two of water or broth while reheating.