Posted in One-Pot Meals

Dutch Oven Favorites

There’s something wonderfully satisfying about cooking dinner in a Dutch oven.

Maybe it’s the way a stew slowly simmers until the meat is tender. Maybe it’s the crisp edges on a small batch of cornbread. Or maybe it’s simply knowing that dinner can happen in one sturdy pot instead of filling the kitchen sink with dishes.

For a small household, that last part matters.

A Dutch oven isn’t just a piece of specialty cookware reserved for Sunday roasts or elaborate recipes. A smaller Dutch oven can be one of the most useful tools in the kitchen when you’re cooking for one or two.

This collection brings together Dutch oven recipes and practical one-pot meals from Good Food Good Meat, with an emphasis on simple ingredients, reasonable portions, and meals that make your grocery dollars work harder.


Our Dutch Oven Favorites

Here are the Dutch oven recipes featured in this week’s Weekend Suppers collection.

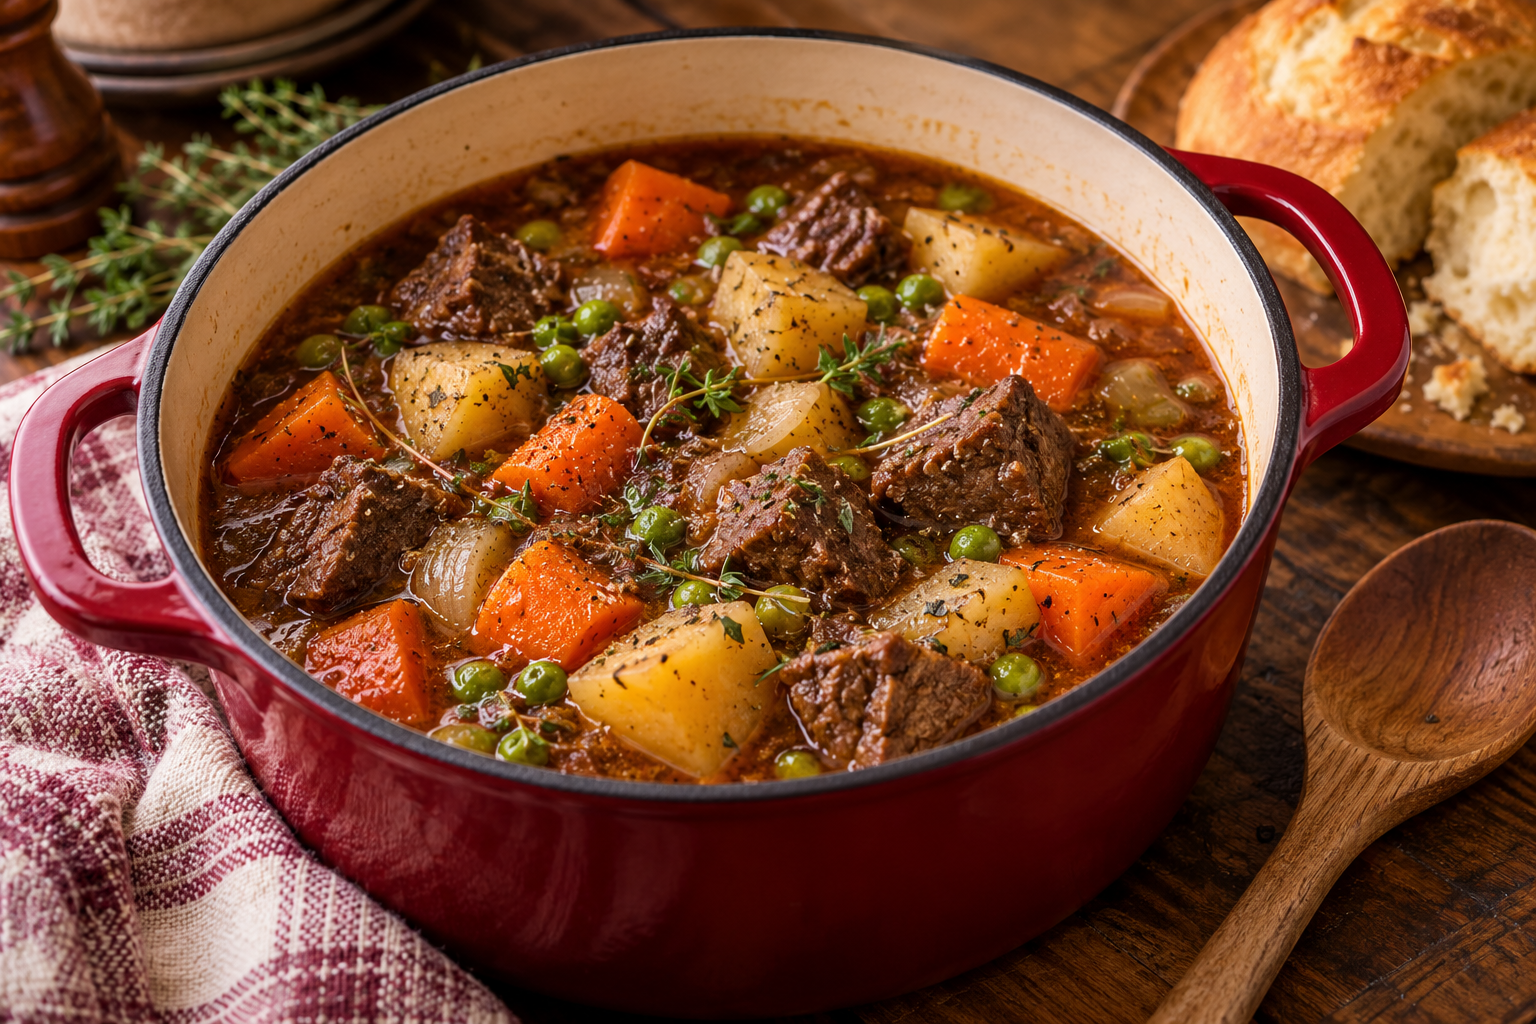
Dutch Oven Beef Stew
There are some meals that just seem to belong to October, and a good beef stew is one of them.
Check out this recipe
The Pantry-to-Pot Formula: Building a One-Pot Meal
Read the Article!
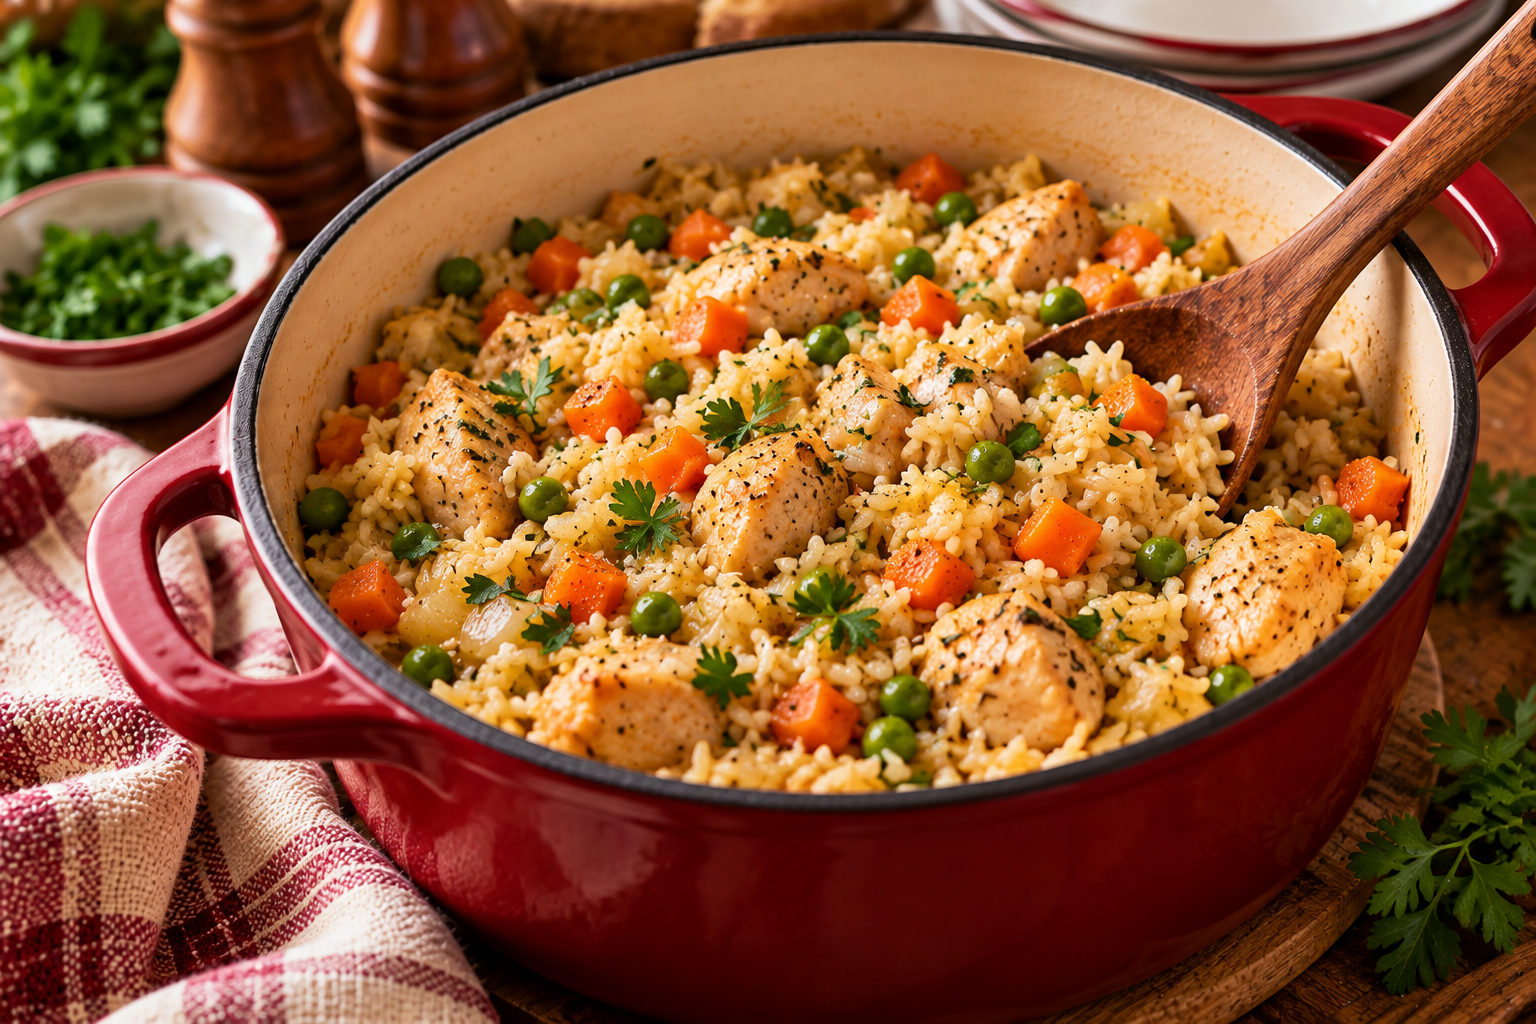
Dutch Oven Chicken & Rice
There is something wonderfully practical about a pot of chicken and rice.
Check out this recipe
Pantry Beans: More Than a Side Dish
Read the Article!
Dutch Oven Cornbread for Two
A pot of soup or stew has a way of asking for cornbread.
Check out this recipe
How to Stretch a Dutch Oven Meal Into Two Suppers
Read the Article!

Why Dutch Oven Cooking Works for Small Households

A good Dutch oven can brown, sauté, simmer, braise, and bake.

That means you can build an entire meal in one pot.

And because Dutch ovens hold heat so well, they’re particularly good for the kinds of meals we tend to crave when the weather gets cooler:

  • Soups
  • Stews
  • Chili
  • Braised meats
  • Chicken and rice
  • Beans
  • One-pot meals
  • Small-batch breads and cornbread

The recipes don’t have to be complicated.

In fact, some of the best Dutch oven meals are built from the simplest ingredients.

Don’t Forget the Second Supper

One of the best things about Dutch oven cooking is that many of these meals can do double duty.

A little planning can turn one cooking session into two suppers.

Try:

  • Beef stew → beef pot pie
  • Chicken and rice → chicken soup
  • Chili → chili baked potatoes
  • Braised chicken → chicken sandwiches or wraps
  • Beans → bean and rice bowls

The goal isn’t to eat the exact same leftovers two nights in a row.

It’s to cook once and make tomorrow easier.

That’s especially valuable when you’re cooking for one or two.

Cooking for One or Two

If you’re used to recipes written for families, Dutch oven cooking may initially seem like a recipe for too much food.

It doesn’t have to be.

Look for smaller Dutch ovens and smaller recipes.

A meal that makes two or four servings can be exactly what you need:

Dinner tonight + lunch tomorrow.

Or:

Dinner tonight + a freezer meal for later.

That’s a much more useful way to think about leftovers than simply trying to avoid them.

And if a recipe makes more than you need, that’s not necessarily a problem. With a little planning, the extra portion can become the starting point for another meal.

A Dutch Oven Is a Pantry Tool

There’s another reason Dutch ovens fit so well with the October Pantry to Table theme.

They make pantry staples useful.

Rice.

Beans.

Potatoes.

Pasta.

Broth.

Canned tomatoes.

Frozen vegetables.

Cornmeal.

A little meat.

These aren’t necessarily exciting ingredients sitting individually on a pantry shelf.

But put them together in a Dutch oven, and they can become dinner.

That’s what a well-stocked pantry is supposed to do.

Build a Meal From What You Have

You don’t always need a recipe to get started.

Remember the Pantry-to-Pot Formula:

Protein + Vegetables + Starch + Liquid + Flavor = One-Pot Meal

Choose a protein.

Add one or two vegetables.

Pick a starch.

Add enough liquid to cook everything properly.

Then season it in a direction you enjoy.

The Dutch oven takes care of the rest.

Once you get comfortable with this way of thinking, you may find yourself looking at the pantry differently.

A can of beans isn’t just a side dish.

A little leftover chicken isn’t necessarily the end of a meal.

And that half bag of rice isn’t just something waiting for a special recipe.

They’re building blocks.

Stretch Every Grocery Dollar

Dutch oven meals are particularly good for budget-conscious cooking because they allow you to use smaller amounts of meat alongside inexpensive ingredients.

A little beef can flavor a stew.

A few ounces of chicken can make a pot of rice more substantial.

Beans can become the main protein or stretch a smaller amount of meat.

Potatoes and grains can turn a modest amount of protein into a satisfying meal.

And because many Dutch oven meals reheat well, one cooking session can take care of more than one meal.

That’s a win for both your grocery budget and your time.

Waste Not, Want Not

Dutch oven cooking also gives you plenty of opportunities to use ingredients before they go to waste.

That extra carrot?

Put it in the stew.

The half onion left from another recipe?

Into the pot.

A handful of frozen peas?

Perfect.

Leftover cooked chicken?

It can become the protein in a completely different one-pot meal.

You don’t have to use every leftover ingredient in every meal. But keeping an eye on what needs to be used first is one of the simplest ways to make your grocery budget work harder.

A Dutch Oven Doesn’t Have to Mean a Giant Meal

This is worth repeating because it’s an easy assumption to make.

Dutch oven recipes don’t have to feed a crowd.

A small Dutch oven is perfectly capable of making:

  • Two servings of stew
  • A small chicken and rice dinner
  • A couple of servings of beans
  • A small batch of cornbread
  • A small casserole
  • A simple fruit crisp

That’s one of the reasons Dutch oven cooking works so well for a small household.

You’re still getting all the benefits of one-pot cooking without committing yourself to leftovers for an entire week.

Weekend Supper

Set the Dutch oven on the stove.

Pull a few things from the pantry.

Use up a couple of vegetables from the refrigerator.

Add a little protein.

Let the pot do the work.

Then sit down and enjoy dinner.

That’s a pretty good weekend supper.

And that’s Pantry to Table.
Posted in One-Pot Meals

Dutch Oven Chicken & Rice

There is something wonderfully practical about a pot of chicken and rice.

You don’t need an expensive cut of meat. You don’t need a long list of ingredients. And you don’t need a pile of dirty dishes afterward.

This Dutch Oven Chicken & Rice is a simple, savory one-pot meal built for a small household. Tender chicken, rice, vegetables, and a flavorful broth cook together until everything is warm, comforting, and satisfying.

It’s also a perfect example of the Pantry-to-Pot Formula we talked about yesterday: choose a protein, add vegetables and a starch, bring everything together with a flavorful liquid, and let one pot do the work.

Why You’ll Love This Recipe

  • One pot does almost everything.
  • It uses inexpensive ingredients that are easy to keep on hand.
  • A small amount of chicken goes a long way when paired with rice and vegetables.
  • It’s naturally suited to cooking for two.
  • It can be adapted to whatever vegetables you have available.
  • Leftovers make an easy second meal.
  • It’s comfort food without being heavy.

Recipe Information

Servings: 2 generous servings
Serving size: About 1½ cups
Prep time: 15 minutes
Cook time: 35–40 minutes
Total time: About 50–55 minutes
Meal category: Dutch Oven Meals / One-Pot Meals
Main protein: Chicken
Estimated calories: Approximately 450–500 calories per serving, depending on the chicken used

simplegoodfood's avatarsimplegoodfood

Dutch Oven Chicken & Rice

There is something wonderfully practical about a pot of chicken and rice.
Prep Time 15 minutes
Cook Time 40 minutes
Total Time 55 minutes
Servings: 2
Course: Dinner, Lunch
Cuisine: American
Calories: 500

Ingredients
  

  • 8 ounces boneless, skinless chicken thighs or chicken breast cut into bite-size pieces
  • 1 tablespoon olive oil
  • ½ small onion diced
  • 1 small carrot diced
  • 1 clove garlic minced
  • ½ cup long-grain white rice uncooked
  • 1¼ cups low-sodium chicken broth
  • ½ teaspoon dried thyme
  • ¼ teaspoon dried parsley
  • ¼ teaspoon paprika
  • ⅛ teaspoon black pepper
  • ¼ teaspoon salt or to taste
  • ½ cup frozen peas
  • 1 teaspoon lemon juice optional
  • 1 tablespoon chopped fresh parsley optional

Method
 

Prepare the chicken
  1. Pat the chicken dry and cut it into bite-size pieces.
  2. Season lightly with the salt, pepper, thyme, and paprika.
Brown the chicken
  1. Heat the olive oil in a small Dutch oven over medium heat.
  2. Add the chicken in a single layer and cook for 3–4 minutes, stirring occasionally, until lightly browned.
  3. The chicken does not need to be completely cooked at this point. It will finish cooking with the rice.
  4. Remove the chicken to a plate and set aside.
Cook the vegetables
  1. Add the onion and carrot to the same Dutch oven.
  2. Cook for 3–4 minutes, stirring occasionally, until the onion begins to soften.
  3. Add the garlic and cook for about 30 seconds.
Add the rice
  1. Stir the uncooked rice into the vegetables.
  2. Cook for about 1 minute, stirring constantly.
  3. This quick step lightly toasts the rice and helps build another layer of flavor.
Add the broth and chicken
  1. Pour in the chicken broth and scrape the bottom of the pot to loosen any browned bits.
  2. Return the chicken and any juices on the plate to the Dutch oven.
  3. Stir in the parsley.
  4. Bring the mixture to a gentle simmer.
Cover and cook
  1. Reduce the heat to low and cover the Dutch oven.
  2. Cook for about 18–20 minutes, or until the rice is tender and most of the liquid has been absorbed.
  3. Avoid repeatedly lifting the lid while the rice cooks. Every time you remove the lid, you lose steam that the rice needs to cook properly.
Add the peas
  1. Stir in the frozen peas during the final 3–5 minutes of cooking.
  2. If desired, add a small squeeze of lemon juice just before serving. It brightens the flavors without making the dish taste lemony.
  3. Let the chicken and rice rest, covered, for about 5 minutes before serving.
  4. Fluff gently with a fork and sprinkle with fresh parsley if you have it.

Notes

Kitchen Confidence
Don’t skip browning the chicken.
You aren’t trying to cook the chicken completely during the first step.
You’re building flavor.
The browned bits left in the bottom of the Dutch oven will become part of the broth once you add the liquid.
Keep the lid on.
Rice is much less forgiving than a stew.
Once the broth is simmering and the lid is on, resist the temptation to keep checking it. Give the rice time to absorb the liquid and cook evenly.
If the rice is still firm when the liquid is nearly gone, add a small splash of broth, cover the pot again, and continue cooking.

Stretch Every Grocery Dollar

Chicken and rice are two of the most useful ingredients in a budget-conscious kitchen.

You don’t need a large amount of chicken to make this a satisfying meal. The rice provides substance while the vegetables add flavor, texture, and nutrition.

Chicken thighs can also be a good choice when they’re less expensive than boneless chicken breast. Remove the skin and any excess fat before cooking if necessary.

And this is exactly the kind of recipe where buying a larger package of chicken when it’s on sale can make sense. Divide it into meal-sized portions and freeze what you won’t use immediately.

Waste Not, Want Not

This recipe is wonderfully flexible when it comes to vegetables.

You can replace the carrot and peas with whatever makes sense in your kitchen.

Try:

  • Frozen mixed vegetables
  • Corn
  • Chopped green beans
  • Diced bell pepper
  • Finely chopped celery
  • A small amount of leftover cooked vegetables

Just remember that vegetables with longer cooking times should go in earlier, while delicate vegetables can be added near the end.

Cooking for One or Two

This recipe makes two generous servings.

If you’re cooking for one, you have two good choices:

Make the recipe as written and save half for tomorrow, or halve the ingredients for a single serving.

For most people, I’d choose the first option.

Cooking once and getting two meals out of it is one of the easiest ways to make home cooking fit into a busy week.

If you halve the recipe, use a very small Dutch oven or heavy saucepan so the rice and liquid remain in a reasonably deep layer.

Meal Prep Note

Chicken and rice is an excellent meal-prep combination.

Divide leftovers into individual containers once the food has cooled.

When reheating, add a tablespoon or two of water or broth before covering and heating. This helps keep the rice from becoming dry.

For best texture, reheat gently rather than blasting it at high heat.

Storage & Freezing

Refrigerate leftovers promptly in a covered container and use within 3–4 days.

Chicken and rice can be frozen, although the rice may become slightly softer after thawing.

For best results, freeze individual portions in airtight freezer containers.

Thaw overnight in the refrigerator and reheat thoroughly before serving.

Easy Variations

Chicken & Vegetable Rice

Add a little extra frozen vegetable mix for a more vegetable-heavy meal.

Garlic Herb Chicken & Rice

Increase the garlic slightly and use thyme, parsley, and a little rosemary.

Creamy Chicken & Rice

Stir a tablespoon or two of plain Greek yogurt into an individual serving after reheating for a creamy finish.

Southwest Chicken & Rice

Use cumin and chili powder instead of thyme and parsley. Add corn and a little diced bell pepper.

You can change the flavor profile without changing the basic cooking method.

What This Recipe Teaches

This little Dutch oven meal is more than just chicken and rice.

It demonstrates why a pantry meal formula is so useful.

You have:

Protein: chicken
Vegetables: carrots and peas
Starch: rice
Liquid: chicken broth
Flavor: garlic, herbs, paprika, and lemon

Put them together in one pot and you have dinner.

That’s Pantry to Table in action.

One More Reason to Love One-Pot Cooking

There’s a practical advantage to one-pot meals that doesn’t get enough attention:

There is less to clean up.

When you’re cooking for one or two people, washing three saucepans, a skillet, a roasting pan, and a casserole dish for one meal gets old quickly.

A Dutch oven lets you brown, sauté, simmer, and serve from the same pot.

Sometimes the best kitchen equipment isn’t the fanciest.

It’s the piece that makes you willing to cook dinner.

Posted in One-Pot Meals, Soups & Stews

Dutch Oven Beef Stew

There are some meals that just seem to belong to October, and a good beef stew is one of them.

This Dutch Oven Beef Stew is the kind of dinner that makes a chilly evening feel a little more welcoming. Tender beef, potatoes, carrots, onions, and a savory broth come together in one pot for a hearty meal without requiring a long list of complicated ingredients.

More importantly, it shows what Pantry to Table is really about: taking a few dependable ingredients you already have on hand and turning them into something that tastes like you planned ahead.

And while a Dutch oven is perfect for this kind of meal, you don’t need an elaborate recipe or a huge family-sized batch. This version is designed with smaller households in mind, so you get a satisfying supper without being buried under a refrigerator full of leftovers.

Why You’ll Love This Recipe

  • One-pot cooking means less cleanup.
  • It’s built around ordinary ingredients that are easy to keep in the pantry or refrigerator.
  • A little beef goes a long way when combined with potatoes and vegetables.
  • It’s perfect for cool-weather cooking.
  • The leftovers can become another supper, making this a particularly good grocery-budget meal.
  • It can be made on the stovetop or finished in the oven, depending on how you like to use your Dutch oven.

Recipe Information

Servings: 2 generous servings
Serving size: About 1½ cups stew
Prep time: 20 minutes
Cook time: 1 hour 30 minutes
Total time: About 1 hour 50 minutes
Meal category: Dutch Oven Meals / Skillet & One-Pot Meals
Main protein: Beef
Estimated calories: Approximately 500–550 calories per serving, depending on the beef used

simplegoodfood's avatarsimplegoodfood

Dutch Oven Beef Stew

There are some meals that just seem to belong to October, and a good beef stew is one of them.
Prep Time 20 minutes
Cook Time 1 hour 30 minutes
Total Time 1 hour 50 minutes
Servings: 2
Course: Dinner, Main Course
Cuisine: American
Calories: 550

Ingredients
  

  • 8 ounces beef stew meat cut into bite-size pieces
  • 1 tablespoon all-purpose flour
  • 1 tablespoon olive oil
  • ½ small onion chopped
  • 1 clove garlic minced
  • 1 medium carrot sliced
  • 1 medium potato peeled and cut into chunks
  • 1 cup low-sodium beef broth
  • 1 tablespoon tomato paste
  • ½ teaspoon dried thyme
  • ¼ teaspoon dried rosemary
  • ¼ teaspoon salt or to taste
  • ⅛ teaspoon black pepper
  • ½ cup frozen peas
  • 1 teaspoon Worcestershire sauce optional

Equipment

  • 1 6 in Dutch Oven

Method
 

Prepare the beef
  1. Pat the beef dry with paper towels. Toss the pieces with the flour, salt, and pepper.
  2. Don’t worry about getting every piece perfectly coated. The small amount of flour will help with browning and will also help thicken the stew as it cooks.
Brown the beef
  1. Heat the olive oil in a small Dutch oven over medium-high heat.
  2. Add the beef in a single layer. Brown for several minutes, turning the pieces so they develop color on more than one side.
  3. Work in batches if necessary. Crowding the pot causes the beef to steam instead of brown.
  4. Remove the beef to a plate and set aside.
Build the base
  1. Reduce the heat to medium.
  2. Add the onion and carrot to the same Dutch oven. Cook for 3–4 minutes, stirring occasionally.
  3. Add the garlic and cook for about 30 seconds.
  4. Stir in the tomato paste and cook for another minute.
Return the beef to the pot
  1. Add the browned beef back to the Dutch oven.
  2. Pour in the beef broth and Worcestershire sauce, if using. Stir well, scraping up the browned bits from the bottom of the pot.
  3. Add the thyme and rosemary.
Add the potatoes
  1. Bring the mixture to a gentle simmer.
  2. Add the potatoes, then reduce the heat to low. Cover and simmer for about 60–75 minutes, or until the beef is tender and the potatoes are cooked through.
  3. Stir occasionally and check the liquid level. If the stew becomes too thick before the beef is tender, add a small amount of broth or water.
Finish with the peas
  1. Stir in the frozen peas during the final 5 minutes of cooking.
  2. Taste and adjust the seasoning if needed.
  3. Let the stew rest for a few minutes before serving. The broth will thicken slightly as it stands.

Notes

Kitchen Confidence

Don’t rush the browning.
The browned bits left on the bottom of the Dutch oven are part of what gives a simple stew its deep flavor. You don’t need to brown the beef until it’s cooked through — you’re simply developing color on the outside.
And don’t panic if the pot looks a little messy after browning. Once you add the broth, those flavorful browned bits become part of the sauce.
A Dutch oven doesn’t have to mean an enormous batch of food.
A smaller Dutch oven works beautifully for cooking for one or two. The heavy pot holds heat well and gives you the advantages of one-pot cooking without requiring a six-quart recipe.

Stretch Every Grocery Dollar

Beef stew is a great example of how to make a modest amount of meat feed more people.

You don’t need a pound or two of beef for two people. Eight ounces of beef combined with potatoes, carrots, onions, and peas makes a substantial meal.

If stew meat is expensive at your grocery store, look for a small chuck roast on sale and cut it into cubes yourself. You can also freeze the extra beef in meal-sized portions for another Dutch oven dinner.

And don’t automatically discard the vegetables in the bottom of the refrigerator. A little celery, a few mushrooms, or leftover frozen vegetables can all find a home in a stew.

Waste Not, Want Not

This is one of those meals where odds and ends can be useful.

Have half an onion left from another recipe? Use it.

A lonely carrot in the refrigerator? Into the stew it goes.

A handful of frozen peas? Perfect.

You can even substitute some of the potato with another sturdy vegetable such as turnip or rutabaga.

The goal isn’t to make the stew exactly the same every time. It’s to use what you have before buying more.

Cooking for One or Two

For one person, divide the finished stew into two portions and save one for another meal.

You can also make the full recipe for two and plan ahead for leftovers. A second serving reheats beautifully and may actually taste better the next day.

If you prefer truly single-serving cooking, halve all the ingredients and use a very small Dutch oven or heavy saucepan with a lid.

Meal Prep Note

This is an excellent make-ahead meal.

Cool leftover stew promptly and refrigerate it in a covered container. When reheating, add a splash of broth or water if the gravy has thickened too much.

For meal prep, portion the stew into individual containers so you have a ready-made supper waiting for you.

Storage & Freezing

Refrigerate leftovers for up to 3–4 days.

For longer storage, freeze cooled stew in individual portions for up to 3 months for best quality.

Potatoes can soften somewhat after freezing and thawing, but the stew will still be delicious. If you know ahead of time that you’re freezing the entire batch, slightly undercook the potatoes.

Thaw overnight in the refrigerator and reheat gently on the stovetop or in the microwave.

A Little More From the Dutch Oven

This stew is the first example in this week’s Dutch Oven & One-Pot Pantry Meals theme.

The real lesson isn’t simply how to make beef stew. It’s how useful one-pot cooking can be when you’re cooking for a small household.

A Dutch oven lets you brown, simmer, and finish a meal in the same pot. That means fewer dishes, fewer specialty ingredients, and plenty of opportunity to use what you already have.

That’s exactly where Pantry to Table begins.

Posted in One-Pot Meals

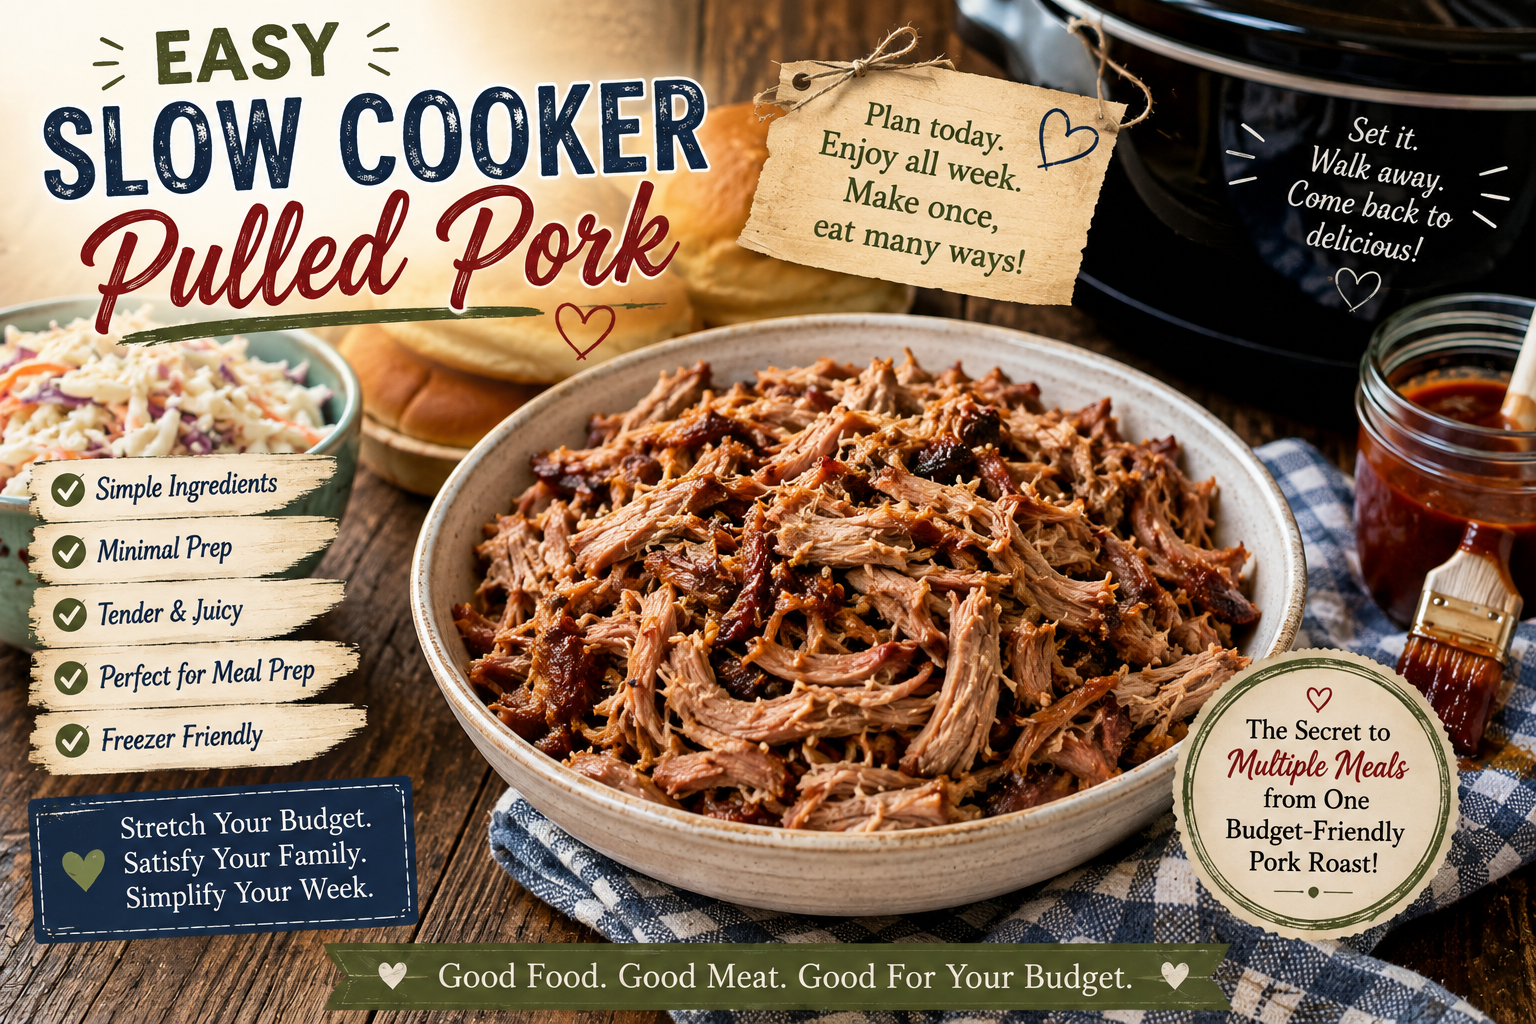
Easy Slow Cooker Pulled Pork

Some recipes feel almost magical, and this is one of them. With just a few minutes of preparation, an inexpensive pork shoulder transforms into tender, flavorful pulled pork that can become several different meals throughout the week.

Whether you’re feeding a family, cooking for one, or planning meals for two, this recipe proves that a little planning goes a long way. It’s nearly impossible to mess up, freezes beautifully, and is one of the best ways to stretch your grocery budget.

This recipe is also the perfect place to begin building kitchen confidence. You don’t need fancy equipment or years of cooking experience—just a slow cooker, a handful of simple ingredients, and a little patience.


❤️ Why You’ll Love This Recipe

  • Budget-friendly and economical
  • Beginner-friendly with minimal prep
  • Great for meal prep and freezer meals
  • Makes several different meals from one roast
  • Perfect for campers, busy families, retirees, and small households

simplegoodfood's avatarsimplegoodfood

Easy Slow Cooker Pulled Pork

Some recipes feel almost magical, and this is one of them.
Prep Time 10 minutes
Cook Time 10 hours
Total Time 10 hours 10 minutes
Servings: 8
Course: Dinner, Main Course
Cuisine: American
Calories: 325

Ingredients
  

  • 3 –4 pound boneless pork shoulder Boston Butt
  • 1 medium onion sliced
  • 3 cloves garlic minced
  • 1 cup low-sodium chicken broth
  • 2 tablespoons apple cider vinegar
  • 2 tablespoons brown sugar
  • 1 tablespoon smoked paprika
  • 2 teaspoons garlic powder
  • 2 teaspoons onion powder
  • 1 teaspoon kosher salt
  • ½ teaspoon black pepper
  • 1 teaspoon Worcestershire sauce
Optional for serving:
  • Your favorite BBQ sauce
  • Hamburger buns
  • Coleslaw
  • Pickles

Method
 

  1. Place the sliced onions in the bottom of the slow cooker.
  2. Set the pork shoulder on top of the onions.
  3. In a small bowl, combine the smoked paprika, garlic powder, onion powder, salt, pepper, and brown sugar. Rub the mixture over the pork.
  4. Pour the chicken broth, apple cider vinegar, Worcestershire sauce, and garlic around the roast.
  5. Cover and cook on Low for 8–10 hours or High for 5–6 hours, until the pork easily falls apart with a fork.
  6. Remove the pork to a large bowl or cutting board.
  7. Using two forks, shred the meat into bite-sized pieces.
  8. Return the shredded pork to the slow cooker and stir it into the cooking juices.
  9. Serve immediately or cool for meal prep.

Notes

🧺 Kitchen Confidence
This Week’s Skill: The Easiest Way to Shred Cooked Meat
Here’s a little kitchen shortcut that can save both time and effort.
After the pork has finished cooking, remove it from the slow cooker and cut it into a few large chunks while it’s still warm. Place the chunks in a large mixing bowl.
Using either a stand mixer fitted with the paddle attachment or a hand mixer, mix on low speed for 30–60 seconds. The meat will quickly shred into perfect, even pieces with very little work.
This trick works beautifully for pulled pork, shredded chicken, and even cooked beef roasts.
Tip: Don’t overmix. Stop as soon as the meat reaches the texture you like.
💰 Stretch Every Grocery Dollar
Pork shoulder is one of the best values in the meat department. Watch for sales and compare the price per pound, not just the package price. Buying a larger roast often costs less per pound and gives you several meals for only a little more money.
♻️ Waste Not, Want Not
Plan ahead by dividing the finished pulled pork into meal-sized containers.
This week’s menu turns one roast into:
  • BBQ Pulled Pork Sandwiches
  • BBQ Pulled Pork Rice Bowls
  • Sweet & Tangy Pork & Veggie Rice Bowls
  • Loaded BBQ Pork Baked Potatoes
You may even have enough left for the freezer.
🍽️ Cooking for One or Two
A large roast might seem like too much, but it’s actually one of the smartest purchases for a small household.
Enjoy pulled pork for dinner tonight, refrigerate a couple of portions for lunches, and freeze the remaining servings in individual containers. Future you will appreciate having a homemade meal ready to reheat on busy days.
🥣 Meal Prep Note
This recipe is the foundation for several meals throughout the week. Cook a batch of rice while the pork finishes, and you’ll already be halfway to tomorrow’s rice bowl. If you’re planning to make homemade coleslaw later in the week, pick up a fresh cabbage during this shopping trip.
Storage & Freezing
Refrigerator: Store in an airtight container for up to 4 days.
Freezer: Freeze in meal-sized portions for up to 3 months. For the best results, freeze with a little of the cooking juices to help keep the meat moist when reheated.
Reheating: Warm gently on the stovetop, in the microwave, or in a slow cooker with a splash of broth if needed.
Posted in One-Pot Meals

Dutch Oven Beef & Vegetable Stew

Nothing says campground comfort quite like a hearty pot of Dutch Oven Beef & Vegetable Stew simmering over the fire. Tender chunks of beef, colorful vegetables, and a rich, savory broth come together in one pot for a meal that’s both satisfying and surprisingly simple.

Sized for four servings, it’s perfect for solo campers who enjoy leftovers or couples looking for an easy dinner with lunch ready for the next day.

simplegoodfood's avatarsimplegoodfood

Dutch Oven Beef & Vegetable Stew

Nothing beats a Dutch oven simmering over the campfire!
Prep Time 15 minutes
Cook Time 3 hours 15 minutes
Total Time 1 hour 30 minutes
Servings: 4
Course: Dinner, Main Course
Cuisine: American
Calories: 430

Ingredients
  

  • 1 pound beef stew meat cut into bite-sized pieces
  • 1 tablespoon olive oil
  • 1 small onion chopped
  • 2 cloves garlic minced
  • 2 carrots sliced
  • 2 celery stalks sliced
  • 2 medium Yukon Gold potatoes cut into 1-inch cubes
  • 1 cup green beans trimmed and cut into 2-inch pieces
  • 2 tablespoons tomato paste
  • 3 cups low-sodium beef broth
  • 1 teaspoon Worcestershire sauce
  • 1 teaspoon dried thyme
  • 1 teaspoon dried parsley
  • ½ teaspoon smoked paprika
  • 1 bay leaf
  • 1 tablespoon cornstarch
  • 2 tablespoons cold water
  • Salt and black pepper to taste

Method
 

  1. Heat the olive oil in a Dutch oven over medium-high heat.
  2. Brown the beef in batches for 4–5 minutes. Remove and set aside.
  3. Add the onion and celery and cook for about 4 minutes until softened.
  4. Stir in the garlic and tomato paste. Cook for 1 minute.
  5. Return the beef to the pot.
  6. Add the broth, Worcestershire sauce, thyme, parsley, smoked paprika, and bay leaf.
  7. Bring to a gentle boil, then reduce to a simmer. Cover and cook for 40 minutes.
  8. Add the carrots and potatoes. Simmer for another 20 minutes.
  9. Stir in the green beans and cook for 10 more minutes.
  10. Mix the cornstarch and cold water until smooth. Stir into the stew and simmer for 2–3 minutes until slightly thickened.
  11. Remove the bay leaf, season to taste, and serve hot.

Notes

Easy Substitutions
  • Beef: Chuck roast cut into cubes works beautifully if stew meat isn’t available.
  • Potatoes: Red potatoes or baby potatoes hold their shape well.
  • Green Beans: Frozen green beans can be added during the last 10 minutes.
  • Vegetables: Add peas, mushrooms, corn, or parsnips depending on what you have on hand.
  • Broth: Beef stock creates a richer flavor than broth if available.
Camp Cook’s Tips
  • Browning the beef first adds tremendous flavor to the finished stew.
  • Keep the Dutch oven covered to retain moisture while simmering.
  • If cooking over a campfire, maintain a bed of hot coals instead of high flames for even cooking.
  • Taste before adding extra salt since the broth and Worcestershire already contribute seasoning.
Serving Suggestions
  • Crusty French bread
  • Buttermilk biscuits
  • Cornbread
  • Side salad
  • Fresh fruit for dessert
Storage
Cool leftovers before refrigerating in an airtight container for up to 3 days.
Reheat gently over medium-low heat, adding a splash of broth if needed.
🥪 Leftover Lunch Idea
Warm a bowl for lunch, or spoon the leftover stew over a baked potato or cooked egg noodles for a completely different meal.

#GoodFoodGoodMeat, #SimplePracticalMeals, #RealFoodRealLife,
#SummerCampgroundMeals, #CookingForOneOrTwo,

#DutchOvenCooking, #BeefStew, #CampgroundCooking, #CampfireMeals, #OnePotDinner, #RVRecipes, #OutdoorCooking, #ComfortFood, #EasyCampingMeals, #DutchOvenRecipes, #BeefRecipes, #CampingLife,

Posted in One-Pot Meals

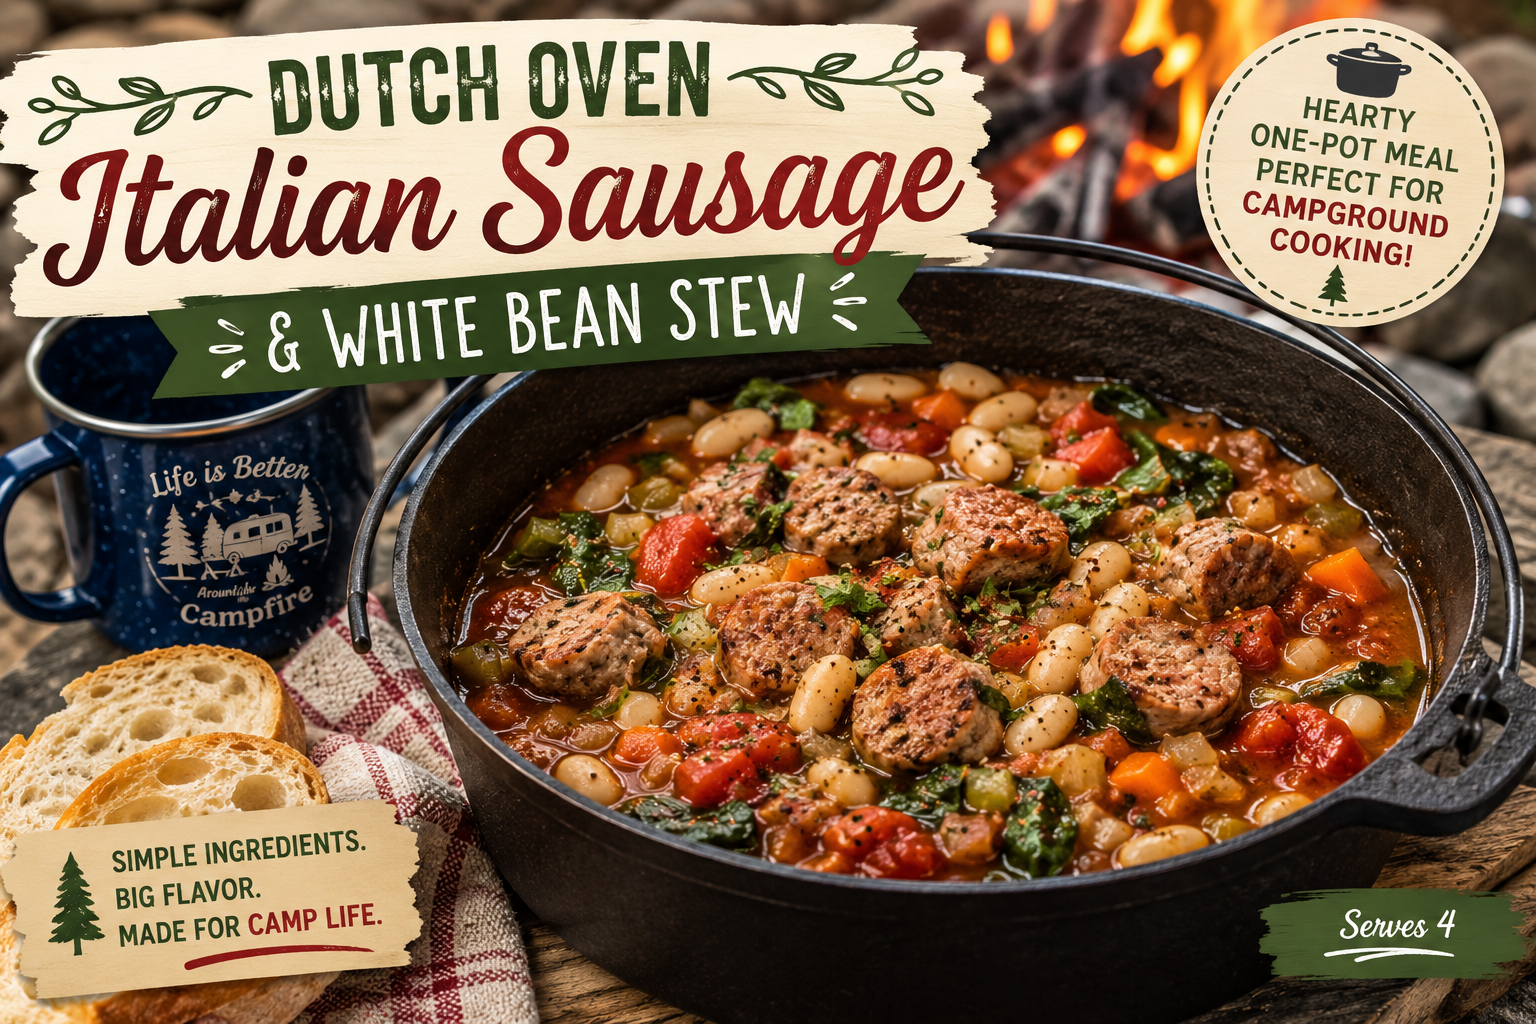
Dutch Oven Italian Sausage & White Bean Stew

Nothing says campground comfort quite like a hearty Dutch oven simmering over the fire. This Dutch Oven Italian Sausage & White Bean Stew combines savory Italian sausage, tender vegetables, creamy white beans, and tomatoes into a rich, satisfying meal that’s easy to make whether you’re cooking over campfire coals or on a camp stove.

It’s filling enough to satisfy hungry campers while using simple pantry staples that are easy to pack. Serve with crusty bread or biscuits to soak up every last spoonful.

simplegoodfood's avatarsimplegoodfood

Dutch Oven Italian Sausage & White Bean Stew

Nothing says campground comfort quite like a hearty Dutch oven simmering over the fire.
Prep Time 15 minutes
Cook Time 40 minutes
Total Time 55 minutes
Servings: 4
Course: Dinner, Main Course
Cuisine: American
Calories: 430

Ingredients
  

  • 1 pound Italian sausage mild
  • 1 tablespoon olive oil if needed
  • 1 medium onion diced
  • 2 carrots sliced
  • 2 celery stalks sliced
  • 3 cloves garlic minced
  • 1 teaspoon Italian seasoning
  • ½ teaspoon dried oregano
  • ¼ teaspoon crushed red pepper flakes optional
  • 2 15-ounce cans cannellini or Great Northern beans, drained and rinsed
  • 1 14.5-ounce can diced tomatoes
  • 3 cups low-sodium chicken broth
  • 2 cups baby spinach
  • Salt and black pepper to taste
  • Fresh parsley or grated Parmesan for garnish optional

Method
 

  1. Heat the Dutch oven over medium heat or campfire coals.
  2. Brown the Italian sausage, breaking it into bite-sized pieces.
  3. Add onion, carrots, and celery. Cook for about 5 minutes until beginning to soften.
  4. Stir in garlic, Italian seasoning, oregano, and red pepper flakes. Cook 1 minute.
  5. Add beans, diced tomatoes with their juices, and chicken broth.
  6. Bring to a gentle boil.
  7. Reduce heat and simmer for 25–30 minutes until vegetables are tender.
  8. Stir in spinach during the final 2–3 minutes until wilted.
  9. Taste and season with salt and pepper.
  10. Garnish with parsley or Parmesan if desired.

Notes

Serving Suggestions
Serve with:
  • Crusty French bread
  • Dutch oven biscuits
  • Garlic toast
  • Small side salad
  • Fresh fruit for dessert
Storage
Refrigerate leftovers for up to 3 days.
Reheat gently on the stove or over the campfire.

#GoodFoodGoodMeat, #SummerCampgroundMeals, #DutchOvenCooking, #CampgroundCooking, #CampfireMeals, #CampingRecipes, #OnePotMeals, #EasyCampingMeals, #RVLiving, #CampingLife, #OutdoorCooking, #SimpleMeals, #ComfortFood, #ItalianSausage, #BeanStew, #CampCooking, #FamilyCamping, #WeekendCamping, #BudgetFriendlyMeals, #RealFoodRealLife,