Posted in Soups & Stews

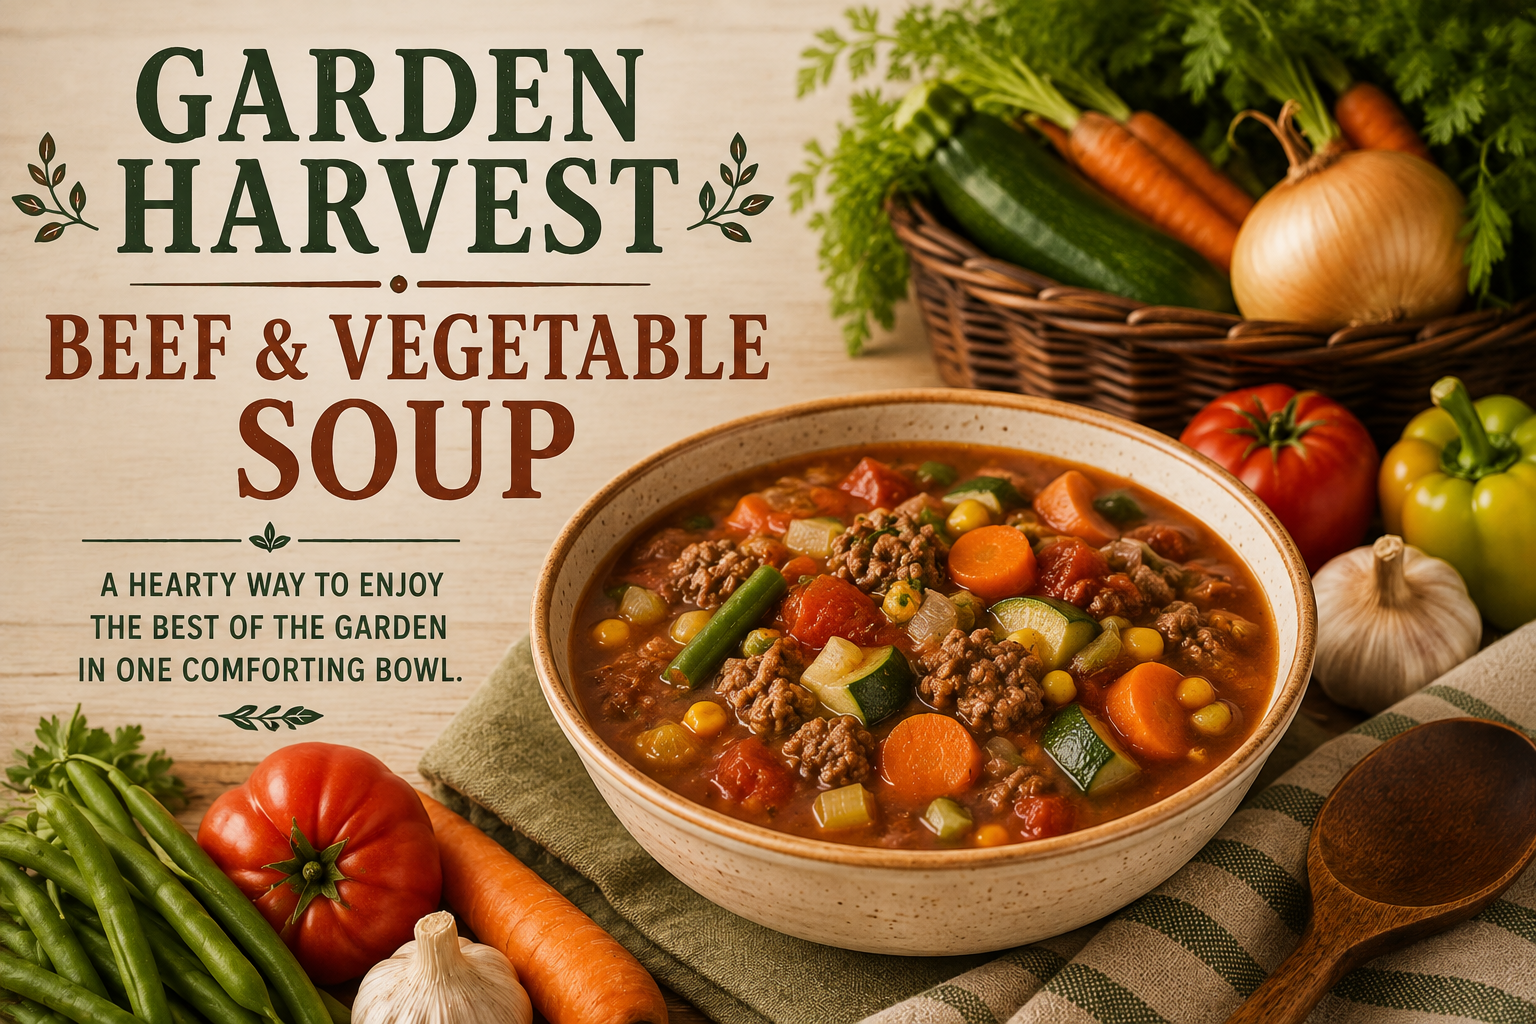
Garden Harvest Beef & Vegetable Soup

There is something wonderfully practical about a pot of vegetable soup.

You don’t need a special occasion or an elaborate recipe. You need some ground beef, a handful of vegetables, a little broth, and a pot big enough to bring everything together.

This Garden Harvest Beef & Vegetable Soup is especially good for that transition from summer into fall. It makes good use of the vegetables that are still plentiful at the end of the growing season while giving us our first taste of cozy soup weather.

Use fresh vegetables from the garden or farmers market when you have them. Use frozen vegetables when that’s what you’ve got. And if you have a few odds and ends tucked away in the refrigerator, this is a great place for them, too.

That’s the spirit behind this month’s Harvest & Putting Things Back theme: enjoy what is plentiful today, and make a little extra while you’re at it.

This soup freezes beautifully, making it an easy way to put a few servings back for another day.

simplegoodfood's avatarsimplegoodfood

Garden Harvest Beef & Vegetable Soup

There is something wonderfully practical about a pot of vegetable soup.
Prep Time 10 minutes
Cook Time 25 minutes
Total Time 35 minutes
Servings: 4
Course: Dinner, Lunch, Soup
Cuisine: American
Calories: 330

Ingredients
  

  • 1/2 pound lean ground beef
  • 1 small onion diced
  • 2 cloves garlic minced
  • 2 medium carrots sliced
  • 2 celery stalks sliced
  • 1 medium zucchini diced
  • 1 cup fresh or frozen green beans cut into bite-sized pieces
  • 1 cup corn fresh or frozen
  • 1 can 14.5 ounces diced tomatoes, with juices
  • 4 cups low-sodium beef broth
  • 1 teaspoon Italian seasoning
  • 1/2 teaspoon dried parsley
  • 1/4 teaspoon black pepper
  • 1 tablespoon Worcestershire sauce
  • Salt to taste
  • 1 tablespoon olive oil if needed

Method
 

Brown the beef.
  1. Heat a large soup pot or Dutch oven over medium heat. Add the ground beef and cook, breaking it into small pieces, until no longer pink. Drain excess fat if necessary.
Add the aromatics.
  1. Add the onion and celery to the pot. Cook for 3–4 minutes, until the onion begins to soften. Add the garlic and cook for about 30 seconds.
Build the soup.
  1. Add the carrots, zucchini, green beans, corn, and diced tomatoes with their juices.
Add the broth and seasonings.
  1. Pour in the beef broth. Stir in the Italian seasoning, parsley, black pepper, and Worcestershire sauce.
Simmer.
  1. Bring the soup to a gentle boil, then reduce the heat and cover. Simmer for about 20–25 minutes, or until the vegetables are tender.
Taste and adjust.
  1. Taste the broth and add salt as needed. If you prefer a thinner soup, add a little more broth or water.
Serve.
  1. Ladle into bowls and serve hot with crusty bread, crackers, or a simple side salad.

Notes

🌾 Make It Your Own
This is one of those recipes where the vegetable drawer gets a vote.
Try swapping in:
  • Green peas for some of the corn
  • Cabbage for some of the zucchini
  • Diced potatoes for the carrots
  • Spinach stirred in during the last few minutes
  • Mushrooms for some of the zucchini
  • Fresh tomatoes in place of canned tomatoes
You can also use ground turkey instead of beef if that’s what you have available.

🧊 Put a Little Back

This soup is an excellent freezer meal.

Let the soup cool, portion it into freezer-safe containers, label it with the name and date, and freeze.

For one or two people, freezing individual portions means you don’t have to thaw an entire pot just to have soup for lunch.

Important canning note: Although this soup is suitable for freezing, don’t assume a freezer soup recipe is automatically safe for home canning. Because it contains meat and vegetables, any version you intend to pressure-can should be based on a tested, approved canning recipe rather than adapting this recipe yourself.

That’s an important part of putting food back: preserve it in a way that’s both practical and safe.

🥄 Serving Suggestions

Serve with:

  • Whole-grain bread
  • A small green salad
  • Crackers
  • Toasted cornbread

Or simply enjoy a bowl on its own. With beef, vegetables, and broth all in one pot, you’ve already got a pretty complete meal.

Posted in Monthly Introductions

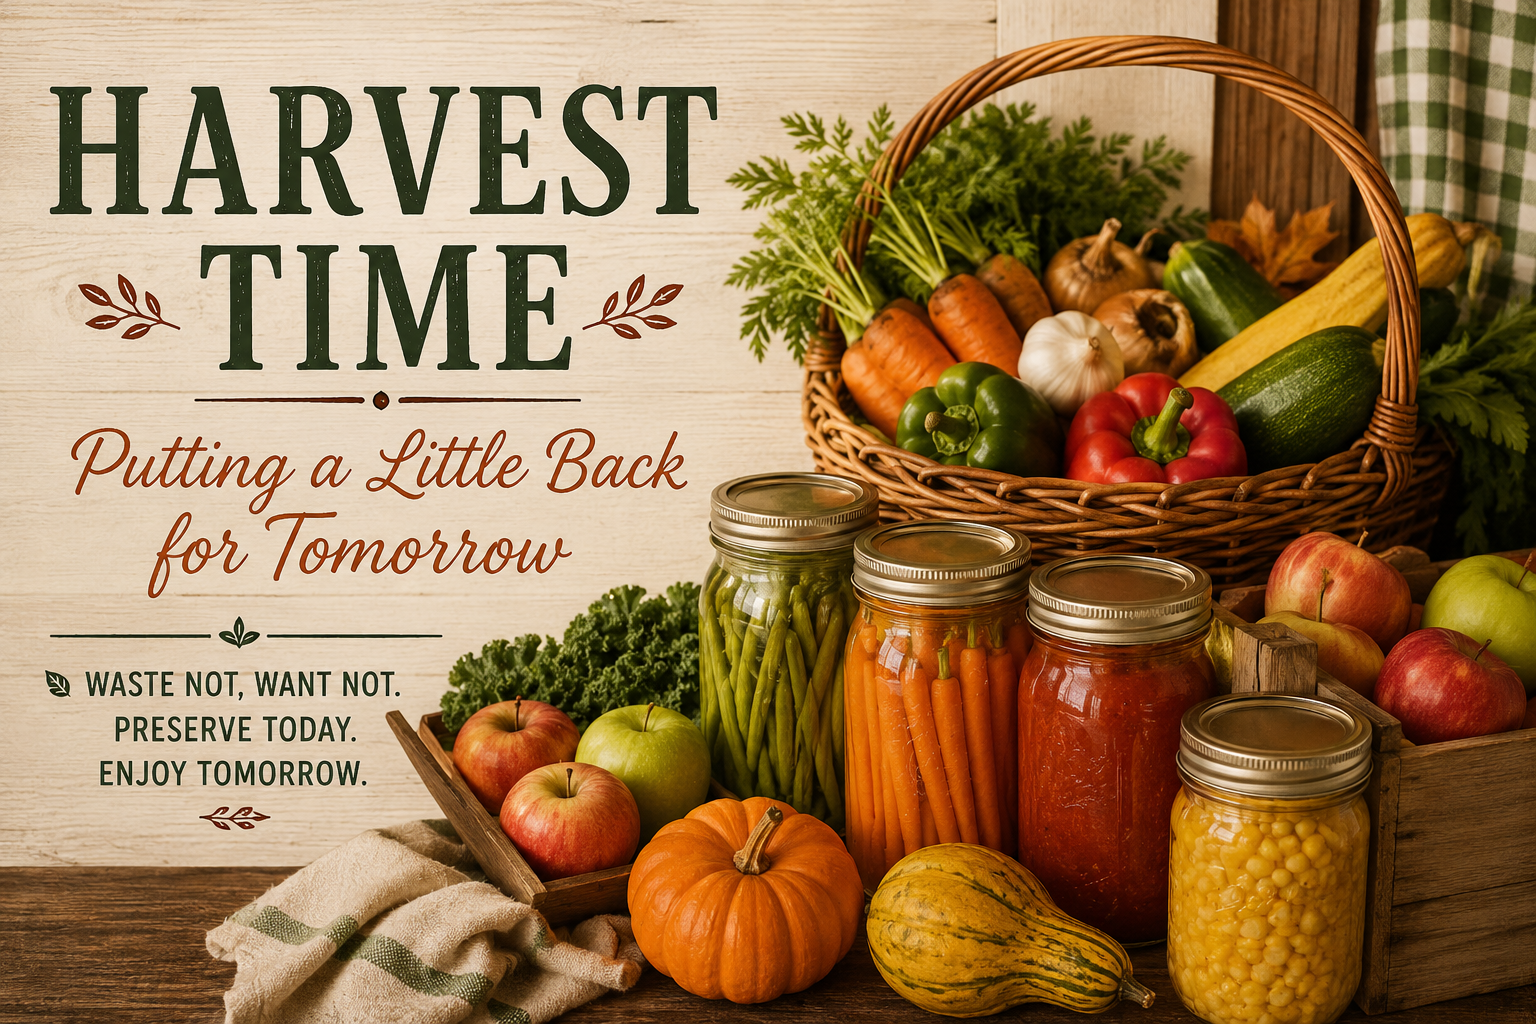
Harvest Time: Putting a Little Back for Tomorrow

There is something special about September.

The gardens are still giving us tomatoes, peppers, green beans, zucchini, and corn. Apples are beginning to show up at roadside stands. Farmers markets are overflowing with the last big harvests of summer while the first signs of autumn are starting to appear.

When I was growing up, this was the time of year when people started thinking about putting a little something back.

Saturday mornings might mean a trip to the farmers market. A roadside stand might have a bushel of peaches or tomatoes for a good price. A neighbor might have more green beans or zucchini than their family could possibly eat.

And then came the family canning days.

There would be jars lined up on the counter, vegetables being prepared, pots simmering, and shelves slowly filling with food that had been gathered while it was plentiful.

It wasn’t about filling every shelf to overflowing.

It was about being practical.

Put a little back while it’s available.

That idea still makes sense today, even if our kitchens—and our lives—look very different.

Maybe you don’t have a garden.

Maybe your harvest comes from a farmers market, a roadside stand, a grocery-store sale, or a surprisingly good deal at Costco.

Maybe putting food back means freezing a few portions instead of canning dozens of jars. Maybe it means dehydrating vegetables, making a soup starter, or simply buying extra of something you know you’ll use later.

The method isn’t really the point.

The principle is.

When something is plentiful and affordable, we can make today’s abundance work a little harder for us tomorrow.

And that’s what September will be about here at Good Food Good Meat.

We’ll talk about preserving the season, stretching a grocery bargain, using what we already have, and building a practical pantry one small step at a time.

We’ll also keep things sensible. Safe food preservation matters, so when we’re talking about canning, we’ll point you toward tested recipes and guidance from the USDA and National Center for Home Food Preservation rather than asking you to guess at a method.

Because putting food back shouldn’t feel overwhelming.

It doesn’t have to mean buying a pressure canner and spending an entire weekend filling jars.

Sometimes it can be as simple as freezing those extra peppers before they go bad.

Or drying a few carrots.

Or making one extra batch of soup.

Or putting one useful jar on the pantry shelf.

🫙 One Thing at a Time

That’s why we’re adding a new September feature: Pantry Builder.

Each week, we’ll choose one practical thing to put back.

Not twenty things.

Just one.

By the end of the month, you may not have a perfectly stocked pantry—and that’s not the goal.

You’ll simply have a few more useful things waiting for you when you need them.

Because there’s something comforting about knowing that tomorrow’s dinner doesn’t always have to start with tomorrow’s grocery trip.

September is a reminder that abundance is temporary.

But with a little planning, some of today’s abundance can become tomorrow’s comfort.

So let’s enjoy the harvest while it’s here—and put a little back for later. 🌾

Today’s plenty can become tomorrow’s peace of mind.

Posted in Skillet Meals

Garden Vegetable Pasta Toss

Introduction

Sometimes the refrigerator doesn’t need another shopping trip.

It needs a little attention.

A zucchini that’s been waiting patiently in the vegetable drawer. A handful of mushrooms. Some green beans. A carrot or two. Maybe a little spinach that’s getting close to the end of its useful life.

That’s where Garden Vegetable Pasta Toss comes in.

This isn’t a recipe that requires you to have exactly the right vegetables. It’s a framework for turning the vegetables you already have into a simple pasta dinner.

The vegetables are sautéed until tender-crisp, tossed with pasta and a light garlic-herb sauce, and finished with Parmesan and fresh herbs.

It’s colorful, satisfying, inexpensive, and — perhaps most importantly — flexible.

Because sometimes the best ingredient in the kitchen is the one you already bought.

Why You’ll Love This Recipe

  • It’s a refrigerator-cleanout meal without feeling like one.
  • You can use almost any combination of vegetables.
  • It’s inexpensive and naturally meatless.
  • One pot of pasta and one skillet handle most of the work.
  • It can be served warm or at room temperature.
  • It’s easy to scale for one or two people.
  • The vegetables can be prepped ahead, making tomorrow’s dinner easier.
simplegoodfood's avatarsimplegoodfood

Garden Vegetable Pasta Toss

This isn't a recipe that requires you to have exactly the right vegetables. It's a framework for turning the vegetables you already have into a simple pasta dinner.
Prep Time 15 minutes
Cook Time 15 minutes
Total Time 30 minutes
Servings: 4
Course: Dinner, Lunch, Main Course
Cuisine: American
Calories: 390

Ingredients
  

  • 8 ounces pasta such as penne, rotini, or bow ties
  • 1 tablespoon olive oil
  • 1 small onion diced
  • 2 medium carrots thinly sliced
  • 1 cup sliced mushrooms
  • 1 cup green beans cut into bite-sized pieces
  • 1 medium zucchini diced
  • 2 cloves garlic minced
  • ½ teaspoon dried basil
  • ½ teaspoon dried parsley
  • ¼ teaspoon dried thyme
  • ½ teaspoon salt or to taste
  • ¼ teaspoon black pepper
  • ½ cup low-sodium vegetable broth
  • 1 tablespoon lemon juice
  • ¼ cup grated Parmesan cheese
  • 2 tablespoons chopped fresh parsley
Optional Additions
  • 1 cup fresh spinach
  • ½ cup frozen peas
  • leftover cooked corn
  • chopped bell pepper
  • roasted vegetables
  • cherry tomatoes
  • cooked chicken or turkey

Method
 

Cook the Pasta
  1. Bring a large pot of salted water to a boil.
  2. Cook the pasta according to the package directions until just tender.
  3. Before draining, reserve ½ cup of the pasta water.
  4. Drain the pasta and set aside.
Start With the Firm Vegetables
  1. While the pasta cooks, heat the olive oil in a large skillet over medium heat.
  2. Add the onion and carrots.
  3. Cook for 3–4 minutes, stirring occasionally.
  4. Add the green beans and mushrooms.
  5. Continue cooking for another 3–4 minutes.
Add the Quick-Cooking Vegetables
  1. Add the zucchini.
  2. Cook for 2–3 minutes, stirring occasionally.
  3. The vegetables should be tender but still have some texture.
  4. If you’re using bell peppers, peas, or other vegetables, add them according to how quickly they cook.
Add the Garlic and Herbs
  1. Add the garlic, basil, parsley, thyme, salt, and black pepper.
  2. Cook for about 30 seconds, just until fragrant.
Make the Light Sauce
  1. Pour the vegetable broth into the skillet.
  2. Add the lemon juice.
  3. Stir and allow the mixture to simmer for 1–2 minutes.
  4. The broth isn’t supposed to make a heavy sauce. It’s simply there to bring the flavors together and give the pasta a little moisture.
Toss Everything Together
  1. Add the drained pasta to the skillet.
  2. Toss gently until the pasta is coated with the vegetables and pan juices.
  3. If the mixture seems dry, add a tablespoon or two of the reserved pasta water.
  4. Continue tossing until everything is heated through.
Finish the Pasta
  1. Remove the skillet from the heat.
  2. Add the Parmesan cheese and fresh parsley.
  3. Toss again.
  4. Taste and adjust the seasoning.
  5. Serve warm.

🌿 Kitchen Confidence: Cook Vegetables in the Right Order

One of the easiest ways to improve a vegetable pasta dish is to stop treating every vegetable the same.

Some vegetables need more time.

Some need almost none.

For this recipe:

Carrots and onions go in first.

Green beans and mushrooms come next.

Zucchini goes in toward the end.

Spinach only needs a minute or two.

That simple change means you can have vegetables that are cooked through without turning everything into one soft, indistinguishable mixture.

And that matters.

Good vegetable dishes should still taste like vegetables.

The Refrigerator-Cleanout Rule

The beauty of this recipe is that you don’t need all five vegetables listed above.

Think of the recipe as a starting point.

You need:

Pasta + vegetables + a little liquid + seasoning.

That’s the basic formula.

If you have zucchini but no green beans, use zucchini.

If the mushrooms need to be used, add them.

If you’ve got leftover cooked broccoli, toss it in near the end.

If you have spinach that needs attention, add it just before the pasta.

The goal isn’t to make the vegetables match the recipe.

The goal is to make the recipe work for the vegetables you have.

Cook Today, Make Tomorrow Easier

This recipe can also become a small meal-prep project without really feeling like one.

If you’re already washing and chopping vegetables for dinner, chop a little extra.

If you’re already cooking pasta, make enough for another meal.

Store the extra cooked vegetables separately or refrigerate the finished pasta for another day.

You can even prepare a container of sautéed vegetables and freeze them as a meal starter for a future pasta dish, soup, or skillet meal.

That’s the whole philosophy we’ve been working with this week:

Do a little more while you’re already in the kitchen.

Make It Your Own

Add Protein

If you want a heartier meal, add:

  • leftover cooked chicken
  • turkey
  • cooked shrimp
  • white beans
  • chickpeas

Change the Pasta

Almost any medium-sized pasta works.

Try:

  • rotini
  • penne
  • bow ties
  • shells
  • whole-wheat pasta
  • chickpea pasta

Change the Flavor

For an Italian-style version, add extra basil and Parmesan.

For a brighter summer version, add more lemon and fresh parsley.

For a heartier fall version, try roasted carrots, mushrooms, and spinach.

The basic method stays the same.

Storage

Store leftovers in a covered container in the refrigerator.

Use within 3–4 days.

When reheating, add a splash of water or vegetable broth if the pasta has dried out.

For best texture, gently reheat in a skillet rather than overheating it in the microwave.

Posted in Skillet Meals

Beef Fried Rice

Introduction

Fried rice is one of those meals that can make you feel like you planned ahead even when you really didn’t.

A little cooked beef left from another meal. Some rice in the refrigerator. A few vegetables that need to be used.

Suddenly, dinner is handled.

This Beef Fried Rice is intentionally flexible. It’s a great way to use leftover cooked beef and rice, along with whatever vegetables are hanging around the refrigerator.

And that’s exactly what makes it such a good fit for Cooking Today, Planning for Tomorrow.

The beef doesn’t have to come from one particular recipe. Leftover beef from a skillet, rice bowl, roast, or meal-prep session can all find a second life here.

It’s not really leftovers anymore.

It’s dinner.

Why You’ll Love This Recipe

  • It’s ready in about 25 minutes.
  • Leftover cooked beef does the heavy lifting.
  • Day-old rice works beautifully.
  • It’s an excellent refrigerator clean-out meal.
  • The seasoning is savory without being overly spicy.
  • You can easily make two servings instead of four.
  • It’s perfect for an electric skillet or regular skillet at the campground.
simplegoodfood's avatarsimplegoodfood

Beef Fried Rice

Fried rice is one of those meals that can make you feel like you planned ahead even when you really didn't.
Prep Time 10 minutes
Cook Time 15 minutes
Total Time 25 minutes
Servings: 4
Course: Dinner, Lunch, Main Course
Cuisine: American
Calories: 500

Ingredients
  

  • 2 cups cooked lean beef chopped into small pieces
  • 3 cups cold cooked rice
  • 1 tablespoon olive oil
  • 1 small onion diced
  • 1 medium carrot finely diced
  • 1 cup frozen peas and carrots
  • ½ cup chopped green beans optional
  • 2 cloves garlic minced
  • 2 large eggs lightly beaten
  • 2 tablespoons low-sodium soy sauce
  • 1 tablespoon Worcestershire sauce
  • ½ teaspoon sesame oil
  • ¼ teaspoon black pepper
  • 2 green onions sliced
Optional Additions
  • mushrooms
  • zucchini
  • corn
  • leftover cooked broccoli
  • spinach
  • a small amount of shredded cabbage

Method
 

Get Everything Ready First
  1. Fried rice moves quickly once you start cooking. Have your beef chopped, rice separated, vegetables prepared, eggs beaten, and seasonings measured before you heat the skillet.
  2. If your rice is stuck together in the refrigerator, break it apart with your fingers or a fork before adding it to the skillet.
Cook the Vegetables
  1. Heat a large skillet or electric skillet over medium-high heat. Add the olive oil. Add the onion and carrot and cook for 2–3 minutes.
  2. Add the frozen peas and carrots and optional green beans. Cook for another 2–3 minutes, until the vegetables are hot and beginning to soften.
Add the Garlic and Beef
  1. Add the garlic and cook for about 30 seconds. Add the chopped cooked beef.
  2. Stir everything together and cook for 2–3 minutes, allowing the beef to warm through and pick up some of the flavor from the skillet.
Add the Rice
  1. Add the cold cooked rice. Spread it across the skillet and let it cook undisturbed for about 1 minute. Then stir and continue cooking for another 3–4 minutes. This little bit of contact with the hot skillet helps the rice develop the texture we’re looking for.
Make Room for the Eggs
  1. Push the beef, rice, and vegetables toward one side of the skillet. Pour the beaten eggs into the empty space. Cook, stirring gently, until the eggs are mostly set. Then stir them into the rice mixture.
Season the Fried Rice
  1. Add the soy sauce, Worcestershire sauce, sesame oil, and black pepper. Stir thoroughly so the seasonings are distributed throughout the rice. Cook for another 1–2 minutes.
  2. Taste and add a little more soy sauce if needed.
Finish and Serve
  1. Remove from the heat.
  2. Stir in the sliced green onions.
  3. Serve immediately.

Cook Today, Make Tomorrow Easier

This recipe is practically the definition of the week’s theme.

When you’re making rice for another meal, cook extra.

When you’re cooking beef, save a portion.

When you have vegetables that need to be used, put them aside.

Then later:

Rice + beef + vegetables = fried rice.

You don’t need to plan a special meal-prep session.

You simply made a few ingredients available for the next meal.

Make It Your Own

Change the Protein

Although we’re using beef here, the same method works with:

  • cooked chicken
  • pork
  • turkey
  • cooked sausage

Change the Vegetables

This is where fried rice really earns its refrigerator-cleanout reputation.

Use what you have.

Try:

  • cabbage
  • mushrooms
  • zucchini
  • corn
  • broccoli
  • spinach
  • green beans

Just remember that vegetables with a lot of moisture may need a little extra cooking time before the rice goes in.

Keep the Seasoning Mild

If you’re not a fan of spicy foods, there’s no reason to add hot sauce or chili peppers.

The combination of soy sauce, Worcestershire sauce, garlic, and a tiny amount of sesame oil gives the dish plenty of flavor without heat.

Storage

Refrigerate leftovers promptly in a shallow, covered container.

Use within 3–4 days.

Reheat thoroughly in a skillet or microwave.

Because this recipe contains cooked rice, it’s especially important to cool and refrigerate leftovers promptly rather than leaving the finished fried rice sitting at room temperature.

Posted in Recipe Roundup

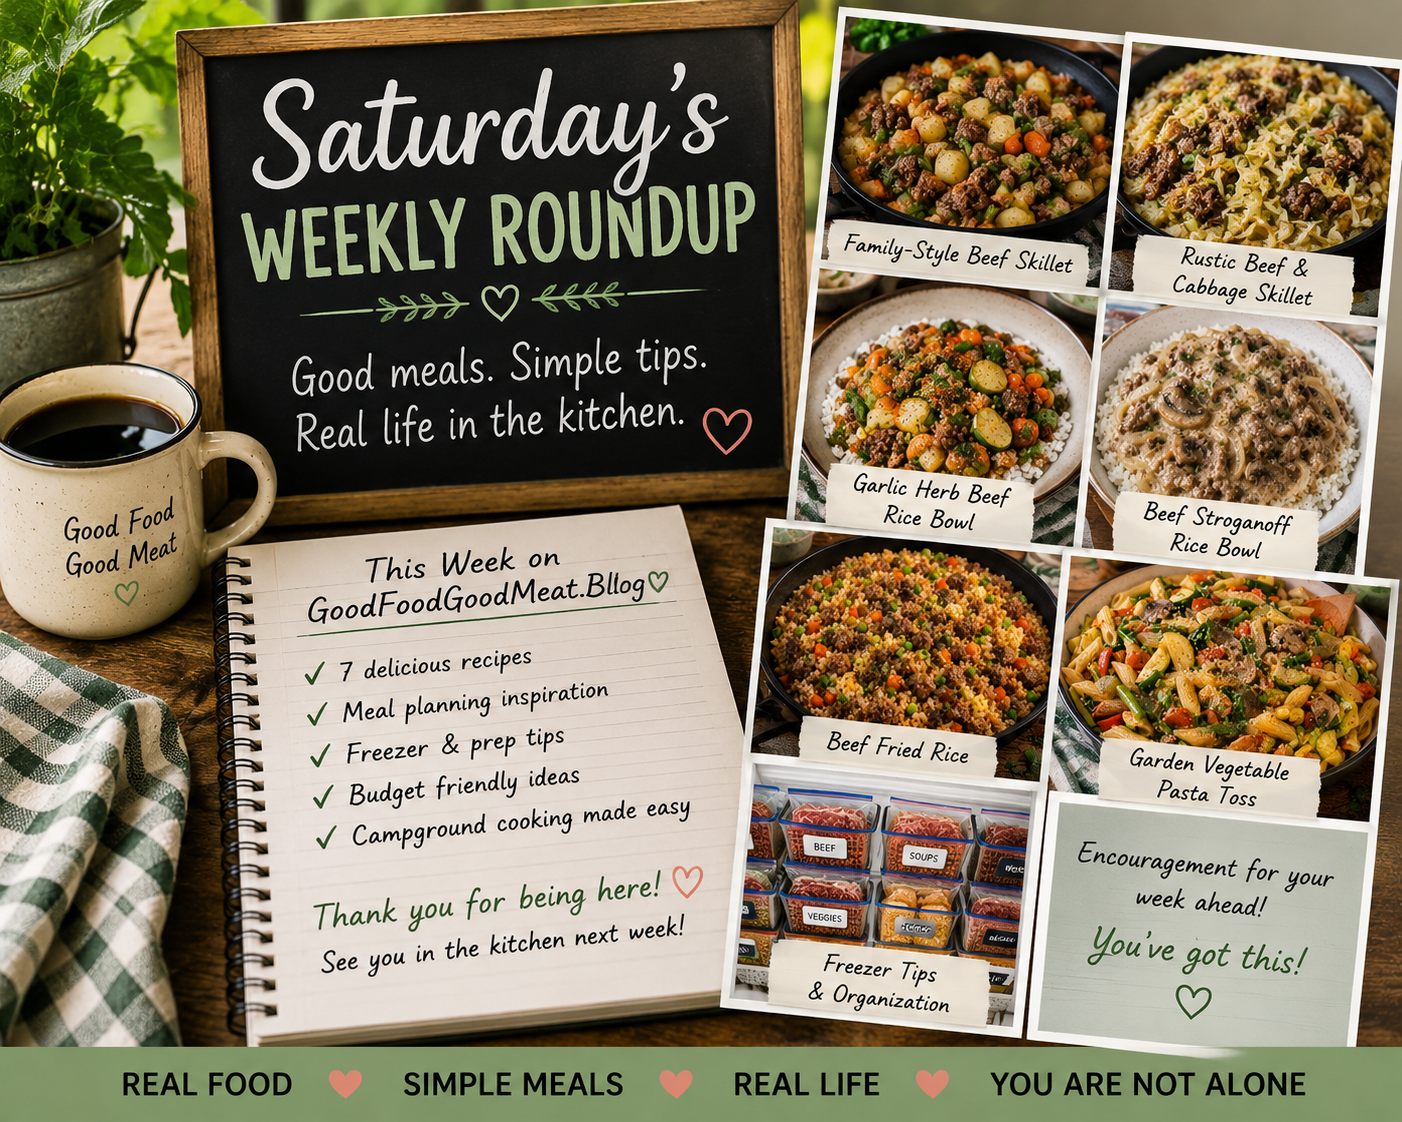
Cooking Today, Planning for Tomorrow: A Week of Practical Meal Prep

Sometimes saving money in the kitchen doesn’t require a complicated meal plan or an entire Sunday spent preparing food.

Sometimes it simply means thinking one meal ahead.

This week on Good Food Good Meat, we’re taking that idea into the kitchen with simple recipes, practical meal-prep strategies, and a little freezer organization.

The goal isn’t to cook everything in advance.

It’s to make a few smart choices while you’re already cooking so that tomorrow’s meal — or next week’s meal — is just a little easier.

That can mean cooking extra ground beef.

Chopping an extra onion.

Making enough rice for another meal.

Freezing a meal starter before it gets forgotten in the refrigerator.

Or organizing your freezer so you can actually find the food you’ve already bought.

That’s Cooking Today, Planning for Tomorrow.


🥘 Start With One Skillet

Family-Style Beef & Vegetable Skillet

We started the week with a simple idea:

Cook a little extra while you’re already cooking.

Our Family-Style Beef & Vegetable Skillet combines lean ground beef with carrots, mushrooms, zucchini, green beans, and onions in a simple savory sauce.

It’s a complete meal on its own, but the real beauty is what happens when you intentionally save a portion.

That extra beef and vegetable mixture can become the starting point for another meal later in the week.

The lesson: Meal prep doesn’t have to mean making a week’s worth of dinners. Sometimes it’s simply making enough for tomorrow.


🥬 Put Cabbage to Work

Rustic Beef & Cabbage Skillet

Cabbage is one of those wonderfully practical vegetables that can stretch a meal without stretching the grocery budget.

This rustic skillet combines ground beef with cabbage, carrots, and onions for a hearty meal that’s simple, inexpensive, and easy to adapt.

And because cabbage keeps well, it’s especially useful when you’re trying to make the most of the produce you’ve already purchased.

Kitchen confidence: Learn how to cook cabbage until it’s tender without turning it into mush.

The lesson: Inexpensive ingredients can still make satisfying meals when you know how to use them.


🥣 Build a Better Rice Bowl

Garlic Herb Beef & Garden Vegetable Rice Bowl

Rice bowls are one of my favorite ways to make a small amount of protein stretch.

This one takes a completely different flavor direction from the other beef recipes this week.

Instead of a spicy sauce or heavily seasoned mixture, we’re using garlic, herbs, beef, rice, and a colorful collection of garden vegetables.

Carrots, green beans, zucchini, mushrooms, and onions make this a bowl that’s full of texture and color.

And because the beef and vegetables can be prepared ahead, you can make the components today and assemble the bowl when you’re ready to eat.

The lesson: Meal prep doesn’t mean every component has to be finished at the same time.


❄️ Build a Freezer Meal Kit

How to Build a Better Freezer Meal Kit

Wednesday took us from cooking today’s dinner to preparing for a future one.

A freezer meal kit doesn’t have to be a complete frozen dinner.

Sometimes the most useful thing to freeze is simply:

  • cooked meat
  • prepared vegetables
  • a sauce or seasoning
  • a label
  • a plan for what you’ll add later

That small package can become a skillet, rice bowl, soup, pasta dish, or another meal entirely.

For smaller households, this can be especially useful because you’re not filling the freezer with six identical meals.

You’re creating flexible meal starters.

The lesson: Freeze components when they’re fresh, and let tomorrow’s meal come together faster.


🍄 Give Stroganoff a Bowl Makeover

Beef Stroganoff Rice Bowl

Thursday brought us another rice bowl, but this one couldn’t be more different.

Savory beef and mushrooms are combined with onions and a light creamy sauce, then served over rice instead of the traditional noodles.

It’s familiar comfort food with a little flexibility built in.

And once again, the beef and mushroom mixture can be prepared ahead, refrigerated for the next few days, or frozen as a future meal starter.

The lesson: The same basic ingredients can take you in completely different directions when you change the flavor profile and the way you serve them.


❄️ Friday at the Farmhouse

How to Label and Organize Your Freezer

This week’s Friday post might be the most practical one of all.

And it started with a simple problem:

The ribs were at the bottom of the chest freezer.

Instead of continuing to dig through a 7-cubic-foot freezer every time something was buried underneath everything else, I bought baskets designed to fit the freezer.

Eight baskets later, the food was much easier to find.

But something else happened, too.

The baskets became a way to organize the freezer around the way I actually cooked.

Proteins could go together.

Vegetables could go together.

Meal starters could have their own space.

And when I was planning meals for an entire month, I could look at what I had and make sure I wasn’t accidentally serving the same kind of meal on the same day every week.

That turned freezer organization into something much more useful:

a meal-planning tool.

The freezer wasn’t telling me what to cook.

It was giving me enough visibility to make better choices.


🍚 Saturday Bonus Recipes

We’ve spent the week learning how to make today’s cooking work a little harder.

So let’s finish by putting those ideas into practice.

Beef Fried Rice

Have leftover cooked beef?

Have some rice in the refrigerator?

Add whatever vegetables need to be used and turn them into a completely different meal.

That’s exactly what we’re looking for when we talk about cook once, enjoy more than once.

The beef doesn’t have to taste like the meal it came from.

A few changes in seasoning and preparation can make leftovers feel like a new dinner.


Garden Vegetable Pasta Toss

And then there’s the ultimate “use what you’ve got” meal.

Garden Vegetable Pasta Toss is designed to be flexible.

Whatever vegetables are hanging around in the refrigerator can become part of dinner.

A little zucchini.

Some mushrooms.

Green beans.

Carrots.

Spinach.

Even leftover cooked vegetables from another meal.

Add pasta and a simple sauce, and you’ve got dinner instead of a collection of vegetables that might otherwise be forgotten.

The lesson: Before you shop for another ingredient, take a look at what needs to be used first.


The Bigger Idea: Small Steps Add Up

None of these ideas requires an entire day of meal preparation.

You can:

Cook extra beef.

Make extra rice.

Chop an extra onion.

Save a portion before it becomes an oversized pile of leftovers.

Freeze food while it’s still fresh.

Label what you freeze.

Organize your freezer so you can actually find it.

Those little decisions don’t look like much individually.

But together, they can change the way you cook.

Instead of starting every meal from zero, you begin to build a small collection of ingredients and meal starters that make future cooking easier.

And that’s especially valuable when you’re cooking for one or two people, cooking at a campground, working with limited refrigerator space, or simply trying to stretch the grocery budget a little further.


Cook Today. Make Tomorrow Easier.

That’s really what this week has been about.

Not elaborate meal prep.

Not spending your Sunday filling thirty freezer containers.

Not eating the same leftovers all week.

Just paying attention to the opportunities that naturally happen while you’re already in the kitchen.

Because sometimes the smartest meal you can cook today isn’t just the one you’re eating tonight.

It’s the one you quietly made easier for tomorrow. 🌿

Family-Style Beef & Vegetable Skillet
There is something wonderfully practical about cooking a little more than you need.
Check out this recipe
Rustic Beef & Cabbage Skillet
This Rustic Beef & Cabbage Skillet keeps things simple: browned ground beef, plenty of cabbage, onions, carrots, and a handful of familiar seasonings.
Check out this recipe
Beef Fried Rice
Fried rice is one of those meals that can make you feel like you planned ahead even when you really didn't.
Check out this recipe
How to Build a Better Freezer Meal Kit
Check out this recipe
Beef Stroganoff Rice Bowl
Love beef stroganoff but want something a little different?
Check out this recipe
How to Label and Organize Your Freezer
Check out this recipe
Beef Fried Rice
Fried rice is one of those meals that can make you feel like you planned ahead even when you really didn't.
Check out this recipe
Garden Vegetable Pasta Toss
This isn't a recipe that requires you to have exactly the right vegetables. It's a framework for turning the vegetables you already have into a simple pasta dinner.
Check out this recipe
Posted in Kitchen Tips

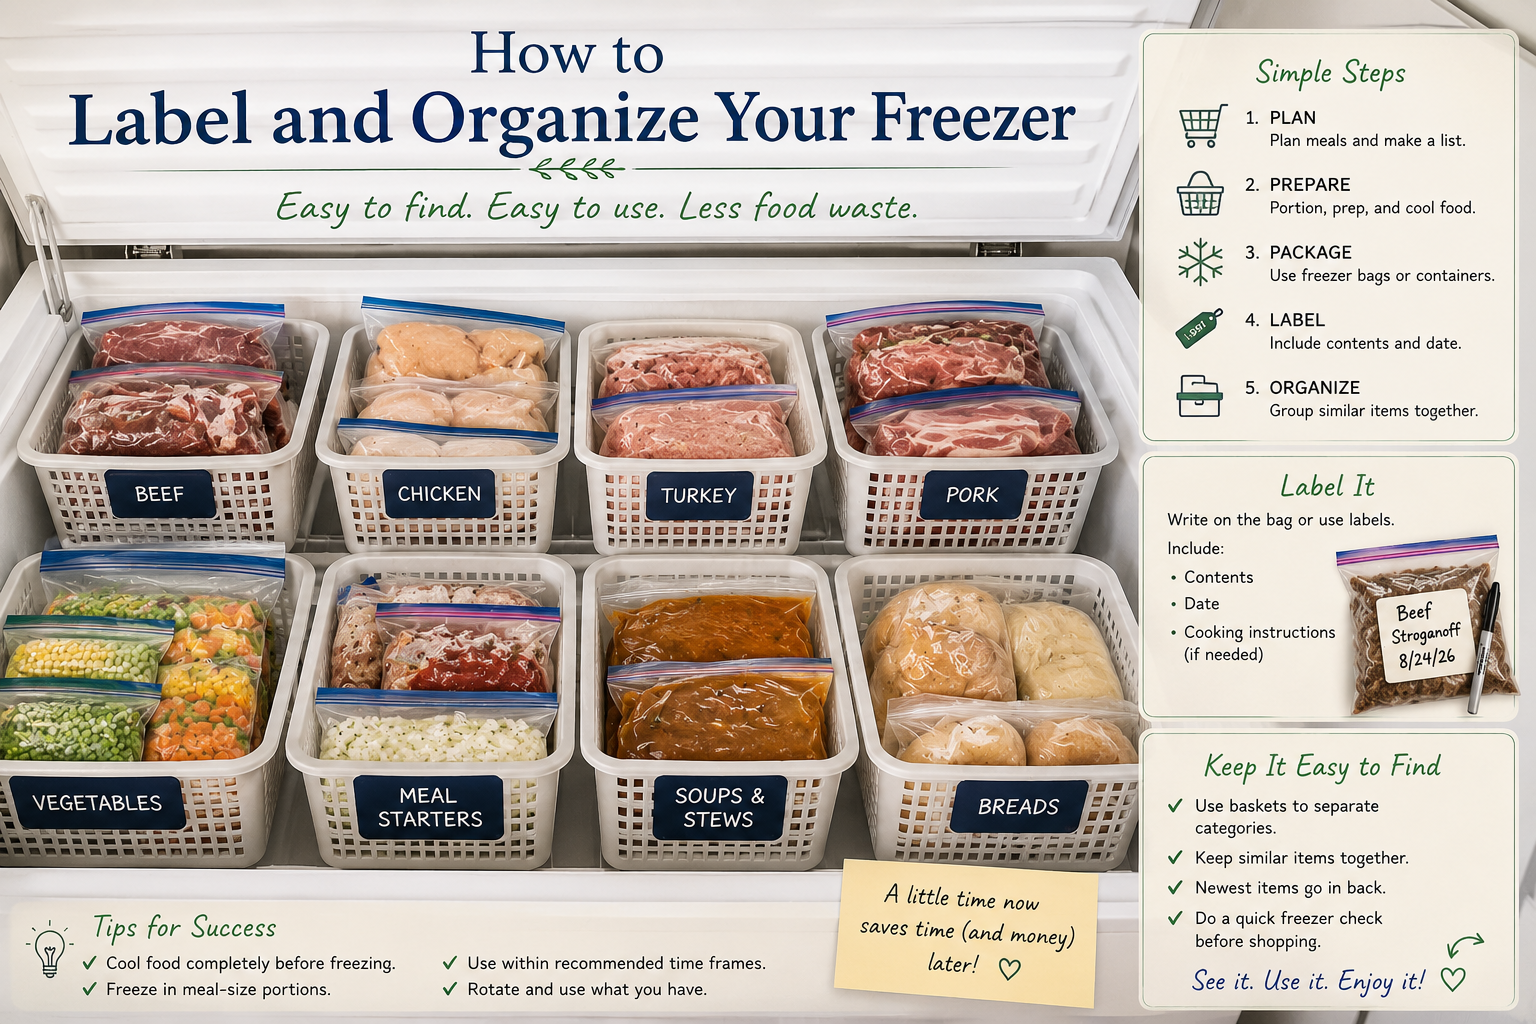
How to Label and Organize Your Freezer

There is organizing a freezer.

And then there is organizing a freezer so you can actually find dinner.

I learned the difference the hard way.

At one point, I had a chest freezer that held 7 cubic feet. One day, I wanted something that was buried at the very bottom — ribs, I think. Getting to them meant digging through everything that was stacked on top.

That’s when I realized my freezer didn’t necessarily need more space.

It needed better access to the space I already had.

So I bought baskets designed specifically for a 7-cubic-foot chest freezer.

I ended up with eight baskets.

And suddenly, instead of digging through a frozen pile every time I wanted something, I could pull out a basket, find what I needed, and put it back.

Even better, I discovered that those baskets could do more than keep things tidy. They could help me organize the freezer around the way I actually cook.

That’s when freezer organization became meal planning.


First: What Kind of Freezer Do You Have?

Not everyone stores frozen food the same way.

Some households have a chest freezer. Others have an upright freezer. Some have a freezer attached to the refrigerator and perhaps a separate freezer somewhere else.

The good news is that the organizing principles are the same, even though the physical setup is different.

If You Have a Chest Freezer

A chest freezer can hold a surprising amount of food, but without some kind of organization, the food at the bottom can become nearly impossible to reach.

That’s where baskets can make a tremendous difference.

Rather than stacking food directly on top of food, use baskets that are designed to fit the size and shape of your freezer.

The baskets essentially become removable drawers.

You can lift one out, find what you need, and put it back without excavating the entire freezer.

And don’t assume that every inch of the freezer needs to be packed with food.

Leave room between and around the baskets for air to circulate properly.

If You Have an Upright Freezer

An upright freezer gives you a different starting point because shelves and drawers already divide the space vertically.

You can use those existing sections as zones and add appropriately sized bins or baskets where they make things easier to reach.

The goal is the same:

Don’t organize food according to where it happens to fit. Organize it according to how you use it.


The Freezer Basket Revelation

My freezer baskets solved one immediate problem:

I could finally get to the food at the bottom.

But once I had them, I realized they could do something even more useful.

I could give each basket a purpose.

Instead of one giant chest freezer containing an assortment of frozen food, I had smaller sections that I could actually manage.

For example, one basket could hold proteins.

Another could hold vegetables.

Another could hold meal starters.

Another could hold prepared meals.

The exact categories don’t matter nearly as much as the fact that you know what belongs where.

And that’s the key.

A good organization system should help you answer:

“Where is the food I need?”

without requiring a search expedition.


Organize Around How You Cook

This is where freezer organization becomes more than housekeeping.

Think about the meals you actually make.

If you regularly plan several meals around a protein and vegetable, consider keeping those foods together.

For example, you might have:

Basket 1: This Week’s Proteins

  • chicken
  • ground beef
  • pork
  • sausage
  • fish

Basket 2: This Week’s Vegetables

  • green beans
  • broccoli
  • corn
  • peas
  • mixed vegetables

Put the baskets beside each other if your freezer allows it.

Now meal planning becomes much easier.

Pull out the protein basket.

Pull out the vegetable basket.

Choose what you’re going to make.

You’re no longer searching through the entire freezer.

You’re choosing from a small, visible collection of possibilities.


Think of Your Freezer as a Collection of Meal-Building Blocks

This is particularly useful when you’re cooking for one or two people.

You don’t necessarily need to freeze a complete meal every time.

Instead, think in terms of components.

Your freezer might contain:

  • browned ground beef
  • shredded chicken
  • cooked pork
  • frozen vegetables
  • sautéed onions
  • cooked beans
  • homemade broth
  • tomato sauce
  • prepared meal starters

Those ingredients can become several different meals.

For example, a container of cooked ground beef might eventually become:

  • a rice bowl
  • fried rice
  • a skillet meal
  • pasta
  • soup
  • tacos
  • stuffed vegetables

That’s much more flexible than filling your freezer with six identical dinners.


Label Everything

Even if you know exactly what something is today, future-you may not.

And future-you has other things to worry about.

A good freezer label should answer three basic questions.

What Is It?

Be specific.

Instead of:

Beef

try:

Browned Ground Beef

Or:

Garlic Herb Beef & Vegetables

When Was It Frozen?

Write the date.

Frozen: 8/23/26

That gives you useful information when you’re deciding what to use first.

What Does It Need?

This is one of the most useful things you can put on a freezer label.

For example:

Garlic Herb Beef & Vegetables
Frozen: 8/26/26
Add rice + fresh parsley

Or:

Cooked Chicken
Frozen: 8/20/26
Use for wraps, bowls, or soup

That little note can save you from standing in front of the freezer trying to remember what you originally had in mind.


Label the Baskets, Too

Individual food packages aren’t the only things worth labeling.

If your baskets have specific jobs, label them.

You might have:

  • This Week
  • Proteins
  • Vegetables
  • Meal Starters
  • Prepared Meals
  • Breakfast
  • Bread & Baked Goods

If you’re using a chest freezer, you might also organize baskets according to how frequently you use them.

Foods you reach for often should be easiest to access.

Foods you use less frequently can go farther down or toward the back.

There is no single perfect system.

The best system is the one that makes sense when you’re standing in front of your freezer looking for dinner.


Portion Food for the People You’re Actually Feeding

If you’re cooking for one or two people, freezer organization becomes even more important.

A giant package of cooked meat isn’t necessarily convenient if you only need enough for two servings.

Whenever practical, freeze food in portions that match the meals you actually make.

That might mean:

  • one serving
  • two servings
  • enough for one skillet meal
  • enough for a pot of soup
  • enough for four rice bowls

Smaller portions also give you more flexibility.

You can thaw exactly what you need instead of turning one freezer container into four meals simply because that’s how it was originally packaged.


Use the First-In, First-Out Rule

You don’t need to memorize everything that’s in your freezer.

Instead, make older food easier to find.

When possible, put newer packages behind older ones.

When you add something to a basket, check what’s already there.

If you discover something that’s been sitting around for a while, move it toward the front and make a plan to use it.

This simple habit can help prevent the freezer from becoming a place where food disappears for months.


Keep a Simple Freezer Inventory

If you have a lot of frozen food, a simple inventory can be helpful.

It doesn’t need to be fancy.

A piece of paper attached to the freezer can work just fine.

For example:

Proteins

  • Ground beef — 2 packages
  • Chicken — 3 packages
  • Pork chops — 2 packages
  • Fish — 2 packages

Vegetables

  • Green beans
  • Corn
  • Peas
  • Broccoli
  • Mixed vegetables

Meal Starters

  • Cooked beef — 2 portions
  • Shredded chicken — 2 portions
  • Soup starter — 1 container

Cross things off as you use them.

Add things when you restock.

The point isn’t to create another household chore.

It’s simply to keep your freezer from becoming a mystery box.


The Weekly Basket Method

One of my favorite ways to use freezer baskets is to think in terms of one week at a time.

If you have enough freezer space, put the proteins you’re planning to use together.

Then keep the vegetables for those meals in a nearby basket.

For example:

Protein Basket

  • chicken
  • ground beef
  • pork chops
  • sausage

Vegetable Basket

  • green beans
  • broccoli
  • corn
  • peas

Now you have a visual reminder of what you already have available.

You can look at the baskets before going grocery shopping.

You can choose meals based on what’s already there.

And you can avoid buying another package of something you forgot was hiding at the bottom of the freezer.

That’s where organization starts saving money.


Use Your Freezer to Prevent Meal-Planning Déjà Vu

When I first started using freezer baskets, I was still shopping and planning meals for an entire month. The baskets turned out to be useful for more than simply finding food.

They gave me a visual inventory of what I had purchased.

I could look at the proteins and vegetables and see the possibilities for the weeks ahead. More importantly, I could see what I had already planned and make sure I wasn’t serving the same type of meal on the same day every week.

If we’d had beef on Monday one week, I could choose chicken or pork for the following Monday. If one week’s Thursday meal was a skillet, I could choose a rice bowl or casserole the next week.

The freezer wasn’t telling me what to cook. It was giving me enough information to make better choices.

That’s one of the biggest benefits of an organized freezer: visibility creates variety.

You don’t have to follow a rigid meal plan. You just need to be able to see what you’ve already got.


Don’t Overfill Your Freezer

A well-organized freezer doesn’t have to be packed from wall to wall.

You need to be able to move food around and retrieve what you need.

You also don’t want to block vents or interfere with the freezer’s ability to circulate cold air.

With a chest freezer, this is another reason I like appropriately sized baskets.

You can create sections without filling every available inch with loose packages.

My eight baskets fit my 7-cubic-foot chest freezer while still leaving plenty of room for air circulation.

The baskets gave me organization without turning the freezer into a solid block of frozen food.


Your Freezer Doesn’t Have to Be Pretty

This may be the most important rule of all.

Your freezer does not need matching containers.

It does not need professionally printed labels.

It does not need to look like one of those perfectly staged refrigerator photographs.

It needs to work for you.

Freezer baskets don’t have to be expensive.

Labels can be as simple as masking tape and a permanent marker.

An old container may be exactly the right container for a particular food.

The goal isn’t perfection.

The goal is being able to open the freezer and quickly answer:

What do I have?

and

What can I make with it?


Turn Freezer Organization Into Meal Planning

This is where the whole system comes together.

Imagine opening your freezer and seeing:

Protein Basket: ground beef, chicken, pork

Vegetable Basket: green beans, broccoli, corn

Meal Starter Basket: cooked beef, shredded chicken, soup starter

Instead of thinking:

I don’t know what to make.

you can think:

I have ground beef and green beans. What sounds good?

Maybe tonight they’re a skillet meal.

Tomorrow, chicken and broccoli become a rice bowl.

Later in the week, the pork and vegetables become a soup.

The freezer isn’t dictating your meals.

It’s giving you options.

And that’s exactly what good organization should do.


The Real Goal

I didn’t buy freezer baskets because I wanted a beautifully organized freezer.

I bought them because the ribs were at the bottom.

What I discovered was that making the food easier to reach also made it easier to use.

And that’s the real purpose of freezer organization.

Not a perfect-looking freezer.

Not a freezer filled with matching containers.

Not an elaborate inventory system that takes longer to maintain than the freezer is worth.

Just a freezer where you can see what you have, reach what you need, and make good use of the food you’ve already paid for.

Because when your freezer is organized around the way you actually cook and eat, it becomes more than a place to store food.

It becomes part of your meal plan.

And sometimes, the best organization system starts with something as simple as:

“I really don’t want to dig all the way to the bottom for those ribs again.” 🌿