Posted in Soups & Stews

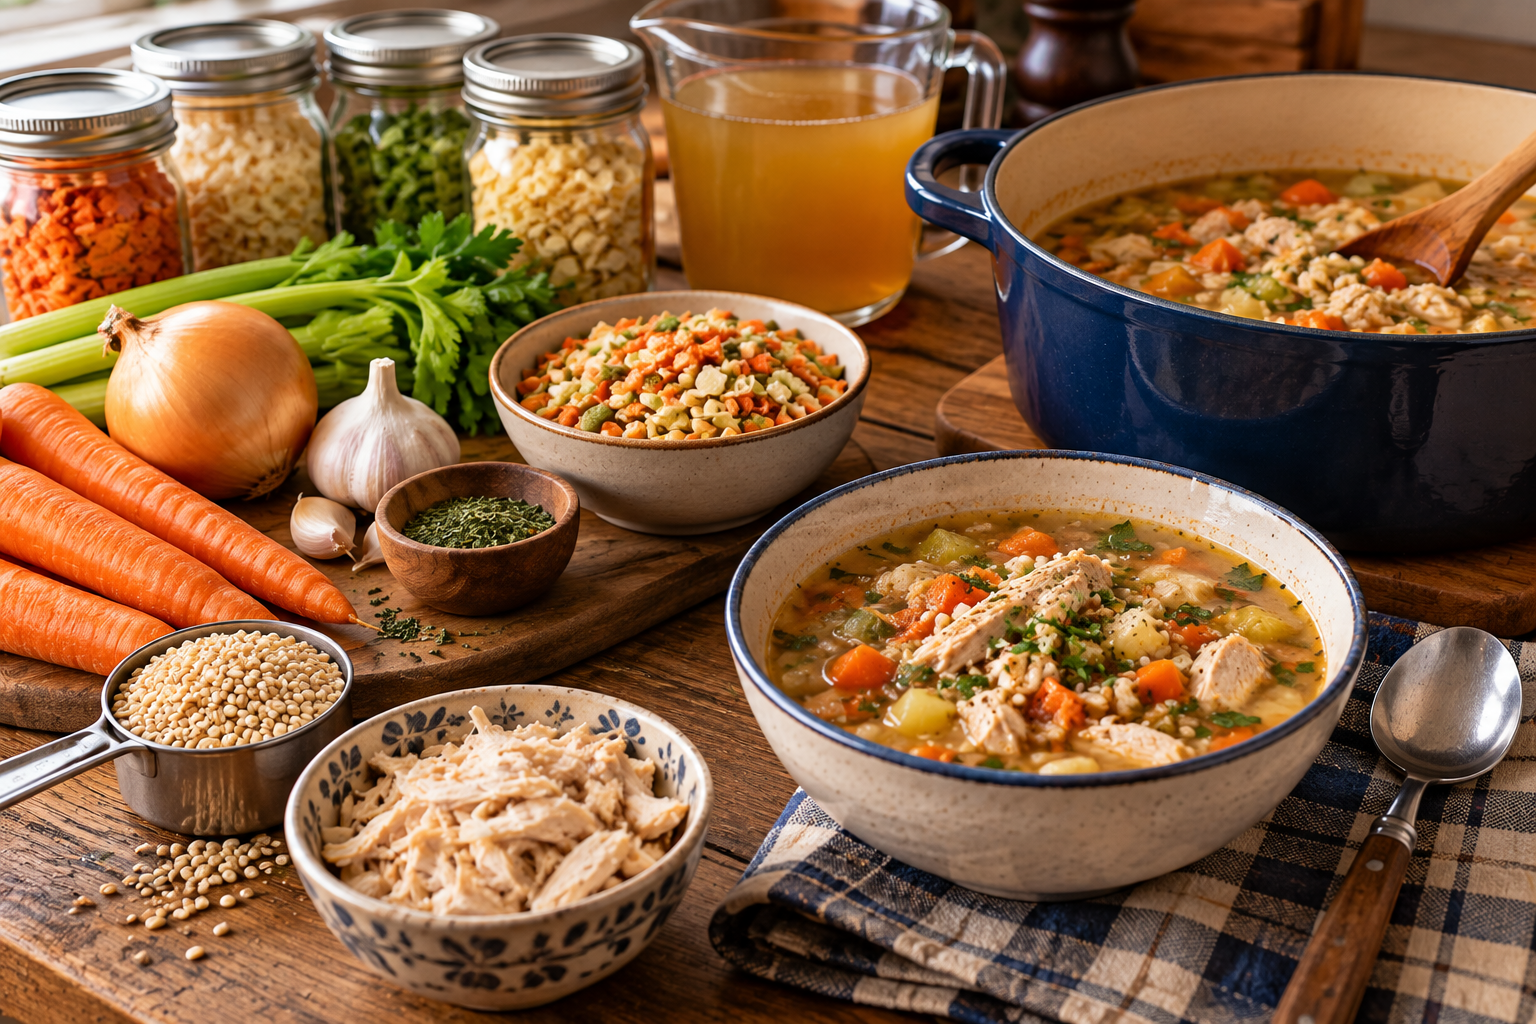
Building a Better Pantry Soup

There are nights when you have plenty of food in the pantry but absolutely no idea what to make for dinner.

You have a can of tomatoes. Maybe some broth. A little leftover chicken. A bag of rice or barley. A few vegetables tucked away in the refrigerator.

Nothing looks like a recipe.

But put the pieces together in the right order, and suddenly you have soup.

That’s one of the best things about keeping a practical pantry: you don’t always need a recipe to make dinner. You need a formula.

For October’s Pantry to Table series, we’re looking at the ingredients and habits that make everyday cooking easier. And learning how to build a good soup from what you already have may be one of the most useful skills in the whole pantry.

Why Build Soup From a Formula?

A recipe tells you exactly what to buy and exactly what to do.

A formula gives you room to work with what you already have.

That’s particularly useful when you’re cooking for one or two people. You may have half an onion, one lonely carrot, some leftover turkey, and a little cooked rice—but not enough of any one ingredient to make the recipe you found online.

Soup doesn’t care.

That’s its superpower.

You can combine small amounts of ingredients, adjust the proportions, and end up with a completely different soup every time.

The Basic Pantry Soup Formula

Think of your soup as a series of building blocks:

Broth + Protein + Vegetables + Starch or Grain + Seasoning + Finish

You don’t necessarily need every component every time, but this gives you a place to start.

1. Start With the Liquid

The broth forms the foundation of the soup.

Good pantry choices include:

  • Chicken broth
  • Turkey broth
  • Vegetable broth
  • Beef broth
  • Homemade stock
  • Bouillon or soup base mixed with water

You can also use water when your other ingredients provide plenty of flavor.

For a small household, shelf-stable broth in smaller containers can be particularly convenient. If you open a larger container, freeze the unused portion in meal-sized amounts rather than letting it sit in the refrigerator waiting for another recipe.

2. Add a Protein

Protein turns a bowl of soup from a side dish into a meal.

And it doesn’t have to mean cooking meat specifically for the soup.

Good pantry and leftover options include:

  • Canned chicken
  • Canned tuna, for appropriate soups
  • Canned salmon
  • Canned mackerel
  • Cooked turkey
  • Leftover chicken
  • Ground beef
  • Ground turkey
  • Cooked pork
  • Eggs
  • Beans
  • Lentils

This is one reason canned proteins can be so useful in a small household. You don’t have to wait until you have enough leftover meat to make soup.

And you don’t have to buy an ingredient just because a recipe says you need it.

3. Add Vegetables

This is where your pantry, freezer, refrigerator, and preservation projects can all work together.

Use whatever makes sense:

Fresh vegetables

  • Carrots
  • Celery
  • Onion
  • Bell pepper
  • Cabbage
  • Zucchini

Frozen vegetables

  • Peas
  • Corn
  • Green beans
  • Mixed vegetables
  • Spinach

Canned vegetables

  • Tomatoes
  • Green beans
  • Corn
  • Carrots

Dehydrated vegetables

  • Onion
  • Carrots
  • Celery
  • Potatoes
  • Other vegetables you’ve preserved

And don’t underestimate a small amount.

Half a carrot doesn’t look like much on the cutting board. In a bowl of soup, it matters.

4. Choose a Starch or Grain

This is another way to make a small amount of protein and vegetables feel like a complete meal.

Try:

  • Rice
  • Barley
  • Pasta
  • Potatoes
  • Sweet potatoes
  • Quinoa
  • Corn
  • Beans

You don’t always need a starch. A vegetable-heavy soup can stand on its own.

But when you’re trying to make soup satisfying enough for dinner, adding a grain, potato, or pasta can make a big difference.

One Small-Household Tip

Don’t automatically cook a large quantity of rice or pasta just because you’re making soup.

For small-batch cooking, adding a modest amount directly to the soup can be easier.

Just remember that grains and pasta continue absorbing liquid as the soup sits. If you’re planning leftovers, you may want to cook them separately and add them to individual portions.

5. Season It

This is where the same basic ingredients can become completely different soups.

For a classic chicken soup, think:

Garlic + thyme + parsley + black pepper

For a tomato-based soup:

Basil + oregano + garlic

For a Mexican-inspired soup:

Cumin + chili powder + oregano

For a cozy barley soup:

Thyme + garlic + onion + black pepper

For a curry-style vegetable soup:

Curry powder + garlic + ginger

You don’t need a cabinet full of specialty spices.

A handful of basic seasonings can take you a surprisingly long way.

6. Finish the Soup

This is the step people sometimes skip.

The soup may be perfectly good without a finishing touch, but something fresh or flavorful added at the end can wake everything up.

Try:

  • A squeeze of lemon
  • A splash of vinegar
  • Fresh parsley
  • Green onion
  • A spoonful of Greek yogurt
  • A little shredded cheese
  • Fresh herbs
  • A drizzle of olive oil

You don’t need much.

Sometimes half a teaspoon of lemon juice is enough to make a pot of soup taste brighter.

A Simple Way to Think About It

When standing in front of the pantry wondering what to make, ask yourself six questions:

1. What liquid do I have?
Broth, stock, or water?

2. What protein do I have?
Chicken, turkey, canned fish, beans, lentils, or something leftover?

3. What vegetables need to be used?
Fresh, frozen, canned, or dehydrated?

4. What will make it filling?
Rice, barley, pasta, potatoes, or another grain?

5. What flavor direction sounds good?
Herb and garlic? Tomato and Italian? Chili and cumin? Something creamy?

6. What can I add at the end?
Lemon, herbs, cheese, yogurt, or another fresh finish?

Once you’ve answered those questions, you’re halfway to dinner.

A Few Combinations to Get You Started

Here are some examples using the same basic formula.

Chicken + Rice Soup

Broth: Chicken
Protein: Chicken
Vegetables: Carrot, celery, onion
Starch: Rice
Seasoning: Thyme, parsley, garlic
Finish: Lemon

Turkey + Barley Soup

Broth: Turkey or chicken
Protein: Turkey
Vegetables: Carrot, celery, onion
Grain: Barley
Seasoning: Thyme, garlic, black pepper
Finish: Fresh parsley

Tomato + White Bean Soup

Liquid: Diced tomatoes + broth
Protein: White beans
Vegetables: Onion, carrot, spinach
Starch: Optional small pasta
Seasoning: Basil, oregano, garlic
Finish: Parmesan

Beef + Vegetable Soup

Broth: Beef
Protein: Ground beef or leftover beef
Vegetables: Carrot, celery, green beans
Starch: Potato
Seasoning: Garlic, thyme, black pepper
Finish: Fresh parsley

Notice something?

None of these combinations requires a special shopping trip.

They’re built from categories of ingredients, not one exact shopping list.

What If You Don’t Have Everything?

That’s where the formula becomes useful.

No celery?

Skip it.

No fresh onion?

Use dehydrated onion.

No carrots?

Use frozen mixed vegetables.

No chicken?

Use turkey.

No barley?

Use rice.

No fresh herbs?

Use dried.

No broth?

Use water and a good soup base.

The goal isn’t to recreate someone else’s recipe perfectly.

The goal is to make your ingredients work together.

Kitchen Confidence: Learn to Taste as You Go

Soup is forgiving, but seasoning can be tricky.

Start conservatively.

You can always add more salt, herbs, or spices. It’s much harder to fix a soup that’s become overwhelmingly salty or spicy.

Taste after the ingredients have had time to simmer together.

Then ask:

Does it need more salt?

Does it need more seasoning?

Does it need acidity?

That last question is particularly useful.

If the soup tastes flat even though you’ve seasoned it, a small splash of lemon juice or vinegar may be what it’s missing.

It doesn’t necessarily make the soup taste sour. It can simply make the other flavors more noticeable.

Stretch Every Grocery Dollar

Soup is one of the best ways to stretch ingredients without making the meal feel stretched.

A small amount of meat can flavor several servings when combined with vegetables, beans, grains, or potatoes.

That leftover roasted chicken breast that isn’t enough for another dinner?

Soup.

The two tablespoons of barley left in the jar?

Soup.

The handful of frozen vegetables at the bottom of the bag?

Soup.

The last cup of broth?

You guessed it.

Soup is where the little bits get a second chance.

Waste Not, Want Not

Keep a small container or freezer bag for suitable vegetable scraps and leftover cooked vegetables.

Things like carrot ends, celery leaves, onion pieces, and small amounts of cooked vegetables can sometimes be useful in homemade stock or future soups.

Just use common sense about what belongs in it. You don’t want strongly flavored, spoiled, or heavily seasoned leftovers ending up in your soup.

And label freezer containers.

That little frozen container that looks like broth today can become a mystery six weeks from now.

A date and a quick description are worth the extra few seconds.

Cooking for One or Two

The beauty of soup is that you don’t need a six-quart stockpot.

For two servings, start with roughly:

3 cups liquid + 1 cup protein/beans + 1½–2 cups vegetables + ½ cup cooked grain or pasta

Adjust from there.

Remember that some ingredients absorb a surprising amount of liquid.

Barley, rice, pasta, and dehydrated vegetables all need liquid to rehydrate and cook.

If your soup is becoming too thick, add more broth.

If it’s too thin, let it simmer uncovered for a little while longer.

There isn’t a magic number that makes soup “right.”

Right is the consistency you enjoy eating.

Meal Prep Note

If you’re intentionally making soup for leftovers, consider keeping certain ingredients separate.

Rice, pasta, and barley can continue absorbing broth after cooking.

For the best texture, store the cooked grain separately when practical and add it when reheating.

This is particularly helpful when you’re making soup for one or two people and expect it to last several meals.

Storage & Freezing

Cool leftover soup promptly and refrigerate in covered containers.

For best quality, use refrigerated soup within 3–4 days.

Many soups freeze beautifully. Broth-based soups containing meat and vegetables are particularly freezer-friendly.

Cream-based soups and soups containing potatoes can change texture after freezing, although they can still be perfectly usable.

For a small household, freeze soup in single-serving portions whenever possible.

That turns your freezer into a collection of future lunches and dinners instead of one enormous container of frozen soup.

The Pantry Is the Starting Point

A well-stocked pantry doesn’t mean you always have exactly what a recipe calls for.

It means you have enough building blocks to make something good.

That’s an important distinction.

Instead of asking:

“What recipe can I make with these ingredients?”

try asking:

“What kind of meal can these ingredients become?”

That’s the real skill behind pantry cooking.

And once you learn the formula, soup becomes one of the easiest answers.

Tomorrow, we’ll take that idea one step further by making a Homemade Soup Starter Mix using dehydrated and shelf-stable ingredients—something you can keep ready for the nights when you want soup without starting at the beginning.
Posted in Soups & Stews

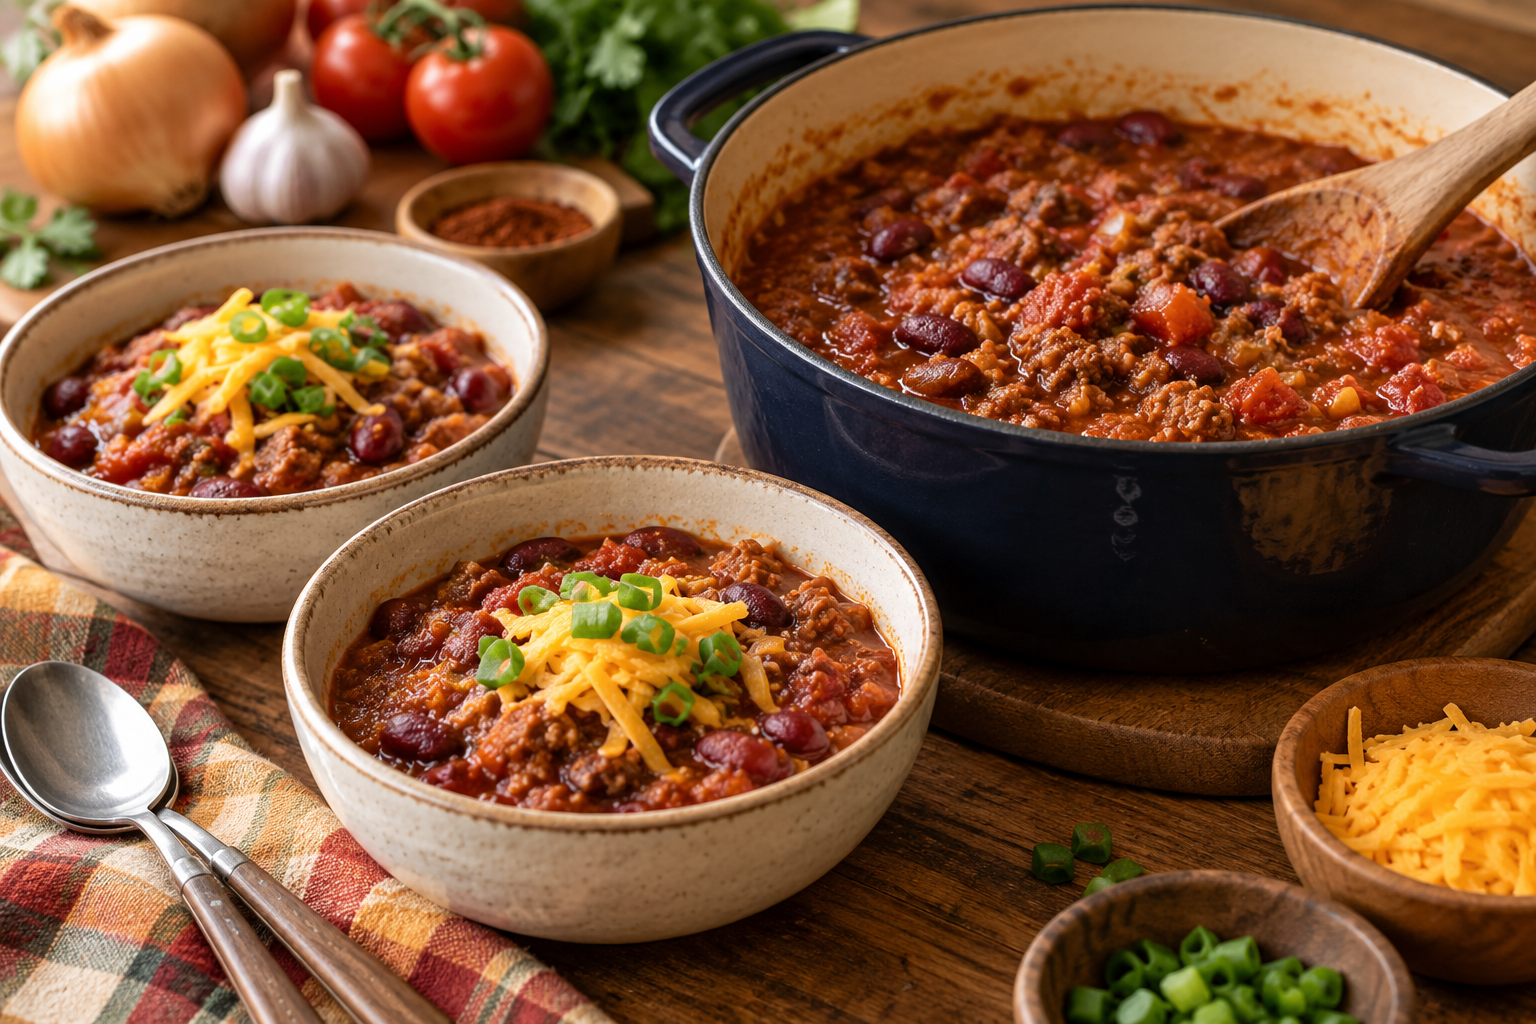
Pantry Chili for Two

There’s something about a pot of chili that makes a cool October evening feel just a little cozier. But if you’re cooking for one or two people, traditional chili recipes can create a problem of their own: enough leftovers to keep you eating chili for the better part of a week.

This Pantry Chili for Two is different.

It’s a small-batch chili built around ingredients that are practical to keep on hand—ground turkey, canned tomatoes, beans, onion, broth, and a few basic spices. There’s no seasoning packet required, and there’s no giant pot involved.

Just enough for two generous bowls of hearty, comforting chili.

And that’s really the point of this month’s Pantry to Table theme: a well-stocked pantry isn’t about filling every shelf with food. It’s about having enough useful ingredients on hand to put a good meal on the table without starting from scratch every single time.

Why You’ll Love This Recipe

  • It makes just two generous servings. No enormous pot of leftovers.
  • It relies on ordinary pantry staples. Nothing particularly exotic is required.
  • Ground turkey keeps it budget-friendly. You can also substitute another ground meat you already have.
  • The seasoning comes from your pantry. No packaged chili seasoning needed.
  • It’s flexible. Change the beans, add vegetables, or adjust the heat to suit what you have.
  • It freezes well. One serving can go into the freezer for another chilly evening.
simplegoodfood's avatarsimplegoodfood

Pantry Chili for Two

There’ssomething about a pot of chili that makes a cool October evening feel just alittle cozier.
Prep Time 10 minutes
Cook Time 30 minutes
Total Time 40 minutes
Servings: 2
Course: Dinner, Lunch
Cuisine: American
Calories: 430

Ingredients
  

  • ½ pound ground turkey
  • ½ cup finely chopped onion
  • 1 small garlic clove minced, or ¼ teaspoon garlic powder
  • 1 tablespoon tomato paste
  • 1 can 14–15 ounces diced tomatoes, undrained
  • 1 can 15 ounces kidney beans, drained and rinsed
  • ½ cup chicken or turkey broth
  • 1 tablespoon chili powder
  • ½ teaspoon ground cumin
  • ½ teaspoon paprika
  • ¼ teaspoon dried oregano
  • ¼ teaspoon salt plus more to taste
  • ⅛ teaspoon black pepper
  • 1 teaspoon olive oil if needed
Optional: A pinch of cayenne pepper or a few dashes of hot sauce if you like more heat.
Optional Toppings
  • Choose just what you have on hand:
  • Shredded cheese
  • A spoonful of Greek yogurt
  • Chopped green onion
  • Diced avocado
  • Fresh cilantro
  • Crushed tortilla chips

Method
 

Brown the turkey.
  1. Heat a medium saucepan or skillet over medium heat. Add the ground turkey and cook, breaking it into small pieces, until no longer pink.
  2. If the turkey is very lean and begins sticking, add the teaspoon of olive oil.
Add the onion.
  1. Stir in the chopped onion and cook for about 3–4 minutes, until it begins to soften.
  2. Add the garlic and cook for another 30 seconds.
Build the chili base.
  1. Stir in the tomato paste, chili powder, cumin, paprika, oregano, salt, and black pepper.
  2. Cook for about 30 seconds, stirring constantly. This gives the spices a chance to bloom and the tomato paste a chance to caramelize slightly.
Add the tomatoes, beans, and broth.
  1. Pour in the diced tomatoes with their juices. Add the drained beans and broth.
  2. Stir everything together and bring the chili to a gentle simmer.
Simmer.
  1. Reduce the heat to low and simmer uncovered for about 20 minutes, stirring occasionally.
  2. If the chili becomes thicker than you like, add another splash of broth.
Taste and adjust.
  1. Taste before serving and adjust the salt or seasonings as needed.
  2. If you like more heat, add a pinch of cayenne or a little hot sauce.
Serve.
  1. Ladle into two bowls and add whatever toppings you have available.
  2. A little shredded cheese or a spoonful of Greek yogurt is enough to turn a simple bowl of chili into a very satisfying supper.

Notes

Kitchen Confidence
Don’t worry about making chili exactly the same way every time.
That’s one of the best things about chili.
If you have a little extra onion, use it. If you have half a bell pepper that needs to be used, dice it and add it with the onion. If you have black beans instead of kidney beans, use those.
The important thing is the basic structure:
protein + tomatoes + beans or vegetables + broth + seasoning
Once you understand that formula, you can make a good pot of chili from what you already have.
About the seasoning
This recipe uses a modest amount of chili powder for a flavorful but not overly spicy chili. If your chili powder is particularly hot, start with less and add more after tasting.
Remember: chili powder and cayenne pepper aren’t the same thing. Chili powder is generally a seasoning blend, while cayenne is much hotter.

Stretch Every Grocery Dollar

Ground turkey is particularly useful for small-household cooking because a relatively small amount can make a hearty meal when combined with beans, tomatoes, and vegetables.

The beans aren’t just filler, either. They add protein, fiber, texture, and staying power while helping stretch the meat.

And there’s no reason to use a large can of everything just because that’s what the recipe happens to call for. Once you get comfortable with small-batch cooking, you’ll start noticing ways to use the rest of an ingredient somewhere else during the week.

That’s one of the real advantages of pantry cooking.

You’re not trying to buy ingredients for one recipe. You’re stocking ingredients that can become several meals.

Waste Not, Want Not

Don’t throw away that little bit of tomato paste left in the can.

If you don’t expect to use it within a few days, portion the extra tomato paste by tablespoon onto a small piece of parchment or wax paper and freeze it. Once frozen, transfer the portions to a freezer container.

Then the next time a recipe calls for a tablespoon of tomato paste, you’ve already got one.

The same idea works for leftover broth. Freeze it in small portions so you’re not opening a carton every time a small recipe calls for a splash.

Cooking for One or Two

This recipe makes two generous servings, but it’s easy to make it work for one.

Simply refrigerate half for another meal within the next few days, or freeze it for later.

And don’t think of the second serving as having to be “leftover chili.”

Tomorrow it can become:

  • Chili over a baked potato
  • Chili stuffed into a small tortilla
  • Chili topped with an egg
  • Chili over a small serving of rice
  • Chili with a little cheese and tortilla chips

That’s where small-batch cooking becomes really useful.

You’re not making a giant pot of one meal. You’re making a small building block for several meals.

Meal Prep Note

Chili is one of those dishes that often tastes even better after a night in the refrigerator.

For planned leftovers, cool the chili promptly, refrigerate it in a covered container, and use within 3–4 days.

For longer storage, freeze individual portions in freezer-safe containers.

A single serving is especially handy on a night when you don’t feel like cooking.

Storage & Freezing

Refrigerator: Store in a covered container for up to 3–4 days.

Freezer: Freeze in individual portions for up to 3 months for best quality.

Thaw refrigerated overnight when possible, then reheat gently on the stovetop or in the microwave until steaming hot throughout.

If the chili thickens during storage, add a tablespoon or two of broth or water while reheating.

A Pantry Meal Is More Than a Recipe

This little pot of chili is a good example of what I mean by Pantry to Table.

You don’t need a pantry packed with specialty foods. You need useful ingredients that work together.

A can of tomatoes can become soup, sauce, or chili. Beans can become part of a bowl, soup, salad, or skillet meal. Broth can turn leftover ingredients into dinner. A few basic spices can change the personality of an otherwise ordinary combination of foods.

The goal isn’t to have a perfect pantry.

The goal is to have a pantry that helps you feed yourself well.

And for a household of one or two, that means learning how to make smaller meals, use what you have, and turn a handful of ordinary ingredients into something that feels like real comfort food.

That’s a pretty good place to start.

Posted in One-Pot Meals

Dutch Oven Favorites

There’s something wonderfully satisfying about cooking dinner in a Dutch oven.

Maybe it’s the way a stew slowly simmers until the meat is tender. Maybe it’s the crisp edges on a small batch of cornbread. Or maybe it’s simply knowing that dinner can happen in one sturdy pot instead of filling the kitchen sink with dishes.

For a small household, that last part matters.

A Dutch oven isn’t just a piece of specialty cookware reserved for Sunday roasts or elaborate recipes. A smaller Dutch oven can be one of the most useful tools in the kitchen when you’re cooking for one or two.

This collection brings together Dutch oven recipes and practical one-pot meals from Good Food Good Meat, with an emphasis on simple ingredients, reasonable portions, and meals that make your grocery dollars work harder.


Our Dutch Oven Favorites

Here are the Dutch oven recipes featured in this week’s Weekend Suppers collection.

Dutch Oven Beef Stew
There are some meals that just seem to belong to October, and a good beef stew is one of them.
Check out this recipe
The Pantry-to-Pot Formula: Building a One-Pot Meal
Read the Article!
Dutch Oven Chicken & Rice
There is something wonderfully practical about a pot of chicken and rice.
Check out this recipe
Pantry Beans: More Than a Side Dish
Read the Article!
Dutch Oven Cornbread for Two
A pot of soup or stew has a way of asking for cornbread.
Check out this recipe
How to Stretch a Dutch Oven Meal Into Two Suppers
Read the Article!

Why Dutch Oven Cooking Works for Small Households

A good Dutch oven can brown, sauté, simmer, braise, and bake.

That means you can build an entire meal in one pot.

And because Dutch ovens hold heat so well, they’re particularly good for the kinds of meals we tend to crave when the weather gets cooler:

  • Soups
  • Stews
  • Chili
  • Braised meats
  • Chicken and rice
  • Beans
  • One-pot meals
  • Small-batch breads and cornbread

The recipes don’t have to be complicated.

In fact, some of the best Dutch oven meals are built from the simplest ingredients.

Don’t Forget the Second Supper

One of the best things about Dutch oven cooking is that many of these meals can do double duty.

A little planning can turn one cooking session into two suppers.

Try:

  • Beef stew → beef pot pie
  • Chicken and rice → chicken soup
  • Chili → chili baked potatoes
  • Braised chicken → chicken sandwiches or wraps
  • Beans → bean and rice bowls

The goal isn’t to eat the exact same leftovers two nights in a row.

It’s to cook once and make tomorrow easier.

That’s especially valuable when you’re cooking for one or two.

Cooking for One or Two

If you’re used to recipes written for families, Dutch oven cooking may initially seem like a recipe for too much food.

It doesn’t have to be.

Look for smaller Dutch ovens and smaller recipes.

A meal that makes two or four servings can be exactly what you need:

Dinner tonight + lunch tomorrow.

Or:

Dinner tonight + a freezer meal for later.

That’s a much more useful way to think about leftovers than simply trying to avoid them.

And if a recipe makes more than you need, that’s not necessarily a problem. With a little planning, the extra portion can become the starting point for another meal.

A Dutch Oven Is a Pantry Tool

There’s another reason Dutch ovens fit so well with the October Pantry to Table theme.

They make pantry staples useful.

Rice.

Beans.

Potatoes.

Pasta.

Broth.

Canned tomatoes.

Frozen vegetables.

Cornmeal.

A little meat.

These aren’t necessarily exciting ingredients sitting individually on a pantry shelf.

But put them together in a Dutch oven, and they can become dinner.

That’s what a well-stocked pantry is supposed to do.

Build a Meal From What You Have

You don’t always need a recipe to get started.

Remember the Pantry-to-Pot Formula:

Protein + Vegetables + Starch + Liquid + Flavor = One-Pot Meal

Choose a protein.

Add one or two vegetables.

Pick a starch.

Add enough liquid to cook everything properly.

Then season it in a direction you enjoy.

The Dutch oven takes care of the rest.

Once you get comfortable with this way of thinking, you may find yourself looking at the pantry differently.

A can of beans isn’t just a side dish.

A little leftover chicken isn’t necessarily the end of a meal.

And that half bag of rice isn’t just something waiting for a special recipe.

They’re building blocks.

Stretch Every Grocery Dollar

Dutch oven meals are particularly good for budget-conscious cooking because they allow you to use smaller amounts of meat alongside inexpensive ingredients.

A little beef can flavor a stew.

A few ounces of chicken can make a pot of rice more substantial.

Beans can become the main protein or stretch a smaller amount of meat.

Potatoes and grains can turn a modest amount of protein into a satisfying meal.

And because many Dutch oven meals reheat well, one cooking session can take care of more than one meal.

That’s a win for both your grocery budget and your time.

Waste Not, Want Not

Dutch oven cooking also gives you plenty of opportunities to use ingredients before they go to waste.

That extra carrot?

Put it in the stew.

The half onion left from another recipe?

Into the pot.

A handful of frozen peas?

Perfect.

Leftover cooked chicken?

It can become the protein in a completely different one-pot meal.

You don’t have to use every leftover ingredient in every meal. But keeping an eye on what needs to be used first is one of the simplest ways to make your grocery budget work harder.

A Dutch Oven Doesn’t Have to Mean a Giant Meal

This is worth repeating because it’s an easy assumption to make.

Dutch oven recipes don’t have to feed a crowd.

A small Dutch oven is perfectly capable of making:

  • Two servings of stew
  • A small chicken and rice dinner
  • A couple of servings of beans
  • A small batch of cornbread
  • A small casserole
  • A simple fruit crisp

That’s one of the reasons Dutch oven cooking works so well for a small household.

You’re still getting all the benefits of one-pot cooking without committing yourself to leftovers for an entire week.

Weekend Supper

Set the Dutch oven on the stove.

Pull a few things from the pantry.

Use up a couple of vegetables from the refrigerator.

Add a little protein.

Let the pot do the work.

Then sit down and enjoy dinner.

That’s a pretty good weekend supper.

And that’s Pantry to Table.

Posted in Side Dishes

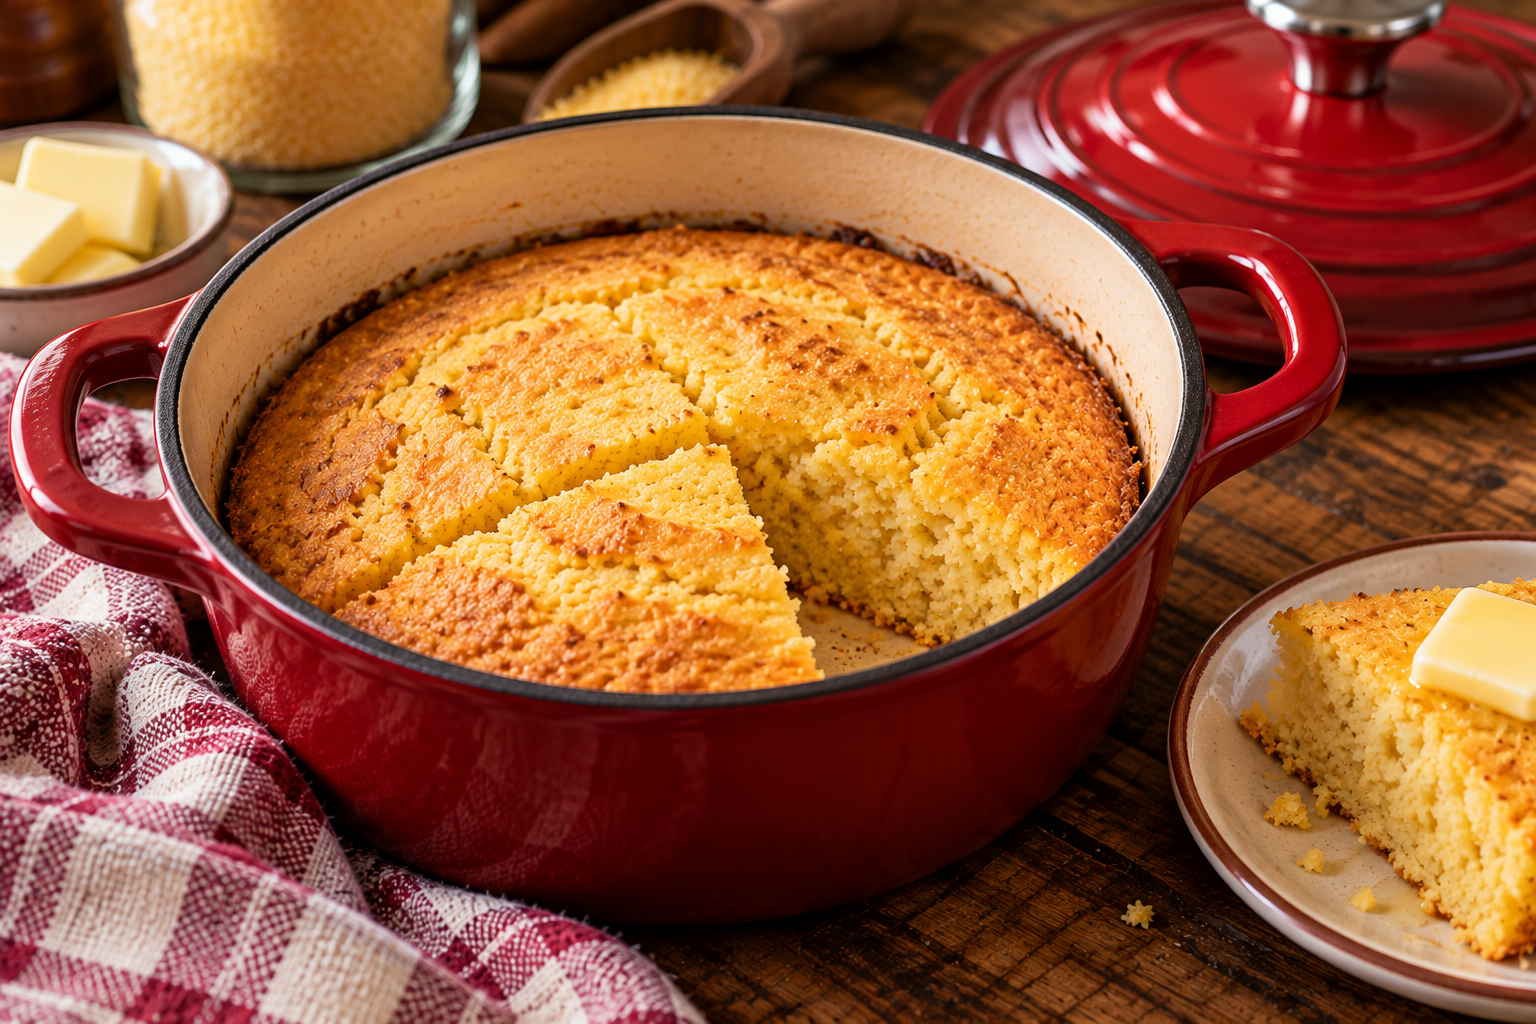
Dutch Oven Cornbread for Two

A pot of soup or stew has a way of asking for cornbread.

There’s just something about having a warm piece of cornbread alongside a bowl of chili, beef stew, or beans. But if you’re cooking for one or two people, a traditional pan of cornbread can leave you with far more than you want.

That’s why this Dutch Oven Cornbread for Two is intentionally small.

It makes just enough for two generous servings—or one serving tonight and another tomorrow—without requiring a full-size skillet or a big batch of leftovers.

And because we’re talking about Pantry to Table, most of the ingredients are simple pantry staples you can keep ready for exactly this kind of meal.

Why You’ll Love This Recipe

  • Makes a genuinely small batch.
  • Uses inexpensive pantry ingredients.
  • No special baking pan required.
  • Works beautifully with soups, stews, chili, and beans.
  • Slightly crisp around the edges while staying tender inside.
  • Easy to adapt for either sweet or savory preferences.
  • Makes good use of a small Dutch oven.

Recipe Information

Servings: 2
Serving size: 1 generous piece per serving
Prep time: 10 minutes
Cook time: 15–18 minutes
Total time: About 25–30 minutes
Meal category: Side Dish / Dutch Oven Meals
Main protein: None
Estimated calories: Approximately 240–260 calories per serving

simplegoodfood's avatarsimplegoodfood

Dutch Oven Cornbread for Two

A pot of soup or stew has a way of asking for cornbread.
Prep Time 10 minutes
Cook Time 18 minutes
Total Time 30 minutes
Servings: 2
Course: Side Dish
Cuisine: American
Calories: 260

Ingredients
  

  • ¼ cup yellow cornmeal
  • ¼ cup all-purpose flour
  • 1 tablespoon granulated sugar optional
  • ½ teaspoon baking powder
  • ⅛ teaspoon baking soda
  • ⅛ teaspoon salt
  • 1 large egg
  • ¼ cup buttermilk
  • 1 tablespoon unsalted butter melted
  • 1 teaspoon butter or olive oil for the Dutch oven

Method
 

Prepare the Dutch oven
  1. Preheat your oven to 400°F.
  2. Place a small oven-safe Dutch oven—approximately 6 inches in diameter—in the oven while it preheats.
  3. The preheated pot helps create those lightly crisp edges that make cornbread so good.
Mix the dry ingredients
  1. In a small bowl, whisk together the cornmeal, flour, sugar if using, baking powder, baking soda, and salt.
Mix the wet ingredients
  1. In another small bowl, whisk together the egg, buttermilk, and melted butter.
Combine
  1. Pour the wet ingredients into the dry ingredients.
  2. Stir just until everything is combined.
  3. Don’t overmix. A few small lumps are perfectly fine.
Add the batter to the Dutch oven
  1. Carefully remove the hot Dutch oven from the oven.
  2. Add the teaspoon of butter or olive oil and swirl carefully to coat the bottom.
  3. Pour in the cornbread batter.
  4. It should begin to sizzle gently when it hits the hot pot.
Bake
  1. Return the Dutch oven to the oven.
  2. Bake for 15–18 minutes, or until the top is golden and a toothpick inserted in the center comes out clean.
  3. The exact time will depend on the size and material of your Dutch oven.
Rest and serve
  1. Let the cornbread cool for about 5 minutes before removing it from the pot.
  2. Cut into two pieces and serve warm.

Notes

Kitchen Confidence
Don’t overmix the batter.
Cornbread doesn’t need the same kind of mixing as a cake.
Stir just until the dry ingredients are moistened. Overmixing can make the finished cornbread tougher.
Preheat the pot.
This is one of the little tricks that makes Dutch oven cornbread special.
The hot cooking surface helps the edges begin cooking immediately, giving you a lightly crisp exterior while the center stays tender.
Just remember that the pot will be very hot. Use oven mitts and keep the handle of the lid and pot turned away from the edge of the counter when possible.
Sweet or Savory?
This is one place where I don’t think there’s a single correct answer.
If you like a slightly sweet cornbread, keep the tablespoon of sugar.
If you prefer savory cornbread, leave it out.
You can also add a little extra flavor with:
  • 1 tablespoon finely chopped green onion
  • 1 tablespoon shredded cheddar cheese
  • A few tablespoons of corn
  • A pinch of dried herbs
For this small batch, keep additions modest so they don’t weigh down the batter.

Stretch Every Grocery Dollar

Cornmeal is one of those pantry ingredients that can quietly earn its keep.

A bag lasts a long time, and a small amount can become cornbread, cornmeal coating, or part of a casserole or skillet meal.

You don’t need to buy a special cornbread mix every time you want a couple of servings.

Keeping cornmeal, flour, baking powder, and eggs on hand gives you the ability to make a small batch whenever you need it.

And because this recipe makes only two servings, you’re not spending money on ingredients for a large batch that may sit around until it goes stale.

Waste Not, Want Not

If you don’t use the entire container of buttermilk, don’t let it become a refrigerator science experiment.

You can freeze buttermilk in small portions for future baking, or use it in pancakes, waffles, biscuits, or another cornbread batch.

No buttermilk?

You can make a quick substitute by adding about ¾ teaspoon lemon juice or vinegar to ¼ cup milk. Let it stand for about 5 minutes before using.

The result won’t be exactly the same, but it works well for a small batch like this.

Cooking for One or Two

For two people, divide the cornbread in half and serve it alongside your main meal.

For one person, you can eat half today and refrigerate the other half for tomorrow.

Reheat gently before serving.

You can also cut the finished cornbread into small cubes and toast them lightly to make a simple addition to soups or salads.

Meal Prep Note

Cornbread is best fresh, but it holds up reasonably well for a day or two.

If you’re planning ahead, wrap the cooled cornbread tightly and refrigerate it.

Reheat briefly in the microwave or warm it in the oven.

For the best texture, don’t overheat it.

Storage & Freezing

Store cooled cornbread in an airtight container.

Refrigerate for up to 3 days.

For longer storage, wrap individual pieces well and freeze for up to 2 months.

Thaw at room temperature or in the refrigerator and warm before serving.

What to Serve With Dutch Oven Cornbread

This little cornbread is a natural partner for all kinds of Pantry to Table meals.

Try it with:

  • Beef stew
  • Chicken soup
  • Vegetable soup
  • Chili
  • Black-eyed peas
  • White bean soup
  • Pinto beans
  • Chicken and vegetable stew
  • Pulled pork
  • A simple skillet meal

And don’t overlook breakfast.

A leftover piece of cornbread warmed with a little butter can make a surprisingly good small breakfast or snack.

A Dutch Oven Isn’t Just for Dinner

When we think about Dutch ovens, it’s easy to picture a big pot of stew simmering away.

But they’re useful for much more than that.

A small Dutch oven can bake a small loaf of bread, a couple of servings of cornbread, a fruit crisp, or another small-batch dessert.

That’s part of what makes Dutch oven cooking so practical for a small household.

You don’t need a huge pot to get the benefits.

Pantry to Table

This little recipe is a good reminder that a practical pantry doesn’t have to contain complicated ingredients.

Cornmeal.

Flour.

Egg.

Buttermilk.

A little butter.

A few basic leaveners.

That’s enough to turn a few pantry staples into something warm and homemade to put beside dinner.

And sometimes that’s exactly what makes an ordinary bowl of soup feel like a meal.

Posted in One-Pot Meals

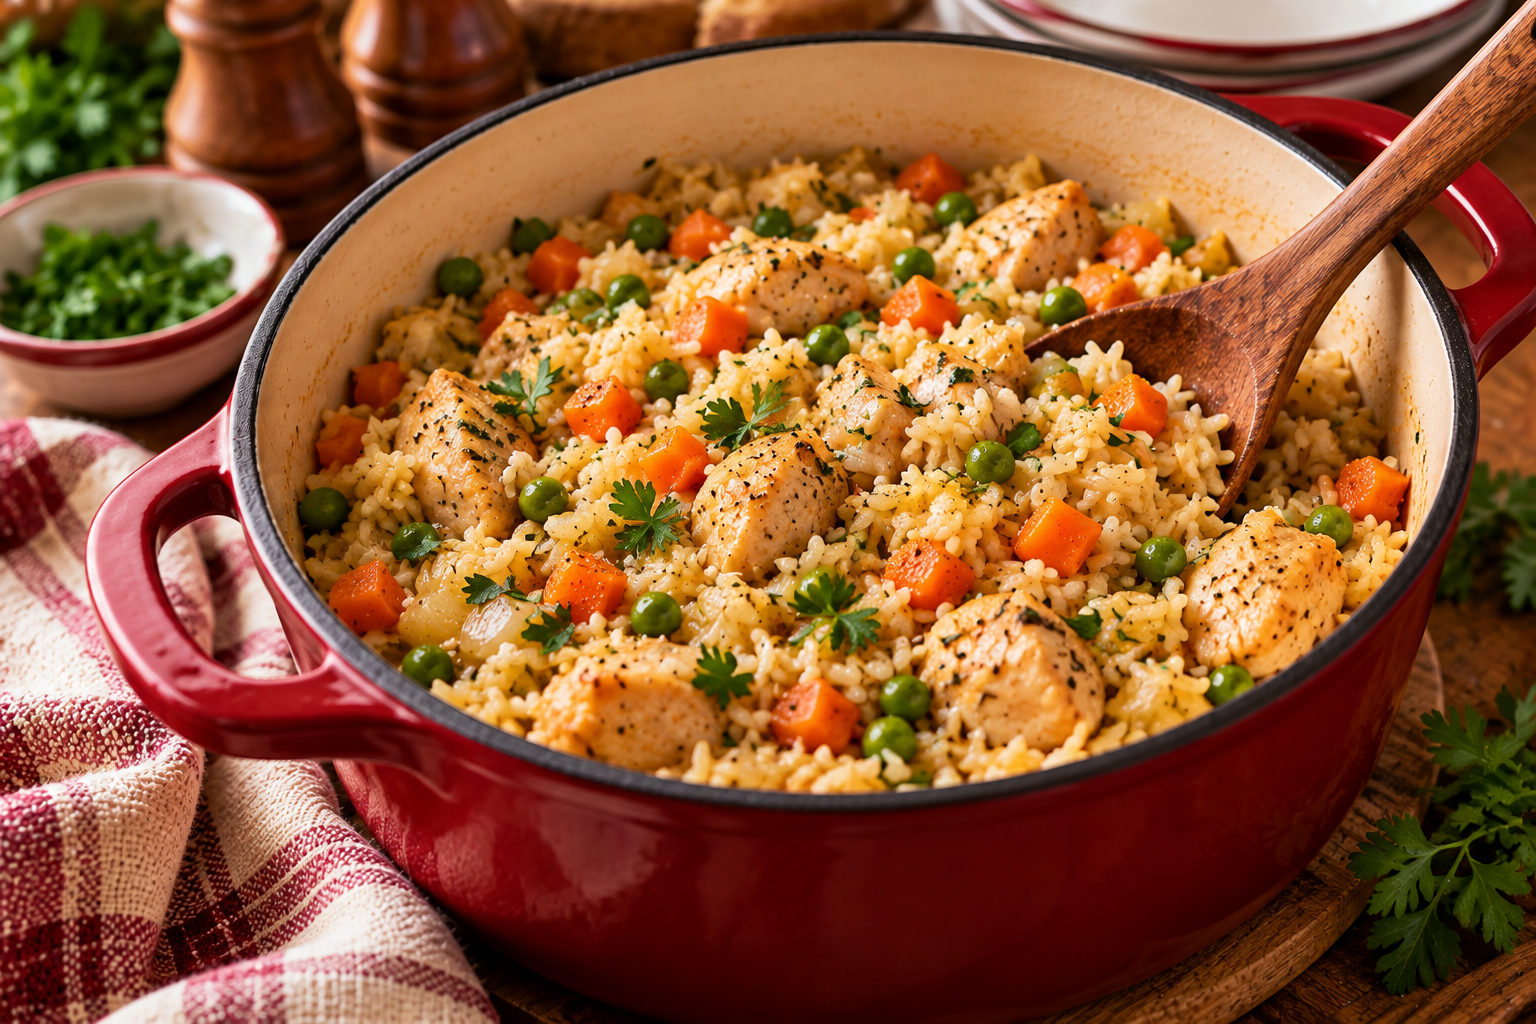
Dutch Oven Chicken & Rice

There is something wonderfully practical about a pot of chicken and rice.

You don’t need an expensive cut of meat. You don’t need a long list of ingredients. And you don’t need a pile of dirty dishes afterward.

This Dutch Oven Chicken & Rice is a simple, savory one-pot meal built for a small household. Tender chicken, rice, vegetables, and a flavorful broth cook together until everything is warm, comforting, and satisfying.

It’s also a perfect example of the Pantry-to-Pot Formula we talked about yesterday: choose a protein, add vegetables and a starch, bring everything together with a flavorful liquid, and let one pot do the work.

Why You’ll Love This Recipe

  • One pot does almost everything.
  • It uses inexpensive ingredients that are easy to keep on hand.
  • A small amount of chicken goes a long way when paired with rice and vegetables.
  • It’s naturally suited to cooking for two.
  • It can be adapted to whatever vegetables you have available.
  • Leftovers make an easy second meal.
  • It’s comfort food without being heavy.

Recipe Information

Servings: 2 generous servings
Serving size: About 1½ cups
Prep time: 15 minutes
Cook time: 35–40 minutes
Total time: About 50–55 minutes
Meal category: Dutch Oven Meals / One-Pot Meals
Main protein: Chicken
Estimated calories: Approximately 450–500 calories per serving, depending on the chicken used

simplegoodfood's avatarsimplegoodfood

Dutch Oven Chicken & Rice

There is something wonderfully practical about a pot of chicken and rice.
Prep Time 15 minutes
Cook Time 40 minutes
Total Time 55 minutes
Servings: 2
Course: Dinner, Lunch
Cuisine: American
Calories: 500

Ingredients
  

  • 8 ounces boneless, skinless chicken thighs or chicken breast cut into bite-size pieces
  • 1 tablespoon olive oil
  • ½ small onion diced
  • 1 small carrot diced
  • 1 clove garlic minced
  • ½ cup long-grain white rice uncooked
  • 1¼ cups low-sodium chicken broth
  • ½ teaspoon dried thyme
  • ¼ teaspoon dried parsley
  • ¼ teaspoon paprika
  • ⅛ teaspoon black pepper
  • ¼ teaspoon salt or to taste
  • ½ cup frozen peas
  • 1 teaspoon lemon juice optional
  • 1 tablespoon chopped fresh parsley optional

Method
 

Prepare the chicken
  1. Pat the chicken dry and cut it into bite-size pieces.
  2. Season lightly with the salt, pepper, thyme, and paprika.
Brown the chicken
  1. Heat the olive oil in a small Dutch oven over medium heat.
  2. Add the chicken in a single layer and cook for 3–4 minutes, stirring occasionally, until lightly browned.
  3. The chicken does not need to be completely cooked at this point. It will finish cooking with the rice.
  4. Remove the chicken to a plate and set aside.
Cook the vegetables
  1. Add the onion and carrot to the same Dutch oven.
  2. Cook for 3–4 minutes, stirring occasionally, until the onion begins to soften.
  3. Add the garlic and cook for about 30 seconds.
Add the rice
  1. Stir the uncooked rice into the vegetables.
  2. Cook for about 1 minute, stirring constantly.
  3. This quick step lightly toasts the rice and helps build another layer of flavor.
Add the broth and chicken
  1. Pour in the chicken broth and scrape the bottom of the pot to loosen any browned bits.
  2. Return the chicken and any juices on the plate to the Dutch oven.
  3. Stir in the parsley.
  4. Bring the mixture to a gentle simmer.
Cover and cook
  1. Reduce the heat to low and cover the Dutch oven.
  2. Cook for about 18–20 minutes, or until the rice is tender and most of the liquid has been absorbed.
  3. Avoid repeatedly lifting the lid while the rice cooks. Every time you remove the lid, you lose steam that the rice needs to cook properly.
Add the peas
  1. Stir in the frozen peas during the final 3–5 minutes of cooking.
  2. If desired, add a small squeeze of lemon juice just before serving. It brightens the flavors without making the dish taste lemony.
  3. Let the chicken and rice rest, covered, for about 5 minutes before serving.
  4. Fluff gently with a fork and sprinkle with fresh parsley if you have it.

Notes

Kitchen Confidence
Don’t skip browning the chicken.
You aren’t trying to cook the chicken completely during the first step.
You’re building flavor.
The browned bits left in the bottom of the Dutch oven will become part of the broth once you add the liquid.
Keep the lid on.
Rice is much less forgiving than a stew.
Once the broth is simmering and the lid is on, resist the temptation to keep checking it. Give the rice time to absorb the liquid and cook evenly.
If the rice is still firm when the liquid is nearly gone, add a small splash of broth, cover the pot again, and continue cooking.

Stretch Every Grocery Dollar

Chicken and rice are two of the most useful ingredients in a budget-conscious kitchen.

You don’t need a large amount of chicken to make this a satisfying meal. The rice provides substance while the vegetables add flavor, texture, and nutrition.

Chicken thighs can also be a good choice when they’re less expensive than boneless chicken breast. Remove the skin and any excess fat before cooking if necessary.

And this is exactly the kind of recipe where buying a larger package of chicken when it’s on sale can make sense. Divide it into meal-sized portions and freeze what you won’t use immediately.

Waste Not, Want Not

This recipe is wonderfully flexible when it comes to vegetables.

You can replace the carrot and peas with whatever makes sense in your kitchen.

Try:

  • Frozen mixed vegetables
  • Corn
  • Chopped green beans
  • Diced bell pepper
  • Finely chopped celery
  • A small amount of leftover cooked vegetables

Just remember that vegetables with longer cooking times should go in earlier, while delicate vegetables can be added near the end.

Cooking for One or Two

This recipe makes two generous servings.

If you’re cooking for one, you have two good choices:

Make the recipe as written and save half for tomorrow, or halve the ingredients for a single serving.

For most people, I’d choose the first option.

Cooking once and getting two meals out of it is one of the easiest ways to make home cooking fit into a busy week.

If you halve the recipe, use a very small Dutch oven or heavy saucepan so the rice and liquid remain in a reasonably deep layer.

Meal Prep Note

Chicken and rice is an excellent meal-prep combination.

Divide leftovers into individual containers once the food has cooled.

When reheating, add a tablespoon or two of water or broth before covering and heating. This helps keep the rice from becoming dry.

For best texture, reheat gently rather than blasting it at high heat.

Storage & Freezing

Refrigerate leftovers promptly in a covered container and use within 3–4 days.

Chicken and rice can be frozen, although the rice may become slightly softer after thawing.

For best results, freeze individual portions in airtight freezer containers.

Thaw overnight in the refrigerator and reheat thoroughly before serving.

Easy Variations

Chicken & Vegetable Rice

Add a little extra frozen vegetable mix for a more vegetable-heavy meal.

Garlic Herb Chicken & Rice

Increase the garlic slightly and use thyme, parsley, and a little rosemary.

Creamy Chicken & Rice

Stir a tablespoon or two of plain Greek yogurt into an individual serving after reheating for a creamy finish.

Southwest Chicken & Rice

Use cumin and chili powder instead of thyme and parsley. Add corn and a little diced bell pepper.

You can change the flavor profile without changing the basic cooking method.

What This Recipe Teaches

This little Dutch oven meal is more than just chicken and rice.

It demonstrates why a pantry meal formula is so useful.

You have:

Protein: chicken
Vegetables: carrots and peas
Starch: rice
Liquid: chicken broth
Flavor: garlic, herbs, paprika, and lemon

Put them together in one pot and you have dinner.

That’s Pantry to Table in action.

One More Reason to Love One-Pot Cooking

There’s a practical advantage to one-pot meals that doesn’t get enough attention:

There is less to clean up.

When you’re cooking for one or two people, washing three saucepans, a skillet, a roasting pan, and a casserole dish for one meal gets old quickly.

A Dutch oven lets you brown, sauté, simmer, and serve from the same pot.

Sometimes the best kitchen equipment isn’t the fanciest.

It’s the piece that makes you willing to cook dinner.

Posted in One-Pot Meals, Soups & Stews

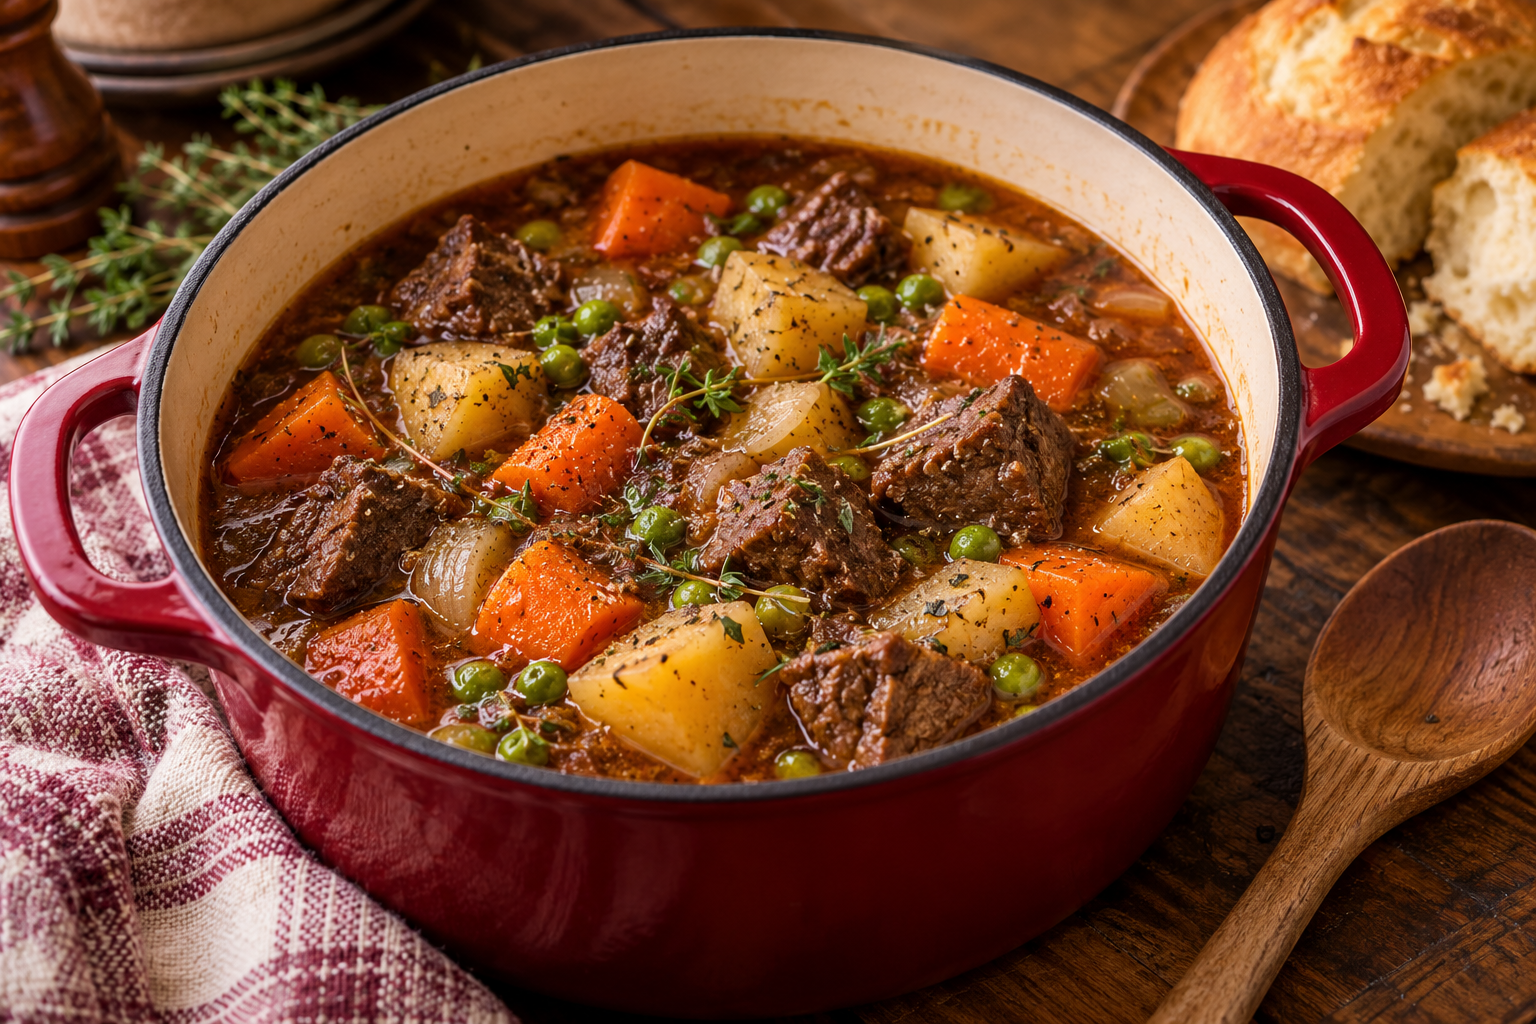
Dutch Oven Beef Stew

There are some meals that just seem to belong to October, and a good beef stew is one of them.

This Dutch Oven Beef Stew is the kind of dinner that makes a chilly evening feel a little more welcoming. Tender beef, potatoes, carrots, onions, and a savory broth come together in one pot for a hearty meal without requiring a long list of complicated ingredients.

More importantly, it shows what Pantry to Table is really about: taking a few dependable ingredients you already have on hand and turning them into something that tastes like you planned ahead.

And while a Dutch oven is perfect for this kind of meal, you don’t need an elaborate recipe or a huge family-sized batch. This version is designed with smaller households in mind, so you get a satisfying supper without being buried under a refrigerator full of leftovers.

Why You’ll Love This Recipe

  • One-pot cooking means less cleanup.
  • It’s built around ordinary ingredients that are easy to keep in the pantry or refrigerator.
  • A little beef goes a long way when combined with potatoes and vegetables.
  • It’s perfect for cool-weather cooking.
  • The leftovers can become another supper, making this a particularly good grocery-budget meal.
  • It can be made on the stovetop or finished in the oven, depending on how you like to use your Dutch oven.

Recipe Information

Servings: 2 generous servings
Serving size: About 1½ cups stew
Prep time: 20 minutes
Cook time: 1 hour 30 minutes
Total time: About 1 hour 50 minutes
Meal category: Dutch Oven Meals / Skillet & One-Pot Meals
Main protein: Beef
Estimated calories: Approximately 500–550 calories per serving, depending on the beef used

simplegoodfood's avatarsimplegoodfood

Dutch Oven Beef Stew

There are some meals that just seem to belong to October, and a good beef stew is one of them.
Prep Time 20 minutes
Cook Time 1 hour 30 minutes
Total Time 1 hour 50 minutes
Servings: 2
Course: Dinner, Main Course
Cuisine: American
Calories: 550

Ingredients
  

  • 8 ounces beef stew meat cut into bite-size pieces
  • 1 tablespoon all-purpose flour
  • 1 tablespoon olive oil
  • ½ small onion chopped
  • 1 clove garlic minced
  • 1 medium carrot sliced
  • 1 medium potato peeled and cut into chunks
  • 1 cup low-sodium beef broth
  • 1 tablespoon tomato paste
  • ½ teaspoon dried thyme
  • ¼ teaspoon dried rosemary
  • ¼ teaspoon salt or to taste
  • ⅛ teaspoon black pepper
  • ½ cup frozen peas
  • 1 teaspoon Worcestershire sauce optional

Equipment

  • 1 6 in Dutch Oven

Method
 

Prepare the beef
  1. Pat the beef dry with paper towels. Toss the pieces with the flour, salt, and pepper.
  2. Don’t worry about getting every piece perfectly coated. The small amount of flour will help with browning and will also help thicken the stew as it cooks.
Brown the beef
  1. Heat the olive oil in a small Dutch oven over medium-high heat.
  2. Add the beef in a single layer. Brown for several minutes, turning the pieces so they develop color on more than one side.
  3. Work in batches if necessary. Crowding the pot causes the beef to steam instead of brown.
  4. Remove the beef to a plate and set aside.
Build the base
  1. Reduce the heat to medium.
  2. Add the onion and carrot to the same Dutch oven. Cook for 3–4 minutes, stirring occasionally.
  3. Add the garlic and cook for about 30 seconds.
  4. Stir in the tomato paste and cook for another minute.
Return the beef to the pot
  1. Add the browned beef back to the Dutch oven.
  2. Pour in the beef broth and Worcestershire sauce, if using. Stir well, scraping up the browned bits from the bottom of the pot.
  3. Add the thyme and rosemary.
Add the potatoes
  1. Bring the mixture to a gentle simmer.
  2. Add the potatoes, then reduce the heat to low. Cover and simmer for about 60–75 minutes, or until the beef is tender and the potatoes are cooked through.
  3. Stir occasionally and check the liquid level. If the stew becomes too thick before the beef is tender, add a small amount of broth or water.
Finish with the peas
  1. Stir in the frozen peas during the final 5 minutes of cooking.
  2. Taste and adjust the seasoning if needed.
  3. Let the stew rest for a few minutes before serving. The broth will thicken slightly as it stands.

Notes

Kitchen Confidence

Don’t rush the browning.
The browned bits left on the bottom of the Dutch oven are part of what gives a simple stew its deep flavor. You don’t need to brown the beef until it’s cooked through — you’re simply developing color on the outside.
And don’t panic if the pot looks a little messy after browning. Once you add the broth, those flavorful browned bits become part of the sauce.
A Dutch oven doesn’t have to mean an enormous batch of food.
A smaller Dutch oven works beautifully for cooking for one or two. The heavy pot holds heat well and gives you the advantages of one-pot cooking without requiring a six-quart recipe.

Stretch Every Grocery Dollar

Beef stew is a great example of how to make a modest amount of meat feed more people.

You don’t need a pound or two of beef for two people. Eight ounces of beef combined with potatoes, carrots, onions, and peas makes a substantial meal.

If stew meat is expensive at your grocery store, look for a small chuck roast on sale and cut it into cubes yourself. You can also freeze the extra beef in meal-sized portions for another Dutch oven dinner.

And don’t automatically discard the vegetables in the bottom of the refrigerator. A little celery, a few mushrooms, or leftover frozen vegetables can all find a home in a stew.

Waste Not, Want Not

This is one of those meals where odds and ends can be useful.

Have half an onion left from another recipe? Use it.

A lonely carrot in the refrigerator? Into the stew it goes.

A handful of frozen peas? Perfect.

You can even substitute some of the potato with another sturdy vegetable such as turnip or rutabaga.

The goal isn’t to make the stew exactly the same every time. It’s to use what you have before buying more.

Cooking for One or Two

For one person, divide the finished stew into two portions and save one for another meal.

You can also make the full recipe for two and plan ahead for leftovers. A second serving reheats beautifully and may actually taste better the next day.

If you prefer truly single-serving cooking, halve all the ingredients and use a very small Dutch oven or heavy saucepan with a lid.

Meal Prep Note

This is an excellent make-ahead meal.

Cool leftover stew promptly and refrigerate it in a covered container. When reheating, add a splash of broth or water if the gravy has thickened too much.

For meal prep, portion the stew into individual containers so you have a ready-made supper waiting for you.

Storage & Freezing

Refrigerate leftovers for up to 3–4 days.

For longer storage, freeze cooled stew in individual portions for up to 3 months for best quality.

Potatoes can soften somewhat after freezing and thawing, but the stew will still be delicious. If you know ahead of time that you’re freezing the entire batch, slightly undercook the potatoes.

Thaw overnight in the refrigerator and reheat gently on the stovetop or in the microwave.

A Little More From the Dutch Oven

This stew is the first example in this week’s Dutch Oven & One-Pot Pantry Meals theme.

The real lesson isn’t simply how to make beef stew. It’s how useful one-pot cooking can be when you’re cooking for a small household.

A Dutch oven lets you brown, simmer, and finish a meal in the same pot. That means fewer dishes, fewer specialty ingredients, and plenty of opportunity to use what you already have.

That’s exactly where Pantry to Table begins.