Posted in Arrival Day Dinner, Cold/No Heat Meals, Sandwiches, Wraps & Handhelds

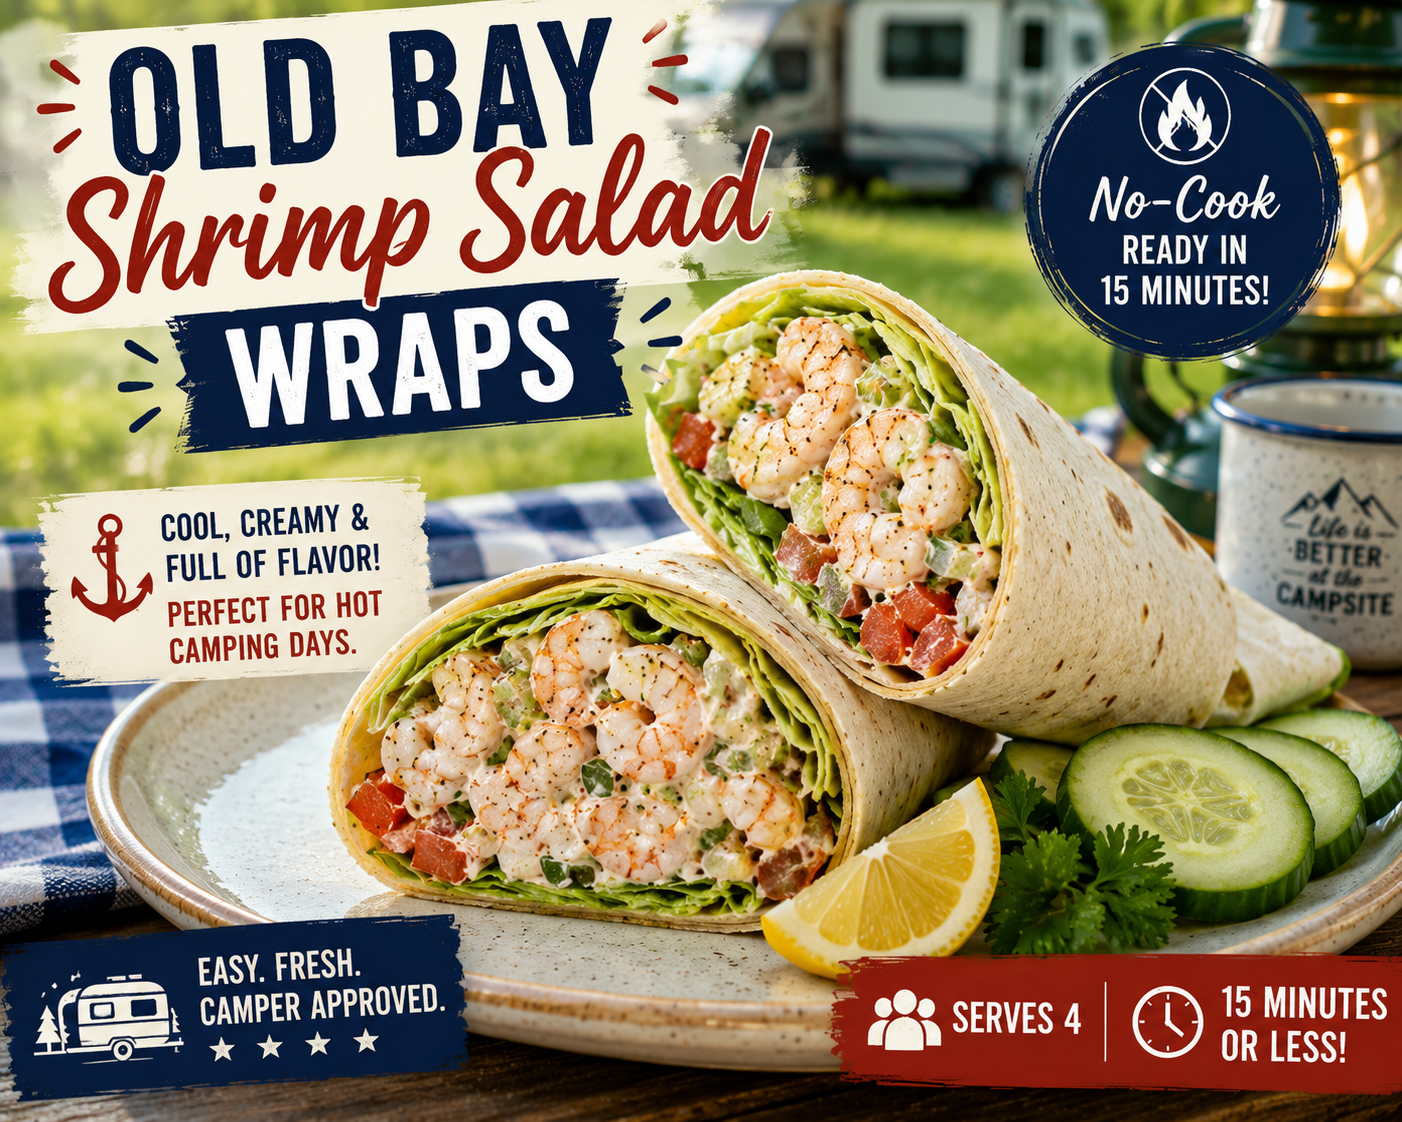
Old Bay Shrimp Salad Wraps

When summer temperatures climb, sometimes the best campground dinner is one that doesn’t require heating up the grill or camp stove. These Old Bay Shrimp Salad Wraps are cool, refreshing, and packed with flavor. Tender shrimp are tossed in a light dressing seasoned with Old Bay, then wrapped in soft tortillas with crisp lettuce and crunchy vegetables. They’re perfect for hot afternoons, beachside campsites, and RV travelers looking for a quick meal with minimal cleanup.

simplegoodfood's avatarsimplegoodfood

Old Bay Shrimp Salad Wraps

A cool, no-cook meal ideal for hot campground afternoons.
Prep Time 15 minutes
Cook Time 5 minutes
Total Time 20 minutes
Servings: 4
Course: Dinner, Lunch, Main Course
Cuisine: American
Calories: 320

Ingredients
  

  • 1 pound cooked shrimp peeled, deveined, and chopped
  • ¼ cup light mayonnaise
  • 2 tablespoons plain Greek yogurt
  • 1 teaspoon Old Bay seasoning
  • 1 teaspoon lemon juice
  • ¼ teaspoon black pepper
  • 2 celery stalks finely diced
  • 2 green onions sliced
  • 1 cup shredded lettuce
  • 4 large flour tortillas
  • Optional: sliced tomato or cucumber

Method
 

Prepare the Shrimp Salad
  1. In a large bowl, combine the mayonnaise, Greek yogurt, Old Bay seasoning, lemon juice, and black pepper.
  2. Stir until smooth.
  3. Add the chopped shrimp, celery, and green onions.
  4. Mix until everything is evenly coated.
Assemble the Wraps
  1. Lay the tortillas flat on a clean surface.
  2. Divide the lettuce evenly among the tortillas.
  3. Spoon the shrimp salad onto the center of each tortilla.
  4. Add tomato or cucumber slices if desired.
Wrap and Serve
  1. Fold in the sides of each tortilla.
  2. Roll tightly into wraps.
  3. Slice in half and serve immediately.

Notes

Storage & Reheating Tips
  • Store the shrimp salad separately from the tortillas if making ahead.
  • Keep refrigerated and use within 2 days.
  • Assemble wraps just before serving to prevent sogginess.
  • Not recommended for freezing.
Posted in Skillet Meals

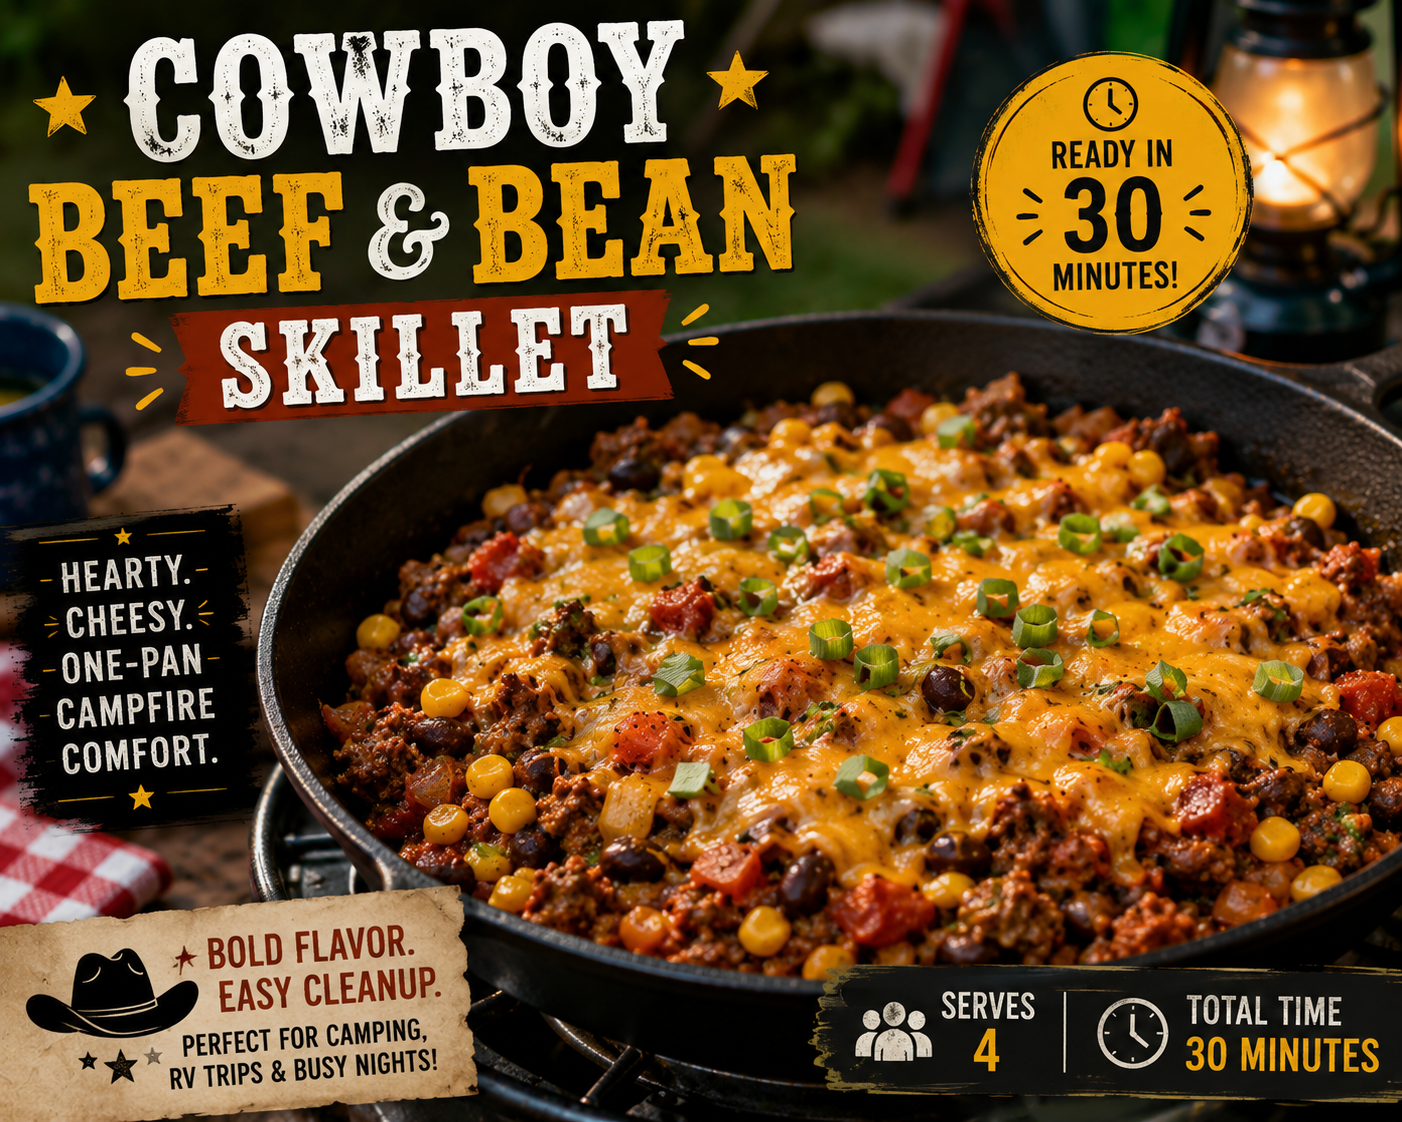
Cowboy Beef & Bean Skillet

When you need a filling campground dinner that doesn’t require a sink full of dishes, this Cowboy Beef & Bean Skillet gets the job done. Ground beef, beans, corn, onions, and seasonings come together in one pan for a hearty meal that’s perfect after a day of hiking, fishing, or exploring. Whether you’re cooking on a camp stove, propane burner, or electric skillet, this recipe delivers big flavor with minimal fuss.

simplegoodfood's avatarsimplegoodfood

Cowboy Beef & Bean Skillet

Groundbeef, beans, corn, onions, and cheese cooked in one skillet.
Prep Time 10 minutes
Cook Time 20 minutes
Total Time 30 minutes
Servings: 4
Course: Dinner, Lunch, Main Course
Cuisine: American
Calories: 470

Ingredients
  

  • 1 pound lean ground beef
  • 1 small onion diced
  • 1 15-ounce can pinto beans, drained and rinsed
  • 1 cup frozen corn
  • 1 10-ounce can diced tomatoes with green chilies, undrained
  • 1 teaspoon chili powder
  • 1 teaspoon smoked paprika
  • ½ teaspoon garlic powder
  • ½ teaspoon cumin
  • ½ teaspoon salt
  • ¼ teaspoon black pepper
  • 1 cup shredded cheddar cheese
  • 2 green onions sliced (optional)

Method
 

Brown the Beef
  1. Heat a large skillet over medium heat.
  2. Add the ground beef and onion.
  3. Cook until the beef is browned and the onion is softened.
  4. Drain excess grease if needed.
Add the Remaining Ingredients
  1. Stir in the beans, corn, diced tomatoes with green chilies, chili powder, smoked paprika, garlic powder, cumin, salt, and pepper.
  2. Bring the mixture to a gentle simmer.
  3. Cook for 8–10 minutes, stirring occasionally, until heated through.
Finish the Dish
  1. Sprinkle the cheddar cheese evenly over the top.
  2. Cover the skillet with a lid or foil.
  3. Cook for 2–3 minutes until the cheese melts.
Serve
  1. Remove from heat.
  2. Garnish with sliced green onions if desired.

Notes

Storage & Reheating Tips
  • Refrigerate leftovers in an airtight container for up to 3 days.
  • Reheat in a skillet over medium-low heat or in the microwave.
  • Leftovers also make an excellent filling for burritos or loaded baked potatoes.
Posted in One-Pot Meals

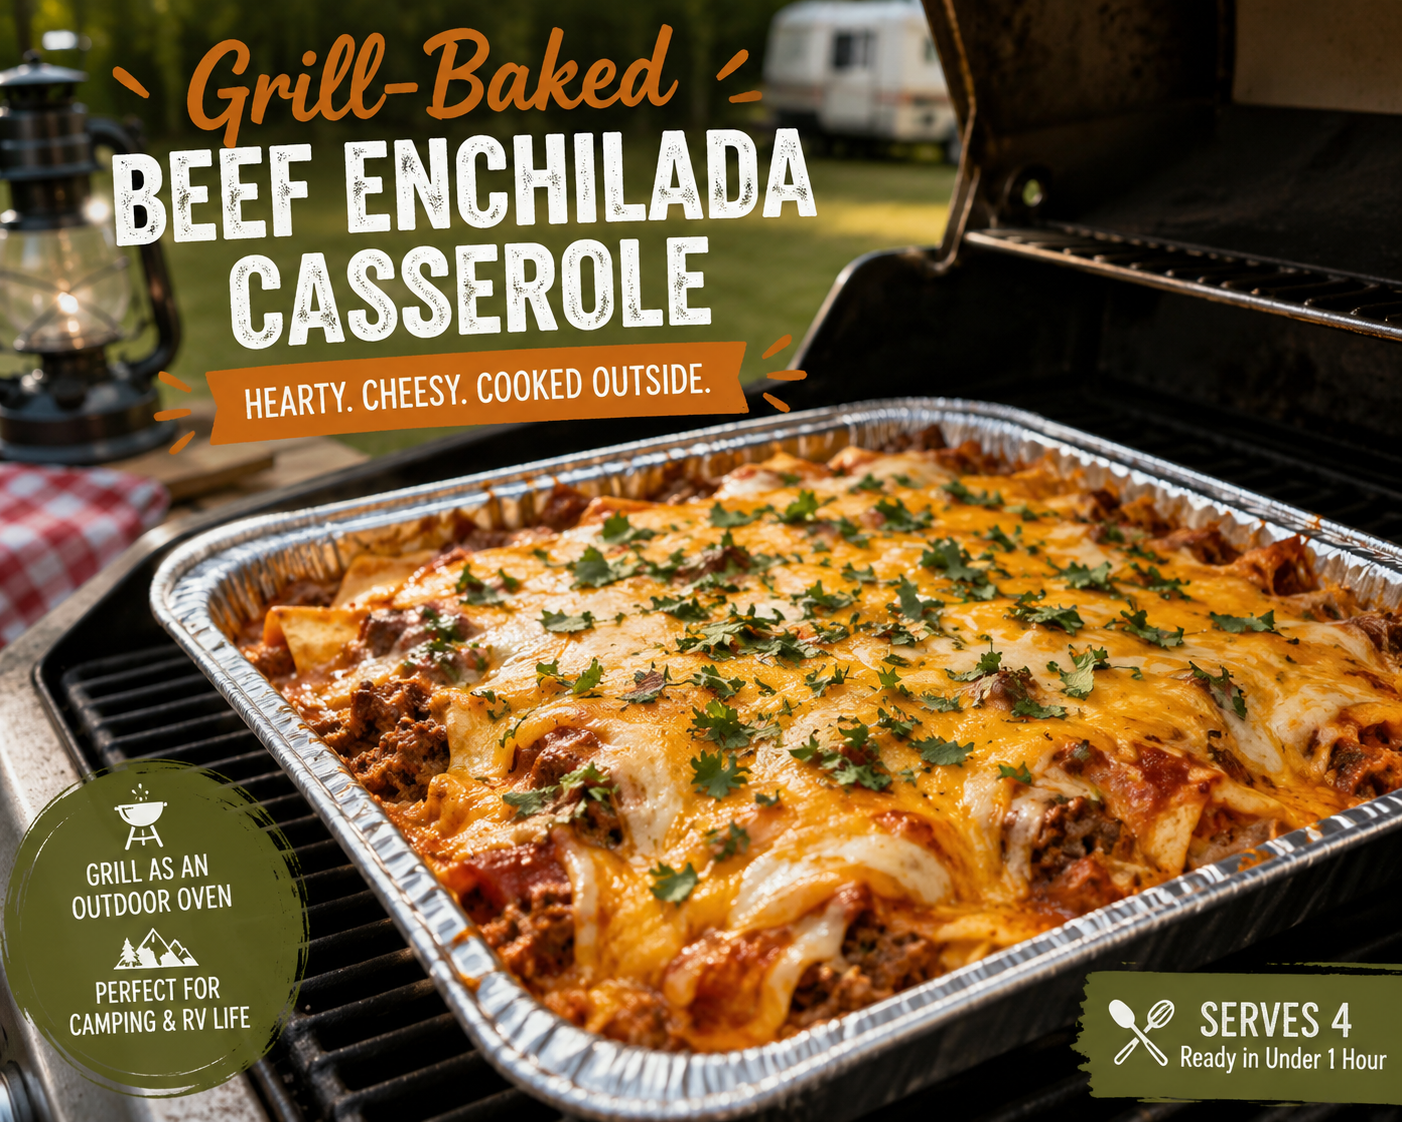
Grill-Baked Beef Enchilada Casserole

If you love the idea of a hearty casserole at the campground but don’t want to heat up the RV, this Grill-Baked Beef Enchilada Casserole is the answer. Cooked in a disposable foil pan over indirect heat, this meal delivers all the flavors of classic beef enchiladas with a fraction of the work. It’s perfect for seasonal campers, RV travelers, and anyone looking to turn their grill into an outdoor oven.

simplegoodfood's avatarsimplegoodfood

Grill-Baked Beef Enchilada Casserole

A foil-pan enchilada casserole cooked over indirect grill heat. Perfect example of using the grill as an outdoor oven.
Prep Time 15 minutes
Cook Time 40 minutes
Total Time 55 minutes
Servings: 4
Course: Dinner, Lunch, Main Course
Cuisine: American
Calories: 520

Ingredients
  

  • 1 pound lean ground beef
  • 1 small onion diced
  • 1 teaspoon chili powder
  • 1 teaspoon cumin
  • ½ teaspoon garlic powder
  • ½ teaspoon salt
  • 1 10-ounce can red enchilada sauce
  • 6 small flour tortillas cut into strips
  • 1 cup shredded cheddar cheese
  • 1 cup shredded Monterey Jack cheese
  • 1 4-ounce can diced green chiles, drained

Method
 

Prepare the Beef
  1. Heat a skillet over medium heat.
  2. Brown the ground beef and onion until the beef is cooked through.
  3. Drain excess grease if necessary.
  4. Stir in chili powder, cumin, garlic powder, and salt.
Assemble the Casserole
  1. Spray an 8 x 8-inch disposable foil pan with cooking spray.
  2. Spread a few spoonfuls of enchilada sauce on the bottom.
  3. Layer half of the tortilla strips in the pan.
  4. Add half of the beef mixture.
  5. Sprinkle with half of the green chiles.
  6. Pour over half of the remaining enchilada sauce.
  7. Top with half of each cheese.
  8. Repeat the layers with the remaining tortillas, beef, chiles, sauce, and cheese.
Grill-Bake
  1. Preheat a gas grill for indirect cooking to approximately 350°F.
  2. Turn off one side of the grill and place the foil pan on the unlit side.
  3. Close the lid and cook for 35–40 minutes, or until bubbly and heated through.
Serve
  1. Let stand for 5 minutes before serving.
  2. Serve with a simple salad, tortilla chips, or campground corn on the cob.

Notes

Storage & Reheating Tips
  • Store leftovers in a covered container in the refrigerator for up to 3 days.
  • Reheat individual portions in a skillet or microwave.
This casserole can be assembled at home, refrigerated in the cooler, and baked at the campground later the same day.

Posted in Miscellaneous (Unsorted)

Vacation Notice!

Yep, I’m finally doing it! I’m taking a (very) much needed break for 2 weeks starting July 1st and returning on July 16th. I’ve scheduled some posts for that timeframe, so I won’t leave you hanging.

I’ve been posting for the last 2 years straight, through my husband’s declining health, and finally his passing. I love each and every one of my followers and don’t want to leave you wondering what happened.

To be perfectly honest, my intentions are to use this time to find a place to live in Pennsylvania that is near to my oldest daughter. In the year since my husband’s death, I’ve discovered that right now I can’t bear to visit that cemetery. By the same token, I can’t bear to stay in Florida without him. I’m sure that’s something that other widows and widowers can sympathize with.

So, like Arnold Schwarzenegger said in Terminator, “I’ll be back.”