Posted in Cookbooks

Coffee Roaster’s Handbook: A How-To Guide for Home and Professional Roasters

From bean to brew—a complete guide to coffee roasting for beginners and professionals alike

Now you can master the art of coffee roasting—with its heavenly aromas and full-bodied flavors—all on your own. The Coffee Roaster’s Handbook is packed with practical information for roasters of any level, whether you’re just getting started or you’re already a coffee-roasting connoisseur.

From selecting and purchasing green coffee beans to storing and cupping your roasts, this colorfully illustrated handbook has all the comprehensive, roasting-related knowledge you’ll need to create and enjoy your own delicious coffee. You’ll find a deep dive on the science of coffee roasting, tips on how to spot bean defects, a how-to guide to evaluating your roasts, and so much more. Now, go forth and roast!

The Coffee Roaster’s Handbook includes:

  • A brief history of coffee—Learn all about the origins of coffee, including primitive roasting methods, its introduction to worldwide trade markets, and its evolution to today.
  • Essential roasting equipment—Explore helpful info about at-home and commercial equipment, from air-popper-style roasters to large drum roasters, and other important tools like thermometers, afterburners, and beyond.
  • Quick reference guide—Discover an illustrated guide to roasting with a small or large drum roaster, from start to finish.

Master the art of coffee roasting with The Coffee Roaster’s Handbook!

Editorial Reviews

Review

“Len has an amazing amount of coffee and roasting knowledge, and I was excited to see him put so much of this into book form. It ties together coffee history and genes with practical tips on roasting and blending. A fun and informative read!” ―Tam Le, Reign Drink Lab, Dorchester, MA

“Most individuals who enter the world of coffee roasting ‘fall’ into it through a passion and love for coffee in itself. The danger of this approach, of course, is that one risks becoming a romantic or an idealist in their craft and never pursues it with the proper knowledge, training, and skills to take that passion to that next level until much later than they should (trust me, I know!). But the key to proper knowledge is having the proper tools in your toolbelt. Whether you’re just stepping into the world of home roasting or have been roasting at a commercial level for years, this book will become one of your most important and frequently used tools. This is not a book that regurgitates a lot of the same basic coffee wisdom you’ll find in other books. Our understanding of both the product and the craft should continue to break new ground, provide new wisdom, and grow new passions. Len Brault’s Coffee Roaster’s Handbook does just that. This will be a book I will return to time and time again.” ―Randy Hardman, Owner, Drinklings Coffee and Mugs

“We have worked extensively with Len over the years to unlock the secrets of green coffees and optimize roast profiles. Coffee Roaster’s Handbook is a treasure trove of practical tips and coffee hacks that until now, one could only have learned through a career’s worth of trial and error. Len’s handbook is a kickstart for roasters everywhere.” ―Justin Will, Inspired Coffee Merchants, inspiredcoffee.com

About the Author

Len Brault believes coffee has a tremendous capacity to create improvement in millions of lives worldwide. Since 2005, he has run an online coffee website (LensCoffee.com) and held many seminars on coffee brewing and roasting. Currently, his company supports projects to help prevent the extinction of Liberica in the Philippines and initiatives to expand the practice of direct trade in the coffee industry.

Posted in Chicken Meals, Kitchen Tips

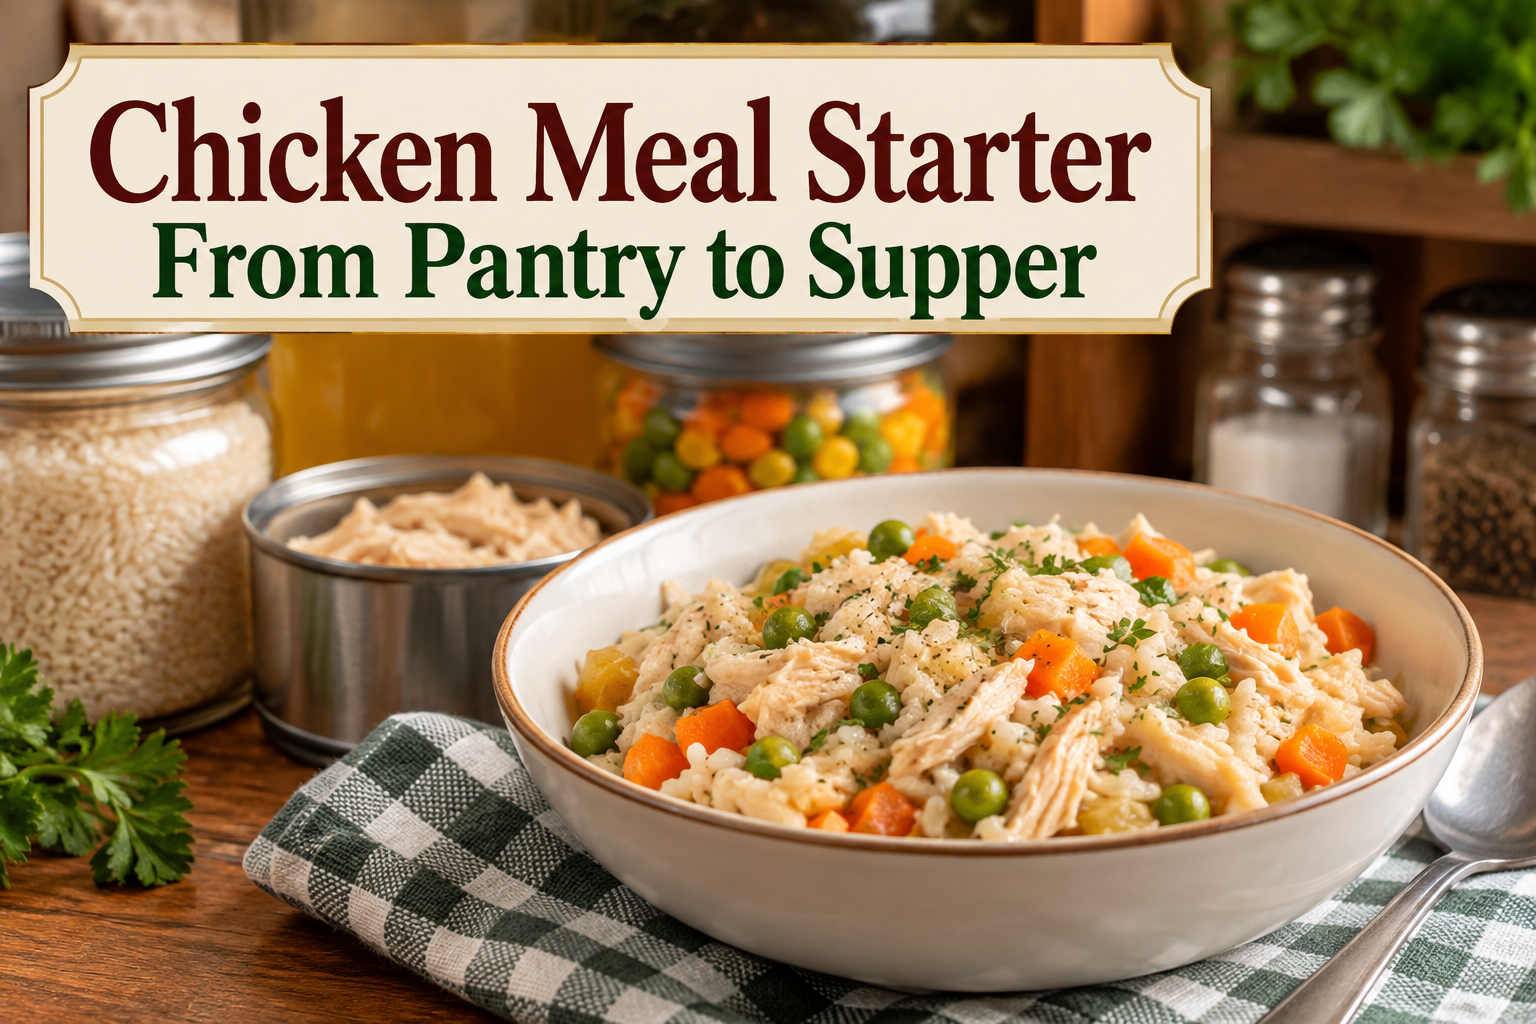
Chicken Meal Starter: From Pantry to Supper

Good meals don’t always begin with a trip to the grocery store. Sometimes they begin with a few things waiting in the pantry.

That’s the idea behind Pantry to Table.

For the next few weeks, we’re going to look at the pantry a little differently—not as a place where we stash food “just in case,” but as part of the everyday kitchen. A well-stocked pantry can make dinner easier, stretch the grocery budget, and save the day when the weather is lousy, the grocery trip didn’t happen, or you simply don’t feel like starting from scratch.

And one of the easiest places to start is with chicken.

This simple Chicken Meal Starter uses ingredients that are practical to keep on hand and can become the beginning of several different meals. You don’t need a freezer full of chicken or a refrigerator full of fresh vegetables. A few shelf-stable ingredients can get dinner moving.

Why You’ll Love This Meal Starter

  • It starts with inexpensive, easy-to-store ingredients.
  • Canned chicken does the heavy lifting.
  • It makes a small amount, appropriate for one or two people.
  • The basic mixture can be turned into several different meals.
  • It gives pantry ingredients a purpose instead of letting them sit forgotten on the shelf.
  • It’s an easy way to stretch a grocery dollar without making dinner feel like “budget food.”

Most importantly, you don’t have to buy a bunch of specialty ingredients to build a pantry.

Start with foods you actually eat.

Recipe Information

Servings: 2
Serving Size: About 1½ cups prepared meal
Prep Time: 10 minutes
Cook Time: 15 minutes
Total Time: 25 minutes
Meal Category: Skillet Meals
Main Protein: Chicken
Estimated Calories: About 350 per serving, depending on the chicken and vegetables used

simplegoodfood's avatarsimplegoodfood

Chicken Meal Starter

Good meals don't always begin with a trip to the grocery store. Sometimes they begin with a few things waiting in the pantry.
Prep Time 10 minutes
Cook Time 15 minutes
Total Time 25 minutes
Servings: 2
Course: Dinner, Lunch
Cuisine: American
Calories: 350

Ingredients
  

  • 1 can 10–12 ounces canned chicken, drained
  • 1 cup canned or dehydrated mixed vegetables
  • 1 cup cooked rice
  • 1 cup chicken broth
  • ½ teaspoon onion powder
  • ¼ teaspoon garlic powder
  • ½ teaspoon dried parsley
  • ¼ teaspoon salt or to taste
  • ¼ teaspoon black pepper or to taste
  • 1 teaspoon butter or cooking oil
Optional additions
  • A spoonful of leftover gravy
  • A little shredded cheese
  • Dehydrated onions
  • A small amount of canned corn
  • A sprinkle of dried herbs
  • A tablespoon or two of cream soup for a creamy version

Method
 

Start the vegetables
  1. Heat the butter or oil in a small skillet over medium heat.
Add the canned or rehydrated vegetables and cook for 2–3 minutes.
  1. If you’re using dehydrated vegetables, rehydrate them first or allow them to simmer with the broth long enough to soften.
Add the chicken
  1. Add the drained canned chicken and gently break it apart with a spoon.
  2. Stir in the onion powder, garlic powder, parsley, salt, and pepper.
  3. Cook for another 2–3 minutes.
Bring it together
  1. Pour in the chicken broth and stir.
  2. Add the cooked rice and bring the mixture to a gentle simmer.
  3. Cook for 5–7 minutes, stirring occasionally, until everything is hot and the flavors have had a chance to come together.
  4. If the mixture becomes too thick, add another splash of broth.
Taste and finish
  1. Taste before adding more salt or seasoning.
  2. Serve hot.

Notes

Kitchen Confidence

This is less about following a recipe perfectly and more about learning how pantry ingredients work together.
Chicken + broth + vegetables + a starch = the beginning of dinner.
Rice is used here, but the same basic idea can work with pasta, potatoes, barley, or another grain you already keep on hand.
That’s the beauty of a practical pantry.
You don’t need twelve versions of the same ingredient. You need a handful of ingredients that can work together in different ways.

From One Starter to Several Meals

This basic chicken mixture is deliberately simple because it can go in several directions.

Make Chicken & Rice Soup

Add extra chicken broth and another handful of vegetables. Simmer until everything is hot.

For a soup serving, aim for about 1½ cups per person.

Make a Creamy Chicken Skillet

Stir in a small amount of cream soup or a spoonful of Greek yogurt after removing the skillet from the heat.

Serve over rice, toast, or potatoes.

Make Chicken & Vegetable Casserole

Transfer the mixture to a small baking dish, top with a little shredded cheese or breadcrumbs, and heat until bubbly.

Turn It Into a Bowl

Spoon the chicken mixture over rice and add whatever vegetables, sauce, or toppings you have available.

A pantry meal doesn’t have to look exactly the same every time.

Stretch Every Grocery Dollar

One of the reasons I like canned chicken for pantry cooking is that it gives you a usable protein without requiring freezer space.

And here’s an important pantry rule:

Don’t buy food simply because someone says you should have it in your pantry.

If you don’t eat salmon, don’t buy canned salmon.

If mackerel isn’t something you’ll actually use, it doesn’t belong on your shelf.

The same goes for beans, vegetables, grains, sauces, and everything else.

A useful pantry is built around your meals and your tastes.

That may mean canned chicken for one household and tuna or salmon for another. There’s no prize for having the biggest pantry.

The goal is having ingredients that help you get dinner on the table.

Waste Not, Want Not

If you open a larger can of vegetables than you need, save the leftovers for tomorrow’s soup, skillet meal, omelet, or casserole.

The same goes for broth.

Freeze leftover broth in small portions if you have freezer space, or use it within a few days.

And don’t overlook small amounts of cooked rice. A little leftover rice can become tomorrow’s skillet meal instead of going into the trash.

Cooking for One or Two

This recipe makes two modest servings, which is exactly what I want from a pantry meal.

If you’re cooking for one, enjoy half today and save the other half for another meal.

If you’re cooking for two, you’ve got dinner without ending up with a refrigerator full of leftovers.

That’s one of the biggest differences between pantry cooking for real life and traditional batch cooking.

You don’t always need to make a giant pot.

Sometimes you just need enough dinner for tonight.

Meal Prep Note

You can assemble the dry seasonings and dehydrated vegetables in a small labeled container or jar ahead of time.

When it’s time to make dinner, add the chicken, broth, and rice.

That gives you a simple pantry meal starter that’s ready to turn into dinner with very little fuss.

Just remember to label homemade mixes with the ingredients and date.

Storage & Freezing

Refrigerate leftovers promptly in a covered container and use within 3–4 days.

If freezing, cool the finished meal before packaging.

Rice can change texture somewhat after freezing, but the mixture works well when reheated with a splash of broth.

For the best texture, reheat gently and add a little broth as needed.

The Bigger Pantry-to-Table Idea

This little chicken meal isn’t meant to be the answer to every dinner.

It’s meant to demonstrate something more useful:

A pantry doesn’t have to be huge to be helpful.

A few cans of protein.
Some vegetables.
Rice or another grain.
Broth.
A few seasonings.

Those simple ingredients can become soup, skillet meals, casseroles, bowls, and quick lunches.

That’s what we’re going to explore throughout October.

Not filling shelves for the sake of filling shelves.

Not buying ingredients because they’re trendy.

Not storing food you’ll never eat.

Just good food, practical ingredients, and a pantry that earns its keep.

Welcome to Pantry to Table.

Good meals begin before you start cooking.


Pinterest Caption

Pantry to Table starts with a simple Chicken Meal Starter! Canned chicken, vegetables, rice, broth, and a few seasonings become an easy meal for one or two—with plenty of ways to turn the same pantry basics into soup, skillet meals, casseroles, and bowls. Practical pantry cooking for real life!

Posted in Cookbooks

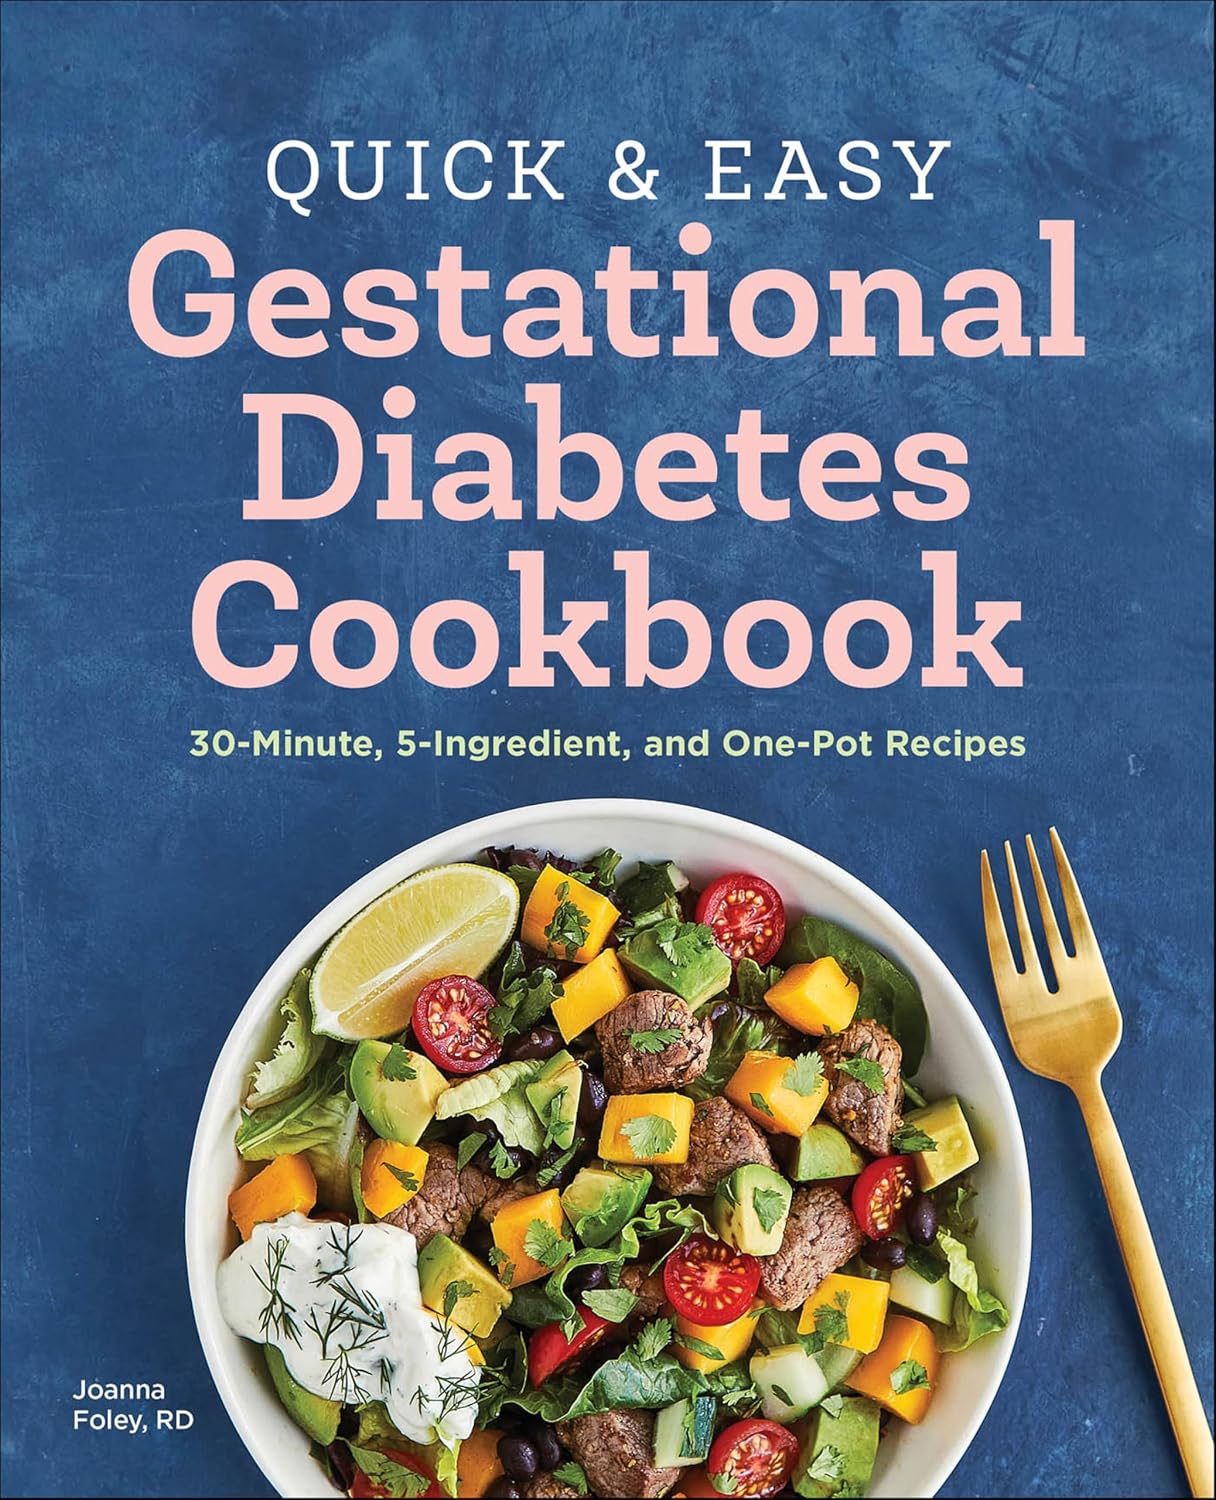
Quick & Easy Gestational Diabetes Cookbook: 30-Minute, 5-Ingredient, and One-Pot Recipes

Manage your diabetes and cook your way through a healthy pregnancy.

Receiving a gestational diabetes diagnosis during pregnancy can feel daunting. But adopting a nourishing diet plays an important role in lowering your blood sugar for a healthy pregnancy. With this easy cookbook, you’ll discover simple and nutritious recipes that help manage blood glucose and deliver essential nutrients to you and your baby.

Inside this pregnancy cookbook you’ll find:

  • Gestational diabetes information—Learn what gestational diabetes means for you and baby, so you can change your diet with confidence.
  • Super simple recipes—Spend less time on your feet and more time relaxing with recipes that are easy in three different ways, thirty-minute, one-pot, and five-ingredient.
  • A balanced plate—Discover tips to help you avoid certain foods, practice portion control, and develop healthy habits.

Spend less time cooking and more time focused on a happy pregnancy with dietician Joanna Foley’s Quick & Easy Gestational Diabetes Cookbook.

Editorial Reviews

Review

“What a gift this cookbook is to pregnant women who have just been dealt a scary diagnosis! Joanna takes all the guesswork out of meal planning during gestational diabetes. Her focus on a whole-foods, balanced diet will set moms up for successful, healthy eating even beyond their pregnancy.” —Tricia Perry, MPH, RD

“Joanna did such a good job at understanding the needs, desperation even, of expecting moms with GD and reassuring them that it is, in fact, possible to have a healthy pregnancy and delivery despite the diagnosis. Followed by that is simply stated information that answers just about every question a mom with GD could have and approved recipes to take away some of the guesswork. This book is indeed a one-stop-shop!” —Traci Houston, The Gestational Diabetic Chef

“Joanna is a trusted nutrition expert. Her science-based approach to gestational diabetes is positive, refreshing, and easy to understand.” —Lori Zanini, RD, CDE, author of The Diabetes Cookbook and Meal Plan for the Newly Diagnosed

About the Author

JOANNA FOLEY is a registered dietitian, health coach, and writer. She is the author of The Gestational Diabetes Cookbook and Meal Plan and has also been featured in a variety of media outlets, where she provides informative and engaging content on health and wellness for readers.

Posted in Preservation

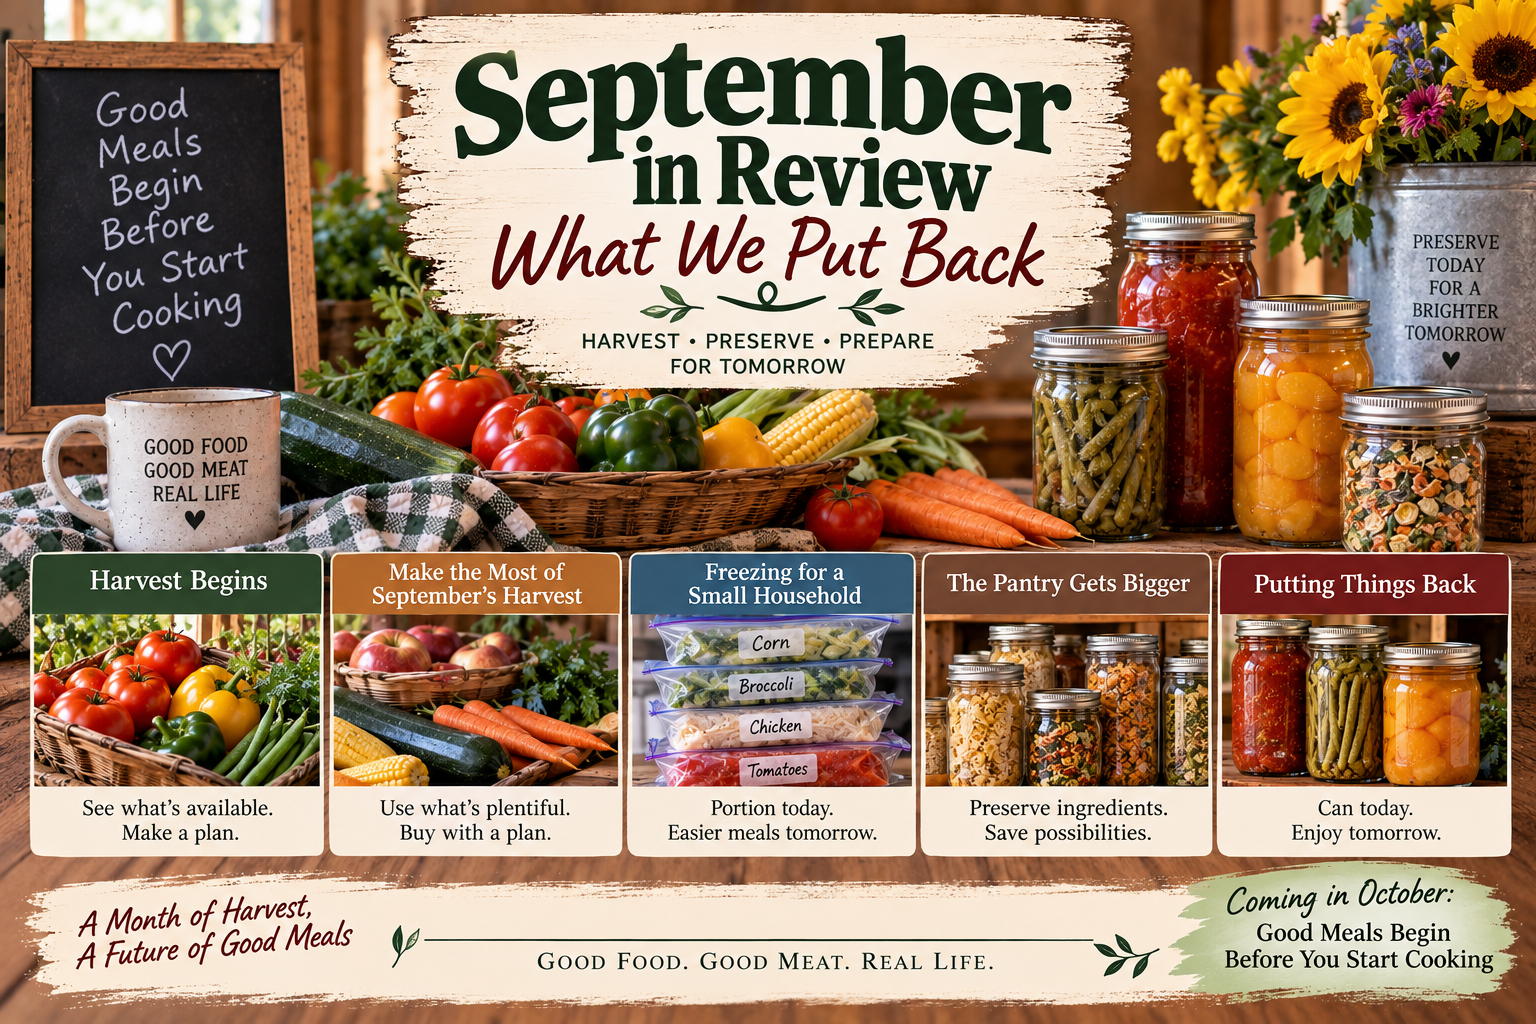
September in Review: What We Put Back

September has been a month of harvest, planning, preserving, and putting a little something back.

We started with fresh produce and the simple question of what we could do with it. From there, we worked our way through using what was plentiful, freezing food in practical amounts for a small household, building a more useful pantry, and finally moving into home canning.

It has been a busy month in the kitchen.

But the real goal was never to see how many jars we could fill or how much food we could squeeze into a freezer.

The goal was to make future meals easier.

🌾 September’s Harvest Journey

If you missed some of this month’s posts, these weekly roundups are the easiest way to catch up.

Harvest Begins

September started with the basics: recognizing what is available, making the most of seasonal produce, and thinking about preservation before food gets pushed to the back of the refrigerator.

Harvest Time: Putting a Little Back for Tomorrow
Read the Article!
Garden Harvest Beef & Vegetable Soup
There is something wonderfully practical about a pot of vegetable soup.
Check out this recipe
Fresh Corn & Zucchini Skillet
Fresh summer corn and tender zucchini come together in this simple one-skillet side dish.
Check out this recipe
Harvest Chicken Rice Bowl
There is something wonderfully satisfying about a bowl built from simple ingredients.
Check out this recipe
Pressure-Canning Ground Beef
Check out this recipe
Autumn Harvest Rice Bowl
Roasted squash or sweet potatoes, carrots, onions, rice, and tender beef or chicken come together in this cozy fall-inspired Build-A-Bowl.
Check out this recipe
Smart Shopper Spotlight: What’s Worth Buying in September?
Check out this recipe
Harvest Vegetable Fried Rice
Give leftover vegetables and cooked rice a delicious second life with this easy one-skillet fried rice.
Check out this recipe
End-of-Market Vegetable Soup
A flexible, no-waste vegetable soup designed for all those little bits of produce left after market day.
Check out this recipe

It was the beginning of our September theme:

Today’s harvest can become tomorrow’s dinner.

Make the Most of September’s Harvest

Once we had an idea of what was available, we moved on to making good use of it.

Some foods were ready to eat right away. Others were worth buying when prices were good and putting a little aside for later.

When the Farm Stand is Full
Read the Article!
Smart Shopper Spotlight: What to Buy When It’s in Season
Read the Article!
Harvest Chicken & Vegetable Skillet
Tender pieces of chicken are cooked with sweet corn, zucchini, bell pepper, onion, and tomatoes for a simple skillet dinner that tastes like the best of late summer and early fall.
Check out this recipe
Put a Little Back: Sweet Corn — Today’s Corn, Tomorrow’s Meals
Read the Article!
How Much Should You Actually Preserve?
Read the Article!
Harvest Corn & Chicken Rice Bowls
There is something satisfying about putting food away when it's at its best and then actually using it later.
Check out this recipe
Farm Stand Vegetable Fritatta
When the farm stand is full, make a frittata!
Check out this recipe

The important thing wasn’t simply buying more.

It was buying with a plan.

Freezing for a Small Household

For a household of one or two, preservation has to be practical.

There’s not much point in freezing a giant package if you’re only going to use a cup or two at a time. This week was about portioning food for the meals we actually cook, reducing waste, and making the freezer a useful part of the kitchen rather than a place where food disappears until nobody remembers what it is.

Why Freezing Might Be the Best Preservation Method for a Small Household
Read the Article!
The September Freezer: What to Put Back When Produce Is Plentiful
Read the Article!
Chicken & Vegetable Pot Pie Skillet
There are nights when you want chicken pot pie, but you don't necessarily want to make an entire pie.
Check out this recipe
Put a Little Back: Green Beans for Future Dinners
Read the Article!
Freezer Inventory: Know What You Put Back
Read the Article!
Harvest Chicken & Green Bean Rice Bowls
A portion of frozen green beans, some cooked chicken, rice, and a handful of pantry staples come together in a warm, satisfying bowl.
Check out this recipe
Freezer Clean-Out Vegetable Soup
This Freezer Clean-Out Vegetable Soup is exactly the kind of meal I want waiting at the end of a week like this.
Check out this recipe

A little corn.

A few portions of cooked chicken.

Some vegetables.

A meal or two tucked away for a busy day.

Those small additions add up.

The Pantry Gets Bigger

The next step was looking beyond the freezer.

Dehydrating, pantry building, meal starters, and thoughtful storage all give us another way to take advantage of today’s harvest.

Building a Pantry One Jar at a Time
Start small and build a useful pantry without filling every available shelf.
Read the Article!
Dehydrating for Real Life: Turning the Harvest into Useful Ingredients
Look at dehydrating as a way to create practical, recipe-ready ingredients rather than simply preserving food for storage.
Read the Article!
Rustic Harvest Chicken & Rice
Put those dehydrated vegetables to work in a simple, satisfying meal.
Check out this recipe
Put a Little Back: Dehydrated Vegetables
Read the Article!
How to Make Your Dehydrated Food Work Like Ingredients
Read the Article!
Harvest Vegetable & Lentil Soup
Turn that little pantry starter into a warm, practical meal.
Check out this recipe
Pork & Cabbage Rustic Bowl
Use simple ingredients to create another small-batch meal without needing a refrigerator full of leftovers.
Check out this recipe

The idea is simple:

Don’t just preserve ingredients. Preserve possibilities.

A jar of dried vegetables isn’t just a jar of dried vegetables. It’s something that can become part of a soup, skillet, rice bowl, or another meal down the road.

That’s where preservation starts to become meal planning.

Putting Things Back

And now we come to the final chapter.

This week we’ve moved into home canning — beginning with tomatoes and water-bath canning, then moving into pressure canning and the Chicken Meal Starter.

Weekend Suppers: Simple Skillet Meals for Fall
Read the Article!
Why Tomatoes Need Special Attention When Canning
Read the Article!
Canning Tomatoes: Your First Water-Bath Project
Read the Article!
What Can I Do With Those Canned Tomatoes?
Read the Article!
Water Bath or Pressure Canner? Knowing Which One to Use
Read the Article!
Chicken Meal Starter: Putting a Future Supper in the Pantry
Read the Article!

This is where all the pieces we’ve been talking about come together.

We’re not preserving food simply because we can.

We’re preserving it because we have a plan for using it.

What September Really Taught Us

There are plenty of ways to preserve food.

Freezing.

Dehydrating.

Water-bath canning.

Pressure canning.

But the method isn’t really the most important part.

The important part is asking:

Will this make my future meals easier?

Will I actually use it?

Is it stored in an amount that makes sense for my household?

Can I find it when I need it?

Does it save me money, reduce waste, or give me something useful when I don’t feel like starting dinner completely from scratch?

Those are the questions that turn preservation into practical kitchen planning.

From Today’s Harvest to Tomorrow’s Supper

When we started September, the harvest was the focus.

By the end of the month, we’re looking at something different.

We’re looking at future meals.

A bag of frozen corn can become part of a quick skillet supper.

A container of cooked chicken can become soup, a rice bowl, or a wrap.

A jar of dried vegetables can become part of a meal starter.

A jar of home-canned tomatoes can become sauce, soup, or a skillet dinner.

And a jar of Chicken Meal Starter is already halfway to a future supper.

That’s the payoff.

We didn’t put all this food back just to fill jars, freezer bags, and pantry shelves.

We put it back so that one day, when it’s time to make supper, some of the work has already been done.

Looking Ahead to October

And that brings us right to next month.

September has been about putting food back.

October is going to be about using what we’ve put back.

Our October theme is:

Good Meals Begin Before You Start Cooking

Because sometimes the easiest supper starts long before you turn on the stove.

It starts with having the right ingredients.

It starts with knowing what’s in the pantry.

It starts with a few portions in the freezer.

It starts with a jar on the shelf that can become dinner.

September taught us how to put a little something back. October is going to show us what we can do with it.

And I think that’s a pretty good place to end the harvest season.

Posted in Preservation

Chicken Meal Starter: Putting a Future Supper in the Pantry

Yesterday we talked about the difference between water-bath and pressure canning.

Today we’re going to put that knowledge to work.

We’re pressure canning chicken.

But this isn’t just about putting chicken into jars.

The idea behind this particular project is something I really love about preserving food:

What if one afternoon of cooking could give you several future meal starters?

That’s exactly what I was after with this Chicken Meal Starter.

What Is a Chicken Meal Starter?

Think of it as a head start on supper.

Instead of opening a jar and having a complete finished meal, you’re opening a jar containing the makings of one.

Chicken.

Vegetables.

Broth.

Seasoning.

The contents can then become soup, a skillet meal, a casserole, a rice bowl, or something else entirely.

The jar doesn’t dictate the final meal.

It gives you somewhere to start.

And for someone cooking for one or two, that can be incredibly useful.

Why Make a Meal Starter?

There are plenty of ways to preserve chicken.

You can can plain chicken and use it in whatever recipe you want later.

You can freeze cooked chicken.

You can dehydrate chicken.

But I like the idea of a meal starter because some of the thinking and preparation has already happened.

The chicken is cooked and preserved.

The vegetables are there.

The broth is there.

When I need supper later, I’m not starting from scratch.

That’s the kind of pantry convenience I’m interested in.

Not convenience food.

Convenient real food.

My Chicken Canning Day

This wasn’t a theoretical canning exercise.

I actually made this batch.

And I learned something about my pressure canner in the process.

I knew it was a good-sized canner, but I hadn’t realized just how many half-pint jars it could hold until I started loading it.

Twelve half-pint jars.

Not eight.

Twelve.

That gave me room to do a little experimenting with the batch.

I ended up with:

  • 8 jars of Chicken Meal Starter
  • 2 jars of extra vegetables and broth
  • 2 jars of broth

That’s twelve jars of future possibilities from one canning session.

And honestly, discovering that my canner could hold twelve half-pints was a pretty nice surprise.

What Went Into the Meal Starter?

The basic idea was simple:

  • Chicken
  • Vegetables
  • Broth
  • Seasonings

The ingredients were prepared according to the tested canning procedure being used for the batch.

The important thing here is that the canning procedure comes first.

This isn’t the place to start changing ingredients, adding extra vegetables, changing the jar size, or deciding that a cooking recipe can simply be converted into a canning recipe.

When you’re preparing food for shelf-stable storage, the tested procedure is part of the recipe.

A Very Important Canning Note

This is where I want to slow down for a minute.

Don’t use this post as a pressure-canning procedure by itself.

Chicken is a low-acid food and must be pressure canned using a current, tested procedure.

The National Center for Home Food Preservation’s tested directions for canning poultry are here:

https://nchfp.uga.edu/how/can/how-do-i-can/meat-poultry-game

The USDA Complete Guide to Home Canning is another reliable reference:

https://nchfp.uga.edu/resources/category/usda-guide

Use the tested processing instructions for the specific chicken preparation you’re making, including the correct jar size, processing time, pressure, headspace, and altitude adjustment.

Don’t substitute a cooking time for a canning time.

Those are two very different things.

Why Half-Pints?

I chose half-pint jars because I’m cooking for one or two.

A quart jar of chicken might be perfectly reasonable for a large family.

For me?

That’s a lot of chicken to use at once.

Half-pints give me much smaller portions and make it easier to open only what I need.

That’s one of the recurring themes in my kitchen:

Preserve food in portions that make sense for the people you’re actually feeding.

What Can You Do With a Jar?

This is where the Chicken Meal Starter gets interesting.

A jar can become the beginning of several different meals.

🍚 Chicken & Rice Bowl

Add cooked rice and whatever fresh or frozen vegetables you have available.

A little seasoning or sauce can take it in an entirely different direction.

🍲 Chicken Soup

Add the contents of the jar to a saucepan with additional broth or vegetables as needed.

Add noodles, rice, potatoes, or another soup ingredient.

Suddenly, dinner is soup.

🥔 Chicken & Potato Skillet

Add the chicken mixture to a skillet with cooked or partially cooked potatoes.

Brown everything together and you’ve got a completely different meal from the same pantry starter.

🥣 Chicken Vegetable Bowl

Serve the chicken and vegetables over rice, mashed potatoes, or another grain.

Add a little gravy or sauce if you like.

🥧 Chicken Pot Pie Filling

The starter can provide the foundation for a small chicken pot-pie-style meal when combined with additional vegetables and a suitable topping.

And this is exactly why I like the word starter.

The jar isn’t trying to be everything.

It’s giving you a head start.

Those Extra Jars Have a Purpose, Too

Remember those two jars of extra vegetables and broth?

And the two jars of broth?

They’re not mistakes.

They’re pantry building blocks.

The vegetable-and-broth jars can become the beginning of soup or a sauce.

The broth can become cooking liquid for rice, potatoes, soup, or another meal.

Sometimes the most useful thing you can preserve is an ingredient that makes the next meal easier.

Stretch Every Grocery Dollar

This is where the economics of preservation get interesting.

When you buy ingredients and use them for several future meals, you’re not simply preserving food.

You’re preserving future convenience.

The chicken that went into these jars will eventually become several different meals.

The vegetables can be stretched into soups, bowls, and skillet meals.

The broth can replace purchased stock later.

And the work happened once.

That’s a pretty good return on a canning afternoon.

Kitchen Confidence

If pressure canning still sounds intimidating, I understand.

There’s more equipment involved than with a boiling-water canner.

There’s more to pay attention to.

And when you’re dealing with meat, there’s no room for guessing.

But there’s also something very satisfying about learning how to preserve a food that would otherwise need refrigerator or freezer space.

Once you understand why pressure canning is required, the equipment and procedure start to make more sense.

And once you have those first jars sitting on the shelf?

Well…

That’s when the fun begins.

Cooking for One or Two

This is really where the Chicken Meal Starter earns its place in my pantry.

I’m not interested in opening a giant jar and figuring out how to use three days’ worth of chicken.

I want to be able to open a small jar, add a couple of ingredients, and make supper.

That’s the beauty of small-batch preservation.

You don’t have to preserve like a family of six when you’re feeding two people.

Preserve according to the way you actually eat.

What’s Next?

This is where I’m going to let the canning series breathe a little.

We’ve talked about tomatoes.

We’ve learned why acidity matters.

We’ve used a boiling-water canner.

We’ve talked about pressure canning.

And now we’ve put chicken meal starters into the pantry.

But those jars aren’t the end of the story.

They’re the beginning.

Over the next few weeks, I’ll be bringing some of those jars back out of the pantry and showing you what I actually do with them.

Because there’s no point in putting food back if it just sits on a shelf forever.

Today’s preserved food is tomorrow’s supper.

And that’s the whole idea behind Putting Things Back.


A Note About the Canning Procedure

The Chicken Meal Starter described here is based on my own canning project, but this post is not intended to replace a tested pressure-canning recipe or procedure.

For current tested guidance on canning poultry:

National Center for Home Food Preservation — Meat, Poultry & Game

https://nchfp.uga.edu/how/can/how-do-i-can/meat-poultry-game

USDA Complete Guide to Home Canning

https://nchfp.uga.edu/resources/category/usda-guide

Always follow the tested procedure for the food being canned, including processing time, pressure, jar size, headspace, and altitude adjustments.

Posted in Preservation

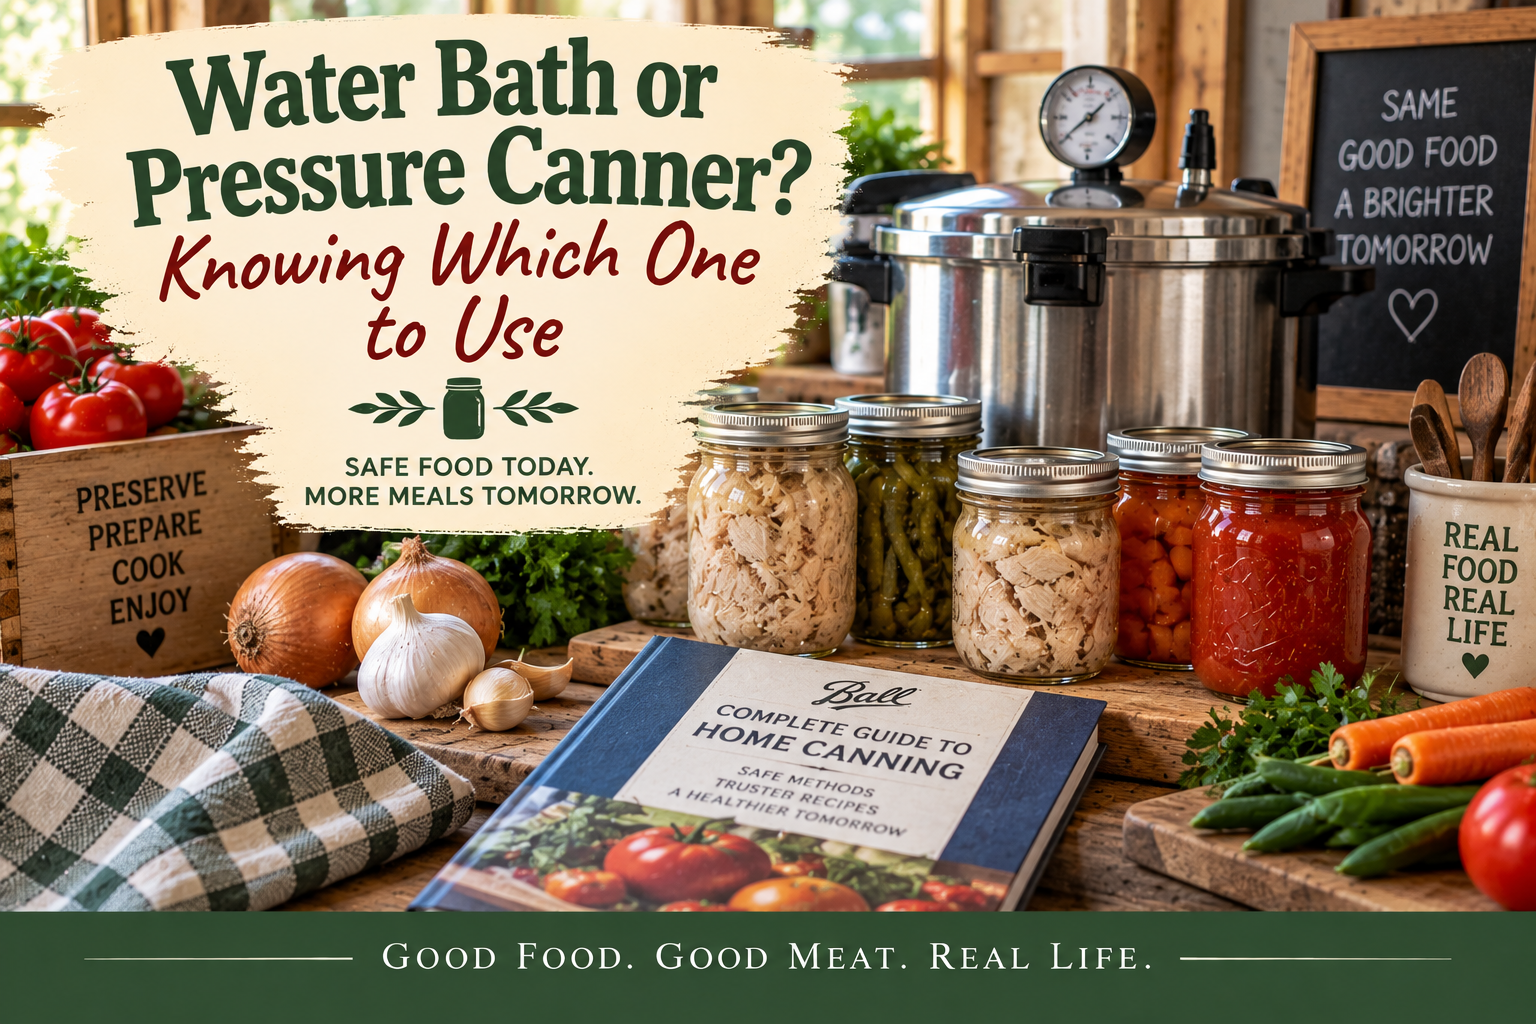
Water Bath or Pressure Canner? Knowing Which One to Use

We’ve spent the first part of this week talking about tomatoes.

We’ve talked about acidity, why tomatoes need added acid when they’re canned, and how to process them safely in a boiling-water canner.

Today, we’re going to make a change.

Because tomorrow, we’re moving from tomatoes to chicken.

And that means we’re moving from water-bath canning to pressure canning.

If you’re new to home canning, this is one of the most important distinctions to understand:

The food determines the processing method.

Not the size of your kitchen.

Not which canner happens to be sitting in your cupboard.

And definitely not what your grandmother’s recipe card says.

Let’s look at why.

Water-Bath Canning: For Acid Foods

A boiling-water canner works by surrounding the jars with boiling water.

At sea level, water boils at 212°F.

That temperature is sufficient for safely processing properly acidified high-acid foods when you follow a tested recipe and the appropriate processing time.

Foods commonly processed this way include:

  • Fruits
  • Pickles
  • Jams and jellies
  • Fruit spreads
  • Properly acidified tomatoes and tomato products

That’s why we started this week with tomatoes.

They can be safely processed using a boiling-water canner when the tested recipe’s acidification and processing instructions are followed.

Pressure Canning: For Low-Acid Foods

Now let’s talk about chicken.

Meat and poultry are low-acid foods.

And boiling water isn’t hot enough to safely process low-acid foods for shelf-stable storage.

That’s where pressure canning comes in.

A pressure canner allows the temperature inside the canner to rise above the boiling point of water.

That higher temperature is necessary to destroy microorganisms of concern in low-acid foods when the food is processed according to a tested pressure-canning procedure.

That’s why you don’t take a water-bath recipe and simply put it in a pressure canner.

The pressure canner isn’t a magic safety button.

The recipe still needs to be tested for that particular food, preparation, jar size, processing time, and pressure.

So Which Canner Should You Buy?

Here’s where things get interesting.

If you’re just starting out and can only afford one canner, I would seriously consider buying a pressure canner.

Why?

Because a pressure canner gives you the ability to safely process low-acid foods such as meat, poultry, and many vegetables.

And it can also be used for boiling-water processing of foods that are appropriate for that method.

That means one piece of equipment can cover both types of processing.

But There’s an Important Catch

You don’t pressure-can an acid food simply because you’re using a pressure canner.

When you’re using the pressure canner as a boiling-water canner, you are not building pressure.

You’re using it as a large boiling-water canner.

That’s something I’ve done myself.

My pressure canner has a rack that keeps the jars up off the bottom of the pot, and because the canner is larger than some of my other pots, I can sometimes fit more jars in it.

For a boiling-water recipe, I use the canner as a boiling-water bath rather than sealing it up and processing under pressure.

The important thing is to follow the tested recipe’s instructions for water level, jar placement, processing time, and any other requirements.

One Canner Doesn’t Mean One Method

This is worth repeating.

A pressure canner can be used for boiling-water processing.

But that does not mean:

“If I put a water-bath recipe under pressure, it’s automatically safe.”

Those are two different processes.

And I learned another lesson the hard way:

Jelly Doesn’t Necessarily Like Pressure

I once tried pressure-processing a jelly recipe.

The result?

It didn’t jell.

I had changed the processing environment from what the recipe was designed for, and the jelly wasn’t happy about it.

That’s a pretty good kitchen lesson:

Equipment can sometimes be versatile. Recipes aren’t necessarily interchangeable.

So if you’re making jelly, use a tested jelly recipe and the processing method specified for that recipe.

If you’re canning chicken, use a tested pressure-canning recipe.

If you’re canning tomatoes, use a tested tomato recipe.

The canner doesn’t replace the recipe.

What About Tomatoes in a Pressure Canner?

Here’s another point that sometimes causes confusion.

Some tested tomato procedures can be processed in a pressure canner.

But that doesn’t mean you can skip the acidification step.

NCHFP’s tomato guidance specifically provides acidification directions for tomatoes regardless of whether they are processed in a boiling-water canner or pressure canner.

https://nchfp.uga.edu/how/can/how-do-i-can-tomatoes/tomato-acidification-directions

So don’t think of pressure canning as a way around tomato acidification.

The method and the acidity are two separate parts of the safety equation.

The Easy Way to Remember It

If you’re trying to decide which method to use, start with the food.

Think Water Bath

High-acid foods

Think:

🍓 Fruit
🍎 Apples
🍇 Jams and jellies
🥒 Pickles
🍅 Properly acidified tomatoes

Think Pressure Canner

Low-acid foods

Think:

🍗 Chicken
🥩 Meat
🌽 Many vegetables
🥣 Some soups and combination foods

There are exceptions and special cases, which is why we use tested recipes rather than relying on a simple list.

But this is a good starting point.

Don’t Guess With Combination Foods

This is particularly important when you start getting creative.

Suppose you want to make a jar containing:

  • Chicken
  • Rice
  • Vegetables
  • Broth
  • Seasonings

Sounds like dinner, right?

It does.

But you can’t simply decide how long to pressure-can that jar based on how long it takes to cook those ingredients on the stove.

Different ingredients heat differently.

The density of the food matters.

The jar size matters.

The preparation matters.

The processing time and pressure matter.

That’s why tested recipes are so important for combination foods.

And that’s exactly where we’re headed tomorrow.

Tomorrow: Chicken Meal Starter

Tomorrow I’ll show you the Chicken Meal Starter I put together for my own pantry.

This isn’t just a theoretical recipe.

I actually made these jars.

My canner holds 12 half-pint jars, and I filled all twelve during the batch:

  • 8 jars with the Chicken Meal Starter
  • 2 jars with extra vegetables and broth
  • 2 jars with broth

That’s a lot of future meals sitting on one shelf.

And those jars are going to give us something even more valuable than a canning tutorial:

a real example of how a preserved food can become the starting point for future meals.

Stretch Every Grocery Dollar

This is where pressure canning starts to make sense beyond simply learning another preservation technique.

Chicken can be expensive.

But when you can preserve a larger quantity safely, you can turn one cooking session into multiple future meal starters.

That’s the same philosophy we’ve been talking about all month:

Buy when you can. Preserve when it makes sense. Use it later.

The goal isn’t to have the biggest pantry.

The goal is to have a pantry that works for you.

Kitchen Confidence

If you’ve been intimidated by pressure canning, don’t let the equipment make the whole process seem mysterious.

Understand the basic rule first:

High-acid foods can generally be processed in a boiling-water canner. Low-acid foods require pressure canning.

Then learn the tested recipe.

Then learn your equipment.

You don’t need to memorize every canning rule before you begin.

You just need to understand why you’re doing what you’re doing — and follow the tested procedure.

Tomorrow, we’ll put that knowledge to work.

And we’ll put some chicken in the pantry. 🍗


Reliable Canning Resources

National Center for Home Food Preservation — Ensuring Safe Canned Foods

https://nchfp.uga.edu/how/can/general-information/ensuring-safe-canned-foods

NCHFP — Canning Tomatoes: Introduction

https://nchfp.uga.edu/how/can/how-do-i-can-tomatoes/canning-tomatoes-introduction

NCHFP — Tomato Acidification Directions

https://nchfp.uga.edu/how/can/how-do-i-can-tomatoes/tomato-acidification-directions

USDA Complete Guide to Home Canning

https://nchfp.uga.edu/resources/category/usda-guide

For pressure-canning meat and poultry, always use a current, tested procedure rather than adapting a cooking recipe for canning.