Posted in Jar Mixes (Meal Starters)

Homemade Soup Starter Mix

One of the best things about having a pantry stocked with dehydrated vegetables is realizing that those little jars aren’t just ingredients waiting for a recipe.

They can become the recipe starter.

A handful of dehydrated vegetables, a little barley or rice, some herbs and seasonings, and a jar of shelf-stable ingredients can turn into the beginning of a homemade pot of soup whenever you need it.

That’s the idea behind this Homemade Soup Starter Mix.

It isn’t meant to be a complete instant soup. Instead, it’s a flexible little pantry helper that gives you a head start.

Add broth. Add protein. Let everything simmer and rehydrate.

Dinner gets a whole lot easier.

Why Make a Homemade Soup Starter?

There are plenty of packaged soup mixes at the grocery store. So why make your own?

Because homemade lets you decide exactly what goes into it.

You can:

  • Use vegetables you already dehydrated.
  • Adjust the quantities for a small household.
  • Leave out ingredients your family doesn’t like.
  • Control the seasoning.
  • Use the grains or starches you already keep.
  • Make individual or two-serving portions.
  • Use up small quantities of dehydrated vegetables.
  • Build several different soups from the same basic starter.

And perhaps most importantly, you know what’s in the jar.

This isn’t about creating another complicated food-prep project.

It’s about making the pantry you already have more useful.

The Basic Soup Starter Formula

Think of your jar as four basic components:

Vegetables + Grain/Starch + Seasoning + Optional Dried Flavor Ingredients

That’s it.

The protein and broth can be added later.

For this version, we’re using dehydrated vegetables, pearl barley, onion, garlic, and simple herbs.

The result is a versatile starter that works particularly well with turkey or chicken.

Homemade Soup Starter Mix

Makes

4 small starter portions

Each portion makes approximately 2 servings of soup, depending on the amount of broth and protein added.

Ingredients

For the complete dry mix:

  • ½ cup dehydrated diced carrots
  • ½ cup dehydrated diced celery
  • ½ cup dehydrated diced onion
  • ½ cup dehydrated diced potatoes
  • 1 cup pearl barley
  • 2 teaspoons dried parsley
  • 1 teaspoon dried thyme
  • 1 teaspoon garlic powder
  • 1 teaspoon onion powder
  • ½ teaspoon black pepper
  • ½ teaspoon salt

To Package

You’ll also need:

  • Four pint-size mason jars or other airtight containers
  • Labels

A pint jar gives you plenty of room to combine the ingredients without having to cram everything inside.

Making the Mix

1. Make sure the vegetables are thoroughly dry.

This is the most important step.

Dehydrated vegetables intended for storage should be completely dry and properly cooled before being packed.

They should not feel soft or damp.

If you’re unsure whether a batch is sufficiently dry, give it more drying time rather than taking chances with storage.

2. Combine the dry ingredients.

In a large bowl, combine the dehydrated carrots, celery, onion, and potatoes.

Add the barley, parsley, thyme, garlic powder, onion powder, black pepper, and salt.

Stir thoroughly so the seasonings are distributed throughout the mixture.

3. Divide into four portions.

Measure approximately 1½ cups of the dry mixture into each jar.

Don’t worry if the portions aren’t perfectly identical. The mix is flexible.

4. Label the jars.

At minimum, write:

Homemade Soup Starter Mix

Use 1 jar for approximately 2 servings

Date prepared

If you’re keeping several mixes in your pantry, it’s also helpful to note the main ingredients.

How to Use the Soup Starter

When you’re ready to make soup, empty one jar into a saucepan.

Add:

  • 4 cups chicken or turkey broth
  • 1 to 1½ cups cooked turkey or chicken, chopped or shredded

Bring the mixture to a boil, then reduce the heat and simmer gently until the barley and vegetables are tender.

Because dehydrated vegetables vary in size and dryness, cooking time can vary.

Start checking around 35 minutes, but allow additional time if the barley or vegetables aren’t tender yet.

Add additional broth or water as needed.

Taste and adjust the seasoning before serving.

A Note About the Potatoes

Dehydrated potatoes can take a little longer to rehydrate than some other vegetables.

Cutting them into small, uniform pieces before dehydrating helps them cook more evenly.

If your dehydrated potato pieces are larger, give them extra cooking time.

What Goes Into the Soup Later?

This is intentionally a starter, not a finished meal.

That’s what makes it useful.

You can add:

Protein

  • Cooked turkey
  • Cooked chicken
  • Canned chicken
  • Cooked pork
  • Beans
  • Lentils

Extra Vegetables

  • Frozen peas
  • Frozen green beans
  • Corn
  • Spinach
  • Fresh cabbage
  • Fresh zucchini

Finishing Ingredients

  • Lemon juice
  • Fresh parsley
  • Greek yogurt
  • Parmesan
  • Shredded cheese
  • A splash of vinegar

The same jar can become several different soups depending on what you add.

Kitchen Confidence: Don’t Make the Mix Too Complicated

It’s tempting when making homemade mixes to keep adding ingredients.

A little of this.

A little of that.

Another spice.

Another dried vegetable.

Before you know it, you’ve created a jar that only works for one specific recipe.

That’s not what we’re trying to do here.

The most useful pantry mixes are flexible.

Think of this as a blank canvas rather than a finished recipe.

The jar gives you the vegetables, grain, and basic seasoning.

You decide what dinner becomes.

Stretch Every Grocery Dollar

This kind of mix can also help you make better use of food you’ve already preserved.

Dehydrated vegetables take up very little storage space, which makes them especially useful when refrigerator and freezer space are limited.

Instead of keeping a large bag of fresh vegetables in the refrigerator and hoping you’ll use them before they spoil, you can preserve some of them for later.

And once they’re dehydrated, they become incredibly convenient.

A tablespoon or two of dried onion can be exactly what a small recipe needs.

A handful of dried carrots can become part of a soup.

Those little quantities add up.

Waste Not, Want Not

This is also a good project for using the smaller quantities left over from different dehydrating batches.

You don’t need to dedicate an entire batch of vegetables to soup mix.

Have a little dehydrated carrot left?

Add it.

A small jar of dried onion?

Use it.

Some dehydrated celery that isn’t enough for another storage jar?

Into the soup mix it goes.

This is one of the places where dehydrating really shines for a small household.

Small quantities don’t have to become waste.

They can become ingredients.

Cooking for One or Two

The recipe makes four starter portions, but you can easily scale it down.

For a household of one, make smaller jars containing enough mix for one serving.

You can also prepare the four portions and simply use half of a jar when you need one bowl of soup.

The important thing is to keep the dry ingredients in a clean, dry, airtight container.

Meal Prep Note

These starter jars are a great way to make future meal prep easier.

You can prepare several jars at once and keep them ready in the pantry.

Then on a busy evening, you aren’t measuring five different dried vegetables and three different seasonings.

The measuring is already done.

You simply grab a jar and start cooking.

That is exactly what a good pantry convenience food should do.

Storage

For best storage, make sure every dehydrated ingredient is completely dry before assembling the mix.

Store the finished mix in a clean, dry, airtight container in a cool, dark pantry.

Label each jar with the date and ingredients.

Because this mix contains multiple homemade dehydrated ingredients, I recommend treating the storage life according to the ingredient with the shortest reliable storage life rather than assuming the entire mix will last indefinitely.

If you notice moisture, condensation, off odors, mold, or any other sign of spoilage, discard the mix.

When in doubt, throw it out.

Important Preservation Note

This homemade soup mix is a dry pantry mix, not a pressure-canned or shelf-stable canned meal.

Do not put the assembled soup mix into a canning jar and process it as though it were a tested canning recipe.

For food-preservation guidance, follow tested recommendations from reliable preservation authorities and use your dehydrated ingredients according to established dehydration and storage practices.

Three Ways to Use One Starter

The real beauty of this mix is what happens after the jar is opened.

Turkey & Barley Comfort Soup

Add turkey, chicken or turkey broth, and finish with parsley and a squeeze of lemon.

That’s the version we’ll be making tomorrow.

Chicken & Vegetable Soup

Use chicken instead of turkey and add a handful of frozen peas near the end.

The same starter suddenly has a completely different personality.

Vegetable & Bean Soup

Skip the meat and add a can of drained white beans or another bean you enjoy.

Add a little tomato if you want a richer, tomato-based soup.

One starter.

Three very different dinners.

And that’s before we start changing the seasonings.

The Bigger Pantry Idea

A pantry full of ingredients is useful.

A pantry full of ready-to-combine ingredients is even more useful.

That’s the difference between simply storing food and actually building a working pantry.

The goal isn’t to have shelves that look impressive.

The goal is to be able to open the pantry on a Wednesday night, look around, and think:

“I can make dinner from this.”

A few jars of homemade soup starter can help make that possible.

Tomorrow, we’ll put one of these jars to work with Turkey & Barley Comfort Soup—a good example of how a little advance preparation can turn dehydrated pantry ingredients into a genuinely comforting meal.
Posted in Jar Mixes (Meal Starters)

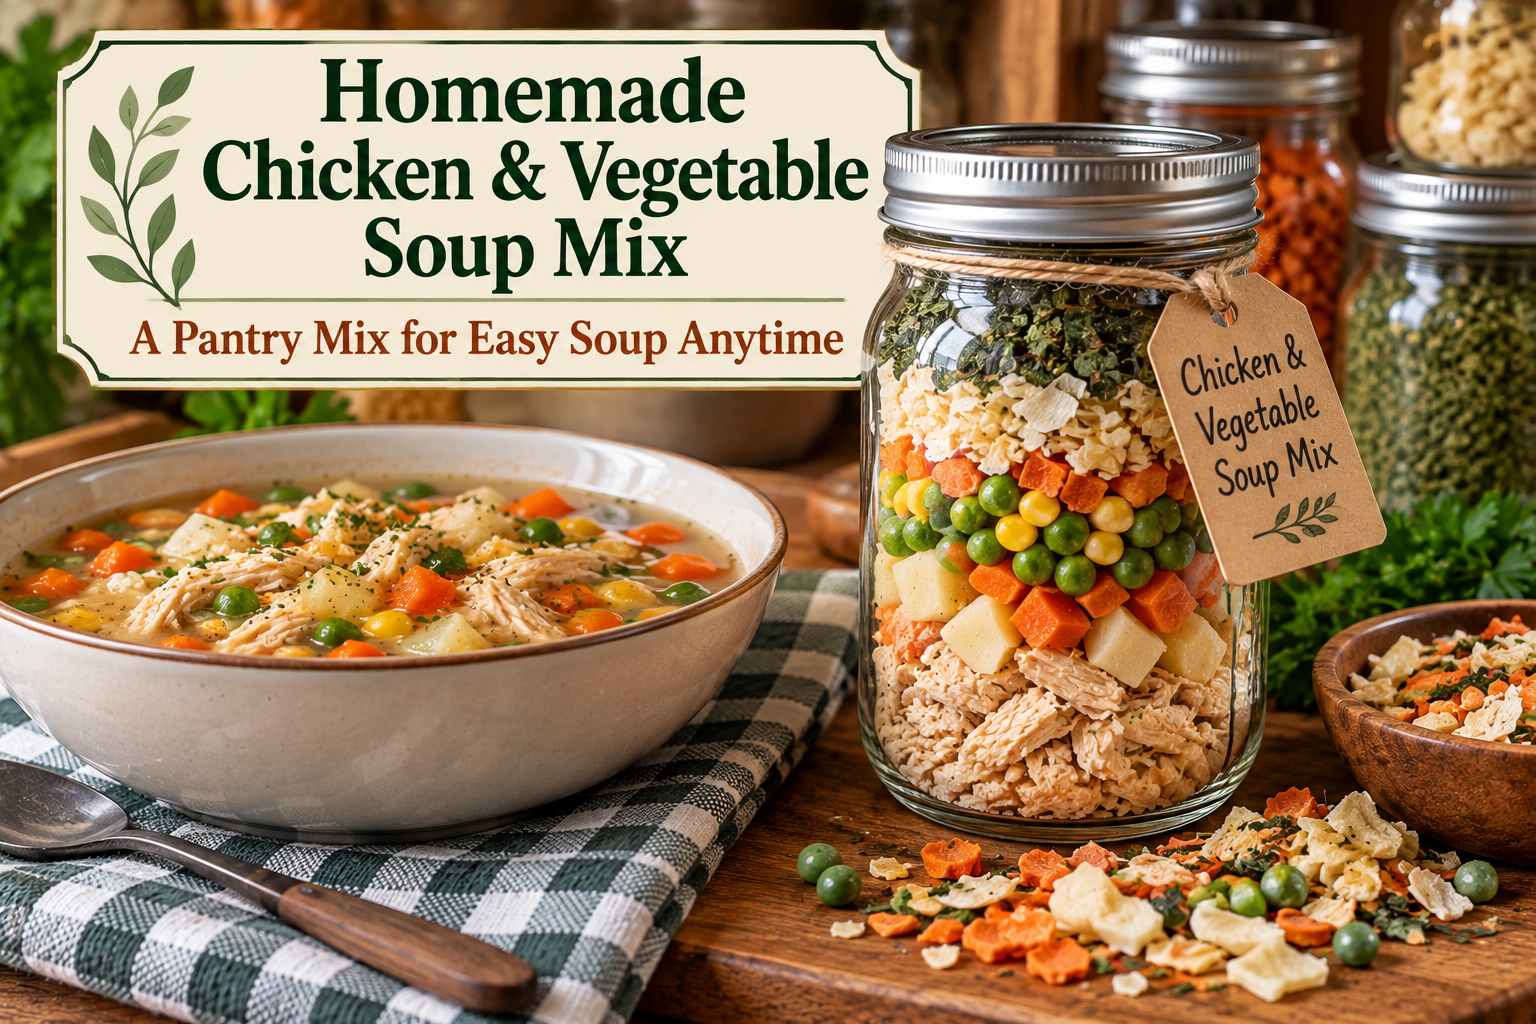
Homemade Chicken & Vegetable Soup Mix

There is something wonderfully practical about having a jar on the pantry shelf that can become dinner.

This Homemade Chicken & Vegetable Soup Mix is built from dehydrated and shelf-stable ingredients, portioned specifically for a small household.

Instead of opening several cans of vegetables every time you want soup, you measure the dry ingredients into a jar ahead of time. When you’re ready for soup, add water or broth, simmer until the vegetables are tender, and add chicken.

It’s the kind of pantry convenience that makes sense to me: make it once, store it, and have a small meal ready when you need it.

Why You’ll Love This Soup Mix

  • Makes a small batch suitable for one or two people
  • Uses dehydrated and pantry ingredients
  • Doesn’t require refrigerator or freezer space for the mix
  • Lets you use your own dehydrated vegetables
  • Can be prepared several jars at a time
  • Makes a practical lunch or light dinner
  • Easy to customize
  • A good way to use small amounts of dehydrated vegetables

Recipe Information

Yield: 1 soup mix
Mix Container: 1 half-pint (8-ounce) Mason jar
Finished Servings: 2
Serving Size: About 1½ cups prepared soup
Prep Time: 10 minutes
Cook Time: 25–35 minutes
Total Time: About 40 minutes
Meal Category: Soups, Stews & Chili
Main Protein: Chicken
Estimated Calories: About 250–300 per serving, depending on the chicken and broth used

simplegoodfood's avatarsimplegoodfood

Homemade Chicken & Vegetable soup

There is something wonderfully practical about having a jar on the pantry shelf that can become dinner.
Prep Time 10 minutes
Cook Time 35 minutes
Total Time 45 minutes
Servings: 2
Course: Dinner, Lunch, Soup
Cuisine: American
Calories: 300

Ingredients
  

Dry Mix
  • ¼ cup dehydrated chicken finely chopped or shredded
  • 2 tablespoons dehydrated carrots
  • 2 tablespoons dehydrated peas
  • 2 tablespoons dehydrated corn
  • 2 tablespoons dehydrated onion
  • 2 tablespoons dehydrated celery if available
  • ¼ cup dehydrated potato diced small
  • 1 tablespoon dry parsley
  • ½ teaspoon garlic powder
  • ½ teaspoon onion powder
  • ½ teaspoon dried thyme
  • ¼ teaspoon black pepper
  • ½ teaspoon salt or to taste
  • 1 tablespoon chicken bouillon powder
To Prepare the Soup
  • 3 cups water or chicken broth
  • 1 soup mix
  • 1 tablespoon additional dehydrated chicken optional

Method
 

  1. You will need one clean, completely dry 8-ounce (half-pint) Mason jar with a tight-fitting lid.
  2. Place all of the dry ingredients into the jar.
  3. Layering the ingredients can make the jar look attractive, but mixing everything together is perfectly fine.
  4. Seal the container tightly.
Label it:
  1. Chicken & Vegetable Soup Mix
  2. Makes 2 servings
  3. Add 3 cups water or broth
  4. Simmer 25–35 minutes
  5. Add fresh or canned chicken if desired
  6. Prepared: __________
  7. Store the finished mix in a cool, dry place according to the storage recommendations for your individual dehydrated ingredients.
  8. Important: Because the volume of dehydrated ingredients can vary depending on how finely they are cut and how thoroughly they are dried, don’t pack the ingredients tightly into the jar. If your particular batch does not comfortably fit an 8-ounce jar, use the next larger container rather than compressing the ingredients.
How to Make the Soup
    Start the vegetables
    1. Place the soup mix in a small saucepan.
    2. Add 3 cups of water or chicken broth.
    3. Stir well.
    4. Bring to a boil, then reduce the heat to a gentle simmer.
    Let the vegetables rehydrate
    1. Cover loosely and simmer for about 20–25 minutes.
    2. Stir occasionally.
    3. The exact cooking time will depend on how finely your vegetables were cut and how thoroughly they were dehydrated.
    4. The potatoes and carrots should be tender before moving on.
    Add chicken if needed
    1. If you used dehydrated chicken in the mix, continue simmering until the chicken is fully rehydrated and heated through.
    2. If you’re using canned chicken instead, drain and add it during the last 5–10 minutes of cooking.
    3. This is also an excellent place to use leftover cooked chicken.
    Adjust the soup
    1. Taste the broth.
    2. Add more water or broth if the soup is thicker than you prefer.
    3. Adjust the seasoning if necessary.
    4. Serve hot.

    Notes

    Kitchen Confidence

    This is a formula, not a recipe that has to be followed to the teaspoon.
    That’s one of the advantages of making your own soup mixes.
    You can change the vegetables based on what you’ve dehydrated.
    No peas?
    Use green beans.
    No celery?
    Leave it out.
    Have extra dehydrated onions?
    Use them.
    Have dehydrated potatoes but no carrots?
    That’s perfectly fine.
    The important thing is keeping the proportions reasonable and making sure all of your ingredients are properly dehydrated and completely dry before assembling the mix.

    Build Your Own Vegetable Combination

    Think of this mix as a starting point.

    You might make:

    Chicken + Carrot + Pea + Potato

    or

    Chicken + Corn + Green Bean + Potato

    or

    Chicken + Mixed Vegetable + Onion

    You could even make several different jars so that opening one doesn’t always mean eating exactly the same soup.

    That’s the beauty of doing your own preservation.

    You’re building a pantry around the foods you like.

    Stretch Every Grocery Dollar

    This mix is particularly useful for using vegetables that you’ve dehydrated yourself.

    A small amount of several different vegetables might not look like much individually.

    Together, they make soup.

    That’s a great way to get more value from produce purchased when it’s inexpensive or plentiful.

    And because you’re making a small jar at a time, you don’t need to commit a huge quantity of your dehydrated food to one recipe.

    Waste Not, Want Not

    Soup is one of the best ways to use small quantities.

    A tablespoon or two of dehydrated vegetables that isn’t enough for another meal can become part of a soup mix.

    The same goes for small amounts of dehydrated chicken.

    Instead of having several nearly empty jars taking up space, combine compatible ingredients into a meal.

    Just be sure that every ingredient going into the mix is completely dry and suitable for long-term storage.

    Cooking for One or Two

    This recipe intentionally makes only two servings.

    For one person, that’s dinner tonight and lunch tomorrow.

    Or make half the mix if you prefer truly single-serving portions.

    You can also prepare several jars at once and keep them ready for busy days.

    That’s where homemade convenience mixes really start to earn their keep.

    Meal Prep Note

    If you’re already dehydrating vegetables, consider assembling several soup mixes while everything is out.

    Prepare the jars, label them, and store them together.

    Then you’ve created your own small-batch convenience food without having to purchase a commercial soup mix.

    For your own pantry, you could even keep a few different versions:

    • Chicken & Vegetable
    • Chicken & Potato
    • Chicken & Rice
    • Chicken & Noodle

    That gives you variety without requiring a large collection of ingredients.

    Storage & Food Safety

    The finished soup mix should be stored only after you are certain that every dehydrated ingredient is properly dried and cooled.

    Keep the mix in an airtight container in a cool, dry, dark location.

    For specific dehydration temperatures, preparation methods, and storage recommendations, follow tested food-preservation guidance for the individual ingredients.

    When working with dehydrated foods, it’s especially important not to improvise on food-safety steps simply because the ingredients are going into a soup mix.

    One Jar, Two Bowls of Soup

    This is exactly the kind of pantry convenience I want to explore during Pantry to Table.

    Not a giant emergency-food bucket.

    Not a shelf full of things nobody remembers buying.

    Just a small jar containing ingredients you’ve already prepared and know you’ll eat.

    Add broth.

    Add heat.

    Give it time to rehydrate.

    And you’ve got soup.

    That’s a pantry doing its job.


    Posted in Preservation

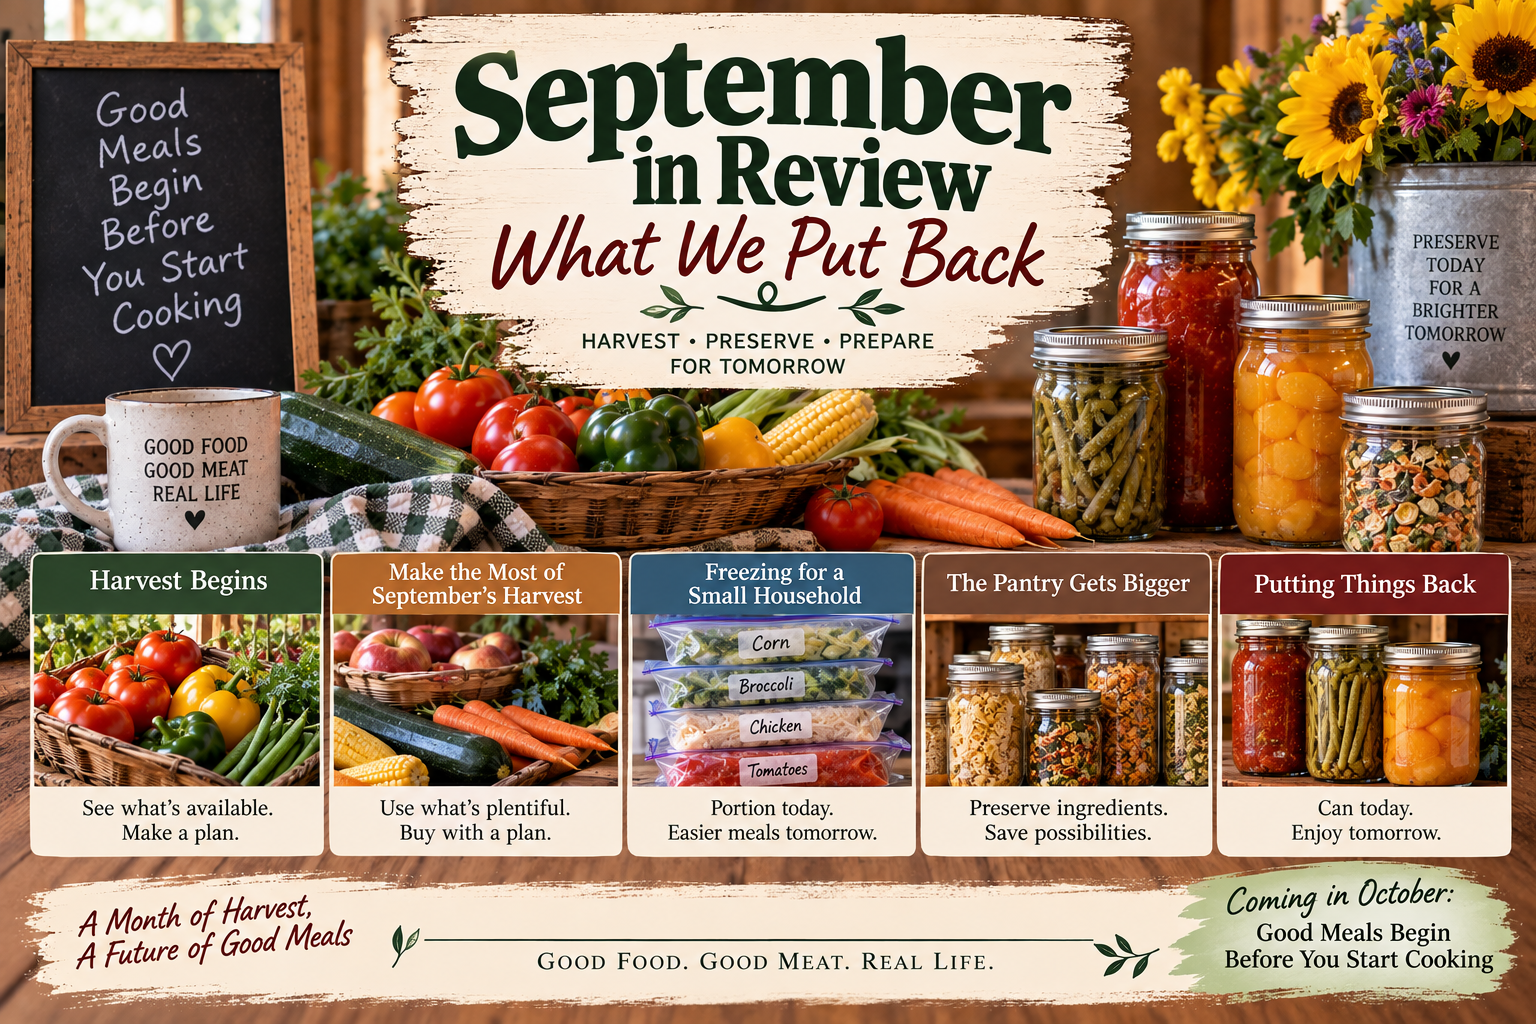
    September in Review: What We Put Back

    September has been a month of harvest, planning, preserving, and putting a little something back.

    We started with fresh produce and the simple question of what we could do with it. From there, we worked our way through using what was plentiful, freezing food in practical amounts for a small household, building a more useful pantry, and finally moving into home canning.

    It has been a busy month in the kitchen.

    But the real goal was never to see how many jars we could fill or how much food we could squeeze into a freezer.

    The goal was to make future meals easier.

    🌾 September’s Harvest Journey

    If you missed some of this month’s posts, these weekly roundups are the easiest way to catch up.

    Harvest Begins

    September started with the basics: recognizing what is available, making the most of seasonal produce, and thinking about preservation before food gets pushed to the back of the refrigerator.

    Harvest Time: Putting a Little Back for Tomorrow
    Read the Article!
    Garden Harvest Beef & Vegetable Soup
    There is something wonderfully practical about a pot of vegetable soup.
    Check out this recipe
    Fresh Corn & Zucchini Skillet
    Fresh summer corn and tender zucchini come together in this simple one-skillet side dish.
    Check out this recipe
    Harvest Chicken Rice Bowl
    There is something wonderfully satisfying about a bowl built from simple ingredients.
    Check out this recipe
    Pressure-Canning Ground Beef
    Check out this recipe
    Autumn Harvest Rice Bowl
    Roasted squash or sweet potatoes, carrots, onions, rice, and tender beef or chicken come together in this cozy fall-inspired Build-A-Bowl.
    Check out this recipe
    Smart Shopper Spotlight: What’s Worth Buying in September?
    Check out this recipe
    Harvest Vegetable Fried Rice
    Give leftover vegetables and cooked rice a delicious second life with this easy one-skillet fried rice.
    Check out this recipe
    End-of-Market Vegetable Soup
    A flexible, no-waste vegetable soup designed for all those little bits of produce left after market day.
    Check out this recipe

    It was the beginning of our September theme:

    Today’s harvest can become tomorrow’s dinner.

    Make the Most of September’s Harvest

    Once we had an idea of what was available, we moved on to making good use of it.

    Some foods were ready to eat right away. Others were worth buying when prices were good and putting a little aside for later.

    When the Farm Stand is Full
    Read the Article!
    Smart Shopper Spotlight: What to Buy When It’s in Season
    Read the Article!
    Harvest Chicken & Vegetable Skillet
    Tender pieces of chicken are cooked with sweet corn, zucchini, bell pepper, onion, and tomatoes for a simple skillet dinner that tastes like the best of late summer and early fall.
    Check out this recipe
    Put a Little Back: Sweet Corn — Today’s Corn, Tomorrow’s Meals
    Read the Article!
    How Much Should You Actually Preserve?
    Read the Article!
    Harvest Corn & Chicken Rice Bowls
    There is something satisfying about putting food away when it's at its best and then actually using it later.
    Check out this recipe
    Farm Stand Vegetable Fritatta
    When the farm stand is full, make a frittata!
    Check out this recipe

    The important thing wasn’t simply buying more.

    It was buying with a plan.

    Freezing for a Small Household

    For a household of one or two, preservation has to be practical.

    There’s not much point in freezing a giant package if you’re only going to use a cup or two at a time. This week was about portioning food for the meals we actually cook, reducing waste, and making the freezer a useful part of the kitchen rather than a place where food disappears until nobody remembers what it is.

    Why Freezing Might Be the Best Preservation Method for a Small Household
    Read the Article!
    The September Freezer: What to Put Back When Produce Is Plentiful
    Read the Article!
    Chicken & Vegetable Pot Pie Skillet
    There are nights when you want chicken pot pie, but you don't necessarily want to make an entire pie.
    Check out this recipe
    Put a Little Back: Green Beans for Future Dinners
    Read the Article!
    Freezer Inventory: Know What You Put Back
    Read the Article!
    Harvest Chicken & Green Bean Rice Bowls
    A portion of frozen green beans, some cooked chicken, rice, and a handful of pantry staples come together in a warm, satisfying bowl.
    Check out this recipe
    Freezer Clean-Out Vegetable Soup
    This Freezer Clean-Out Vegetable Soup is exactly the kind of meal I want waiting at the end of a week like this.
    Check out this recipe

    A little corn.

    A few portions of cooked chicken.

    Some vegetables.

    A meal or two tucked away for a busy day.

    Those small additions add up.

    The Pantry Gets Bigger

    The next step was looking beyond the freezer.

    Dehydrating, pantry building, meal starters, and thoughtful storage all give us another way to take advantage of today’s harvest.

    Building a Pantry One Jar at a Time
    Start small and build a useful pantry without filling every available shelf.
    Read the Article!
    Dehydrating for Real Life: Turning the Harvest into Useful Ingredients
    Look at dehydrating as a way to create practical, recipe-ready ingredients rather than simply preserving food for storage.
    Read the Article!
    Rustic Harvest Chicken & Rice
    Put those dehydrated vegetables to work in a simple, satisfying meal.
    Check out this recipe
    Put a Little Back: Dehydrated Vegetables
    Read the Article!
    How to Make Your Dehydrated Food Work Like Ingredients
    Read the Article!
    Harvest Vegetable & Lentil Soup
    Turn that little pantry starter into a warm, practical meal.
    Check out this recipe
    Pork & Cabbage Rustic Bowl
    Use simple ingredients to create another small-batch meal without needing a refrigerator full of leftovers.
    Check out this recipe

    The idea is simple:

    Don’t just preserve ingredients. Preserve possibilities.

    A jar of dried vegetables isn’t just a jar of dried vegetables. It’s something that can become part of a soup, skillet, rice bowl, or another meal down the road.

    That’s where preservation starts to become meal planning.

    Putting Things Back

    And now we come to the final chapter.

    This week we’ve moved into home canning — beginning with tomatoes and water-bath canning, then moving into pressure canning and the Chicken Meal Starter.

    Weekend Suppers: Simple Skillet Meals for Fall
    Read the Article!
    Why Tomatoes Need Special Attention When Canning
    Read the Article!
    Canning Tomatoes: Your First Water-Bath Project
    Read the Article!
    What Can I Do With Those Canned Tomatoes?
    Read the Article!
    Water Bath or Pressure Canner? Knowing Which One to Use
    Read the Article!
    Chicken Meal Starter: Putting a Future Supper in the Pantry
    Read the Article!

    This is where all the pieces we’ve been talking about come together.

    We’re not preserving food simply because we can.

    We’re preserving it because we have a plan for using it.

    What September Really Taught Us

    There are plenty of ways to preserve food.

    Freezing.

    Dehydrating.

    Water-bath canning.

    Pressure canning.

    But the method isn’t really the most important part.

    The important part is asking:

    Will this make my future meals easier?

    Will I actually use it?

    Is it stored in an amount that makes sense for my household?

    Can I find it when I need it?

    Does it save me money, reduce waste, or give me something useful when I don’t feel like starting dinner completely from scratch?

    Those are the questions that turn preservation into practical kitchen planning.

    From Today’s Harvest to Tomorrow’s Supper

    When we started September, the harvest was the focus.

    By the end of the month, we’re looking at something different.

    We’re looking at future meals.

    A bag of frozen corn can become part of a quick skillet supper.

    A container of cooked chicken can become soup, a rice bowl, or a wrap.

    A jar of dried vegetables can become part of a meal starter.

    A jar of home-canned tomatoes can become sauce, soup, or a skillet dinner.

    And a jar of Chicken Meal Starter is already halfway to a future supper.

    That’s the payoff.

    We didn’t put all this food back just to fill jars, freezer bags, and pantry shelves.

    We put it back so that one day, when it’s time to make supper, some of the work has already been done.

    Looking Ahead to October

    And that brings us right to next month.

    September has been about putting food back.

    October is going to be about using what we’ve put back.

    Our October theme is:

    Good Meals Begin Before You Start Cooking

    Because sometimes the easiest supper starts long before you turn on the stove.

    It starts with having the right ingredients.

    It starts with knowing what’s in the pantry.

    It starts with a few portions in the freezer.

    It starts with a jar on the shelf that can become dinner.

    September taught us how to put a little something back. October is going to show us what we can do with it.

    And I think that’s a pretty good place to end the harvest season.

    Posted in Recipe Roundup

    The Pantry Gets Bigger: This Week’s Harvest & Pantry Ideas

    There’s a funny thing about building a pantry.

    You don’t necessarily need more food.

    Sometimes you just need to make the food you already have a little more useful.

    That was the idea behind this week’s “The Pantry Gets Bigger” theme. We looked at small-batch preservation, dehydrated vegetables, meal starters, and the simple idea of putting a little something away today that can make dinner easier weeks or months from now.

    This isn’t about filling a basement with a year’s worth of food.

    It’s about making a small pantry work harder.

    And when you’re cooking for one or two—or working with limited storage space—that can make a surprisingly big difference.

    🥕 This Week at a Glance

    Here’s what we explored this week:

    Building a Pantry One Jar at a Time
    Start small and build a useful pantry without filling every available shelf.
    Read the Article!
    Dehydrating for Real Life: Turning the Harvest into Useful Ingredients
    Look at dehydrating as a way to create practical, recipe-ready ingredients rather than simply preserving food for storage.
    Read the Article!
    Rustic Harvest Chicken & Rice
    Put those dehydrated vegetables to work in a simple, satisfying meal.
    Check out this recipe
    Put a Little Back: Dehydrated Vegetables
    Read the Article!
    How to Make Your Dehydrated Food Work Like Ingredients
    Read the Article!
    Harvest Vegetable & Lentil Soup
    Turn that little pantry starter into a warm, practical meal.
    Check out this recipe
    Pork & Cabbage Rustic Bowl
    Use simple ingredients to create another small-batch meal without needing a refrigerator full of leftovers.
    Check out this recipe

    🌱 The Pantry Doesn’t Have to Be Big

    When people hear the word pantry, they may picture rows and rows of shelves packed with jars, cans, bags and boxes.

    That isn’t my idea of a useful pantry.

    Especially when you’re cooking for one or two, a huge quantity of ingredients isn’t necessarily an advantage. Food takes up space, and food you don’t use isn’t really helping your grocery budget.

    I’m much more interested in a pantry where every jar has a purpose.

    A jar of dehydrated carrots isn’t just dehydrated carrots.

    It’s an ingredient waiting for soup.

    A jar of dried onions isn’t just something that was preserved during harvest season.

    It’s a shortcut for the next skillet meal.

    And a small jar containing several ingredients can become something even more useful—a future meal.

    That’s where the idea of the meal starter comes in.

    🫙 One Small Jar Can Become Dinner

    Our Harvest Vegetable Soup Starter was a good example.

    The jar contains a combination of ingredients that were chosen because they work well together:

    • Dehydrated carrots
    • Dehydrated celery
    • Dehydrated onions
    • Dehydrated peas
    • Dehydrated spinach
    • Dehydrated potatoes
    • Dry lentils

    The lentils aren’t dehydrated—they’re ordinary dry lentils that are already shelf-stable because they are dry.

    The vegetables, on the other hand, have been dehydrated and reduced to a fraction of their original size.

    Together, they make a very small package of ingredients that can become a pot of soup.

    And that’s the part I find most useful.

    We’re not just preserving vegetables. We’re preserving future meals.

    🥣 What I Learned From Testing the Soup

    This week’s soup test taught me something important.

    Dehydrated vegetables don’t necessarily come back looking exactly like fresh vegetables—and they don’t have to.

    The carrots, celery, onions and potatoes rehydrated nicely. None of them became gummy, and they returned to recognizable shapes.

    The spinach was another story.

    It practically disappeared into the soup.

    But that’s not necessarily a bad thing. It became part of the broth and added another vegetable without taking up much space.

    The peas, however, were a little too prominent in the first batch. Reducing them in the second batch made the soup much better balanced.

    And the thyme?

    Let’s just say the thyme and I have agreed to take a little break. 😄

    It completely overpowered the chicken flavor in the first batch, so I left it out of the second.

    The second version was much better.

    That’s one of the reasons I like testing these ideas before turning them into blog posts. Sometimes the kitchen has opinions.

    🥕 Think About the Future Recipe Before You Dehydrate

    One of the biggest lessons from this week’s experiments is that how you prepare food before dehydrating it matters.

    If you know you’re eventually going to use onions in soups, stews or skillet meals, dice them before dehydrating.

    If you’re making a soup starter, dice your potatoes into a useful size.

    The goal isn’t simply to make food smaller.

    The goal is to make it useful later.

    Before putting something into the dehydrator, ask:

    How am I going to use this six months from now?

    That question can change how you prepare it today.

    🍗 You Don’t Have to Dehydrate Everything

    Another lesson worth repeating is that preservation doesn’t have to mean doing absolutely everything yourself.

    I’ve tried dehydrating meat.

    For me, it takes too long to make it worthwhile.

    I’d much rather use a rotisserie chicken, canned chicken, tuna, salmon or another shelf-stable protein when it makes sense.

    That doesn’t make the meal any less practical.

    In fact, it’s exactly the kind of shortcut that makes a small pantry work.

    You can preserve the vegetables while buying the protein that makes sense for your kitchen.

    That’s still putting a little back.

    🏡 Small Pantry. Small Batches. Useful Meals.

    That’s really what this week’s theme came down to.

    You don’t need a huge pantry.

    You don’t need to preserve every tomato, carrot, onion and green bean that comes through your kitchen.

    And you certainly don’t need to turn your home into a food-storage warehouse.

    Instead, look at what you actually eat.

    Then preserve or purchase a few ingredients that make those meals easier.

    Maybe that’s a jar of dehydrated vegetables.

    Maybe it’s a few cans of chicken.

    Maybe it’s dry lentils, rice or beans.

    Maybe it’s a freezer container holding a leftover meal for another day.

    The point is to create a pantry that supports your real life.

    💰 Stretch Every Grocery Dollar

    Preserving food when it’s inexpensive is one of the simplest ways to stretch the grocery budget.

    When seasonal vegetables are plentiful, you can buy a smaller amount, dehydrate what you won’t use immediately, and turn it into ingredients for future meals.

    That means one grocery purchase can potentially serve several meals instead of becoming one meal followed by forgotten leftovers.

    And because dehydrated vegetables take up so little space, they’re particularly useful when storage room is limited.

    ♻️ Waste Not, Want Not

    This is where the old “Waste Not, Want Not” idea fits beautifully.

    A little extra celery doesn’t have to become forgotten celery in the refrigerator.

    A few carrots don’t have to sit around until they need rescuing.

    An onion doesn’t have to be thrown away because you only needed half.

    If you have a way to preserve those ingredients, they can become part of your pantry instead.

    Not everything needs to be saved.

    But the things you regularly use are worth thinking about.

    🍲 The Real Goal: Easier Dinner

    At the end of the day, I’m not interested in preservation just for the sake of preservation.

    I’m interested in what happens afterward.

    Can that jar help make Tuesday night’s dinner easier?

    Can those dehydrated vegetables turn into soup without a trip to the grocery store?

    Can a little bit of preserved food help stretch a package of meat?

    Can something you bought when it was inexpensive help you make a meal later when prices are higher?

    That’s where preservation becomes practical.

    It’s not just about what you’re putting away.

    It’s about what you’re making possible for future you.

    🌻 Put a Little Back

    That phrase has become the heart of this September series:

    Put a little back.

    Not everything.

    Not perfectly.

    And certainly not all at once.

    Just a little.

    A jar of vegetables.

    A bag of frozen corn.

    A few servings of something you’ve made ahead.

    A pantry ingredient bought when the price is good.

    Every little bit counts.

    And over time, those little bits add up to something pretty valuable—a pantry that helps you feed yourself well without making life more complicated.

    That’s a pantry I can get behind.

    Cooking for One or Two

    For smaller households, I think this approach makes even more sense.

    You don’t necessarily need a gallon jar of anything.

    A one-pint wide-mouth Mason jar can hold a surprisingly useful amount of dehydrated ingredients.

    Small jars mean you can make several different combinations instead of committing an entire shelf to one ingredient.

    And when that jar becomes two servings of soup?

    Even better.

    One for tonight.

    One for another day.

    That’s practical preservation.

    📌 What’s Next?

    We’ve spent this week making the pantry a little more useful.

    Next, we’ll keep building on the idea that today’s harvest can become tomorrow’s dinner.

    Because that’s really what all of this is about.

    Not storing food just to say we stored it.

    Putting good food away in a form that makes sense for the way we actually cook.

    One small batch.

    One useful jar.

    One future meal at a time.

    Posted in Bowls, Pork Meals, Seasonal, Skillet Meals

    Pork & Cabbage Rustic Bowl

    Tender pork, cabbage, potatoes, and simple pantry ingredients come together in a hearty small-batch bowl that makes good use of what you already have on hand.

    Introduction

    Not every meal that comes from the pantry needs to be a soup.

    Sometimes you want something a little more substantial—a bowl of food with distinct ingredients, different textures, and enough variety that it feels like a complete meal.

    That’s where this Pork & Cabbage Rustic Bowl comes in.

    It’s the kind of meal I like for a small household because it doesn’t require a huge roast or a refrigerator full of leftovers. A modest amount of cooked pork can be stretched with cabbage, potatoes, onion, and a few pantry staples.

    And if you’ve been putting a little back through dehydration, some of those ingredients can come straight from your pantry.

    This is rustic food in the best sense: simple ingredients, simple cooking, and very little fuss.

    Why You’ll Love This Recipe

    • Small-batch friendly — Makes two generous servings.
    • A great use for leftover pork or cooked pork from another meal.
    • Uses pantry staples along with fresh cabbage.
    • Flexible enough to use dehydrated vegetables.
    • One skillet meal with minimal cleanup.
    • Budget-friendly because a small amount of pork stretches across two meals.
    • Comforting without being complicated.
    simplegoodfood's avatarsimplegoodfood

    Pork & Cabbage Rustic Bowl

    Use simple ingredients to create another small-batch meal without needing a refrigerator full of leftovers.
    Prep Time 10 minutes
    Cook Time 30 minutes
    Total Time 40 minutes
    Servings: 2
    Course: Dinner, Lunch
    Cuisine: American
    Calories: 450

    Ingredients
      

    • 6 ounces cooked pork chopped or shredded
    • 2 cups thinly sliced fresh cabbage
    • 1 cup diced cooked potatoes
    • 2 tablespoons dehydrated onion
    • ½ cup chicken or vegetable broth
    • 1 tablespoon olive oil
    • 1 teaspoon apple cider vinegar
    • ½ teaspoon garlic powder
    • ¼ teaspoon dried parsley
    • ¼ teaspoon salt or to taste
    • Black pepper optional
    Optional
    • ¼ cup dehydrated carrots rehydrated before adding
    • A small amount of cooked rice
    • Chopped fresh parsley for serving

    Method
     

    Start the Cabbage
    1. Heat the olive oil in a medium skillet over medium heat.
    2. Add the sliced cabbage and dehydrated onion.
    3. Cook for about 5 minutes, stirring occasionally, until the cabbage begins to soften.
    Add the Broth
    1. Pour in the broth and add the garlic powder, parsley, and salt.
    2. Stir well.
    3. Cover the skillet and cook for about 8–10 minutes, until the cabbage is tender but still has some texture.
    4. If using dehydrated carrots, add them with the broth.
    Add the Potatoes
    1. Stir in the cooked potatoes.
    2. Continue cooking for about 5 minutes, stirring occasionally.
    3. If the skillet becomes dry, add another splash of broth.
    Add the Pork
    1. Add the cooked pork and stir everything together.
    2. Cook for another 5–7 minutes, just until the pork is heated through.
    3. Because the pork is already cooked, we’re simply warming it and allowing the flavors to come together.
    Finish the Bowl
    1. Remove the skillet from the heat.
    2. Drizzle the apple cider vinegar over the mixture and gently stir.
    3. Taste and adjust the salt and pepper.
    4. Divide between two bowls and garnish with fresh parsley if desired.

    Notes

    Kitchen Confidence
    Don’t overcook the cabbage.
    For this bowl, I like the cabbage to remain recognizable rather than cooking it until it’s completely soft.
    You’re looking for tender with a little texture.
    Use the pork you have.
    Leftover pork roast, pork chops, or pulled pork can all work.
    If the pork is already seasoned, reduce the added salt and garlic powder accordingly.
    What about dehydrated cabbage?
    If you’ve dehydrated cabbage yourself, you can certainly use it here.
    Because dehydrated cabbage needs additional liquid to rehydrate, I’d add it with the broth and allow it to cook until tender.
    But fresh cabbage works particularly well because it gives the finished bowl some color and texture.

    Stretch Every Grocery Dollar

    Pork doesn’t have to be the largest ingredient in the bowl.

    Six ounces of cooked pork is enough for two servings when combined with cabbage and potatoes.

    That’s one of my favorite ways to use leftovers: don’t simply reheat the original meal. Turn the leftovers into something new.

    A small amount of leftover pork becomes the protein for an entirely different dinner.

    Waste Not, Want Not

    This is a perfect leftover meal.

    Have a little pork left from Sunday dinner?

    Use it here.

    Have one or two potatoes that need to be used?

    Add them.

    A little cabbage left from another recipe?

    Into the skillet it goes.

    And if you have dehydrated vegetables in the pantry, this is another opportunity to use them.

    The best pantry ingredient is one that actually gets eaten.

    Cooking for One or Two

    This recipe makes two servings, but it’s easy to make a single serving.

    Simply divide the ingredients in half and cook in a small skillet.

    Or make the full recipe and save the second bowl for another meal.

    For someone cooking for one, I particularly like the second option. One cooking session gives you two meals without creating a mountain of leftovers.

    Meal Prep Note

    Cooked pork can be portioned into small containers and refrigerated or frozen for future meals.

    When you have a small amount of cooked pork available, think beyond sandwiches.

    It can become:

    • A rustic bowl
    • Fried rice
    • A skillet meal
    • Soup
    • Tacos
    • A breakfast hash

    Having a few small portions of cooked protein available can be incredibly useful when freezer space is limited.

    Storage & Freezing

    Store leftover bowls in a covered container in the refrigerator and use within 3–4 days.

    For longer storage, portion the cooled mixture into freezer-safe containers.

    The cabbage and potatoes may soften somewhat after freezing and reheating, but the dish will still make a useful leftover meal.

    When reheating, add a small splash of broth or water if needed.


    Make It Your Own

    This is one of those recipes where the ingredient list is more of a starting point than a set of rules.

    You could add:

    • Dehydrated carrots
    • Green beans
    • A little corn
    • Cooked rice
    • Different herbs
    • A spoonful of mustard
    • A splash more vinegar for brightness

    You could even swap the pork for cooked chicken or turkey.

    The idea is simple:

    Start with what you have and build a bowl.


    From the Pantry to the Bowl

    This week we’ve been talking about turning dehydrated vegetables into useful ingredients.

    This bowl shows another side of that idea.

    You don’t need every ingredient to come from a jar.

    In fact, I think it’s better when they don’t.

    The fresh cabbage provides texture and color.

    The cooked pork provides protein.

    The potatoes make the meal filling.

    And the dehydrated onion gives you a convenient pantry ingredient that’s ready whenever you need it.

    That’s what a practical pantry looks like to me.

    Some fresh.
    Some preserved.
    Some shelf-stable.
    All working together.

    You don’t have to choose between eating fresh food and preserving food.

    You can use both.

    And when you’re working with limited refrigerator, freezer, and pantry space, that flexibility can make everyday cooking a whole lot easier.

    Sometimes putting a little back doesn’t mean putting away an entire meal.

    Sometimes it just means putting away one useful ingredient that will help you make the next meal.

    And that’s plenty. 🥬🥔🍖

    Posted in Soups & Stews

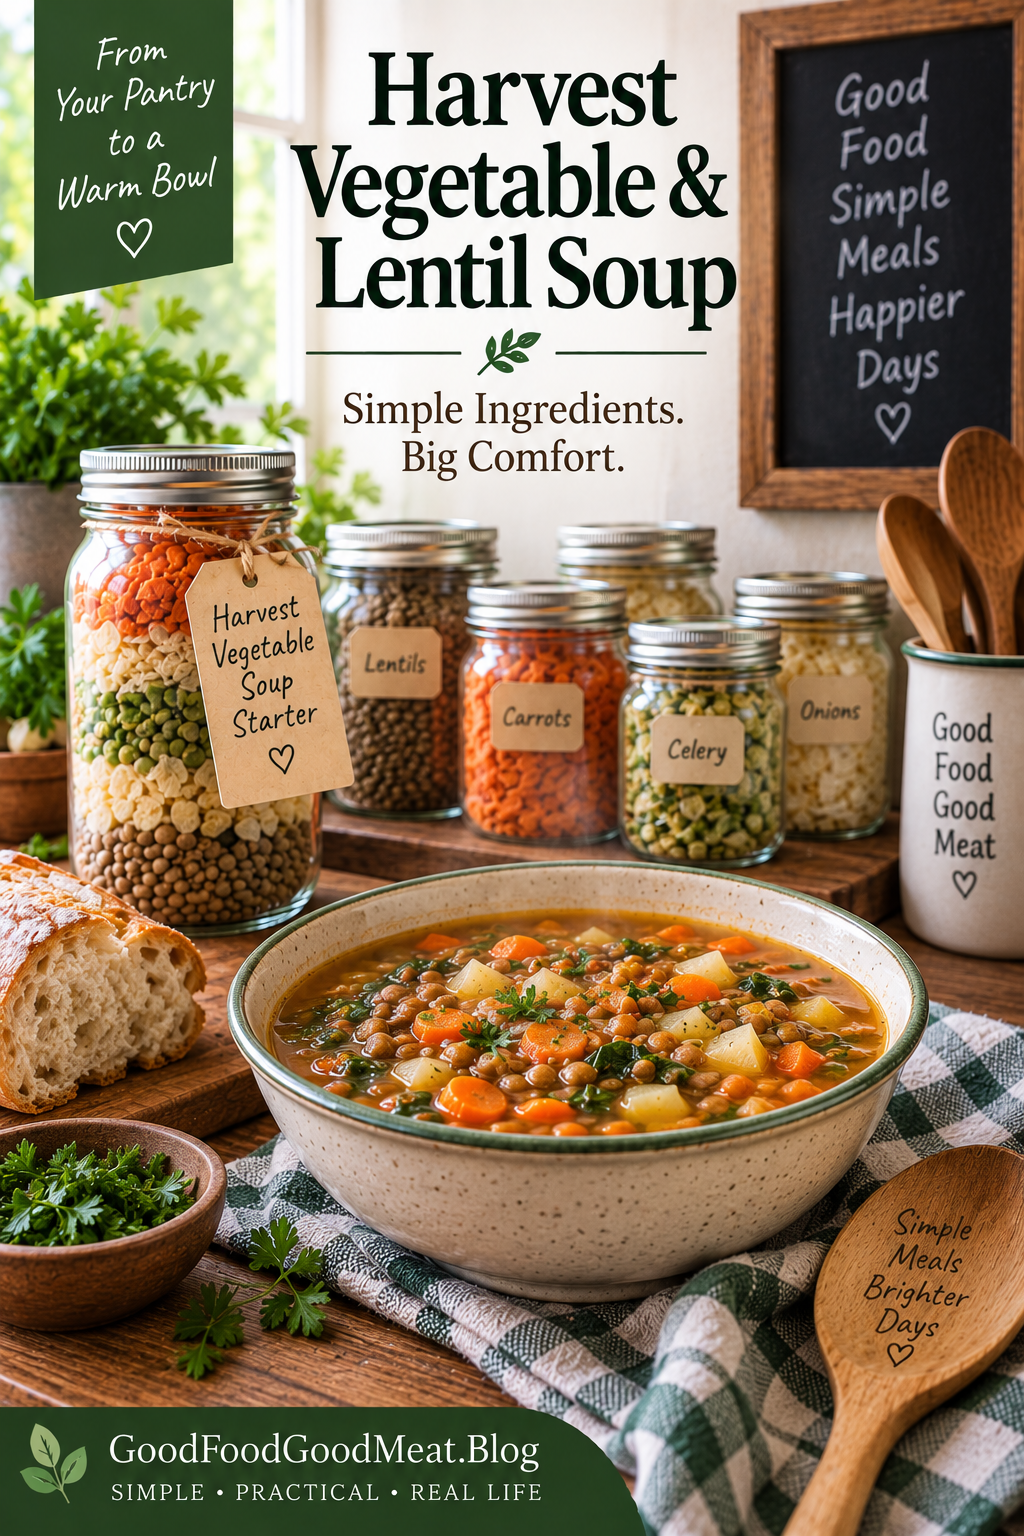
    Harvest Vegetable & Lentil Soup

    Small jars of dehydrated vegetables become a hearty, practical soup in the slow cooker. Add a little cooked chicken if you have it, or let the lentils and vegetables make the meal on their own.

    Introduction

    This soup started with a simple idea: Could a small jar of dehydrated vegetables become an actual meal?

    After testing it, I can say yes.

    The dehydrated carrots, celery, onions, peas, potatoes, and spinach all worked beautifully in this little slow-cooker soup. The vegetables rehydrated without becoming gummy, and the dry lentils cooked right along with them.

    The finished soup makes four cups, which works out to two generous two-cup servings—just right for a small household.

    And that’s really what I like about it.

    You don’t need a big pot, a big pantry, or a freezer full of prepared meals. A handful of shelf-stable ingredients and a little cooked chicken can turn into dinner.

    Why You’ll Love This Recipe

    • Small-batch friendly — Makes just four cups.
    • Perfect for a 1–2 quart slow cooker.
    • Uses dehydrated vegetables as practical pantry ingredients.
    • Dry lentils cook right in the soup.
    • Flexible protein — Add cooked chicken, turkey, or leave it vegetarian.
    • Freezer-friendly — Extra soup can be frozen for another meal.
    • No complicated preparation — Just add everything to the slow cooker and let it cook.
    • Great for limited refrigerator and freezer space.
    simplegoodfood's avatarsimplegoodfood

    Harvest Vegetable & Lentil Soup

    Turn that little pantry starter into a warm, practical meal.
    Prep Time 10 minutes
    Cook Time 3 hours 30 minutes
    Total Time 3 hours 40 minutes
    Servings: 2
    Course: Dinner, Lunch
    Cuisine: American
    Calories: 425

    Ingredients
      

    For the Soup
    • ¼ cup dry lentils rinsed and picked over
    • ¼ cup dehydrated carrots
    • ¼ cup dehydrated celery
    • 2 tablespoons dehydrated onions
    • 2 tablespoons dehydrated peas
    • 2 tablespoons dehydrated spinach
    • 2 tablespoons dehydrated potatoes
    • 3½ cups chicken or vegetable broth
    • ¼ teaspoon garlic powder
    • ¼ teaspoon salt or to taste
    • Black pepper optional
    Optional
    • ½ cup cooked shredded chicken

    Equipment

    • 1 2 Qt Mini Crockpot

    Method
     

    Prepare the Lentils
    1. Rinse the dry lentils and check them for any small stones or debris.
    2. No soaking is necessary.
    Add Everything to the Slow Cooker
    1. Place the lentils, dehydrated carrots, celery, onions, peas, spinach, and potatoes into a 1–2 quart slow cooker.
    2. Add the broth, garlic powder, salt, and optional pepper.
    3. Stir gently.
    Cook
    1. Cover and cook on HIGH for 3½ hours.
    2. The lentils should be tender and the vegetables rehydrated.
    3. Your particular dehydrated vegetables may require a little more or less time, but 3½ hours worked well in my mini-crock.
    Add the Chicken
    1. If using cooked chicken, stir in ½ cup shredded chicken during the last 30–45 minutes of cooking.
    2. Because the chicken is already cooked, it only needs to heat through and absorb some of the soup’s flavor.
    Check the Consistency
    1. When finished, check the soup.
    2. If it seems thicker than you prefer, stir in a little additional broth or water.
    3. Taste and adjust the salt and pepper as needed.
    Serve
    1. Ladle into two bowls and serve hot.
    2. Each serving should be approximately 2 cups.

    Notes

    Rotisserie chicken is an especially convenient choice.
    About the Seasonings
    I deliberately left thyme out of this version.
    My first test batch included thyme, and I found that even the small amount I used overwhelmed the other flavors—especially the chicken.
    The second batch was much better without it.
    That’s one of the advantages of making your own meal starters: you can adjust the recipe to suit your own kitchen and your own taste.
    Kitchen Confidence
    Don’t be afraid of the dehydrated vegetables.
    They may look rather unimpressive when they first go into the slow cooker.
    That’s okay.
    As they absorb the broth, they change considerably.
    In testing this recipe, the carrots, celery, onions, peas, and potatoes all returned to recognizable shapes without becoming gummy.
    The spinach behaved differently. It essentially disappeared into the soup.
    That’s not a problem. It simply becomes part of the broth rather than remaining as visible pieces.
    The color may be different, too.
    Dehydrated vegetables don’t necessarily return to the bright colors of fresh vegetables. The finished soup can look more muted than a soup made with fresh produce.
    The flavor and texture are what matter most.
    If you’d like a little fresh color when serving, add some chopped parsley or green onion.

    Stretch Every Grocery Dollar

    This is a great way to make a little chicken go a long way.

    Just ½ cup of cooked shredded chicken adds protein and flavor to four cups of soup.

    And because the soup already contains lentils, you don’t need a large amount of meat to make it satisfying.

    This is also an excellent use for leftover rotisserie chicken.

    One purchase can provide chicken for sandwiches, salads, and a pot of soup.


    Waste Not, Want Not

    This soup is practically designed for the Waste Not, Want Not philosophy.

    Have a little cooked chicken left?

    Use it.

    Have a different dehydrated vegetable?

    Try it.

    Have an extra serving of soup?

    Freeze it.

    The goal isn’t to follow the recipe rigidly. It’s to make good use of the ingredients you’ve already put away.


    Cooking for One or Two

    This recipe makes two generous servings, approximately two cups each.

    If you are cooking for one, make the full recipe and freeze the second serving.

    That’s exactly what I like about this size of recipe. One pot gives you dinner tonight and another meal waiting in the freezer.

    You don’t have to spend another afternoon cooking.


    Meal Prep Note

    The dry ingredients can be assembled ahead of time as a Harvest Vegetable Soup Starter.

    For a one-pint wide-mouth Mason jar, combine:

    • ¼ cup dry lentils
    • ¼ cup dehydrated carrots
    • ¼ cup dehydrated celery
    • 2 tablespoons dehydrated onions
    • 2 tablespoons dehydrated peas
    • 2 tablespoons dehydrated spinach
    • 2 tablespoons dehydrated potatoes

    Label the jar with the contents and date.

    When you’re ready to make the soup, add the contents to your slow cooker along with 3½ cups broth and the seasonings.

    Add cooked chicken near the end, if desired.

    That’s the beauty of the meal-starter approach: today’s preservation work becomes a future meal.


    Storage & Freezing

    Cool leftover soup promptly and refrigerate in a covered container.

    Use refrigerated leftovers within 3–4 days.

    For longer storage, freeze the soup in individual portions.

    A 2-cup freezer container works particularly well for this recipe because it gives you one complete serving.

    Thaw refrigerated overnight and reheat gently on the stovetop or in the microwave until steaming hot.

    You may need to add a splash of broth or water when reheating because the lentils and vegetables can continue absorbing liquid.


    A Little Jar Becomes Dinner

    This soup is a good reminder that food preservation doesn’t have to mean filling every available shelf.

    A pint jar of dehydrated vegetables and lentils doesn’t look like much.

    But add broth, let the slow cooker do the work, and add a little cooked chicken if you have it—and you’ve got four cups of homemade soup.

    That’s two dinners for one person or a satisfying meal for two.

    And that’s exactly why I like the idea of putting a little back.

    Not everything.

    Not a year’s worth.

    Just something useful.

    One small jar. One simple meal. One little bit of future dinner waiting in the pantry. 🫙🥕🍲