Posted in Skillet Meals

Creamy Chicken & Vegetable Skillet

Introduction

When you’re trying to stretch your grocery budget, variety matters just as much as saving money. Using the same ingredients in different ways keeps leftovers from feeling repetitive, and today’s Creamy Chicken & Vegetable Skillet is a perfect example.

Tender pieces of our Simple Campground Herb Chicken are combined with colorful vegetables in a light, creamy sauce that’s ready in about 20 minutes. Everything cooks in one skillet, making cleanup easy whether you’re cooking at the campground or in your home kitchen.

Serve it over rice, egg noodles, mashed potatoes, or enjoy it on its own for a satisfying meal that proves leftovers can taste brand new.

simplegoodfood's avatarsimplegoodfood

Creamy Chicken & Vegetable Skillet

Leftovers shouldn't taste like leftovers.
Prep Time 10 minutes
Cook Time 15 minutes
Total Time 25 minutes
Servings: 4
Course: Dinner, Lunch, Main Course
Cuisine: American
Calories: 330

Ingredients
  

  • 2 cups cooked Simple Campground Herb Chicken diced
  • 2 teaspoons olive oil
  • 1 small onion diced
  • 1 cup sliced mushrooms
  • 1 cup broccoli florets
  • 1 cup sliced carrots
  • ½ cup frozen peas
  • 2 cloves garlic minced
  • 1 tablespoon flour
  • 1 cup low-sodium chicken broth
  • ½ cup plain nonfat Greek yogurt
  • ½ teaspoon dried thyme
  • ½ teaspoon dried parsley
  • Salt and black pepper to taste
Optional for serving:
  • Cooked rice
  • Egg noodles
  • Mashed potatoes
  • Toasted whole-grain bread

Method
 

  1. Heat olive oil in a large skillet over medium heat.
  2. Cook the onion, carrots, and mushrooms for about 5 minutes until they begin to soften.
  3. Add the broccoli and garlic and cook for another 2 minutes.
  4. Sprinkle the flour over the vegetables and stir well.
  5. Slowly whisk in the chicken broth until smooth.
  6. Simmer for 3–4 minutes until the sauce begins to thicken.
  7. Stir in the cooked chicken and peas.
  8. Remove the skillet from the heat and gently stir in the Greek yogurt.
  9. Season with thyme, parsley, salt, and pepper.
  10. Serve immediately over your favorite starch—or enjoy it just as it is.

Notes

Notes
  • Removing the skillet from the heat before adding the Greek yogurt helps prevent it from curdling.
  • Use whatever vegetables you already have in the refrigerator.
  • This recipe is a wonderful way to clean out the vegetable drawer before grocery shopping.
Leftover & Meal Prep Tips
Don’t worry if you have a little extra left!
Tomorrow we’ll use our leftover chicken in Southwest Chicken Rice Bowls, giving this week’s meal starter another completely different personality.
If you have extra cooked vegetables from today’s meal, save them for Saturday Soup or stir them into Friday’s budget-stretching ideas.
Food Storage & Preservation
Cool leftovers promptly and refrigerate within two hours (or within one hour in very hot weather while camping).
If you’re freezing cooked chicken or vegetables for future meals, or preserving produce by canning or dehydrating, always check the latest USDA recommendations to ensure safe food storage practices.

🏕️ This Week’s Camp Menu

✅ Sunday: Simple Campground Herb Chicken

✅ Monday: Garden Vegetable Rice Bowls with Herb Chicken

🍗 Today’s Recipe: Creamy Chicken & Vegetable Skillet

Coming Up Next:

  • Wednesday: 🌮 Southwest Chicken Rice Bowl
  • Thursday: 🥔 Campground Loaded Baked Potato Bowls
  • Friday: 💵 Stretch This Week’s Groceries Even Further
  • Saturday: 🍗 Five Easy Ways to Stretch One Package of Chicken

⭐ Bonus Recipes

  • Campground Fried Rice
  • Saturday Soup

Tomorrow we’re giving our herb chicken a Southwestern twist with a colorful Southwest Chicken Rice Bowl. Black beans, corn, tomatoes, and a squeeze of lime create a completely different meal using the same simple meal starter.

Posted in Skillet Meals

Campground Chicken & Broccoli Rice Skillet

Whether you’re cooking at the campground or at home after a busy day, this Campground Chicken & Broccoli Rice Skillet delivers a hearty, satisfying meal with minimal cleanup. Tender chicken, fluffy rice, broccoli, and melted cheddar cheese come together in one skillet for a comforting dinner that’s ready in about 35 minutes.

It’s an easy recipe to customize with vegetables you already have on hand, making it a practical choice for campers trying to make the most of their cooler and pantry supplies.

simplegoodfood's avatarsimplegoodfood

Campground Chicken & Broccoli Rice Skillet

Tender chicken, fluffy rice, broccoli, and melted cheddar cheese come together in one skillet for a comforting dinner that's ready in about 35 minutes.
Prep Time 10 minutes
Cook Time 25 minutes
Total Time 40 minutes
Servings: 4
Course: Dessert, Lunch, Main Course
Cuisine: American
Calories: 445

Ingredients
  

  • 1 pound boneless skinless chicken breasts or thighs, cut into bite-sized pieces
  • 1 tablespoon olive oil
  • 1 small onion diced
  • 2 cloves garlic minced
  • 1 cup long-grain white rice uncooked
  • 2¼ cups low-sodium chicken broth
  • 2 cups broccoli florets fresh or frozen
  • 1 teaspoon Italian seasoning
  • ½ teaspoon paprika
  • Salt and black pepper to taste
  • 1 cup shredded sharp cheddar cheese
  • 2 tablespoons chopped fresh parsley optional

Method
 

  1. Heat the olive oil in a large skillet over medium heat.
  2. Add the chicken and cook for 5–6 minutes until lightly browned.
  3. Stir in the onion and cook until softened, about 3 minutes.
  4. Add the garlic and cook for 30 seconds.
  5. Stir in the rice, Italian seasoning, paprika, salt, and pepper.
  6. Pour in the chicken broth and bring to a gentle boil.
  7. Reduce the heat to low, cover, and simmer for 15 minutes.
  8. Add the broccoli over the rice, cover again, and cook another 5–7 minutes until the rice is tender and the broccoli is crisp-tender.
  9. Sprinkle the cheddar cheese over the top. Cover for 2 minutes until melted.
  10. Garnish with parsley before serving.

Notes

Storage
Store leftovers in an airtight container in the refrigerator for up to 3 days.
To reheat, add a splash of chicken broth or water and warm gently in a skillet or microwave until heated through. The extra liquid helps keep the rice moist and prevents it from drying out.
🥪 Leftover Lunch Idea
Don’t let those leftovers go to waste! This Chicken & Broccoli Rice Skillet makes a delicious and filling lunch the next day.
Pack a serving in a reusable container and simply reheat when you’re ready to eat. It’s perfect for a quick campground lunch before heading out for a hike, fishing, sightseeing, or relaxing around camp.
For a different twist, spoon the leftover chicken and rice into a large tortilla, sprinkle with a little extra cheddar cheese, roll it up, and warm it in a skillet for a crispy lunch wrap.

#GoodFoodGoodMeat, #SimplePracticalMeals, #RealFoodRealLife,
#CookingForOneOrTwo, #BudgetFriendlyMeals,

#SummerCampgroundMeals, #CampgroundCooking, #SkilletMeals,
#OnePanDinner, #ChickenRecipes, #BroccoliRice, #CampingRecipes,
#RVCooking, #EasyDinnerIdeas, #OutdoorCooking, #FamilyCamping,
#CampCooking,

Posted in Grilled Meals

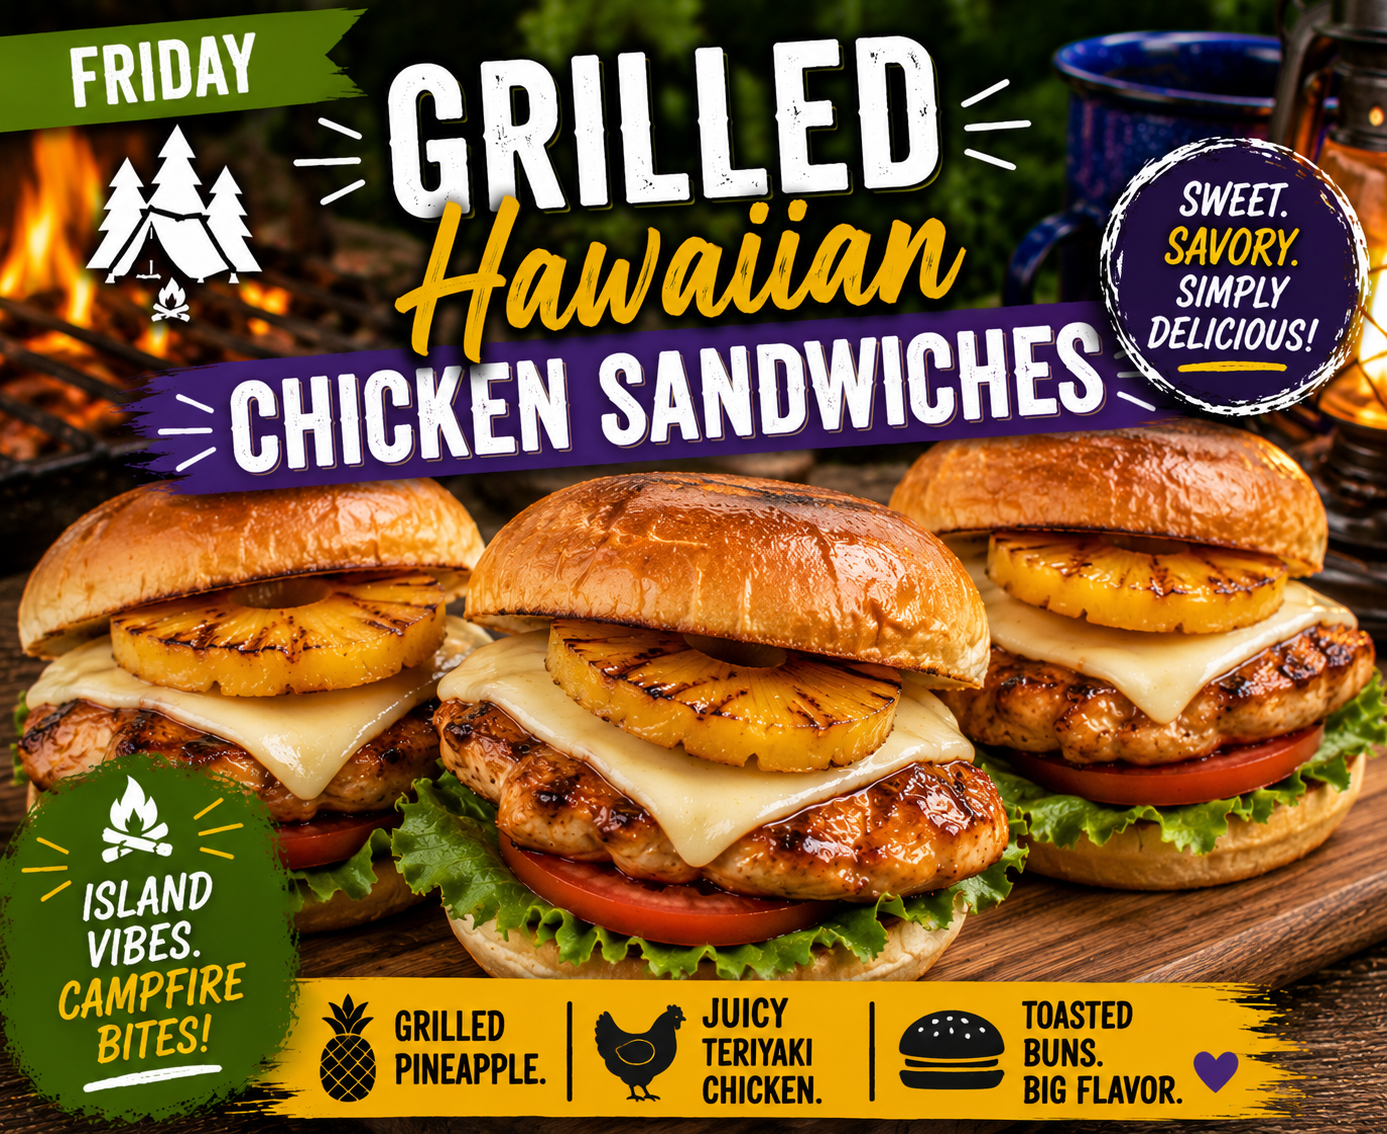
Grilled Hawaiian Chicken Sandwiches

Bring a taste of the islands to your campground with these Grilled Hawaiian Chicken Sandwiches. Juicy grilled chicken is brushed with a sweet and savory teriyaki glaze, then topped with caramelized pineapple and served on toasted buns. It’s an easy summer meal that feels a little special while still being simple enough for campground cooking.

simplegoodfood's avatarsimplegoodfood

Grilled Hawaiian Chicken Sandwiches

TheseGrilled Hawaiian Chicken Sandwiches feature juicy teriyaki chicken, meltedprovolone cheese, and sweet grilled pineapple on a toasted bun.
Prep Time 15 minutes
Cook Time 20 minutes
Total Time 35 minutes
Servings: 6
Course: Dinner, Lunch, Main Course
Cuisine: American
Calories: 465

Ingredients
  

For the Chicken
  • 1½ pounds boneless skinless chicken breasts
  • ¼ cup teriyaki sauce
  • 1 tablespoon olive oil
  • ½ teaspoon garlic powder
  • ¼ teaspoon black pepper
For the Sandwiches
  • 6 pineapple rings fresh or canned, drained
  • 6 sandwich buns
  • 6 slices provolone cheese
  • 6 lettuce leaves
  • 6 tomato slices
  • Additional teriyaki sauce for brushing

Method
 

  1. Pound the chicken breasts to an even thickness if needed.
  2. In a bowl, combine the teriyaki sauce, olive oil, garlic powder, and black pepper.
  3. Add the chicken and marinate for at least 30 minutes, or overnight in a cooler.
  4. Preheat a grill to medium-high heat.
  5. Grill the chicken for 6–7 minutes per side, or until it reaches an internal temperature of 165°F.
  6. During the last few minutes of cooking, grill the pineapple rings until lightly caramelized.
  7. Place a slice of provolone cheese on each chicken breast and allow it to melt.
  8. Toast the sandwich buns on the grill for 1–2 minutes.
  9. Assemble each sandwich with lettuce, tomato, grilled chicken, and a grilled pineapple ring.
  10. Brush with additional teriyaki sauce if desired and serve immediately.

Notes

Campground Tips
  • Marinate the chicken before leaving home for even more flavor.
  • Fresh pineapple grills beautifully, but canned pineapple rings work well and are easier to transport.
  • Serve with pasta salad, baked beans, or kettle chips for a complete campground meal.

#CampgroundCooking, #RVMeals, #OnePanDinner, #EasySummerDinners, #ComfortFoodRecipes, #ElectricSkilletMeals, #EasyDinnerIdeas, #BudgetFriendlyMeals,
#SummerCooking, #SkilletDinner, #SimpleSuppers, #FamilyDinnerIdeas,
#EasyWeeknightDinner, #WhatsForDinner,

Posted in One-Pot Meals

Southwest Beef & Rice Stuffed Peppers

These Southwest Beef & Rice Stuffed Peppers bring bold flavors to the campground table. Colorful bell peppers are filled with seasoned ground beef, rice, tomatoes, and melted cheese, then baked until tender. They’re hearty enough to serve as a complete meal while adding plenty of color and flavor to your camping menu.

Southwest Beef & Rice Stuffed Peppers

TheseSouthwest Beef & Rice Stuffed Peppers are loaded with seasoned beef, rice,tomatoes, corn, and melted cheese.
Prep Time 15 minutes
Cook Time 40 minutes
Total Time 55 minutes
Servings: 6
Course: Dinner, Lunch, Main Course
Cuisine: American
Calories: 430

Ingredients
  

  • 6 large bell peppers any color
  • 1½ pounds lean ground beef
  • 1 small onion diced
  • 1 teaspoon olive oil
  • 1 cup cooked brown rice
  • 1 can 10 ounces diced tomatoes with green chilies, drained
  • 1 cup corn kernels
  • 1 teaspoon chili powder
  • 1 teaspoon cumin
  • ½ teaspoon garlic powder
  • ½ teaspoon black pepper
  • ½ teaspoon salt
  • 1½ cups shredded Mexican-blend cheese divided
  • 2 tablespoons chopped cilantro optional

Method
 

  1. Cut the tops off the bell peppers and remove the seeds and membranes.
  2. Bring a large pot of water to a boil and blanch the peppers for 3 minutes. Drain and set aside.
  3. Heat olive oil in a Dutch oven or large skillet over medium heat.
  4. Add the ground beef and onion. Cook until the beef is browned and the onion is tender.
  5. Stir in the cooked rice, diced tomatoes, corn, chili powder, cumin, garlic powder, salt, and pepper.
  6. Cook for 3–4 minutes until heated through.
  7. Remove from heat and stir in 1 cup of the shredded cheese.
  8. Fill each pepper with the beef and rice mixture.
  9. Arrange peppers upright in a Dutch oven or covered baking dish.
  10. Cover and bake for 25–30 minutes until the peppers are tender.
  11. Sprinkle the remaining cheese over the tops and cook for an additional 5 minutes, or until melted.
  12. Garnish with cilantro if desired and serve.

Notes

Campground Tips
  • Cook the rice at home and store it in the cooler to save time at camp.
  • If using a Dutch oven, place a small rack or a layer of foil balls underneath the peppers to help prevent scorching.
  • Leftover filling makes a great burrito or taco filling the next day.

CampgroundCooking, #RVMeals, #OnePanDinner, #EasySummerDinners,

#ComfortFoodRecipes, #ElectricSkilletMeals, #EasyDinnerIdeas, #BudgetFriendlyMeals,
#SummerCooking, #SkilletDinner, #SimpleSuppers, #FamilyDinnerIdeas,
#EasyWeeknightDinner, #WhatsForDinner,

Posted in One-Pot Meals

Campfire Chicken Alfredo Pasta

Few meals are as comforting after a day outdoors as a creamy bowl of pasta. This Campfire Chicken Alfredo Pasta combines tender chicken, pasta, and a rich Parmesan Alfredo sauce in one pot, making it an easy campground dinner with minimal cleanup. Whether you’re cooking over a camp stove or a campfire grate, this recipe delivers big flavor with simple ingredients.

Campfire Chicken Alfredo

Creamy, comforting, and made in one pot! This Campfire Chicken Alfredo Pasta is packed with tender chicken, Parmesan cheese, and pasta for an easy campground dinner with minimal cleanup.
Prep Time 10 minutes
Cook Time 25 minutes
Total Time 35 minutes
Servings: 6
Course: Dinner, Lunch, Main Course
Cuisine: American
Calories: 540

Ingredients
  

  • 1½ pounds boneless skinless chicken breasts, cut into bite-sized pieces
  • 2 tablespoons olive oil
  • 3 cloves garlic minced
  • 12 ounces penne pasta
  • 4 cups low-sodium chicken broth
  • 1 cup milk
  • 4 ounces reduced-fat cream cheese softened
  • 1 cup grated Parmesan cheese
  • 1 teaspoon Italian seasoning
  • ½ teaspoon black pepper
  • ¼ teaspoon salt
  • 2 tablespoons chopped parsley optional

Method
 

  1. Heat the olive oil in a large Dutch oven or heavy stockpot over medium heat.
  2. Add the chicken and cook for 5–6 minutes until lightly browned.
  3. Stir in the garlic and cook for 30 seconds.
  4. Add the chicken broth, milk, Italian seasoning, salt, and pepper.
  5. Bring the mixture to a gentle boil.
  6. Stir in the penne pasta and reduce heat to a simmer.
  7. Cover and cook for 12–15 minutes, stirring occasionally, until the pasta is tender.
  8. Stir in the cream cheese until completely melted and incorporated.
  9. Add the Parmesan cheese and stir until the sauce is smooth and creamy.
  10. Remove from heat and let stand for 3–5 minutes to thicken slightly.

Notes

Campground Tips
  • Dice the chicken and measure ingredients before leaving home for faster meal prep.
  • Add steamed broccoli or peas during the last few minutes of cooking for extra vegetables.
  • Keep extra broth on hand if cooking over a campfire, as evaporation rates can vary.

CampgroundCooking, #RVMeals, #OnePanDinner, #EasySummerDinners, #ComfortFoodRecipes, #ElectricSkilletMeals, #EasyDinnerIdeas, #BudgetFriendlyMeals,
#SummerCooking, #SkilletDinner, #SimpleSuppers, #FamilyDinnerIdeas,
#EasyWeeknightDinner, #WhatsForDinner,

Posted in One-Pot Meals

Dutch Oven Sloppy Joe Casserole

This Dutch Oven Sloppy Joe Casserole takes a classic family favorite and turns it into a hearty campground meal. Savory seasoned beef is simmered in a rich sloppy joe sauce, then topped with fluffy biscuit pieces and baked until golden brown. It’s comfort food at its finest and a perfect meal for feeding hungry campers after a day outdoors.

simplegoodfood's avatarsimplegoodfood

Dutch Oven Sloppy Joe Casserole

This Dutch Oven Sloppy Joe Casserole takes a classic family favorite and turns itinto a hearty campground meal.
Prep Time 15 minutes
Cook Time 35 minutes
Total Time 50 minutes
Servings: 6
Course: Dinner, Lunch, Main Course
Cuisine: American
Calories: 510

Ingredients
  

For the Sloppy Joe Filling
  • 1½ pounds lean ground beef
  • 1 medium onion diced
  • 1 green bell pepper diced
  • 2 cloves garlic minced
  • 1 cup tomato sauce
  • ¼ cup ketchup
  • 1 tablespoon Worcestershire sauce
  • 1 tablespoon brown sugar
  • 1 teaspoon yellow mustard
  • ½ teaspoon black pepper
  • ½ teaspoon salt
For the Topping
  • 1 can 16.3 ounces refrigerated biscuit dough
  • 1 cup shredded cheddar cheese

Method
 

  1. Preheat a 12-inch Dutch oven.
  2. Brown the ground beef with the onion and bell pepper until the beef is no longer pink. Drain excess grease if needed.
  3. Stir in the garlic and cook for 1 minute.
  4. Add tomato sauce, ketchup, Worcestershire sauce, brown sugar, mustard, salt, and pepper.
  5. Simmer for 10 minutes, stirring occasionally.
  6. Cut each biscuit into quarters and scatter evenly over the sloppy joe mixture.
  7. Sprinkle with shredded cheddar cheese.
  8. Cover the Dutch oven and bake using approximately 16 coals on top and 8 underneath for 20–25 minutes, or until the biscuits are golden brown and cooked through.
  9. Allow to rest for 5 minutes before serving.

Notes

Campground Tips
  • Brown the beef and prepare the filling at home for even faster campsite cooking.
  • If using a camp oven over a grill, maintain medium heat and rotate the oven occasionally for even baking.
  • Serve with a simple green salad or coleslaw.