
Posted in Casserole & Bakes, Chicken Meals, Seasonal, Skillet Meals

Chicken & Vegetable Pot Pie Skillet

There are nights when you want chicken pot pie, but you don’t necessarily want to make an entire pie.

That’s where this Chicken & Vegetable Pot Pie Skillet comes in.

Tender chicken and vegetables are tucked into a simple creamy sauce, then topped with golden biscuits and baked right in the skillet. It has all the cozy appeal of pot pie without rolling out a crust or making a full-size casserole.

And it’s exactly the kind of meal that makes a well-stocked freezer worthwhile.

Those vegetables you put away when they were plentiful? This is one of the dinners they were waiting for.

Why You’ll Love This Recipe

  • All the comfort of chicken pot pie without making a pie crust.
  • Uses convenient cooked chicken, making it a great way to use meal-prepped or leftover chicken.
  • Frozen vegetables work beautifully here.
  • Everything starts in one skillet and finishes in the oven.
  • Makes 4 servings, so it works for a small household with leftovers for lunch.
  • Easy to adapt based on what’s in your freezer.
  • Mildly seasoned rather than heavily spiced.
simplegoodfood's avatarsimplegoodfood

Chicken & Vegetable Pot Pie Skillet

There are nights when you want chicken pot pie, but you don't necessarily want to make an entire pie.
Prep Time 15 minutes
Cook Time 20 minutes
Total Time 35 minutes
Servings: 4
Course: Dinner, Lunch, Main Course
Cuisine: American
Calories: 390

Ingredients
  

For the Filling
  • 2 cups cooked chicken shredded or chopped
  • 2 cups mixed vegetables such as carrots, peas, corn, and green beans
  • 1 tablespoon olive oil
  • 1/2 cup finely diced onion
  • 2 tablespoons all-purpose flour
  • 2 cups low-sodium chicken broth
  • 1/2 cup milk
  • 1/2 teaspoon dried thyme
  • 1/4 teaspoon garlic powder
  • 1/4 teaspoon salt or to taste
  • 1/4 teaspoon black pepper or to taste
For the Biscuit Topping
  • 1 cup baking mix
  • 1/3 cup milk
  • 1 tablespoon grated Parmesan cheese optional
  • 1/4 teaspoon dried parsley optional

Equipment

  • 1 10-inch Oven-safe Skillet

Method
 

Prepare the Skillet
  1. Preheat the oven to 400°F.
  2. Heat a 10-inch oven-safe skillet over medium heat. Add the olive oil and diced onion. Cook for about 3–4 minutes, stirring occasionally, until the onion begins to soften.
Make the Sauce
  1. Sprinkle the flour over the onion and stir well. Cook for about 1 minute to remove the raw flour taste.
  2. Gradually pour in the chicken broth, stirring constantly to prevent lumps.
  3. Add the milk, thyme, garlic powder, salt, and pepper. Continue cooking for 3–5 minutes, stirring frequently, until the sauce thickens enough to coat the back of a spoon.
Add the Chicken and Vegetables
  1. Stir in the cooked chicken and mixed vegetables.
  2. If you’re using frozen vegetables, there’s no need to thaw them first. Allow the mixture to heat through for several minutes.
Taste and adjust the seasoning if needed.
  1. The filling should be creamy but still loose enough that it can bubble around the biscuit topping. If it seems too thick, add another splash of broth or milk.
Make the Biscuit Topping
  1. In a small bowl, stir together the baking mix and milk until just combined.
  2. Don’t overmix. A few small lumps are perfectly fine.
  3. If using them, gently stir in the Parmesan and dried parsley.
Add the Biscuits
  1. Drop the biscuit dough by spoonfuls over the chicken mixture, leaving a little space between the biscuits so steam can escape.
  2. You don’t need to completely cover the filling. In fact, leaving a few little windows of creamy chicken and vegetables showing makes the finished skillet look especially inviting.
Bake
  1. Carefully transfer the skillet to the preheated oven.
  2. Bake for 15–20 minutes, or until the biscuits are golden brown and cooked through and the filling is bubbling around the edges.
  3. If the biscuits brown before they’re completely cooked inside, loosely cover the skillet with foil and continue baking until done.
Rest and Serve
  1. Let the skillet rest for about 5 minutes before serving.
  2. That gives the filling a chance to settle while the biscuits finish soaking up a little of that creamy sauce.
  3. Spoon directly from the skillet and enjoy.

Notes

Make It Your Own

This is exactly the kind of recipe where your freezer can do the heavy lifting.
Use whatever vegetables you have available, as long as they’re suitable for cooking in a creamy filling.
Good choices include:
  • Green beans
  • Peas
  • Corn
  • Carrots
  • Broccoli
  • Cauliflower
  • Diced zucchini
  • Mixed vegetables
You can also substitute cooked turkey for the chicken.
And if you have leftover roasted vegetables, don’t be afraid to use them. Just remember that already-cooked vegetables may need less time to heat through.

Using Your Freezer Chicken

This recipe is especially useful if you’ve cooked chicken ahead and portioned it for future meals.

A freezer package containing about 2 cups of cooked chicken is practically an invitation to make this skillet.

Thaw the chicken safely in the refrigerator before using, or use chicken that has already been thawed and refrigerated.

The same goes for your frozen vegetables: keeping them portioned in meal-sized amounts means you can pull out exactly what you need without thawing an entire bag.

That’s the whole idea behind this week’s freezer theme.

You’re not just putting food away. You’re putting future meals away.

What to Serve With Chicken Pot Pie Skillet

Honestly, this skillet can stand on its own.

You’ve already got protein, vegetables, a creamy sauce, and biscuits all in one dish.

If you’d like something alongside it, keep it simple:

  • A green salad
  • Fresh fruit
  • Steamed vegetables
  • A small side of cranberry sauce

You don’t need to turn a cozy skillet supper into a production.

Storing Leftovers

Refrigerate leftovers promptly in a covered container.

For the best quality, enjoy refrigerated leftovers within 3–4 days.

The biscuit topping will soften as it sits, but reheating individual portions in the oven or air fryer can help bring back some of the crispness.

If you’re cooking for one or two, leftovers make an especially good next-day lunch.

A Little Future Dinner

This is one of my favorite reasons to preserve food.

A bag of frozen vegetables doesn’t look particularly exciting.

Neither does a container of cooked chicken.

But combine them with a few pantry staples, and suddenly you’ve got a warm, bubbling chicken pot pie skillet coming out of the oven.

That’s the payoff.

Today’s harvest becomes tomorrow’s dinner.

Recipe Details

Yield: About 6 cups, 4 servings
Prep Time: 15 minutes
Cook Time: 20 minutes
Total Time: About 35 minutes
Equipment: 10-inch oven-safe skillet
Posted in Casserole & Bakes, One-Pot Meals

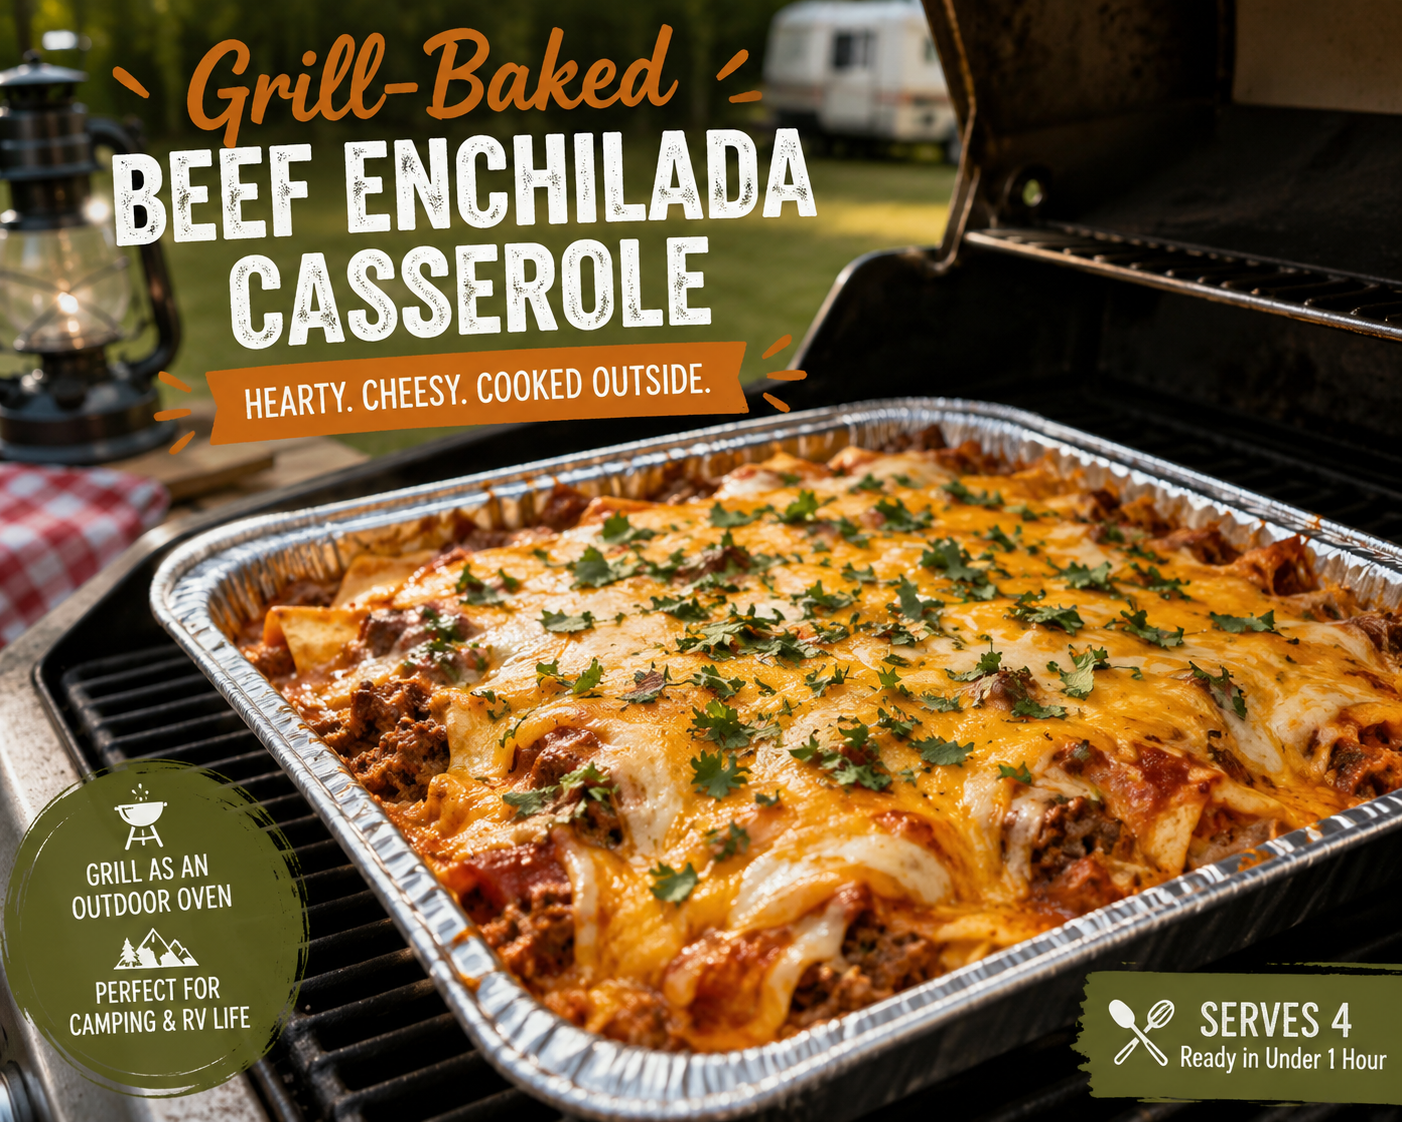
Grill-Baked Beef Enchilada Casserole

If you love the idea of a hearty casserole at the campground but don’t want to heat up the RV, this Grill-Baked Beef Enchilada Casserole is the answer. Cooked in a disposable foil pan over indirect heat, this meal delivers all the flavors of classic beef enchiladas with a fraction of the work. It’s perfect for seasonal campers, RV travelers, and anyone looking to turn their grill into an outdoor oven.

simplegoodfood's avatarsimplegoodfood

Grill-Baked Beef Enchilada Casserole

A foil-pan enchilada casserole cooked over indirect grill heat. Perfect example of using the grill as an outdoor oven.
Prep Time 15 minutes
Cook Time 40 minutes
Total Time 55 minutes
Servings: 4
Course: Dinner, Lunch, Main Course
Cuisine: American
Calories: 520

Ingredients
  

  • 1 pound lean ground beef
  • 1 small onion diced
  • 1 teaspoon chili powder
  • 1 teaspoon cumin
  • ½ teaspoon garlic powder
  • ½ teaspoon salt
  • 1 10-ounce can red enchilada sauce
  • 6 small flour tortillas cut into strips
  • 1 cup shredded cheddar cheese
  • 1 cup shredded Monterey Jack cheese
  • 1 4-ounce can diced green chiles, drained

Method
 

Prepare the Beef
  1. Heat a skillet over medium heat.
  2. Brown the ground beef and onion until the beef is cooked through.
  3. Drain excess grease if necessary.
  4. Stir in chili powder, cumin, garlic powder, and salt.
Assemble the Casserole
  1. Spray an 8 x 8-inch disposable foil pan with cooking spray.
  2. Spread a few spoonfuls of enchilada sauce on the bottom.
  3. Layer half of the tortilla strips in the pan.
  4. Add half of the beef mixture.
  5. Sprinkle with half of the green chiles.
  6. Pour over half of the remaining enchilada sauce.
  7. Top with half of each cheese.
  8. Repeat the layers with the remaining tortillas, beef, chiles, sauce, and cheese.
Grill-Bake
  1. Preheat a gas grill for indirect cooking to approximately 350°F.
  2. Turn off one side of the grill and place the foil pan on the unlit side.
  3. Close the lid and cook for 35–40 minutes, or until bubbly and heated through.
Serve
  1. Let stand for 5 minutes before serving.
  2. Serve with a simple salad, tortilla chips, or campground corn on the cob.

Notes

Storage & Reheating Tips
  • Store leftovers in a covered container in the refrigerator for up to 3 days.
  • Reheat individual portions in a skillet or microwave.
This casserole can be assembled at home, refrigerated in the cooler, and baked at the campground later the same day.

Posted in Casserole & Bakes, One-Pot Meals

Dutch Oven BBQ Chicken & Potato Bake

This Dutch Oven BBQ Chicken & Potato Bake is the kind of campground dinner that feels hearty and satisfying without requiring a lot of fuss. Tender chicken, potatoes, onions, and a smoky BBQ sauce cook together in one pot for an easy meal that’s perfect after a day of hiking, fishing, or relaxing around camp. With only a handful of ingredients and minimal cleanup, it’s a great addition to your campground meal rotation.

simplegoodfood's avatarsimplegoodfood

Dutch Oven BBQ Chicken & Potato Bake

This Dutch Oven BBQ Chicken & Potato Bake is the kind of campground dinner that feels hearty and satisfying without requiring a lot of fuss.
Prep Time 15 minutes
Cook Time 45 minutes
Total Time 1 hour
Servings: 4
Course: Dinner, Main Course
Cuisine: American
Calories: 425

Ingredients
  

  • 1 pound boneless skinless chicken breasts or thighs, cut into bite-sized pieces
  • 1 pound potatoes diced into 1-inch pieces
  • 1 small onion diced
  • 1 cup BBQ sauce
  • 1 tablespoon olive oil
  • 1 teaspoon garlic powder
  • 1 teaspoon paprika
  • ½ teaspoon salt
  • ¼ teaspoon black pepper
  • 1 cup shredded cheddar cheese optional
  • Chopped green onions for garnish optional

Method
 

Campground Dutch Oven Method
  1. Preheat a 12-inch Dutch oven over medium campfire coals.
  2. Add olive oil and the diced chicken. Cook for 4-5 minutes until lightly browned.
  3. Stir in the potatoes and onion.
  4. Sprinkle with garlic powder, paprika, salt, and pepper.
  5. Pour the BBQ sauce over the mixture and stir until everything is evenly coated.
  6. Cover the Dutch oven and cook for 30-35 minutes, stirring once or twice, until the potatoes are tender and the chicken reaches 165°F.
  7. If using cheese, sprinkle it over the top during the last 5 minutes of cooking and cover until melted.
  8. Garnish with green onions before serving.
Home Kitchen Method
  1. Preheat oven to 375°F.
  2. Combine chicken, potatoes, onion, seasonings, olive oil, and BBQ sauce in a greased 9×13-inch baking dish.
  3. Cover with foil and bake for 35-40 minutes.
  4. Remove foil, top with cheese if desired, and bake an additional 5 minutes.
  5. Serve hot.

Notes

Recipe Tips
  • Chicken thighs stay especially moist during campfire cooking.
  • Baby potatoes work well and require little prep.
  • Use your favorite BBQ sauce to customize the flavor.
  • Add bell peppers during the last 15 minutes for extra vegetables.
  • Leftovers reheat well for lunch the next day.
Storage
Store leftovers in an airtight container in the campground refrigerator or cooler for up to 3 days. Reheat in a skillet, microwave, or covered Dutch oven.

#CampgroundMeals, #CampingRecipes, #DutchOvenCooking, #OutdoorCooking, #RVCooking, #CampfireCooking, #EasyCampingMeals, #OnePotMeals, #ChickenDinner, #GoodFoodGoodMeatBlog,

Posted in Casserole & Bakes, One-Pot Meals

Dutch Oven Sloppy Joe Casserole

This Dutch Oven Sloppy Joe Casserole takes a classic family favorite and turns it into a hearty campground meal. Savory seasoned beef is simmered in a rich sloppy joe sauce, then topped with fluffy biscuit pieces and baked until golden brown. It’s comfort food at its finest and a perfect meal for feeding hungry campers after a day outdoors.

simplegoodfood's avatarsimplegoodfood

Dutch Oven Sloppy Joe Casserole

This Dutch Oven Sloppy Joe Casserole takes a classic family favorite and turns itinto a hearty campground meal.
Prep Time 15 minutes
Cook Time 35 minutes
Total Time 50 minutes
Servings: 6
Course: Dinner, Lunch, Main Course
Cuisine: American
Calories: 510

Ingredients
  

For the Sloppy Joe Filling
  • 1½ pounds lean ground beef
  • 1 medium onion diced
  • 1 green bell pepper diced
  • 2 cloves garlic minced
  • 1 cup tomato sauce
  • ¼ cup ketchup
  • 1 tablespoon Worcestershire sauce
  • 1 tablespoon brown sugar
  • 1 teaspoon yellow mustard
  • ½ teaspoon black pepper
  • ½ teaspoon salt
For the Topping
  • 1 can 16.3 ounces refrigerated biscuit dough
  • 1 cup shredded cheddar cheese

Method
 

  1. Preheat a 12-inch Dutch oven.
  2. Brown the ground beef with the onion and bell pepper until the beef is no longer pink. Drain excess grease if needed.
  3. Stir in the garlic and cook for 1 minute.
  4. Add tomato sauce, ketchup, Worcestershire sauce, brown sugar, mustard, salt, and pepper.
  5. Simmer for 10 minutes, stirring occasionally.
  6. Cut each biscuit into quarters and scatter evenly over the sloppy joe mixture.
  7. Sprinkle with shredded cheddar cheese.
  8. Cover the Dutch oven and bake using approximately 16 coals on top and 8 underneath for 20–25 minutes, or until the biscuits are golden brown and cooked through.
  9. Allow to rest for 5 minutes before serving.

Notes

Campground Tips
  • Brown the beef and prepare the filling at home for even faster campsite cooking.
  • If using a camp oven over a grill, maintain medium heat and rotate the oven occasionally for even baking.
  • Serve with a simple green salad or coleslaw.
Posted in Casserole & Bakes, One-Pot Meals

Campfire Chicken & Rice Bake

Nothing says campground comfort food quite like a hearty chicken and rice dinner cooked over the campfire. This Campfire Chicken & Rice Bake combines tender chicken, fluffy rice, vegetables, and a creamy sauce into a satisfying one-pot meal that’s perfect for camping weekends, RV adventures, or backyard campfires. Best of all, everything cooks together in a Dutch oven, making cleanup easy and leaving more time to enjoy the outdoors.

simplegoodfood's avatarsimplegoodfood

Campfire Chicken & Rice Bake

Asimple Dutch oven meal that can be assembled ahead and cooked over the fire.
Prep Time 10 minutes
Cook Time 40 minutes
Total Time 50 minutes
Servings: 6
Course: Dinner, Main Course
Cuisine: American
Calories: 420

Ingredients
  

  • 1½ pounds boneless skinless chicken breasts, cut into bite-sized pieces
  • 1 tablespoon olive oil
  • 1 medium onion diced
  • 1 cup carrots diced
  • 1 cup celery diced
  • 2 cloves garlic minced
  • 1½ cups long-grain rice uncooked
  • 3 cups low-sodium chicken broth
  • 1 can 10.5 ounces cream of chicken soup
  • 1 teaspoon dried parsley
  • 1 teaspoon dried thyme
  • ½ teaspoon black pepper
  • ½ teaspoon paprika
  • 1 cup frozen peas

Method
 

  1. Heat a large Dutch oven, deep skillet, or stockpot over medium heat.
  2. Add the chicken and cook until lightly browned on all sides, about 5–6 minutes.
  3. Stir in the onion, bell pepper, and garlic. Cook for 3–4 minutes until vegetables begin to soften.
  4. Add the uncooked rice, chicken broth, cream of chicken soup, and seasonings. Stir well to combine.
  5. Bring the mixture to a gentle boil.
  6. Reduce heat to low, cover, and simmer for 20–25 minutes, stirring once or twice during cooking, until the rice is tender and most of the liquid has been absorbed.
  7. Sprinkle the shredded cheese over the top. Cover again for 2–3 minutes until melted.
  8. Remove from heat and let stand for 5 minutes before serving.

Notes

Campground Cooking Note

If using instant rice, reduce the broth by about ½ cup and cook according to the rice package directions. If using a portable camp stove that runs hot, stir occasionally to prevent sticking.

#CampgroundCooking, #CampingMeals, #DutchOvenRecipes, #CampfireCooking, #RVRecipes, #OutdoorCooking, #FamilyCamping, #OnePotMeals, #CampingFood, #EasyDinnerRecipes, #CampfireDinner, #WeekendCamping, #ComfortFoodRecipes, #CampingLife, #CampingRecipeIdeas,

Posted in Campground Meals, Casserole & Bakes

Dutch Oven Chicken Pot Pie

Nothing says comfort food at the campground quite like a hearty chicken pot pie. This Dutch oven version delivers all the creamy goodness of the classic family favorite while being simple enough to prepare at your campsite.

simplegoodfood's avatarsimplegoodfood

Dutch Oven Chicken Pot Pie

Nothing says comfort food at the campground quite like a hearty chicken pot pie.
Prep Time 5 minutes
Cook Time 30 minutes
Total Time 35 minutes
Servings: 6
Course: Dinner, Lunch, Main Course
Cuisine: American
Calories: 425

Ingredients
  

  • 2 cups cooked chicken diced
  • 1 can cream of chicken soup
  • 1 cup frozen mixed vegetables
  • ½ cup milk
  • 1 tsp poultry seasoning
  • 1 tube refrigerated biscuits

Method
 

  1. Preheat Dutch oven.
  2. Mix chicken, soup, vegetables, milk, and seasoning.
  3. Pour into Dutch oven.
  4. Arrange biscuits on top.
  5. Bake 25–30 minutes until biscuits are golden brown.

#CampgroundCooking, #RVMeals, #OnePanDinner, #EasySummerDinners,
#ComfortFoodRecipes, #EasyDinnerIdeas, #BudgetFriendlyMeals,
#SummerCooking, #SimpleSuppers, #FamilyDinnerIdeas,
#EasyWeeknightDinner, #WhatsForDinner,