Posted in Heat & Eat, Sandwiches, Wraps & Handhelds

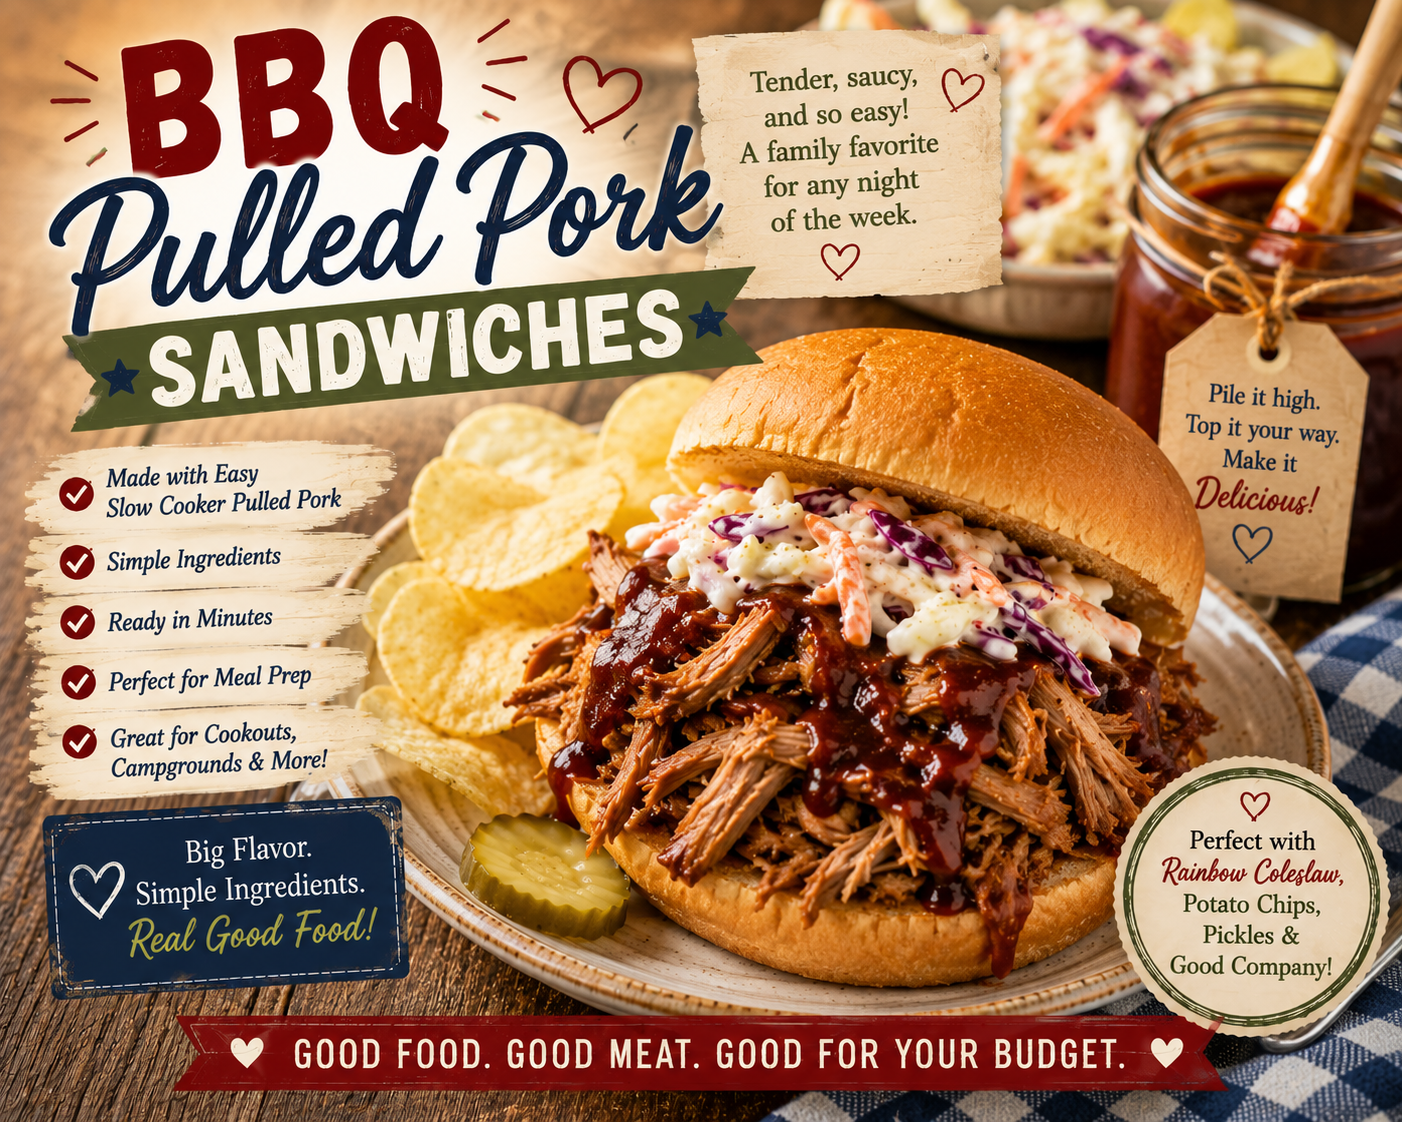
BBQ Pulled Pork Sandwiches

One of the best rewards for spending a few minutes preparing a slow cooker meal is how easy dinner becomes the next day. These BBQ Pulled Pork Sandwiches come together in just minutes using precooked Easy Slow Cooker Pulled Pork, making them perfect for busy weeknights, relaxed weekends, or campground meals.

With a toasted bun, warm pulled pork, your favorite barbecue sauce, and a scoop of creamy homemade coleslaw, you’ve got a hearty meal that’s satisfying without requiring hours in the kitchen. It’s proof that leftovers don’t have to feel like leftovers—they can become something everyone looks forward to eating.


❤️ Why You’ll Love This Recipe

  • Ready in about 15 minutes
  • Perfect use for planned leftovers
  • Budget-friendly and filling
  • Easy enough for beginning cooks
  • Great for lunch or dinner
  • Campground and RV friendly

simplegoodfood's avatarsimplegoodfood

BBQ Pulled Pork Sandwiches

One of the best rewards for spending a few minutes preparing a slow cooker meal ishow easy dinner becomes the next day.
Prep Time 5 minutes
Cook Time 10 minutes
Total Time 15 minutes
Servings: 4
Course: Dinner, Lunch
Cuisine: American
Calories: 425

Ingredients
  

  • 3 to 4 cups Easy Slow Cooker Pulled Pork
  • ½ to ¾ cup your favorite barbecue sauce
  • 4 hamburger buns
  • 1 tablespoon butter optional, for toasting buns
Optional Toppings:
  • Homemade Creamy Coleslaw
  • Dill pickle slices
  • Sliced red onion
  • Jalapeño slices
  • Extra barbecue sauce

Method
 

  1. Place the pulled pork in a saucepan over medium-low heat.
  2. Stir in the barbecue sauce until the pork is evenly coated and heated through.
  3. If desired, butter the cut sides of the hamburger buns and toast them lightly in a skillet until golden.
  4. Spoon a generous amount of pulled pork onto each bun.
  5. Top with creamy coleslaw, pickles, onions, or your favorite toppings.
  6. Serve immediately with chips, baked beans, potato salad, or fresh fruit.

Notes

🧺 Kitchen Confidence
This Week’s Skill: Toasting Sandwich Buns
Toasting your buns is a simple step that makes a big difference. A lightly toasted bun stays firmer, adds extra flavor, and helps keep juicy barbecue sauce from soaking through too quickly.
Simply butter the cut sides lightly and toast them in a dry skillet for 2 to 3 minutes, watching carefully so they don’t burn.

💰 Stretch Every Grocery Dollar

Buying a larger pork shoulder may cost a few dollars more upfront, but it creates multiple meals throughout the week. Instead of buying deli sandwiches or takeout, one batch of pulled pork can provide several delicious lunches and dinners for less money.


♻️ Waste Not, Want Not

Only warm the amount of pulled pork you plan to eat today. Leaving the remaining pork refrigerated allows you to use it later this week for rice bowls, baked potatoes, or another easy meal.


🍽️ Cooking for One or Two

This recipe is easy to scale down. Warm only one or two servings of pulled pork and freeze the rest in individual portions. Keeping meal-sized containers in the freezer means you’ll always have the start of a homemade dinner ready to go.


🥣 Meal Prep Note

If you’re following this week’s menu, save some of your pulled pork for tomorrow’s BBQ Pulled Pork Rice Bowl. Cooking a batch of rice tonight will make tomorrow’s dinner even faster.


Storage & Freezing

Refrigerator: Store precooked pulled pork in an airtight container for up to 4 days.

Freezer: Freeze precooked pulled pork in meal-sized portions for up to 3 months.

Reheating: Warm gently with a splash of broth or barbecue sauce to keep the meat moist.

Posted in Heat & Eat, Sandwiches, Wraps & Handhelds

Italian Turkey Meatball Subs

Introduction

One of the easiest ways to stretch your grocery budget is to transform leftovers into something that feels completely new. These Italian Turkey Meatball Subs take yesterday’s homemade turkey meatballs and turn them into warm, cheesy sandwiches that taste like they came from your favorite neighborhood deli.

With toasted rolls, rich marinara sauce, and gooey melted mozzarella, this hearty meal comes together in just minutes while giving your family (or yourself) a dinner that never feels like leftovers.

💡 Meal Prep Shortcut

This recipe uses the Simple Italian Turkey Meatballs you made earlier this week as part of our Stretch Every Grocery Dollar series.

Joining us midweek? No problem! Simply substitute 12 fully cooked frozen turkey meatballs (about 1 pound), thawed and heated through. Your meal will still be delicious, although the homemade version offers the best flavor and the greatest savings.

simplegoodfood's avatarsimplegoodfood

Italian Turkey Meatball Subs

Oneof the easiest ways to stretch your grocery budget is to transform leftoversinto something that feels completely new.
Prep Time 10 minutes
Cook Time 10 minutes
Total Time 20 minutes
Servings: 4
Course: Dinner, Lunch
Cuisine: American
Calories: 455

Ingredients
  

  • 12 cooked Italian Turkey Meatballs
  • 2 cups marinara sauce
  • 4 hoagie rolls or sturdy sandwich rolls
  • 1½ cups shredded mozzarella cheese
  • ¼ cup grated Parmesan cheese
  • 1 teaspoon Italian seasoning
  • Fresh parsley chopped (optional)

Method
 

  1. Preheat the oven to 375°F.
  2. Place the meatballs and marinara sauce in a saucepan. Heat over medium-low until the meatballs are hot, about 8–10 minutes.
  3. Split the hoagie rolls without cutting all the way through.
  4. Lightly toast the rolls for 3–4 minutes if desired.
  5. Place 3 meatballs inside each roll and spoon additional marinara over the top.
  6. Sprinkle generously with mozzarella and Parmesan cheese.
  7. Return the sandwiches to the oven for 5–7 minutes, or until the cheese is melted and bubbly.
  8. Garnish with parsley and serve immediately.

Notes

Easy Variations
Pepper & Onion Subs
Add sautéed bell peppers and onions before topping with cheese.
Garlic Bread Subs
Brush the rolls with garlic butter before toasting.
Pizza Meatball Subs
Add sliced pepperoni or mushrooms before baking.
Campground Version
Wrap assembled sandwiches in foil and heat on a campfire grate or campground grill for about 10 minutes over medium heat.
Serving Suggestions
Serve with:
  • Oven fries
  • Coleslaw
  • Garden salad
  • Fresh fruit
  • Roasted vegetables
Storage
These sandwiches are best assembled fresh, but leftover meatballs in marinara will keep in the refrigerator for up to 4 days.
Tips
  • Toasting the rolls first helps prevent soggy sandwiches.
  • Warm the marinara before assembling for even heating.
  • Use part-skim mozzarella for a lighter meal.
  • If your rolls are large, add a fourth meatball for extra heartiness.

🍽️ This Week’s Menu: Stretch Every Grocery Dollar

Sunday – Simple Italian Turkey Meatballs

The perfect meal prep recipe that starts this week’s budget-friendly menu.

Monday – Italian Turkey Meatball Subs ⭐ Today’s Recipe

Warm toasted rolls filled with homemade turkey meatballs, marinara sauce, and melted mozzarella.

Tuesday – Mediterranean Turkey Rice Bowls

Fresh vegetables, seasoned rice, and sliced turkey meatballs with a bright Mediterranean flavor.

Wednesday – Turkey Meatball Vegetable Soup

A hearty soup that stretches the last of the meatballs into another comforting meal.

Thursday – Taco Turkey Rice Bowls

A Tex-Mex makeover using rice, beans, salsa, and leftover turkey.

Friday – Five Ways to Stretch Ground Turkey

Simple money-saving ideas to help one package of ground turkey go even further.

Saturday – Six Budget-Friendly Turkey Meals

A roundup of this week’s recipes plus extra ideas for reducing food waste.

Bonus Recipes This Week

  • Turkey Fried Rice
  • Refrigerator Clean-Out Quesadillas

➡️ Stop back tomorrow for our Mediterranean Turkey Rice Bowls!

Posted in Arrival Day Dinner, Cold/No Heat Meals, Sandwiches, Wraps & Handhelds

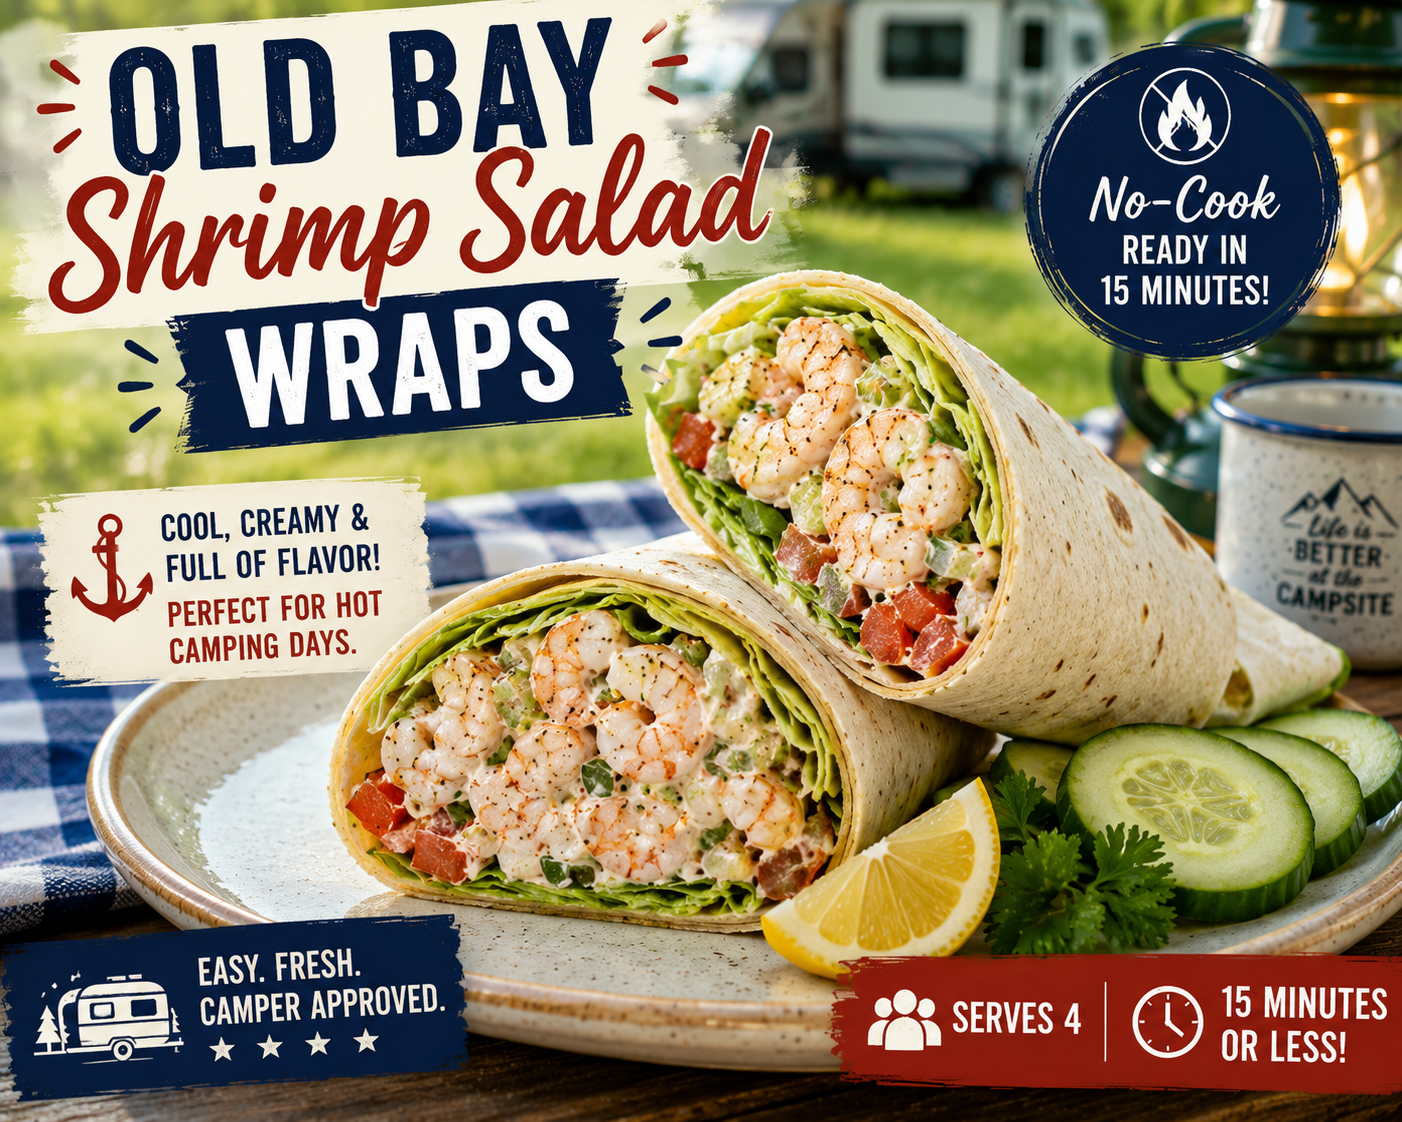
Old Bay Shrimp Salad Wraps

When summer temperatures climb, sometimes the best campground dinner is one that doesn’t require heating up the grill or camp stove. These Old Bay Shrimp Salad Wraps are cool, refreshing, and packed with flavor. Tender shrimp are tossed in a light dressing seasoned with Old Bay, then wrapped in soft tortillas with crisp lettuce and crunchy vegetables. They’re perfect for hot afternoons, beachside campsites, and RV travelers looking for a quick meal with minimal cleanup.

simplegoodfood's avatarsimplegoodfood

Old Bay Shrimp Salad Wraps

A cool, no-cook meal ideal for hot campground afternoons.
Prep Time 15 minutes
Cook Time 5 minutes
Total Time 20 minutes
Servings: 4
Course: Dinner, Lunch, Main Course
Cuisine: American
Calories: 320

Ingredients
  

  • 1 pound cooked shrimp peeled, deveined, and chopped
  • ¼ cup light mayonnaise
  • 2 tablespoons plain Greek yogurt
  • 1 teaspoon Old Bay seasoning
  • 1 teaspoon lemon juice
  • ¼ teaspoon black pepper
  • 2 celery stalks finely diced
  • 2 green onions sliced
  • 1 cup shredded lettuce
  • 4 large flour tortillas
  • Optional: sliced tomato or cucumber

Method
 

Prepare the Shrimp Salad
  1. In a large bowl, combine the mayonnaise, Greek yogurt, Old Bay seasoning, lemon juice, and black pepper.
  2. Stir until smooth.
  3. Add the chopped shrimp, celery, and green onions.
  4. Mix until everything is evenly coated.
Assemble the Wraps
  1. Lay the tortillas flat on a clean surface.
  2. Divide the lettuce evenly among the tortillas.
  3. Spoon the shrimp salad onto the center of each tortilla.
  4. Add tomato or cucumber slices if desired.
Wrap and Serve
  1. Fold in the sides of each tortilla.
  2. Roll tightly into wraps.
  3. Slice in half and serve immediately.

Notes

Storage & Reheating Tips
  • Store the shrimp salad separately from the tortillas if making ahead.
  • Keep refrigerated and use within 2 days.
  • Assemble wraps just before serving to prevent sogginess.
  • Not recommended for freezing.
Posted in Campground Meals, Cold/No Heat Meals, Sandwiches, Wraps & Handhelds

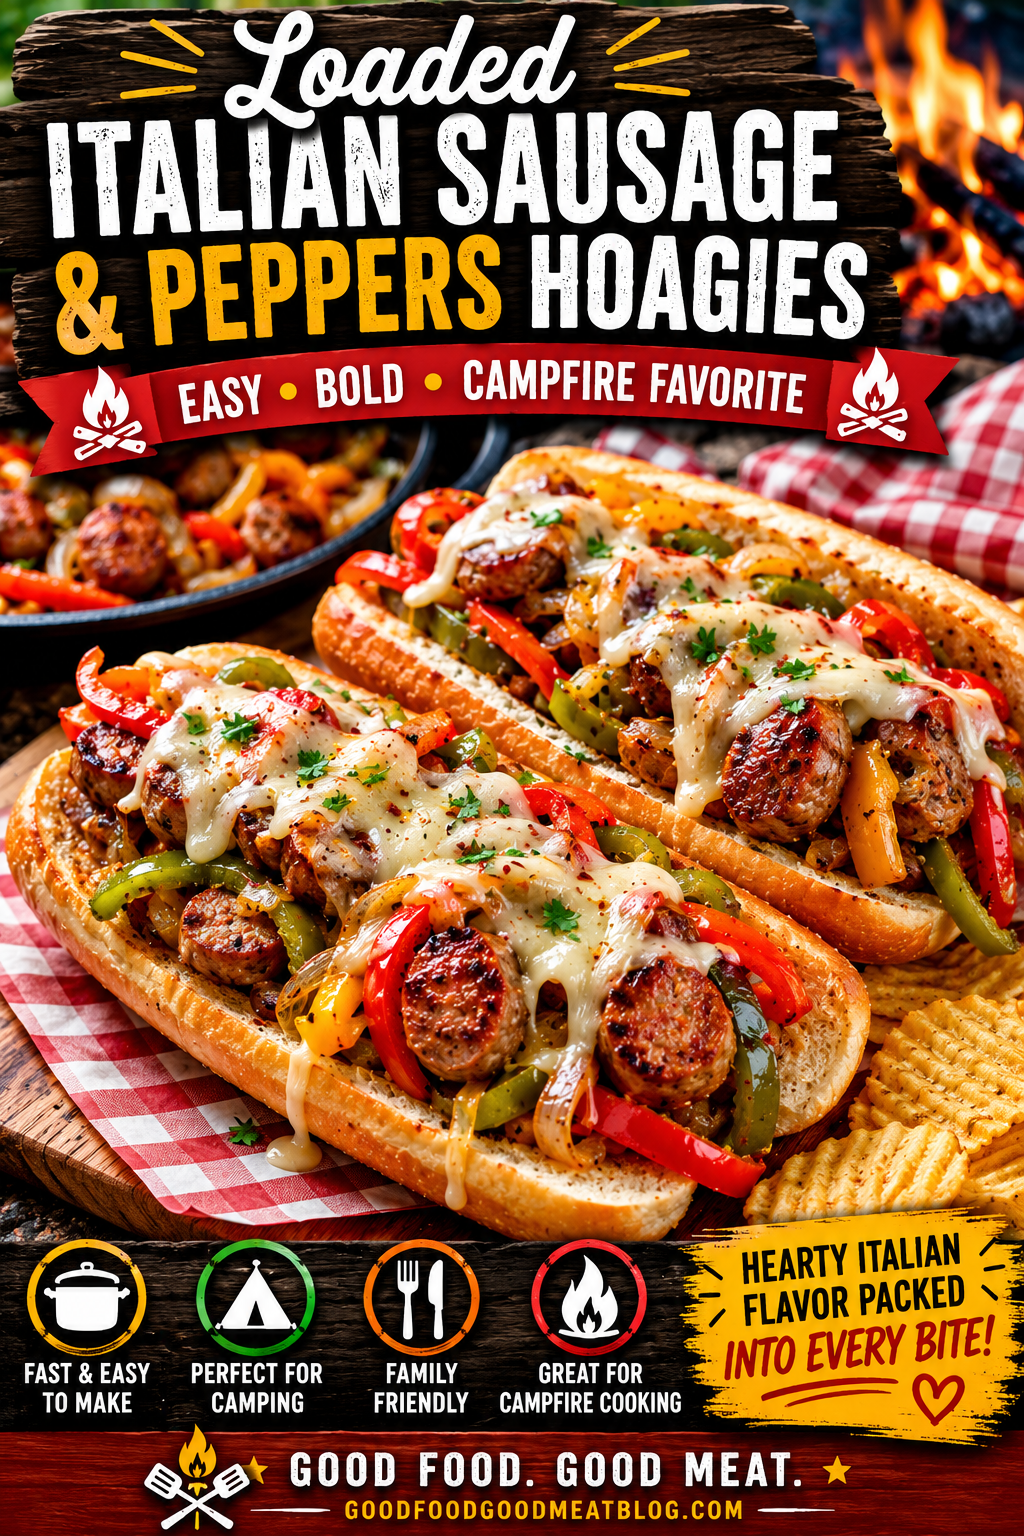
Loaded Italian Sausage & Peppers Hoagies

When it comes to easy campground meals, it’s hard to beat a hearty sausage sandwich loaded with savory peppers and onions. These Loaded Italian Sausage & Peppers Hoagies are packed with bold flavors, require minimal cleanup, and come together quickly in a single skillet. Whether you’re cooking over a camp stove, flat-top griddle, or campfire skillet, this meal is sure to become a camping favorite.

Serve these hoagies with chips, potato salad, or fresh fruit for a satisfying dinner that’s perfect after a day of hiking, fishing, or exploring the campground.

simplegoodfood's avatarsimplegoodfood

Loaded Italian Sausage & Peppers Hoagies

When it comes to easy campground meals, it's hard to beat a hearty sausage sandwich loaded with savory peppers and onions.
Prep Time 10 minutes
Cook Time 25 minutes
Total Time 35 minutes
Servings: 6
Course: Dinner, Lunch, Main Course
Cuisine: American
Calories: 520

Ingredients
  

  • 6 Italian sausage links mild or hot
  • 1 tablespoon olive oil
  • 2 bell peppers sliced (any color)
  • 1 large onion sliced
  • 1 teaspoon Italian seasoning
  • ½ teaspoon garlic powder
  • ¼ teaspoon black pepper
  • 6 hoagie rolls
  • 6 slices provolone cheese optional
  • ¼ cup grated Parmesan cheese optional

Method
 

  1. Heat olive oil in a large skillet over medium heat.
  2. Add the sausage links and cook, turning occasionally, until browned and cooked through, about 12–15 minutes. Remove from skillet and keep warm.
  3. Add the sliced peppers and onions to the same skillet.
  4. Sprinkle with Italian seasoning, garlic powder, and black pepper.
  5. Cook for 8–10 minutes, stirring occasionally, until vegetables are tender and lightly caramelized.
  6. Return the sausages to the skillet and cook for 2–3 minutes to combine flavors.
  7. Place each sausage in a hoagie roll and top generously with the pepper and onion mixture.
  8. Add provolone cheese and Parmesan cheese if desired.
  9. Serve immediately.

Notes

Campground Prep Tip
Slice the peppers and onions at home and store them in a zip-top bag in your cooler. This reduces prep time and makes campsite cooking even easier.

#CampingRecipes, #CampgroundCooking, #RVRecipes, #CampingFood, #OutdoorCooking, #ItalianSausage, #SausageAndPeppers, #EasyDinnerRecipes, #FamilyCamping, #CampgroundMeals, #SummerCamping, #SkilletMeals, #QuickDinnerIdeas, #CampingLife, #Hoagies,

Posted in Grilled Meals, Sandwiches, Wraps & Handhelds

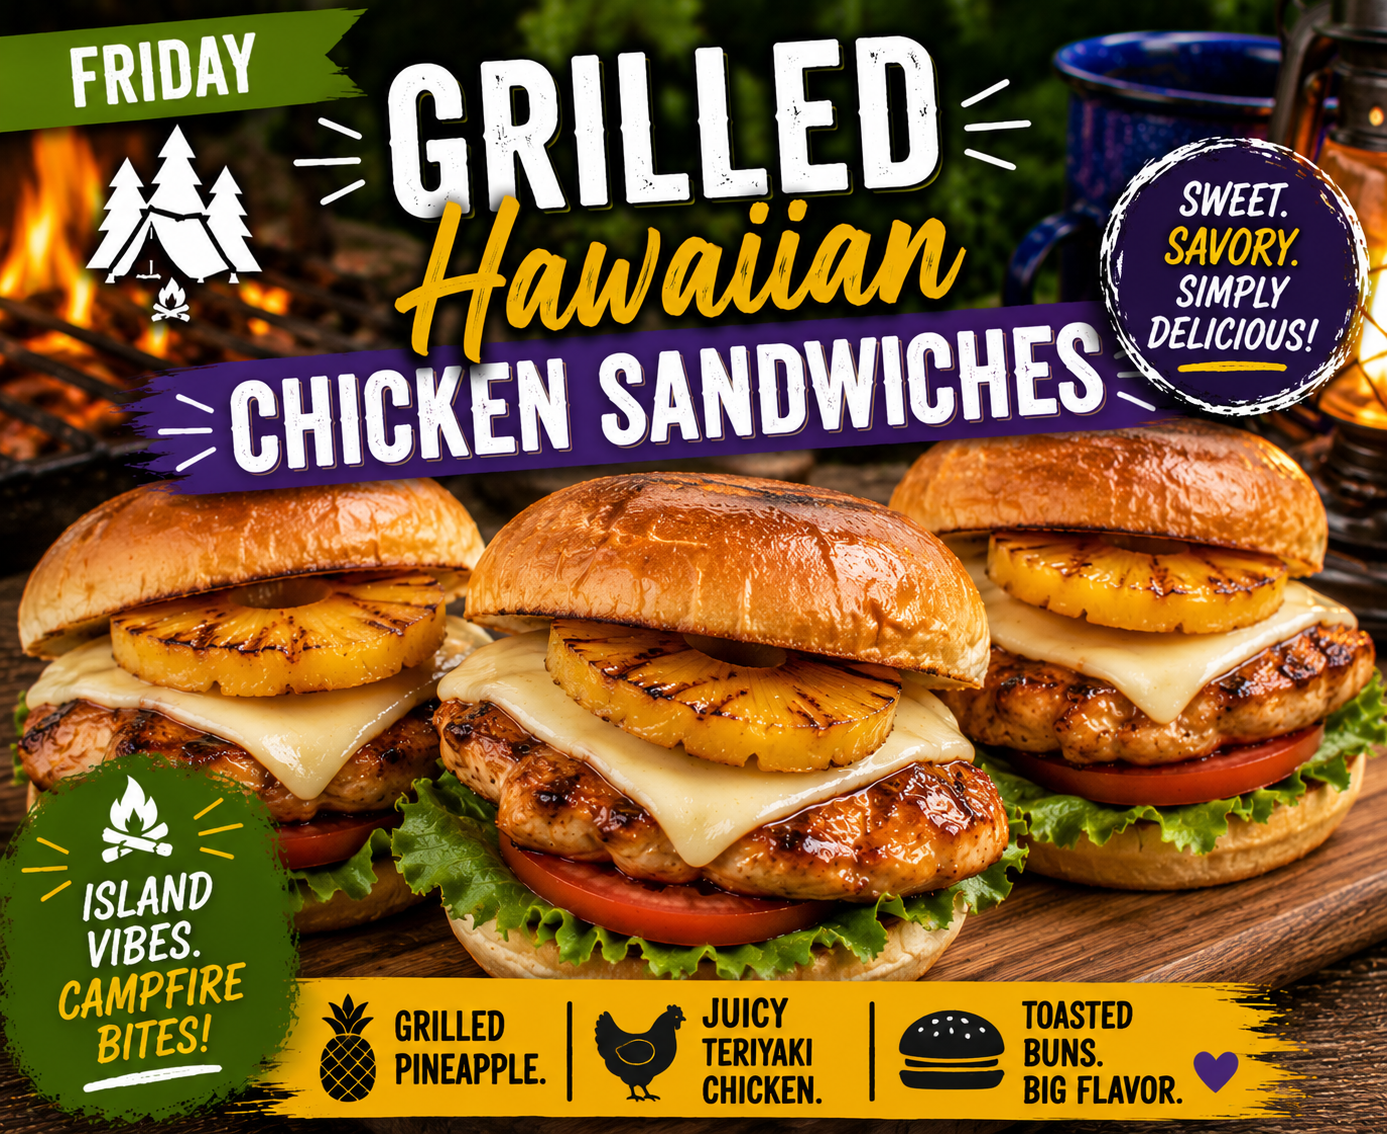
Grilled Hawaiian Chicken Sandwiches

Bring a taste of the islands to your campground with these Grilled Hawaiian Chicken Sandwiches. Juicy grilled chicken is brushed with a sweet and savory teriyaki glaze, then topped with caramelized pineapple and served on toasted buns. It’s an easy summer meal that feels a little special while still being simple enough for campground cooking.

simplegoodfood's avatarsimplegoodfood

Grilled Hawaiian Chicken Sandwiches

TheseGrilled Hawaiian Chicken Sandwiches feature juicy teriyaki chicken, meltedprovolone cheese, and sweet grilled pineapple on a toasted bun.
Prep Time 15 minutes
Cook Time 20 minutes
Total Time 35 minutes
Servings: 6
Course: Dinner, Lunch, Main Course
Cuisine: American
Calories: 465

Ingredients
  

For the Chicken
  • 1½ pounds boneless skinless chicken breasts
  • ¼ cup teriyaki sauce
  • 1 tablespoon olive oil
  • ½ teaspoon garlic powder
  • ¼ teaspoon black pepper
For the Sandwiches
  • 6 pineapple rings fresh or canned, drained
  • 6 sandwich buns
  • 6 slices provolone cheese
  • 6 lettuce leaves
  • 6 tomato slices
  • Additional teriyaki sauce for brushing

Method
 

  1. Pound the chicken breasts to an even thickness if needed.
  2. In a bowl, combine the teriyaki sauce, olive oil, garlic powder, and black pepper.
  3. Add the chicken and marinate for at least 30 minutes, or overnight in a cooler.
  4. Preheat a grill to medium-high heat.
  5. Grill the chicken for 6–7 minutes per side, or until it reaches an internal temperature of 165°F.
  6. During the last few minutes of cooking, grill the pineapple rings until lightly caramelized.
  7. Place a slice of provolone cheese on each chicken breast and allow it to melt.
  8. Toast the sandwich buns on the grill for 1–2 minutes.
  9. Assemble each sandwich with lettuce, tomato, grilled chicken, and a grilled pineapple ring.
  10. Brush with additional teriyaki sauce if desired and serve immediately.

Notes

Campground Tips
  • Marinate the chicken before leaving home for even more flavor.
  • Fresh pineapple grills beautifully, but canned pineapple rings work well and are easier to transport.
  • Serve with pasta salad, baked beans, or kettle chips for a complete campground meal.

#CampgroundCooking, #RVMeals, #OnePanDinner, #EasySummerDinners, #ComfortFoodRecipes, #ElectricSkilletMeals, #EasyDinnerIdeas, #BudgetFriendlyMeals,
#SummerCooking, #SkilletDinner, #SimpleSuppers, #FamilyDinnerIdeas,
#EasyWeeknightDinner, #WhatsForDinner,

Posted in Cold/No Heat Meals, Sandwiches, Wraps & Handhelds

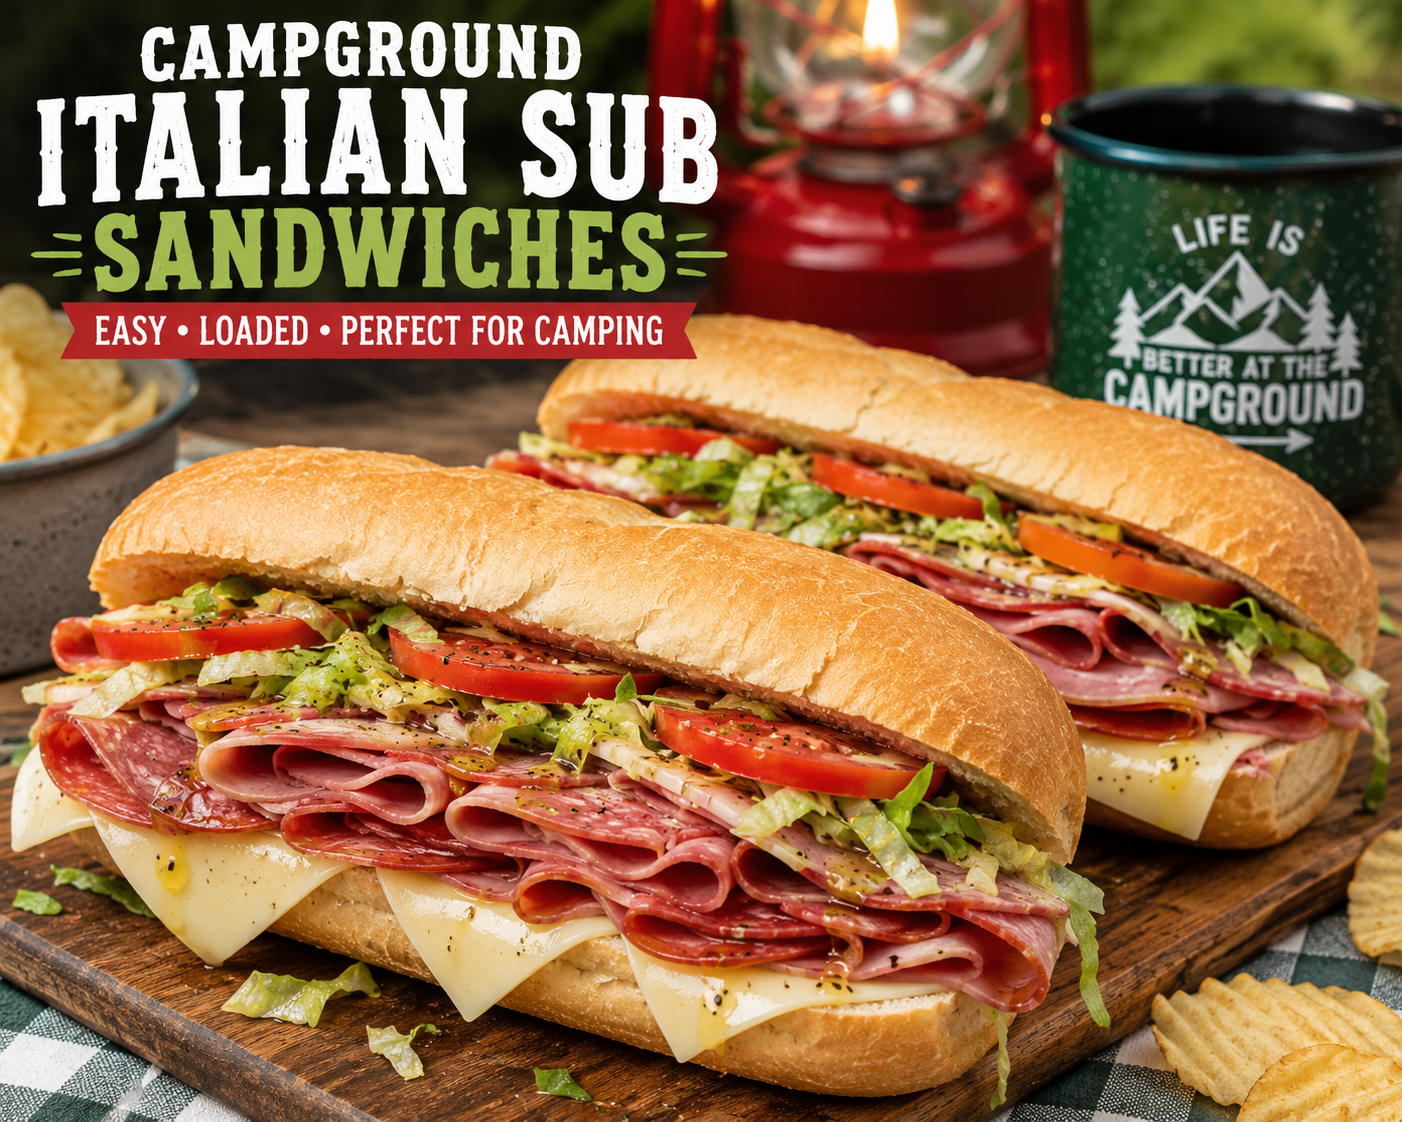
Campground Italian Sub Sandwiches

When the weather is hot and nobody wants to cook, these loaded Italian subs make an easy campground dinner with plenty of flavor.

simplegoodfood's avatarsimplegoodfood

Campground Italian Sub Sandwiches

When the weather is hot and nobody wants to cook, these loaded Italian subs make an easy campground dinner with plenty of flavor.
Prep Time 5 minutes
Cook Time 0 minutes
Total Time 5 minutes
Servings: 4
Course: Dinner, Lunch, Main Course
Cuisine: American
Calories: 550

Ingredients
  

  • 4 hoagie rolls
  • ½ lb deli ham
  • ½ lb salami
  • ½ lb pepperoni
  • 4 slices provolone cheese
  • Lettuce
  • Tomato slices
  • Italian dressing

Method
 

  1. Split rolls.
  2. Layer meats and cheese.
  3. Add lettuce and tomatoes.
  4. Drizzle with dressing.
  5. Wrap and serve.

#CampgroundCooking, #RVMeals, #OnePanDinner, #EasySummerDinners,
#ComfortFoodRecipes, #EasyDinnerIdeas, #BudgetFriendlyMeals,
#SummerCooking, #SimpleSuppers, #FamilyDinnerIdeas,
#EasyWeeknightDinner, #WhatsForDinner,